The clipboard is the background buffer service that (temporarily) holds your copied links, texts, and images before they are pasted somewhere else. Up until October 2018, when Windows introduced Clipboard history, one had to use external clipboard managers to keep a log of all their copied content. But with this update, it became possible to ditch those managers for the supercharged native clipboard.
But is it safe to keep your copied content on the clipboard? If you have to copy sensitive information every now and then, perhaps not so much. Here are six ways to empty the clipboard on Windows 11 and why you must do so from time to time.
Related: 8 ways to fix screenshots not working problem
Why you should clear the clipboard on Windows 11
If you’ve enabled Clipboard history on your computer, just by pressing Win+V, you can see up to 25 of your clipboard items. This includes HTML, text snippets, small images (4MB and below), and other shorter forms of data.
But keeping a log of all that you’ve copied ever since you logged on can be dangerous if you’re working with sensitive content. Anyone who has access to your laptop even for a few seconds can see all that you’ve copied to the clipboard since you powered your system up. It is recommended that you clear out clipboard history before leaving your system to avoid any threats to your privacy.
Related: How To Turn On Bluetooth Windows 10
How to empty the clipboard on Windows
There are a bunch of ways that let you empty the clipboard history. Though most of them require only a few clicks, some of them can be set up to allow clipboard dumping with a single click. Here they are:
Method 1: With Clipboard Hotkey (Modern Clipboard)
The modern Windows 11 clipboard can be accessed with a simple hotkey combination – Win+V. If you’ve enabled the history feature, you should see a small window open up displaying up to 25 of your copied content items in small note form. Here’s how to empty clipboard:
- To delete items individually, simply click on the three dots next to them.

- Then select Delete.

- If you want to delete them all in one go, select Clear All.

Related: How To Mute an App on Windows 10
Method 2: From Settings
You can also clear clipboard history from Windows Settings. Follow the steps given below to do so:
- Press
Win+Ito open Settings, then go to System > Clipboard.

- Next to “Clear clipboard data”, click Clear.

- And just like that, your clipboard history will get deleted in one fell swoop.
Method 3: From Command Prompt
Those who like to alter their system settings with commands can use the command prompt to good effect for clearing clipboard data. Here’s how:
- Press Start, type cmd, then click on Run as administrator.
- Then type in the following command and press Enter:
for /f tokens^=2* %i in ('sc query^|find "Clipboard"')do >nul cd.|clip & net stop "%i %j" && net start"%i %j"

This command will stop and then restart clipboard, effectively clearing the history.
Method 4: From PowerShell
Power users can clear clipboard history from PowerShell as well. Here’s how to do so:
- Press Start, type PowerShell, then click on Run as administrator.
- Now, copy the following command in PowerShell, and press Enter:
Restart-Service -Name "cbdhsvc*" -force

And just like that, your clipboard service will restart which will clear its history.
Method 5: Add a “Clear Clipboard” option to the desktop context menu
You can also add a “clear clipboard option” to the desktop context menu. Here’s how:
- Press
Win+Rto bring up the RUN box, type “regedit”, and hit Enter. - Navigate to the following registry address:
HKEY_CLASSES_ROOT\Directory\BackgroundAlternatively, you can copy the same and paste it into the registry address bar.
- In the left pane, right-click on the Shell folder, select New, then click on Key.
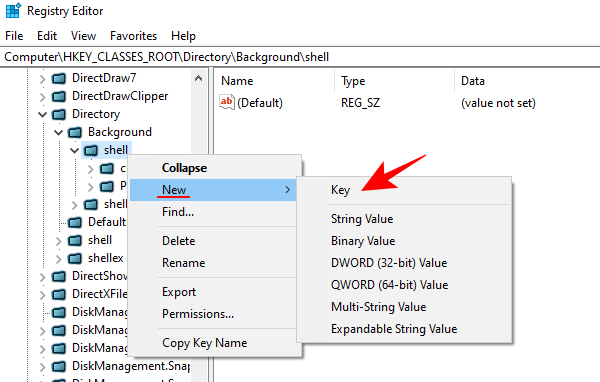
- Name this folder Clear clipboard.
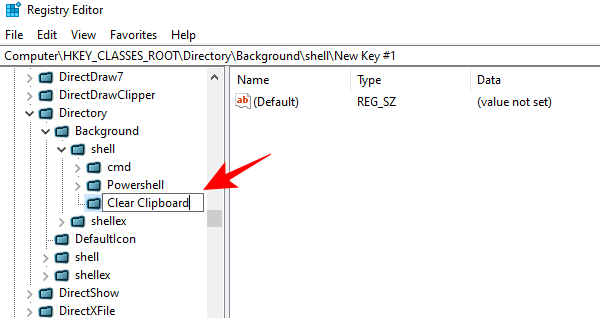
- Now, right-click this Clear Clipboard folder, select New, then Key.
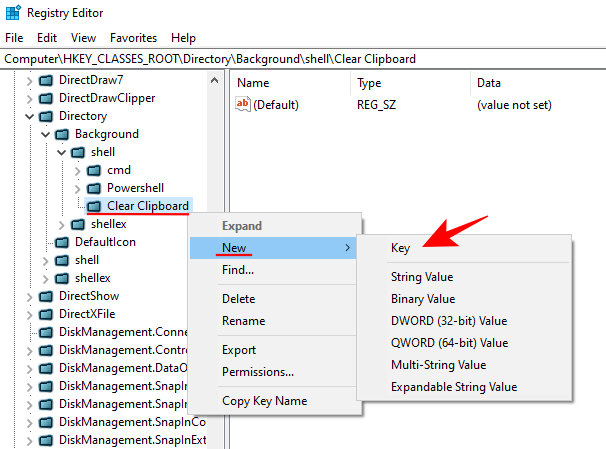
- Name this key Command.
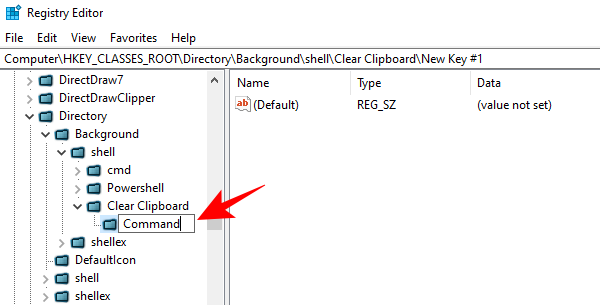
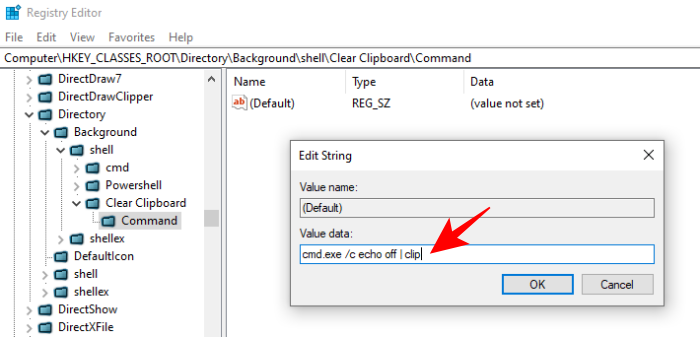
- With this key selected in the left pane, double-click on Default in the right pane.
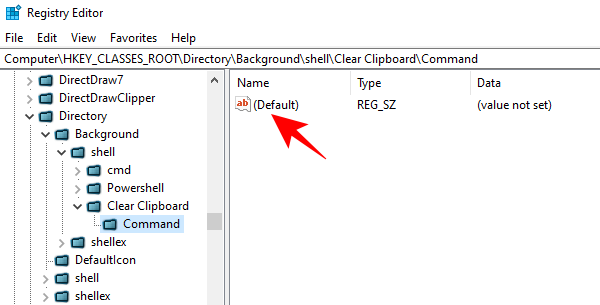
- Now, under “Value data”, type in the following:
cmd.exe /c echo off | clip
- Press OK, then exit the registry. Now, whenever you right-click on the desktop and select ‘Show more options’, you will see a Clear clipboard option. Simply click on it to clear the clipboard at once.

Method 6: Disable Clipboard History
If you don’t want to use clipboard history, you can simply disable it from Windows Settings.
- Press
Win+Ito open Settings, then go to System > Clipboard. - Toggle Off the “Clipboard history” button.

And that’s it! You don’t have to worry about items being saved to clipboard history anymore.
These were all the ways to clear clipboard history on Windows 11. Although the clipboard history is cleared every time you shut down your computer, it is nevertheless important to clear clipboard history whenever you’re away from the keyboard, just to be safe.
RELATED