What to know
- Install, set up SwiftKey as your primary keyboard, and log in to your Microsoft account to get started.
- Tap on the text field of an app to bring up the Swiftkey keyboard, then tap on the Bing logo > Text > type your text > tap on the right arrow > choose a new tone of voice.
- SwiftKey lets you choose from six different tones – Professional, Casual, Polite, Funny, Social post, and Witty.
AI is now in your smartphone keyword! Starting with Microsoft’s SwiftKey, which has recently gained a few AI-powered features, you will get the capabilities of AI straight from your keyboard, such as AI stickers, camera lenses, and image creation. On top of these, it also gets a nifty sentence reconstruction option that changes the ‘tone’ of your text to appear more professional, casual, polite, funny, etc. – one for every conversation type.
Let’s see how this Bing AI ‘Tone’ feature works on the SwiftKey keyboard and how to implement it in your day-to-day texts.
How to change tone of text with SwiftKey keyboard using Bing AI
The latest AI-based SwiftKey keyboard features are available for both iOS and Android devices. To use these AI features, it is recommended that you sign in to your Microsoft account while setting up SwiftKey.

Then follow the steps given below to change the tone of your texts with the Swiftkey keyboard itself.
Step 1: Type tone text in SwiftKey
Open an app and tap in the text field to bring up the keyboard. Then tap on the Bing logo towards the top left corner.
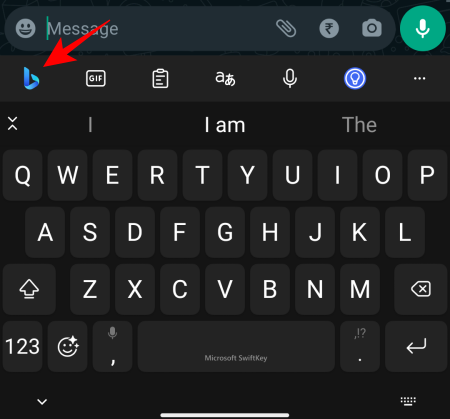
Tap on the Tone tab to switch to it.
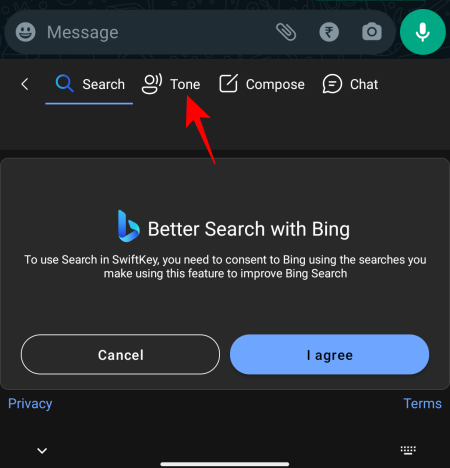
Select I agree to continue.
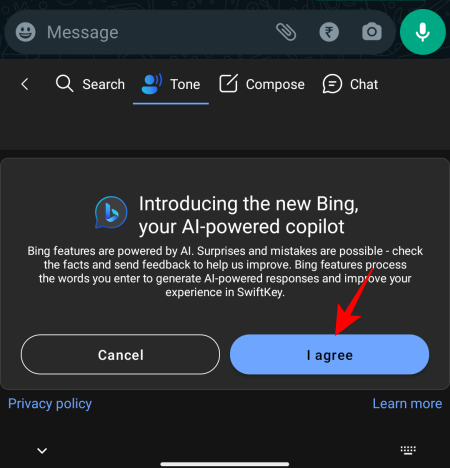
Next, in the ‘Rewrite tone text ‘ field, type the main point of your sentence.
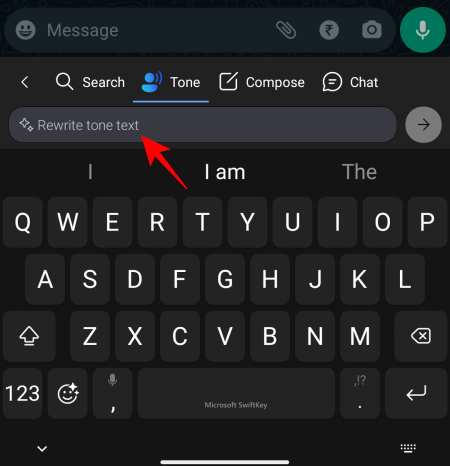
Don’t worry about getting it right. Just get it written. Bing AI will take care of the tone later.
Once typed, tap on the right arrow next to it.
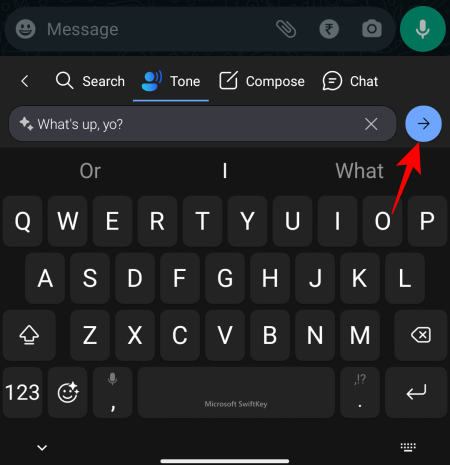
Wait for the AI to analyze your text.

Step 2: Pick a new tone
Once your text is analyzed, Bing AI will suggest a few changes to fit the tone of voice you’re looking to get.

The different tones include Professional, Casual, Polite, Funny, Social post, and Witty. Each of these tones will offer a different way to convey the same message.
Swipe left to see more tones.

Alternatively, tap on the tone tabs in the bottom row.
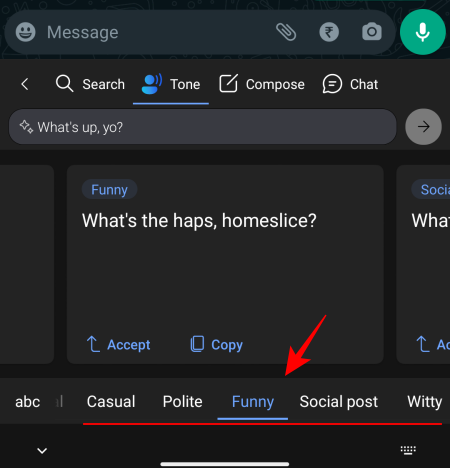
To use a tone, tap on Accept.
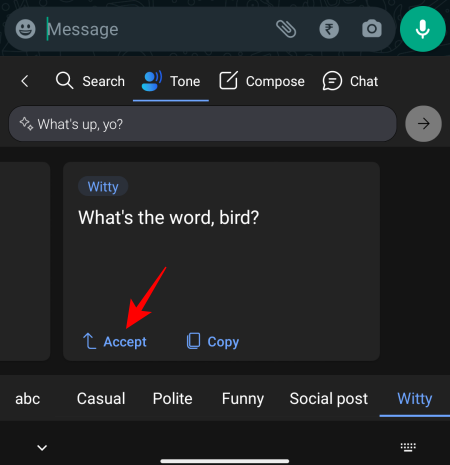
The new text will be entered in the text field.
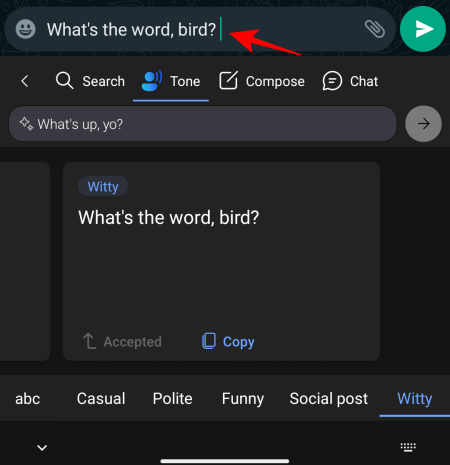
Alternatively, tap on Copy.

Once it’s copied to the clipboard, paste it wherever you like.
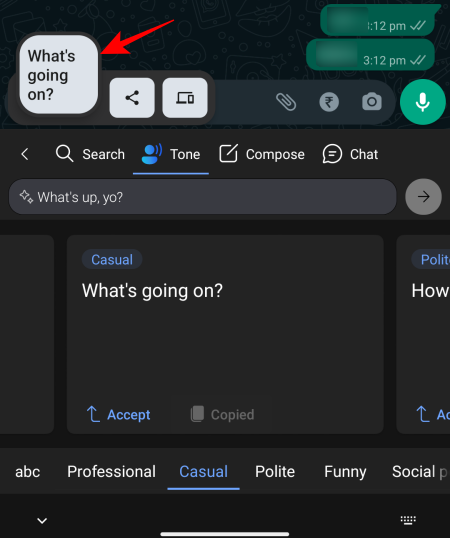
The new ‘tone’ option can be used to change the wording as well as the structure of your sentence to suit a variety of conversation types.
For work-related texts, the Professional and Polite tone is ideal. For friendly conversations, Casual should do the trick. To make your sentence funny, use the Funny tone, and the Witty tone to be tongue-in-cheek.
The Social post tone is particularly helpful to quickly type captions for social media posts, including auto-generated hashtags so you don’t have to rack your brain for them.

FAQ
Let’s consider a few commonly asked questions about the AI features in the SwiftKey keyboard.
How do I get Bing AI in SwiftKey?
To get Bing AI features in Swiftkey, download the app and log in to your Microsoft account with it. Bring up the SwiftKey keyboard and tap on the Bing logo to start using Bing AI features in SwiftKey.
Why is Bing AI not working in SwiftKey?
If Bing AI is not working with SwiftKey, it’s most likely because you’re using an outdated version of the app or haven’t logged in to your Microsoft account. So make sure to update the SwiftKey app and log in.
Will Microsoft use my SwiftKey texts to train Bing AI?
At the time of setting it up, you can choose whether or not you want to send your data to Microsoft to improve the keyboard. Alternatively, open the SwiftKey app, go to Settings > Privacy > toggle off Help Microsoft improve.
The slew of AI features added to SwiftKey continues to make an already good keyboard app better and more relevant going forward. The ‘tone’ feature is perfectly suited to improve your communication with different parties and get on their good side. We hope this guide helped you with the same. Until next time!


