

Catch continuously spawning Bonesky during Beast Fang Ridge’s Vein Abundance event to level your party; Lucky catches add Prismatic Energy as you pursue Prismana Glynsera.
Vein Abundance: Beast Fang Ridge features Prismana Glynsera and a Bonesky Mass Surge, giving you a repeatable capture farm while the event is active. The ridge supplies the queue; your Aniipods do the paperwork.
- How Beast Fang Ridge builds Prismatic Energy
- Prepare for the Beast Fang Ridge Bonesky farm
- Buttons you’ll press
- How to farm Bonesky and build toward Glynsera in Aniimo
- Where to look
- How it ends
- What you get
- Keep the capture loop going while reserves level
- Spot Prismana Glynsera and choose its capture item
- Process Bonesky catches and budget the next run
- Quick questions
- Frequently Asked Questions
How Beast Fang Ridge builds Prismatic Energy
Prismana Glynsera is a Season 1 Aniimo with Light/Ice elements. Prismana Glynsera is available during the September 21–27 Vein Abundance event, and Bonesky continuously respawn in its Beast Fang Ridge farming area during the two-day weekend farm. Featured Prismana forms rotate between events, so select this event in Events when it appears.
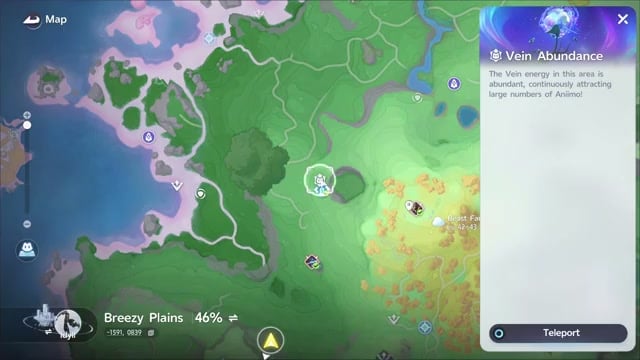
On the world map, check the Bloom marker in Breezy Plains. Open the regional Nurture view at Breezy Plains Branch. That view shows targets across the area; move the map to Beast Fang Ridge to see its Prismatic Energy state. Select the bottom of the Bloom display for more information.
Each world area has a Bloom. You receive a daily Nurture charge; nurturing the Bloom raises the area’s Prismatic Energy and starts a Wild Surge that attracts Aniimo. Catching those Aniimo gathers energy for the area. Vein Essences can also be used for Nurture.
During the featured event, the first three Nurture actions gain 50% more Prismatic Energy for the Bloom’s gauge. One day’s mysterious-vendor offer also included two nurturing orbs, enough for two Nurture actions, alongside a 400,000 price quote. That quote does not establish a per-orb price.
After gathering energy from a Wild Surge, interact with the Bloom to release it into the area.
The Beast Fang Ridge display can begin at Very Low and progress through High to Full. As regional energy rises, Prismana spawn chances improve and higher-level Aniimo can appear. A Prismana can appear before Full; maximum energy can trigger Prismana Flow. Keep building the bar, but watch for an encounter along the way.
Prepare for the Beast Fang Ridge Bonesky farm
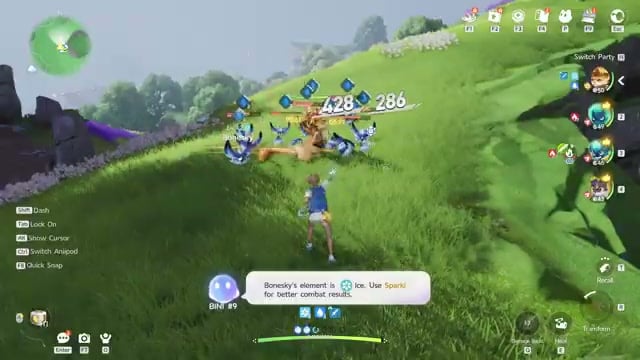
Use one capable Aniimo to handle combat and fill the other party slots with Aniimo that need XP. Helion is the demonstrated carry; reserve party members gain experience and can level without fighting directly. The combat hint identifies Bonesky as Ice and recommends Sparki, though the capture loop here uses Helion.
How to farm Bonesky and build toward Glynsera in Aniimo
Set up the party, capture the event’s respawning Bonesky, and watch the area’s Prismatic Energy.
STEP 1/12
8%
Open the Beast Fang Ridge event
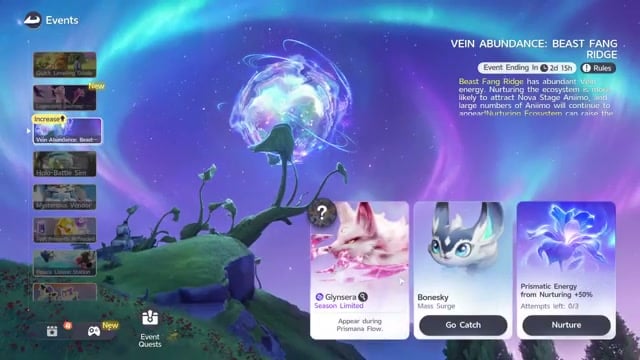
Press F2 and open Events, then choose Vein Abundance: Beast Fang Ridge. There, find its Bonesky Mass Surge and Go Catch destination.
STEP 2/12
17%
Set up your leveling party
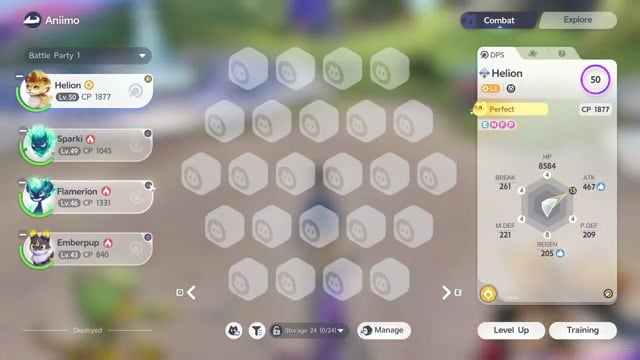
Check your combat Aniimo’s stats and party setup, then put Helion in the active slot with Aniimo that still need levels in reserve.
STEP 3/12
25%
Stock basic Aniipods
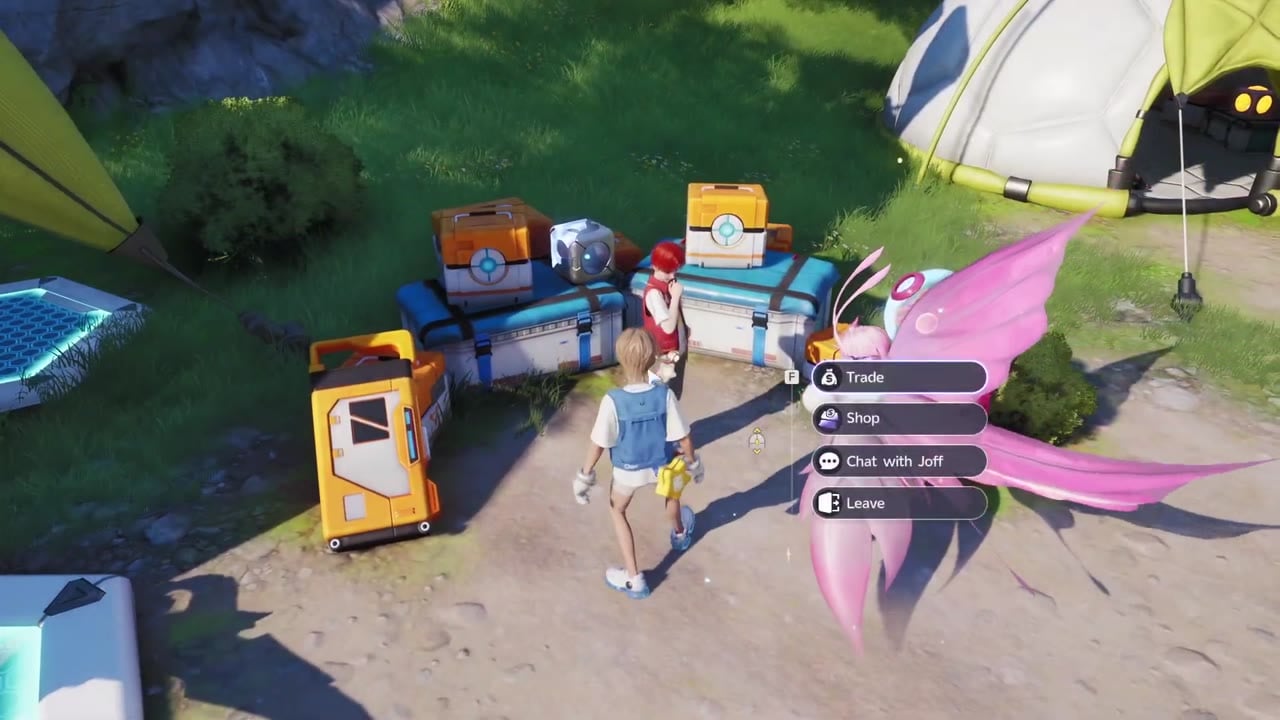
Bring enough basic Aniipods for repeated catches before heading to the event area; Joff at the Outpost sells them.
STEP 4/12
33%
Enter the Bonesky group
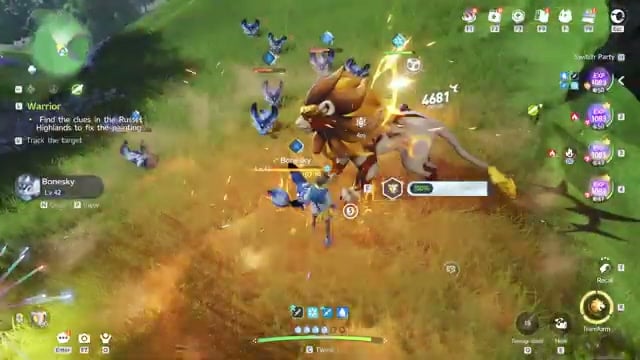
Use Go Catch to travel to Breezy Plains / Beast Fang Ridge, where Bonesky keep spawning in clusters, and watch the Bloom’s Prismatic Energy gauge.
STEP 5/12
42%
Let Helion weaken the pack
Keep Helion attacking the Bonesky group so targets become ready for an Aniipod capture.
STEP 6/12
50%
Boost damage with Q
Press Q for the demonstrated damage boost while Helion works through the group.
STEP 7/12
58%
Capture at 100%
Press F when a target’s catch indicator reaches 100%, then repeat as more Bonesky spawn.
STEP 8/12
67%
Keep moving between clusters
Move across the slope as you farm to reduce repeated deaths.
STEP 9/12
75%
Check the reserve members
Watch their XP as catches continue; the reserve member’s maximum level was 15.

STEP 10/12
83%
Redirect an immediate threat
Shoot a Bonesky that is attacking you to make Helion switch to that target.
STEP 11/12
92%
Bring Helion back to the pack
Shoot toward the main Bonesky group to redirect Helion’s attention there.
STEP 12/12
100%
Recognize a blocked carry
If Helion stops attacking, check whether other Bonesky are blocking its path to the chosen target.
Where to look
How it ends
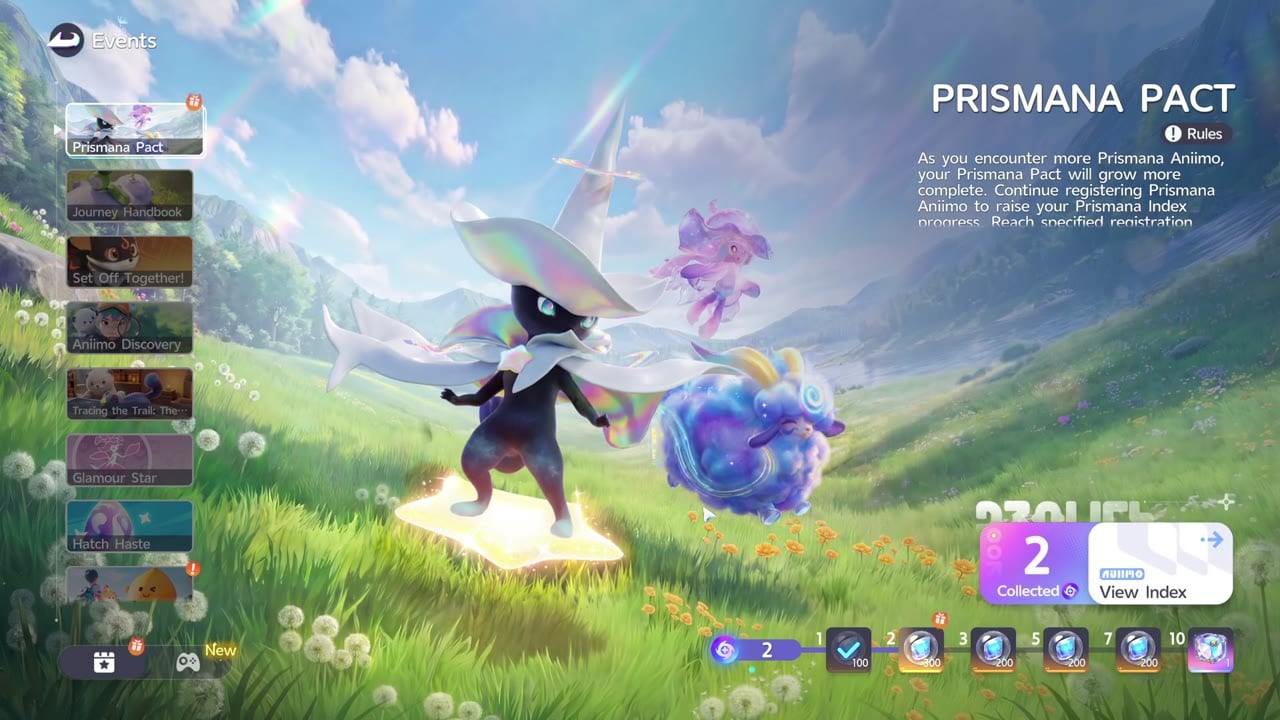
After purchasing Anipods from Joff, you open the Events menu to the Prismana Pact page.
What you get
Keep the capture loop going while reserves level
The 100% catch indicator takes practice to time. A quick-catch prompt can appear at only 60%, so the prompt alone is no reason to spend an Aniipod. Helion’s attacks can leave targets in a break state, and its burst or ultimate can clear a crowded pack; defeating those Bonesky is a separate outcome from capturing them. Collect drops as you move between clusters and manage your attack cooldowns.
Ordinary captures help your party gain XP and offer a chance at a Perfect Bonesky. Lucky and Very Lucky catches are the extra trigger that contributes to regional Prismatic Energy; the described gains were 1–2%, without tying either amount to a particular catch tier. Lucky catches are rare, and the demonstrated batch produced none, so keep the energy bar in view as you farm.
When a reserve Aniimo reaches its applicable level cap, bring in another member for the next combat session. Level 15 was the stated maximum level. Once your daily Nurture is exhausted, the Bonesky loop remains available during the active event: continue while you have Aniipods, then replenish them.
Spot Prismana Glynsera and choose its capture item
Prismana Flow in Beast Fang Ridge can bring out Prismana Glynsera. When Glynsera appears, a large on-screen icon signals the encounter. A Full energy bar is a useful progression goal, but the encounter and capture still require your attention.
Before attempting the capture, select the special item in your inventory. That choice matters once you reach Glynsera, so make it before using a capture item.
Process Bonesky catches and budget the next run
Return to the Outpost after farming and research the captured Aniimo to look for Perfect specimens. At the Research Console, use the “Press to upload Aniimo report” interaction to submit the batch and collect its rewards. Review your catches before releasing duplicates, deliberately keeping any Perfect, Alpha, or Sparkling Aniimo you want.
Research rewards include Credits and Voxel Coins; combat badges can also appear among the rewards. Voxel Coin acquisition has a weekly cap, and a warning appears when releasing large batches.
Aniipod costs and one batch result
| Item or batch detail | Amount |
|---|---|
| One basic Aniipod | 3,500 Credits |
| Demonstrated replacement purchase | 100 basic Aniipods |
| Recorded batch | 106 Bonesky |
| Approximate batch duration | 10 minutes |
| Recorded batch rewards | 248,000 Credits and 106 Voxel Coins |
That purchased-pod cycle returned less in Credits than the replacement purchase cost. The purchase restocked Aniipods; it does not tell you precisely how many pods were consumed, and one batch does not establish a fixed loss for every run. For repeated farming, prepare Homeland Aniipod production through its machinery or benches using mined resources and stone.
Related Aniimo guides
Quick questions
Who sells Anipods?
You can purchase Anipods from Joff.
Which button do you press to trade on PC?
You press F to trade.
Frequently Asked Questions
Can a Prismana Crystal trigger Prismana Flow?
Yes. After unlocking Ecosystem Intervention, you can use a Prismana Crystal through a Branch’s weather controls to activate Prismana Flow. Beast Fang Ridge’s Flow can produce Prismana Glynsera; the Crystal starts the Flow, but Glynsera still has to appear.




Leave a Reply