
You can share almost any kind of media with your friends and family but when it comes to sharing your personal stuff with the public, you may have to think twice. This is especially important when the stuff you’re sharing contains sensitive details like photos, contact details, or social security numbers of yourself and your loved ones.
While you can blur or scratch out faces and sensitive text inside photos easily, hiding such info inside videos or screen recordings can be quite hard, especially for those not well-equipped with high-end software or trained to do so. In this post, we’ll help you blur texts and faces inside these videos directly from your iPhone in the simplest way possible.
How to blur something in a video on an iPhone
Apple doesn’t offer a native tool to blur sensitive content like text and faces inside videos on an iPhone. There are a lot of third-party apps that offer this functionality but for simplicity and ease-of-use, we’ll be using the Blur-Video app from the App Store. This app allows you to achieve blur or pixelation effects to hide text or faces inside a video for free and the highlight is that all of its features are available for everyone without additional charges.
Short guide:
To blur portions of a video, go to the Blur-Video app > Start > select a video > pinch outwards to expand the video into multiple frames > locate the frame where the object first appears > choose Blur or Pixelate > Add Blur and adjust the size, shape, and position of the blur box. For moving objects, use Keyframes to adjust the blur shape and size for multiple frames.
GIF guide:

Step-by-step guide:
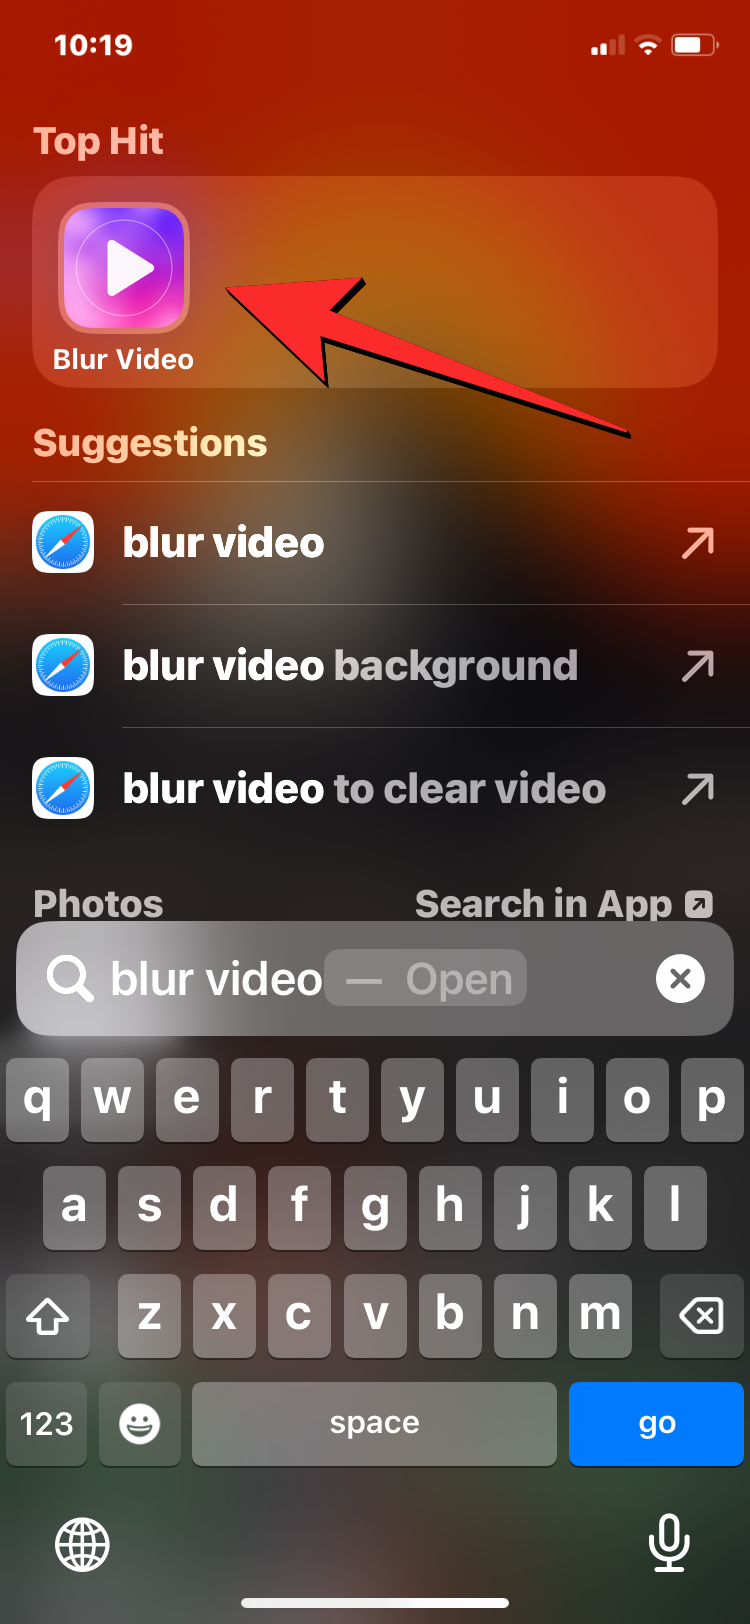
- Before you can blur parts of a video, make sure you download the Blur-Video app from the App Store. Once it’s downloaded, open the Blur-Video app from the App Library. Inside Blur-Video, tap on Start at the bottom.

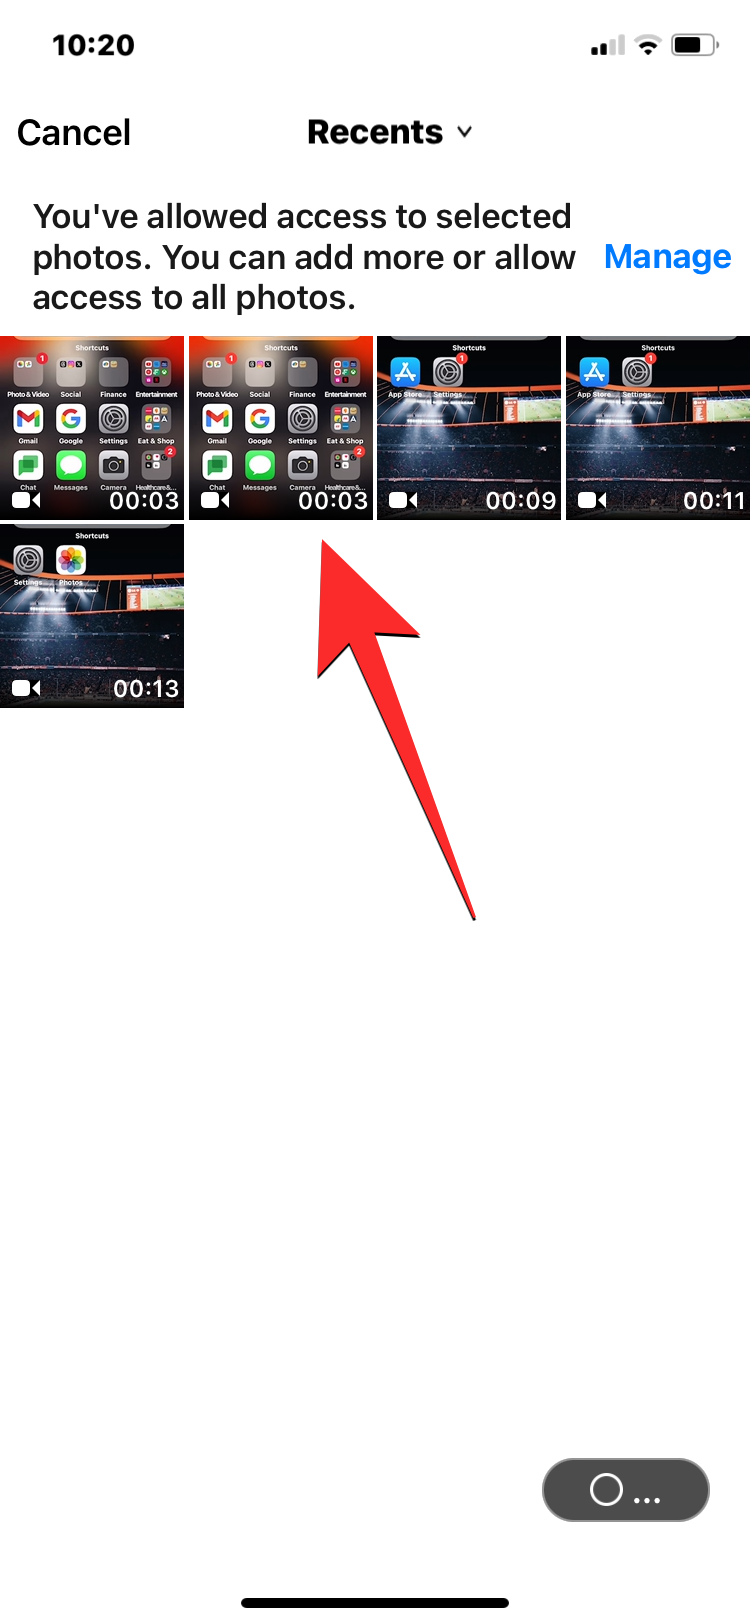
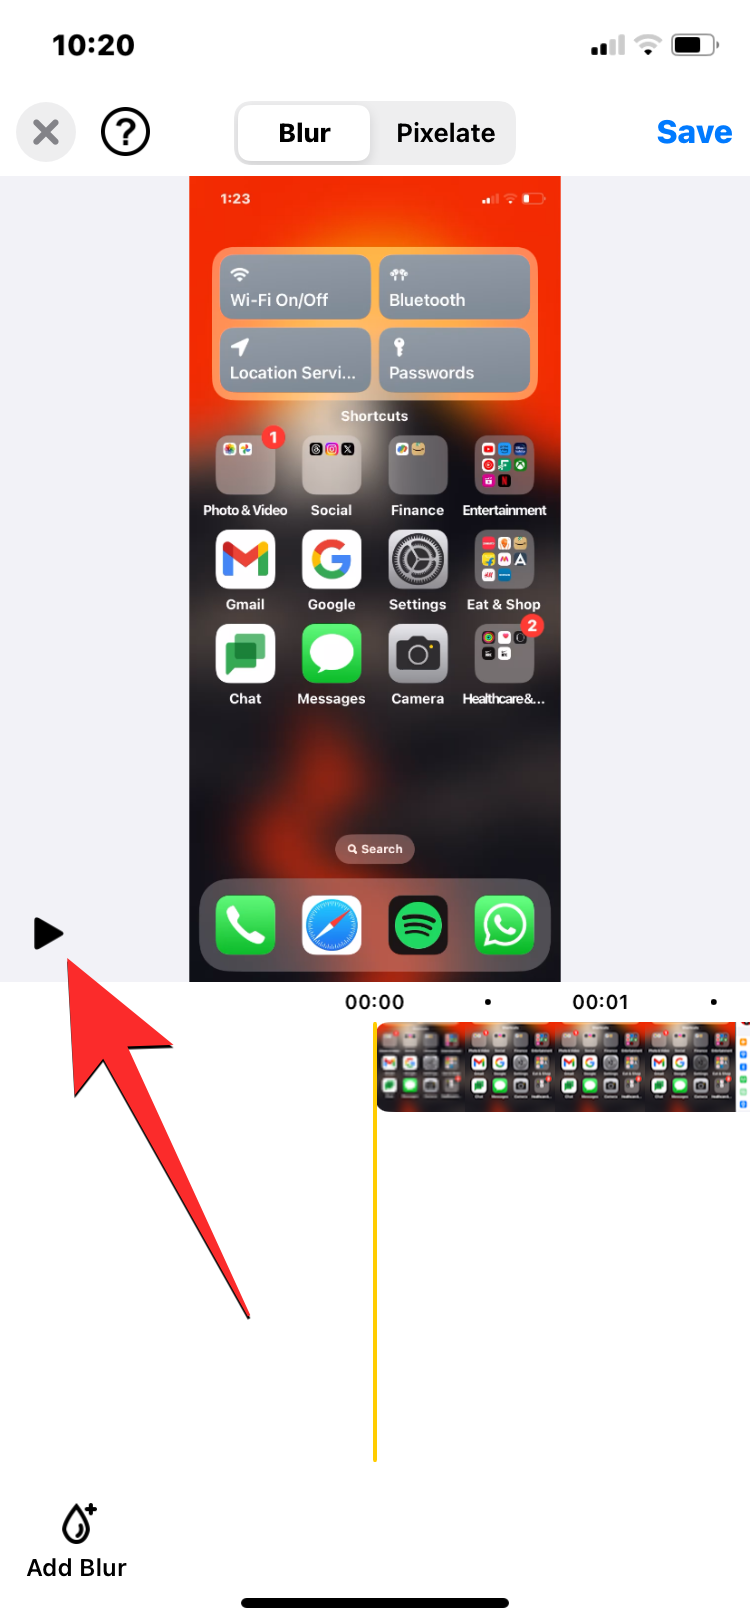
- You’ll be asked to choose a video from your Camera roll to edit it. From this screen, tap on the video you want to edit. The selected video will now be shown in the preview at the top. At the bottom, you’ll see a video seeker with thumbnails for each of the frames to help you find the portion of the video where you want to add the blur. You can tap on the Play icon to play the video once before you add the blur box.
- When you locate the frame where the blur needs to be added, pinch outwards on the seeker tool to expand the video into multiple frames to make it easier for you to locate the exact frame from where the content you want to hide starts appearing. We recommend you pinch outwards as much as possible to land on the exact frame. Doing so will split 1 second of your video into 30 frames, making it easier to hide content from the moment it appears. This will be evident when you look at the frame labels above the thumbnails that read “3f”, “6f”, “9f”, and so on.
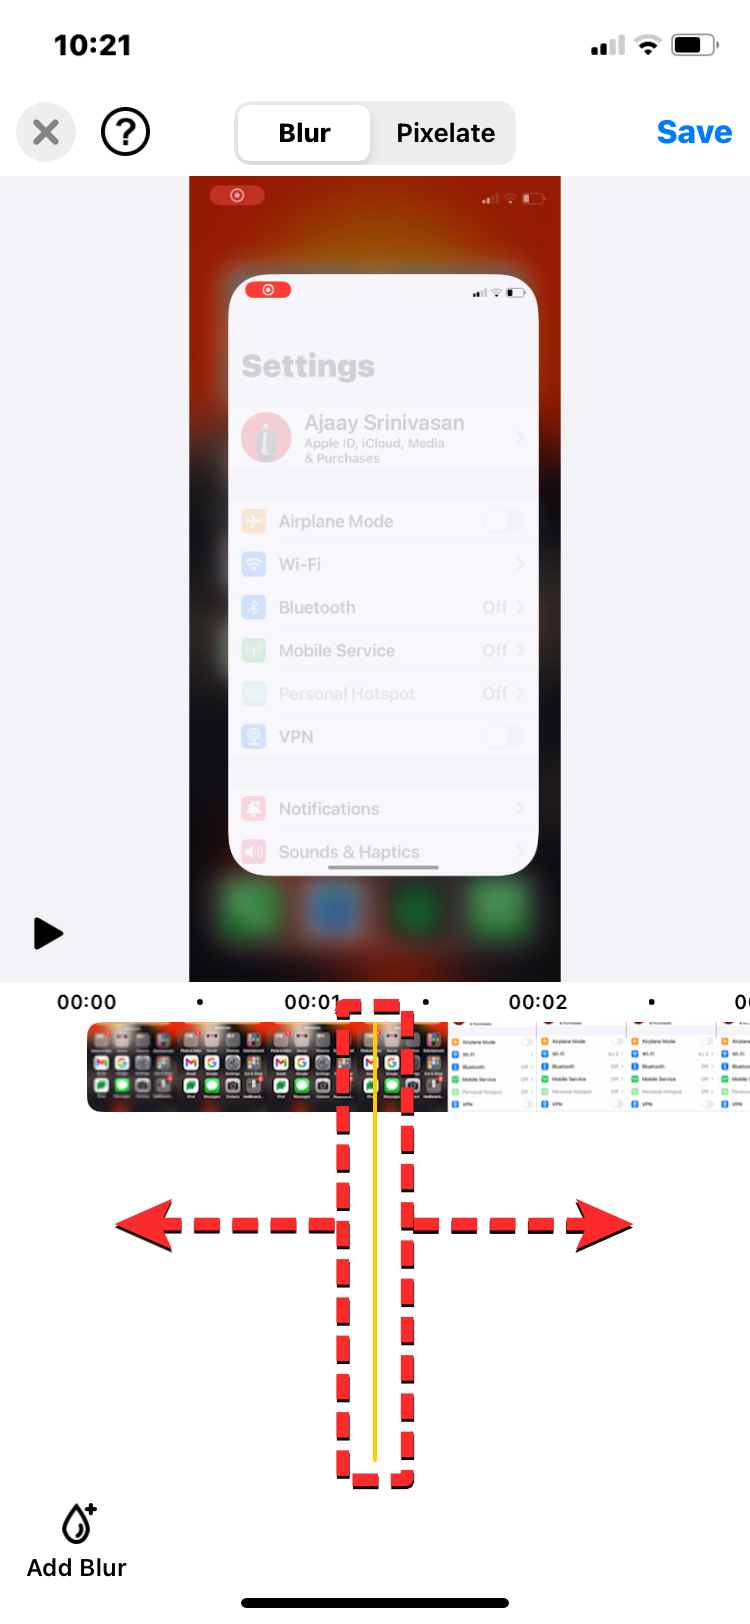
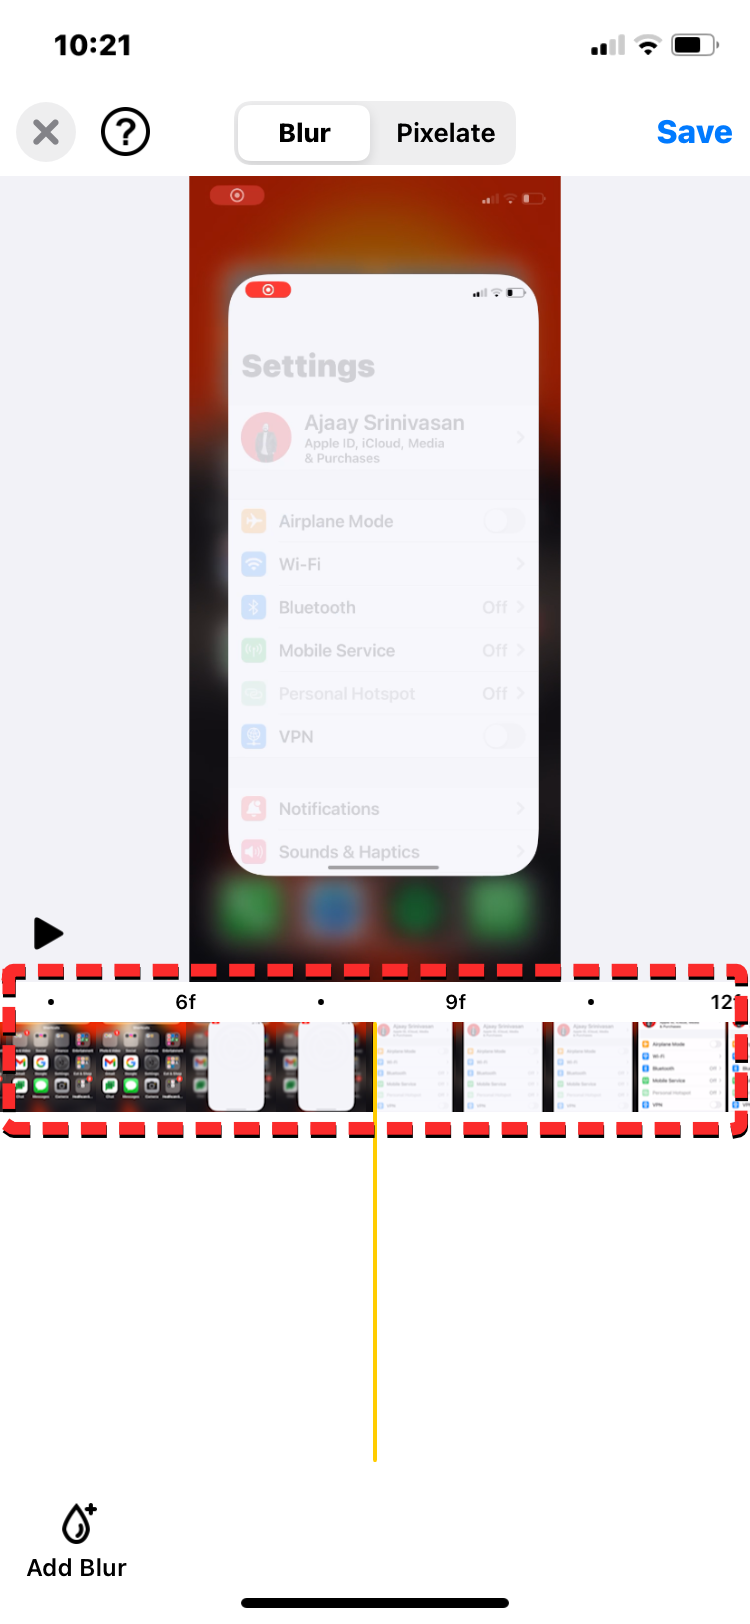
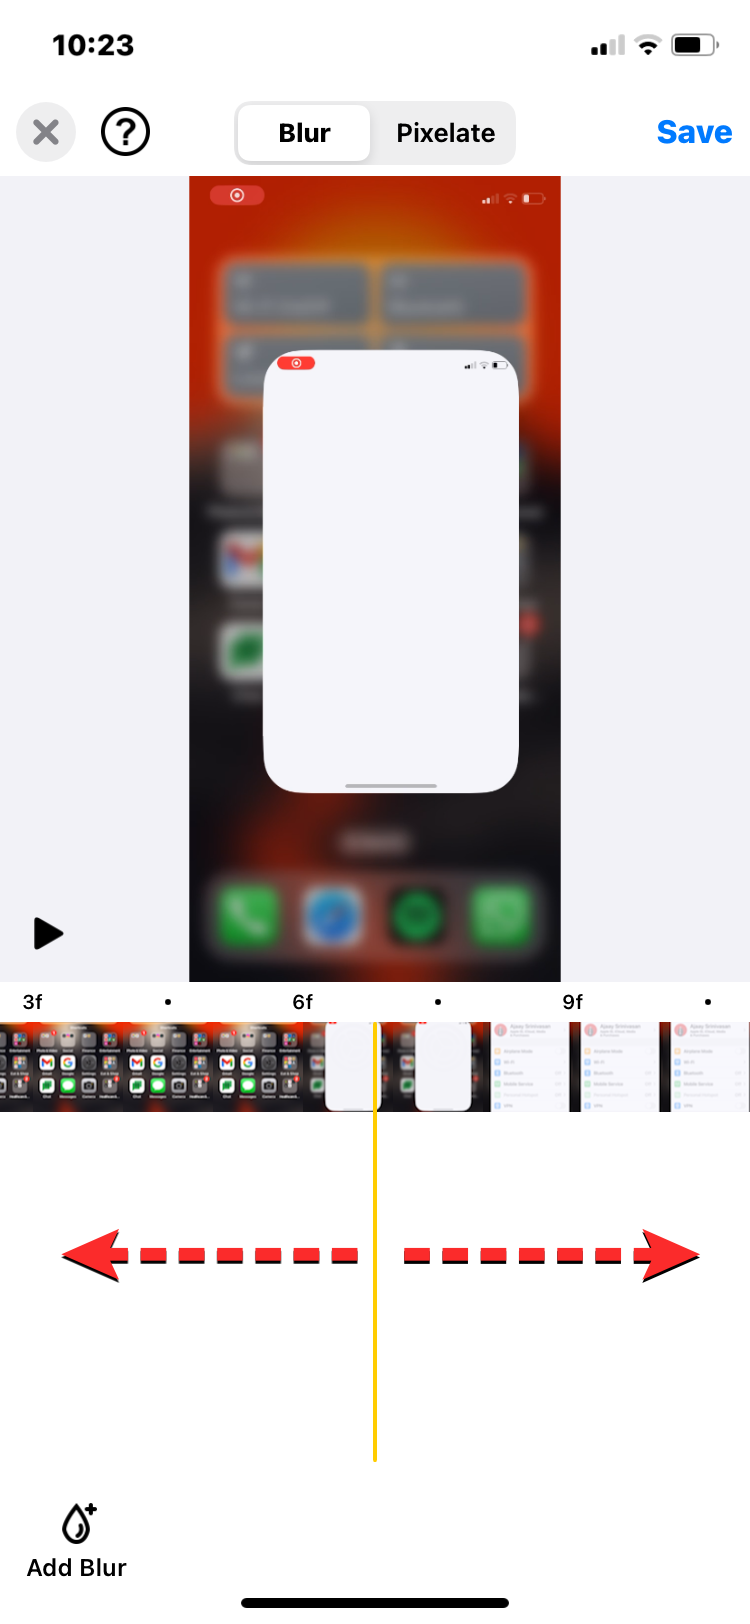
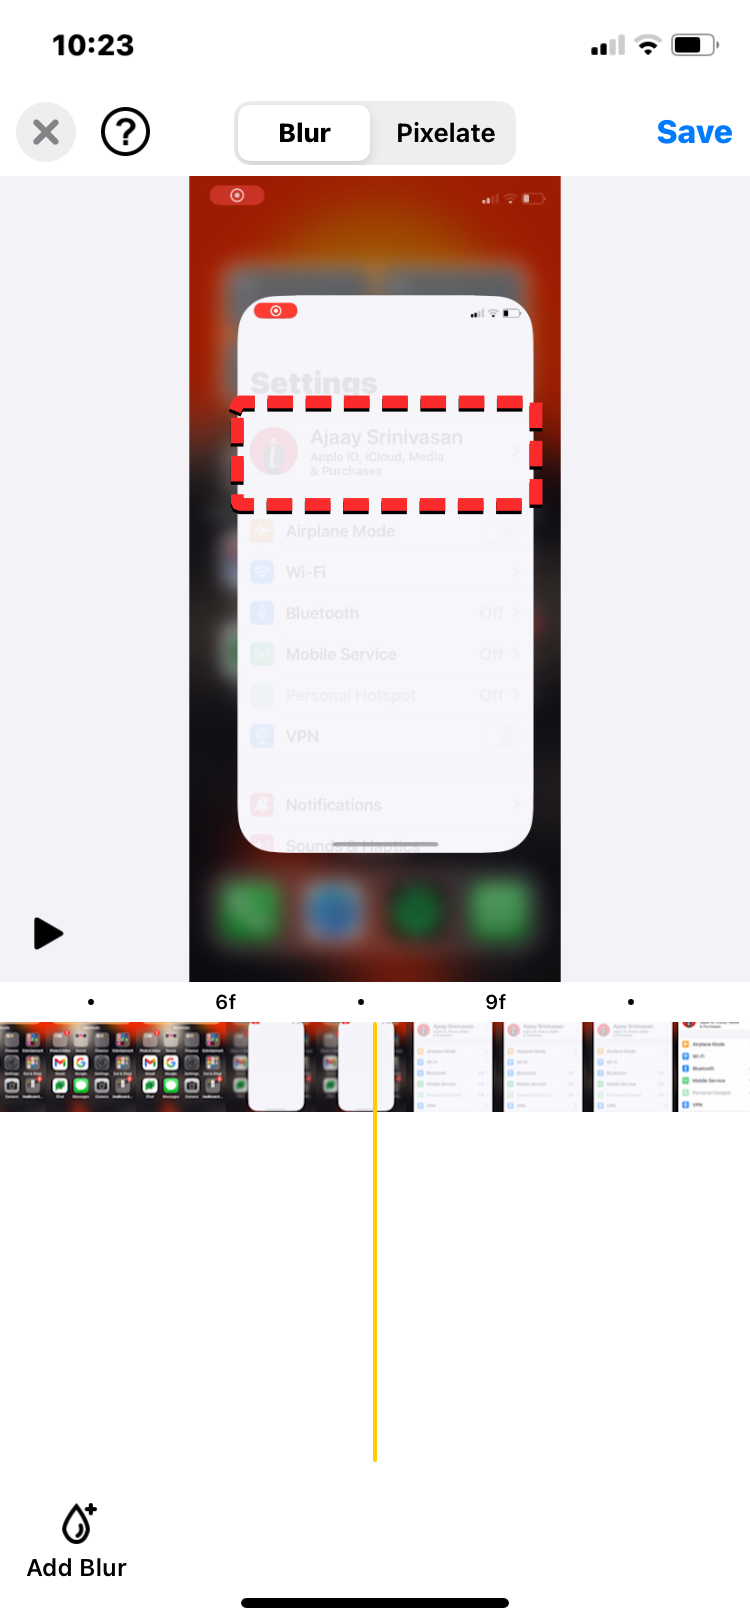
- Once you expand the video into multiple frames, swipe leftwards or rightwards using the seeker tool at the bottom to get to the exact starting frame where you want to apply the blur tool. In this particular video, we’re trying to hide the name and photo that appears when you open the Settings app on iOS. So, we attempt to find the frame where the name starts being visible.
- When you get to this stage, select the Blur tab or Pixelate tab from the top to apply your preferred blur effect. Blur will give you a soft overlay that can be good for hiding text portions in a video while Pixelate can disguise photos and text with large blocks of pixels.
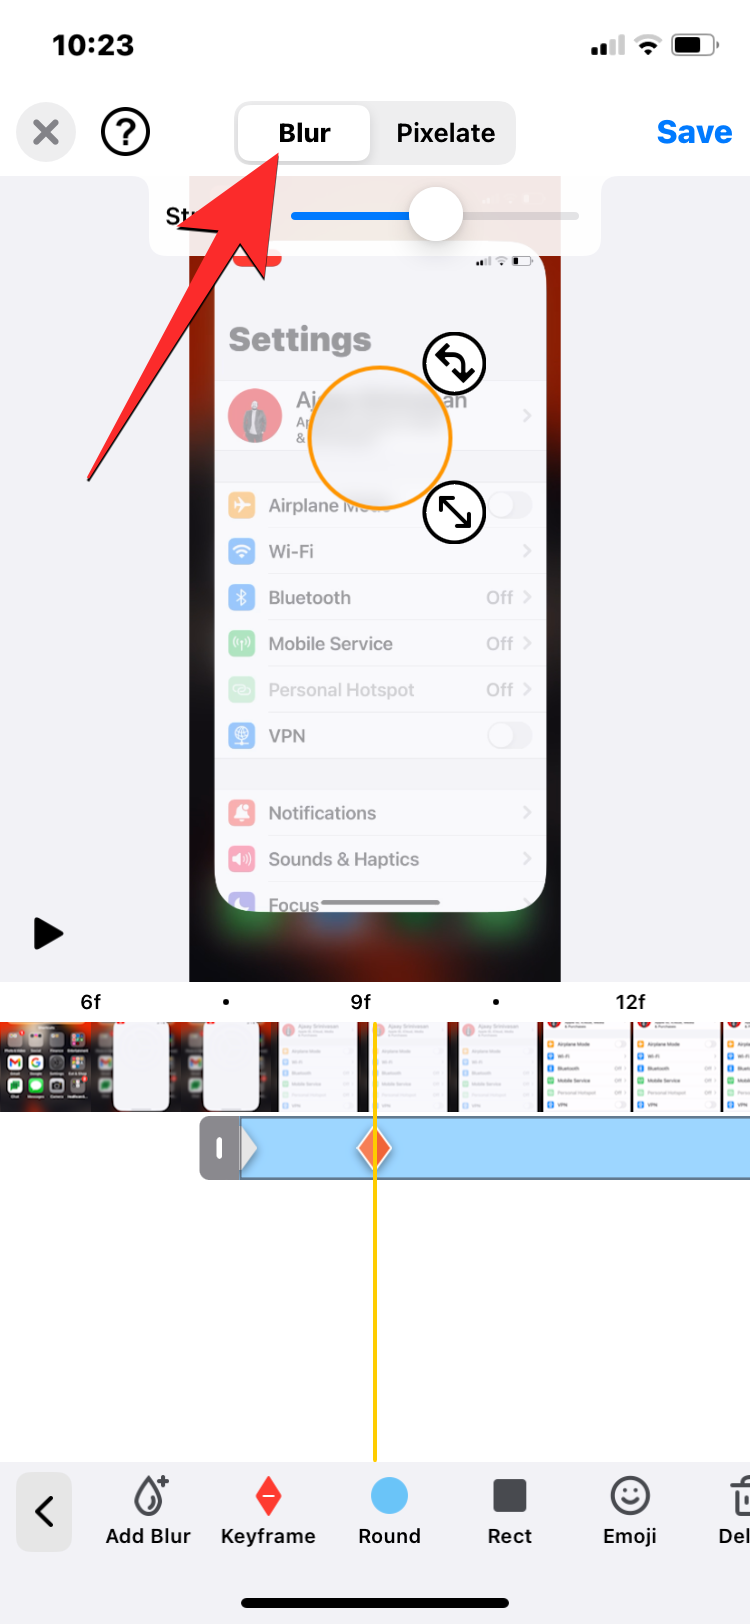
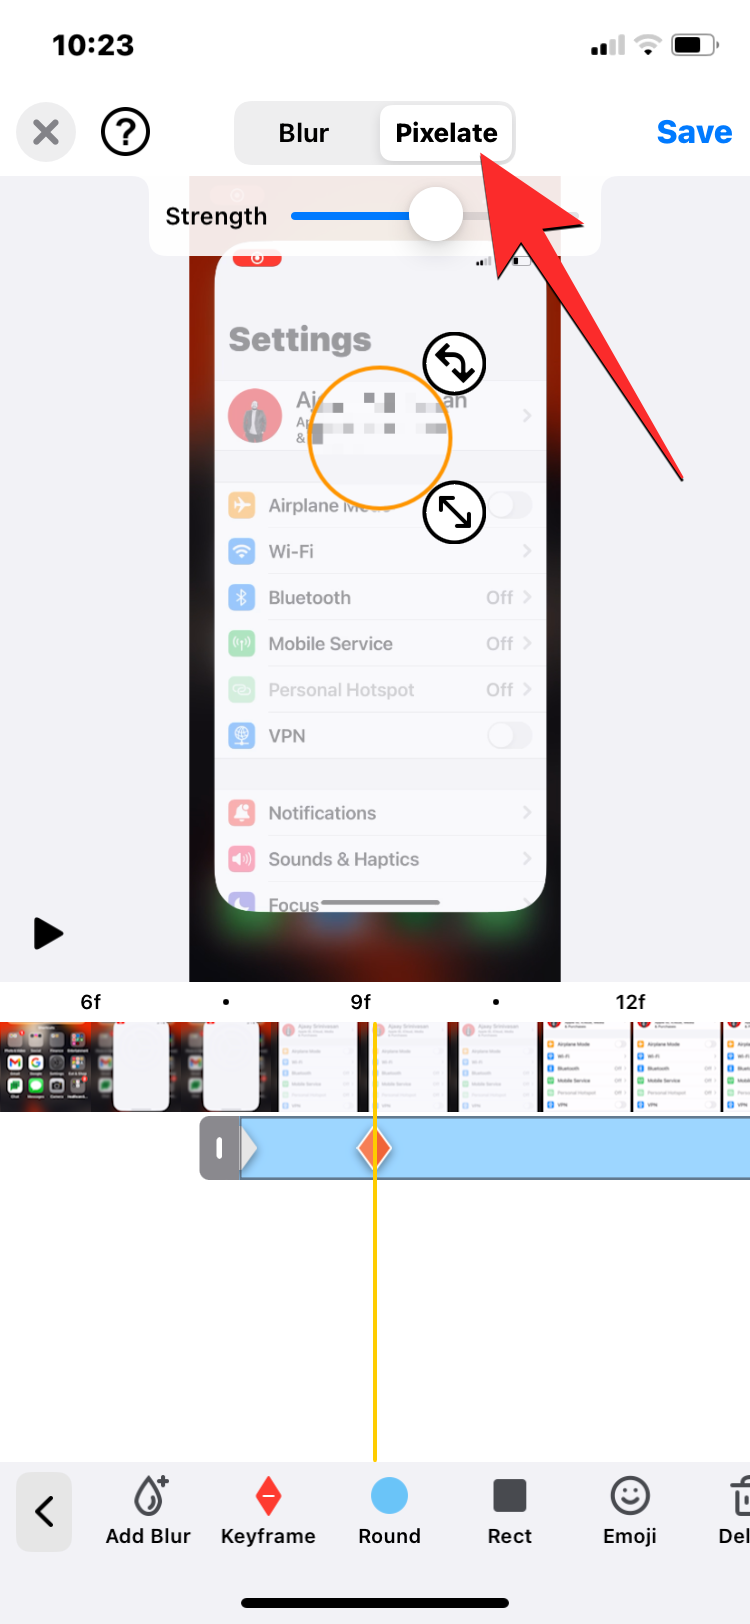
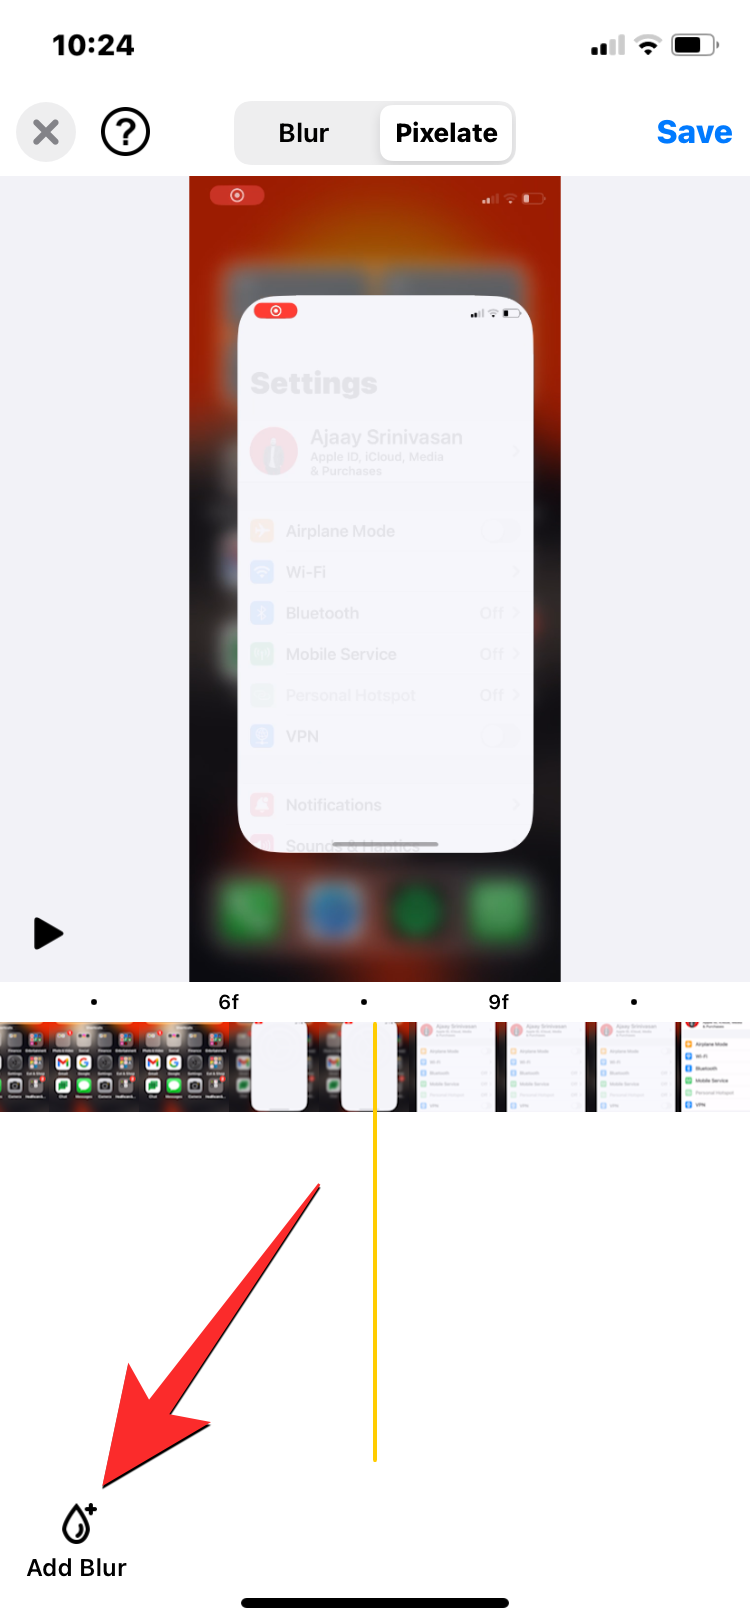
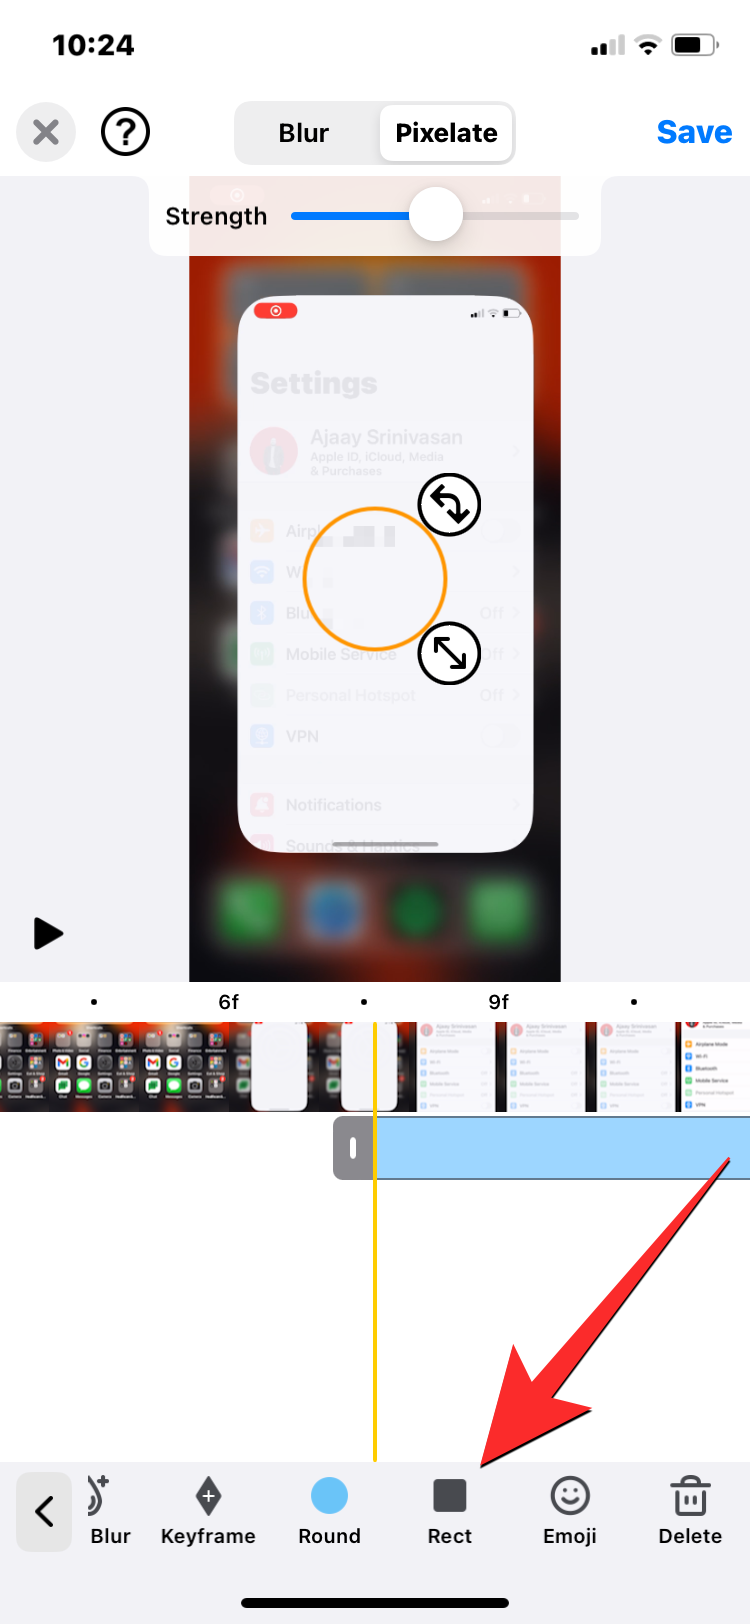
- Now, tap on the Add Blur button at the bottom left corner to add a blur overlay from this frame. You’ll now see a blur circle appear on the screen along with a new blur layer below the frame thumbnails to represent its timeline. If you wish to change this circular blur box into a rectangle, you can tap on the Rect option from the bottom row.
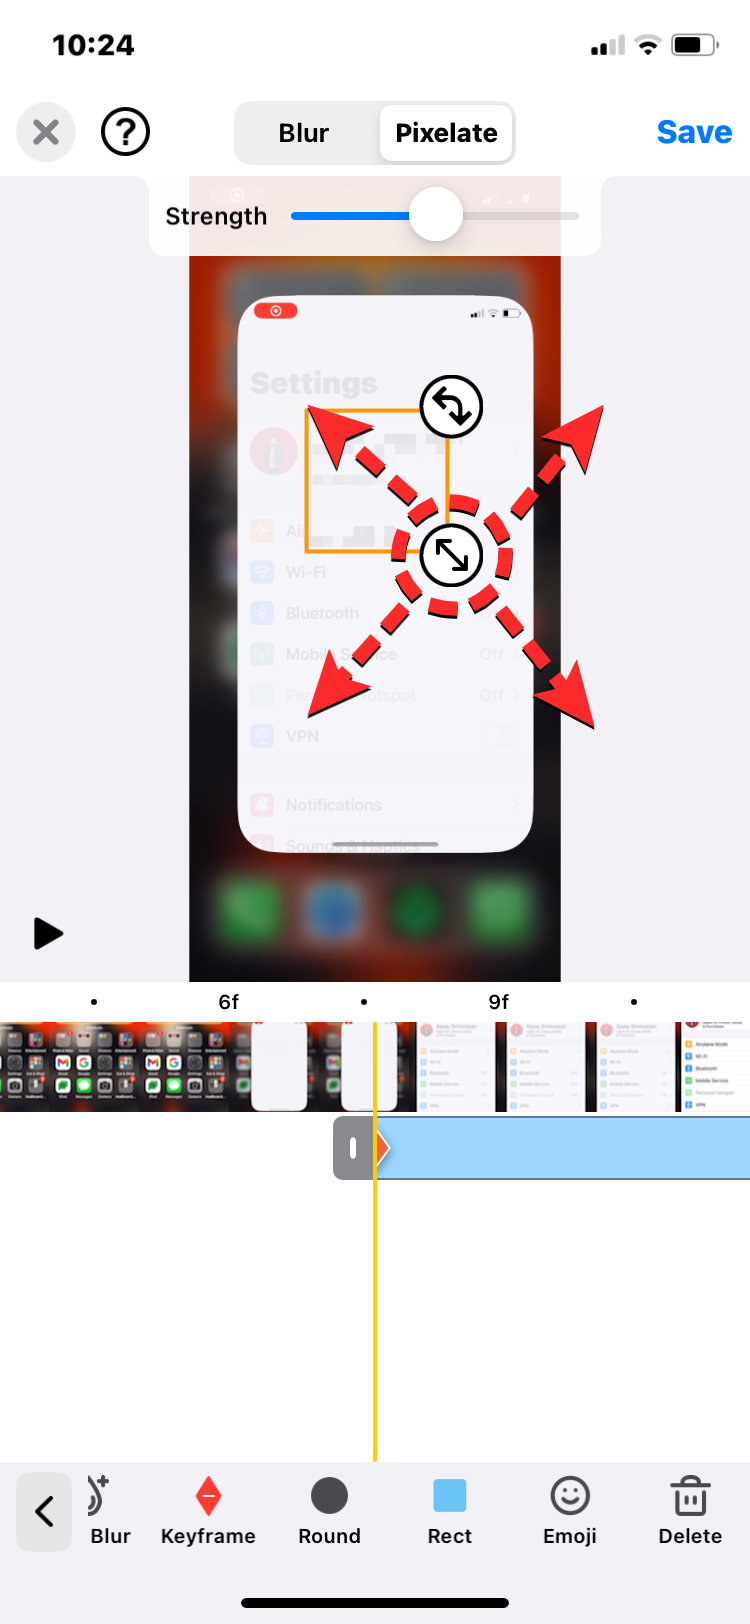
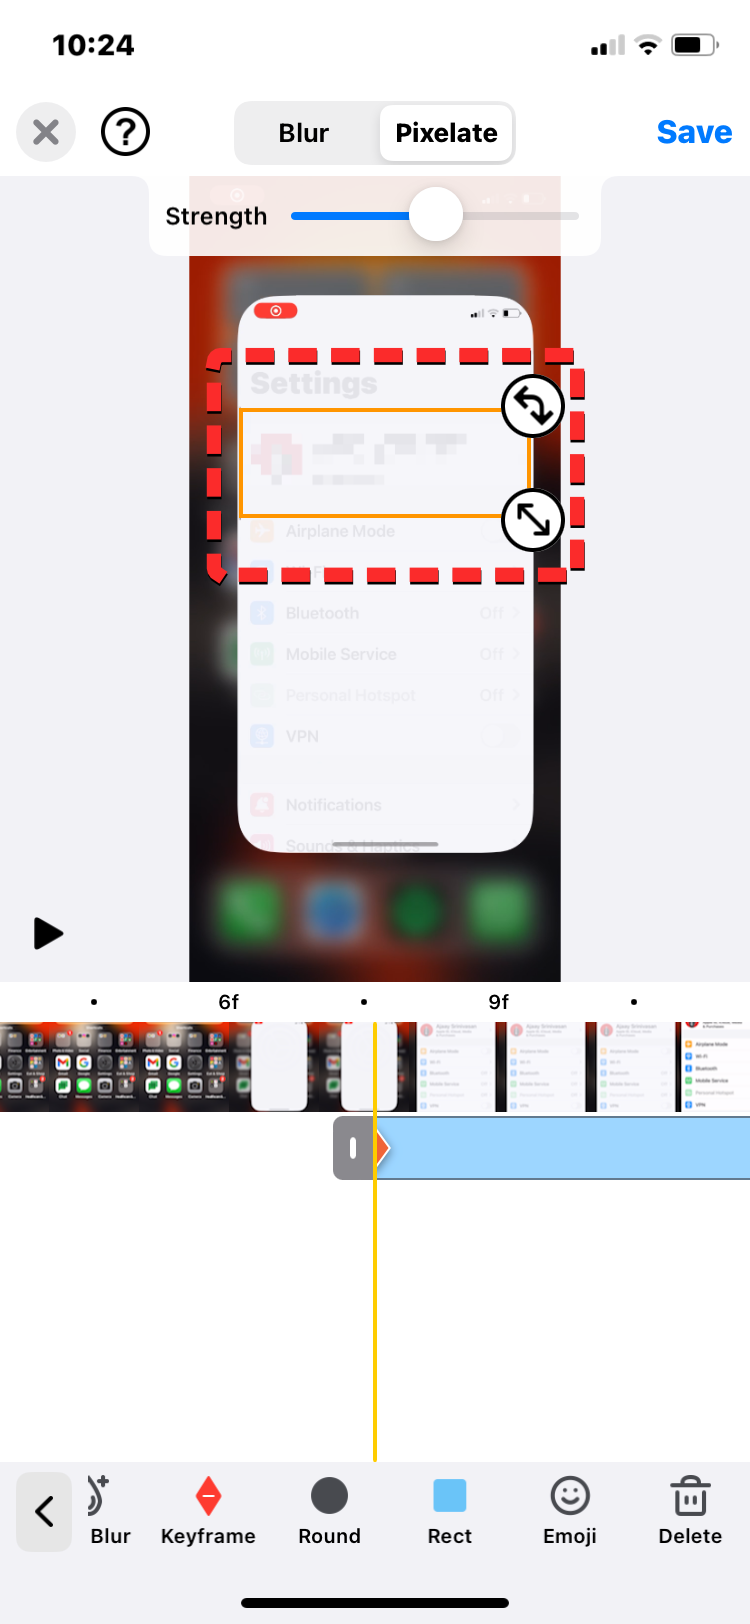
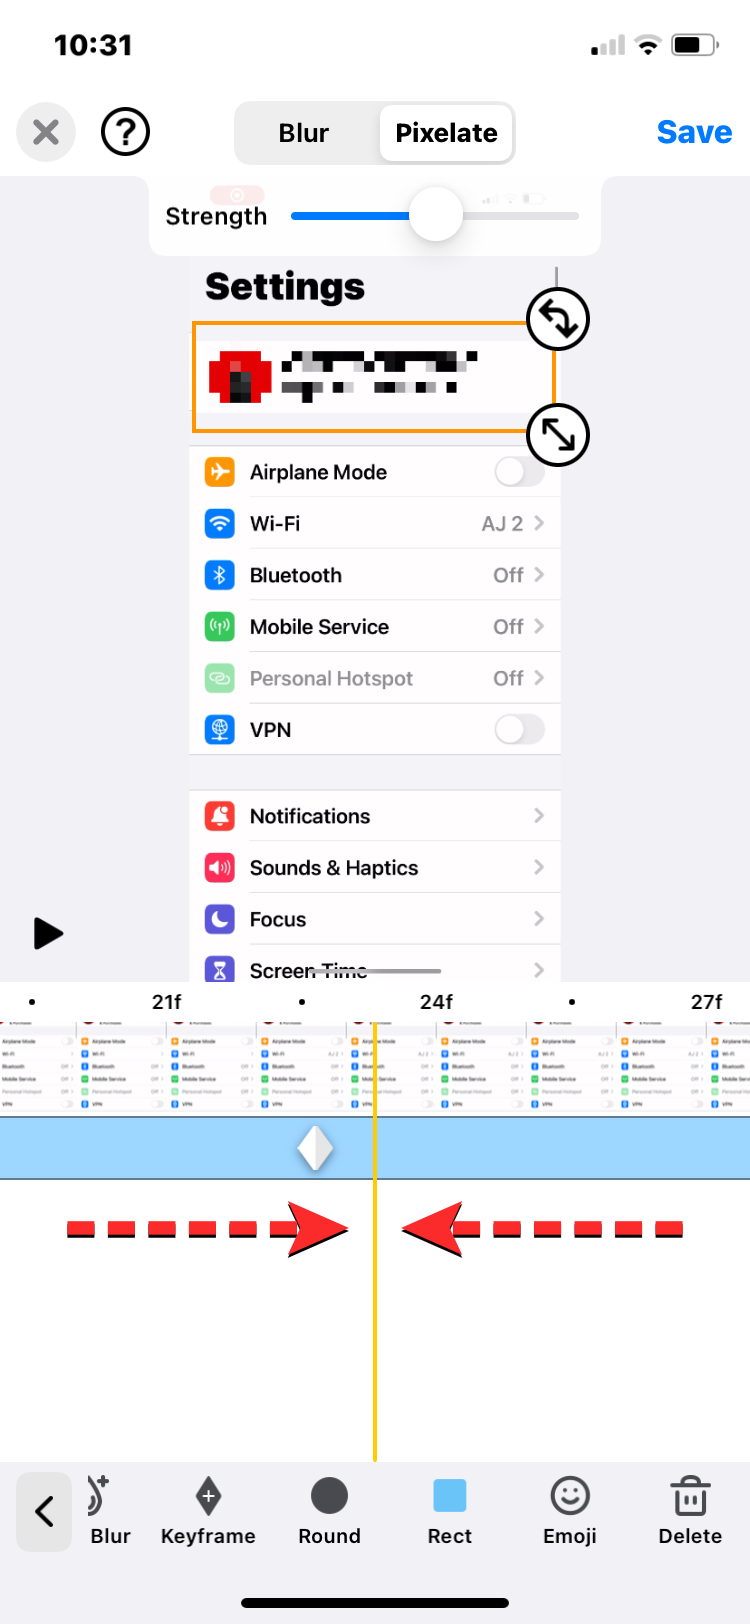
- Once you select the desired blur shape, drag the blur box on the video preview to the portion of the video that you wish to blur. For best results, apply the blur overlay from the first frame where the object starts appearing as explained in steps 3-4 above. You can resize this box by dragging the diagonal arrow icon inwards and outwards until you get the desired shape and size. Once resized, drag this box to re-adjust its position relative to the portion you want to hide.
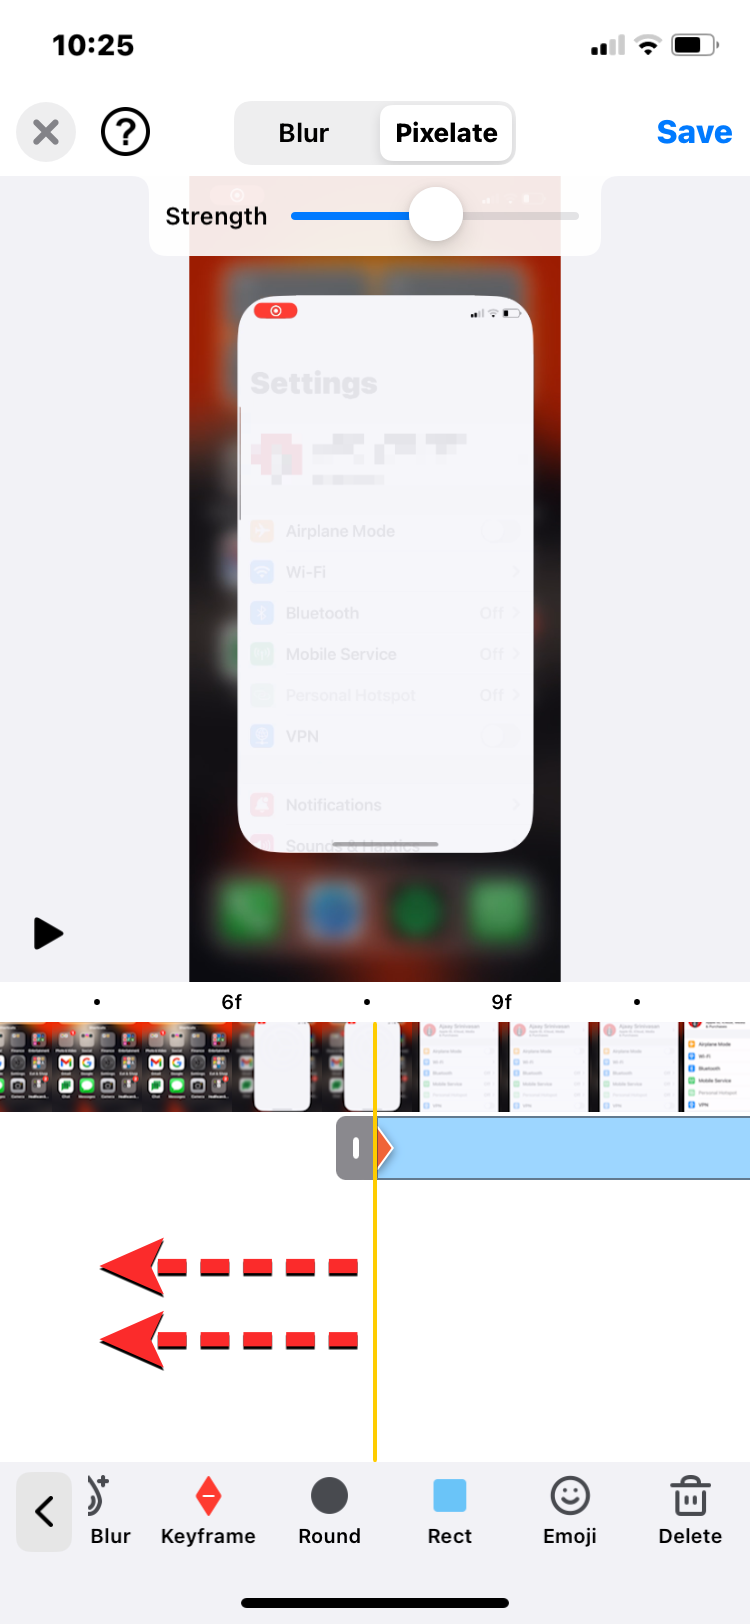
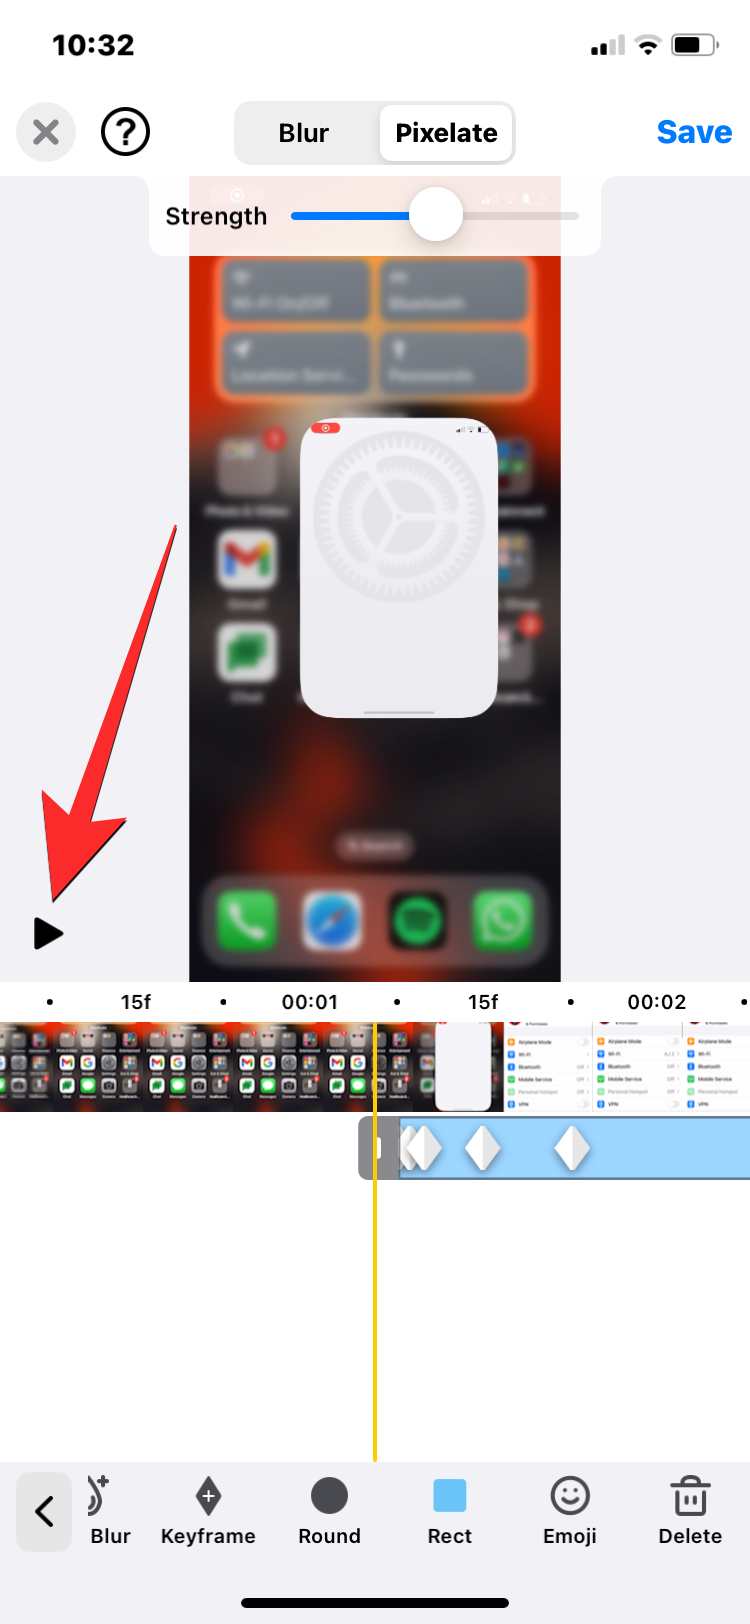
- Now, swipe the seeker leftwards to the subsequent frames to see if the face or text portion moves. If the content you want to blur is stationary, you can skip the rest of the steps below and jump directly to step 12 of this guide. But if you’re dealing with moving content, you will have to apply the blur effect to each and every frame using the Keyframes tool.
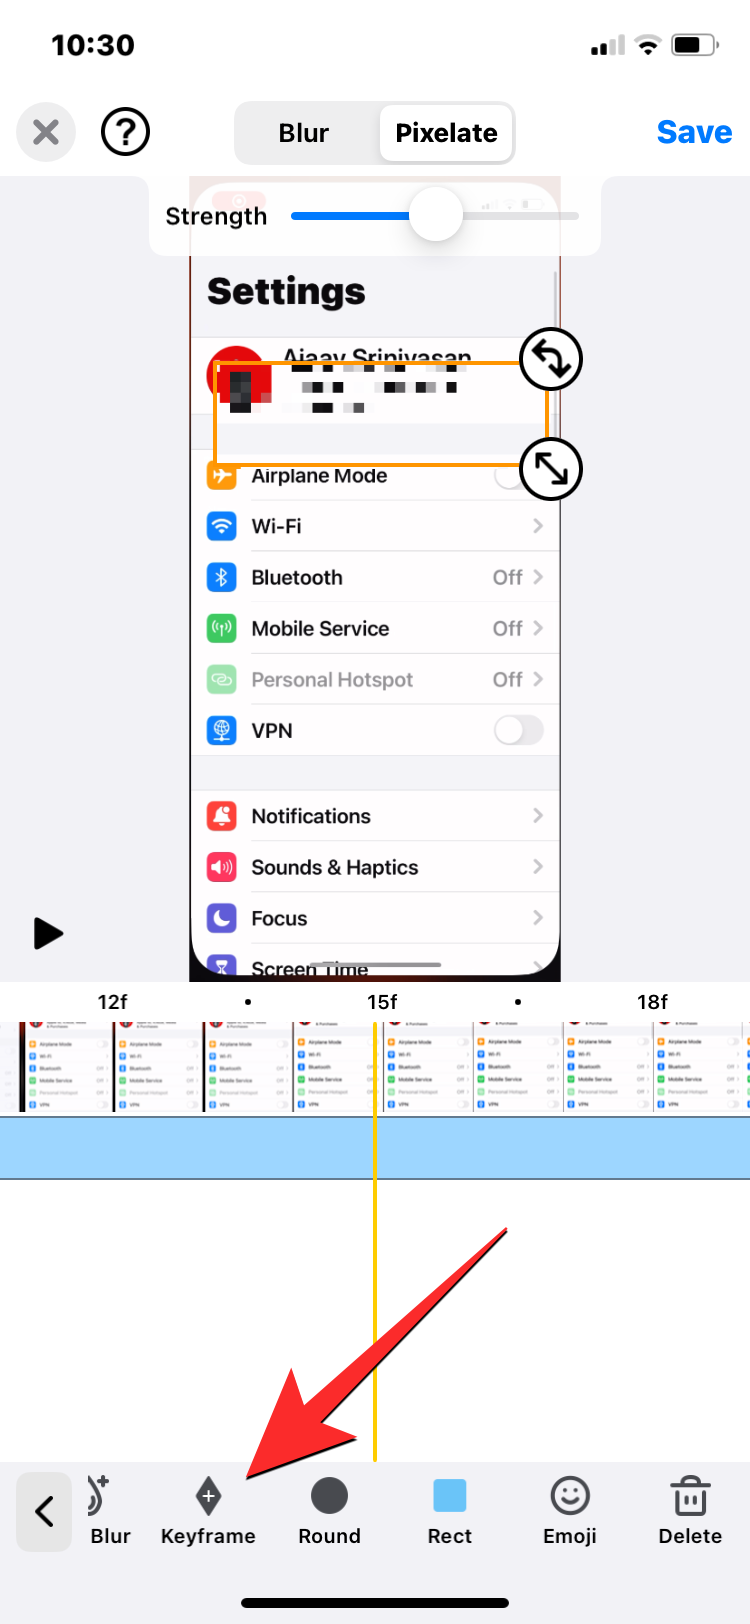
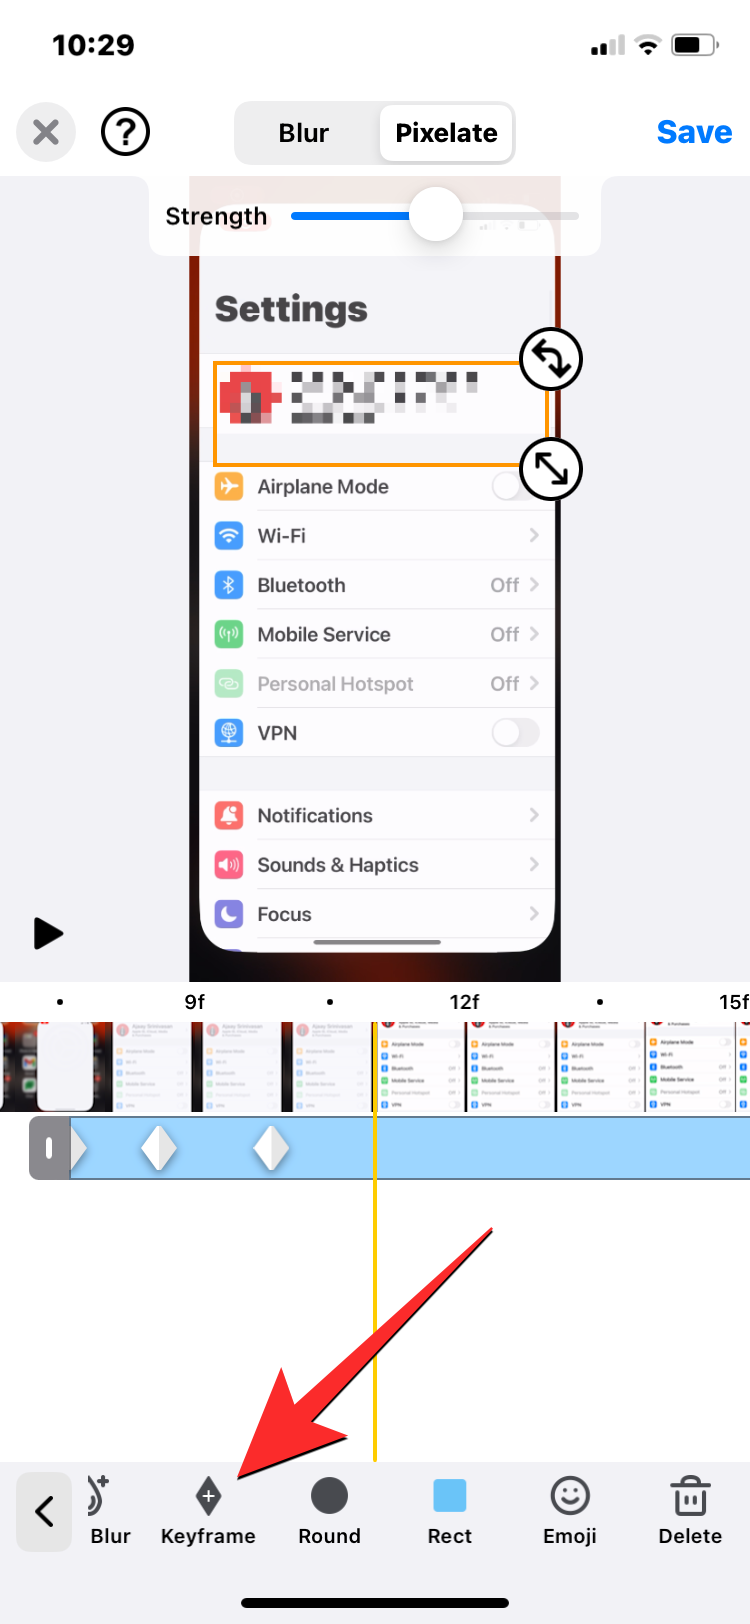
Keyframes lets you apply blur across different frames so that when the video plays normally, the item you want to obscure remains hidden throughout the video. Once you’ve placed the blur box for the first frame, you can move to the frame where this item moves to a different location. On this frame, tap on the Keyframe option from the bottom bar.
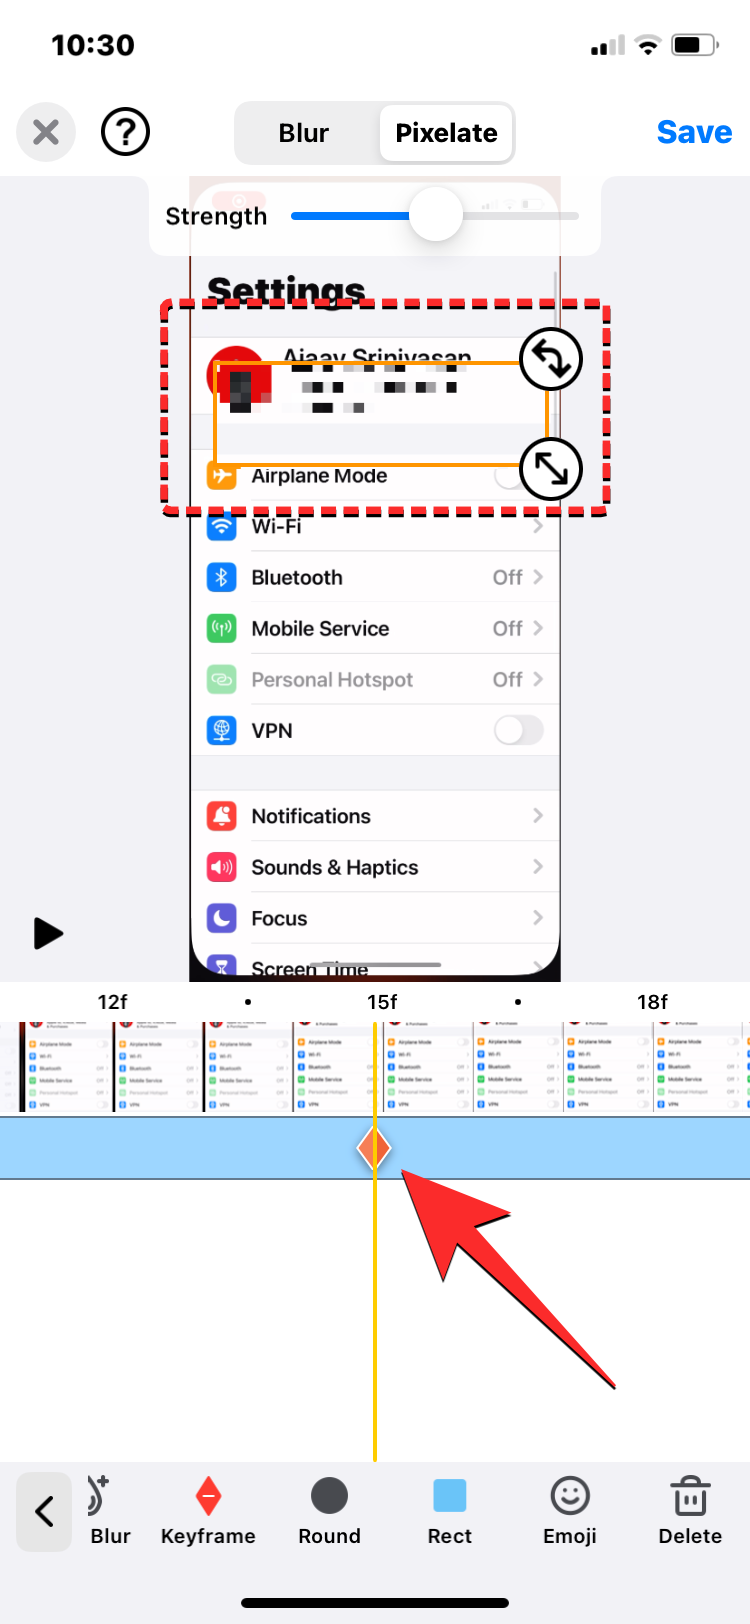
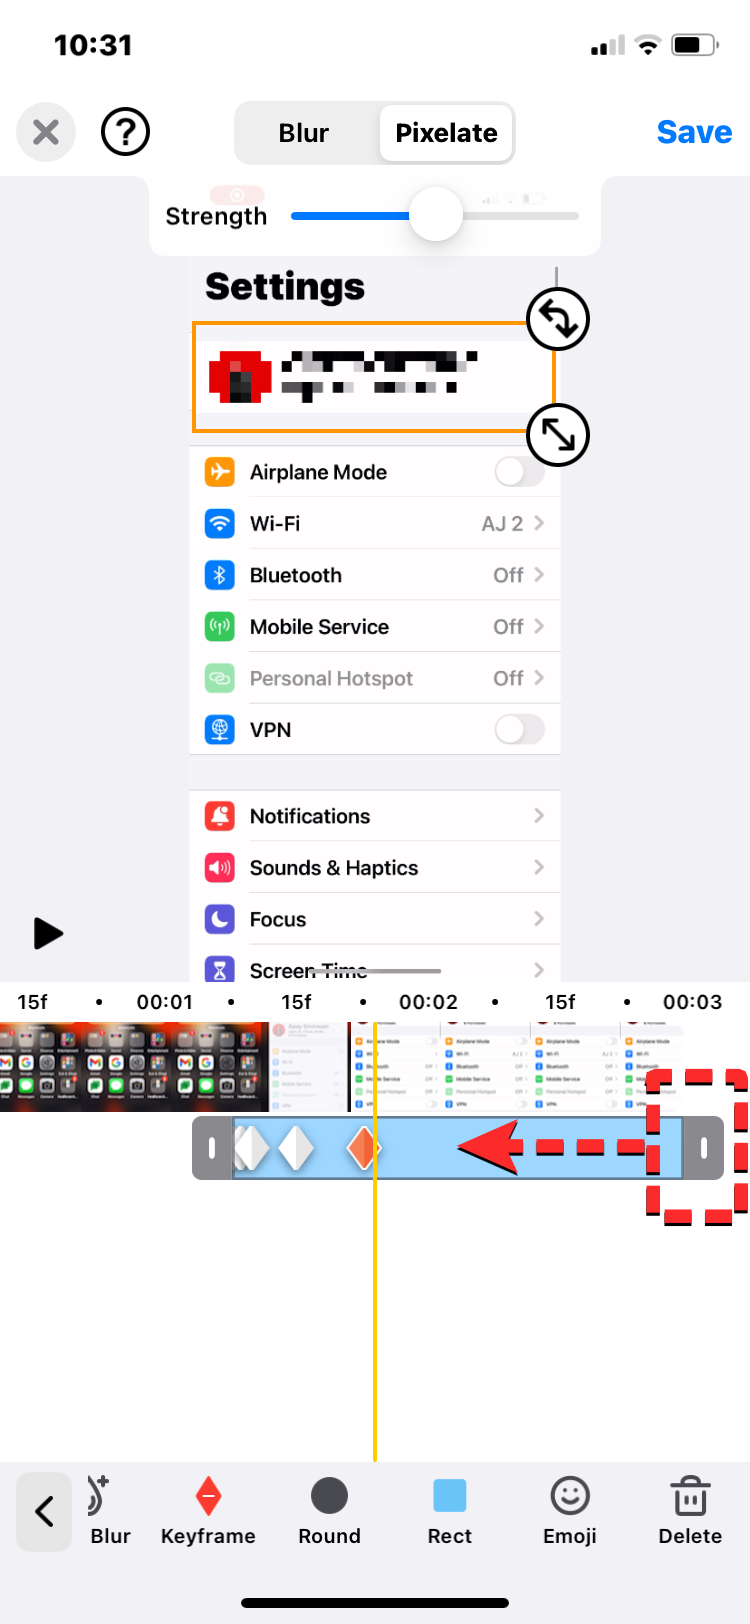
- When you tap on Keyframe, you’ll see a red diamond icon appear inside the blur timeline underneath the thumbnail of the respective frame. With a keyframe created, you can adjust the blur box’s position, shape, and size accordingly to hide only the desired portion of the video.
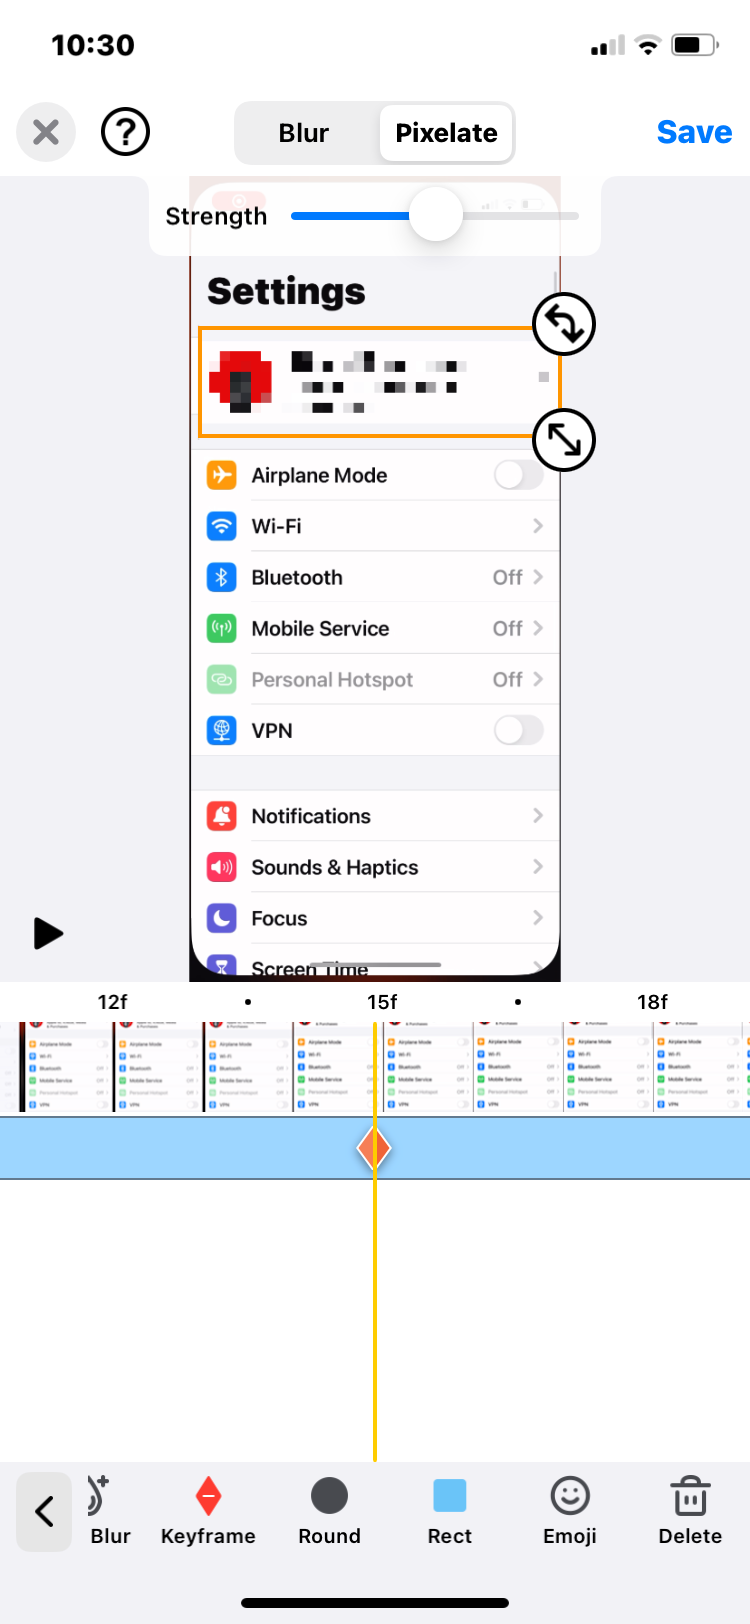
- You will need to repeat steps 8-9 to add more keyframes throughout the video and adjust the blur’s shape and size for each of the keyframes you create. The number of keyframes you add is proportional to how much the object you want to hide moves.
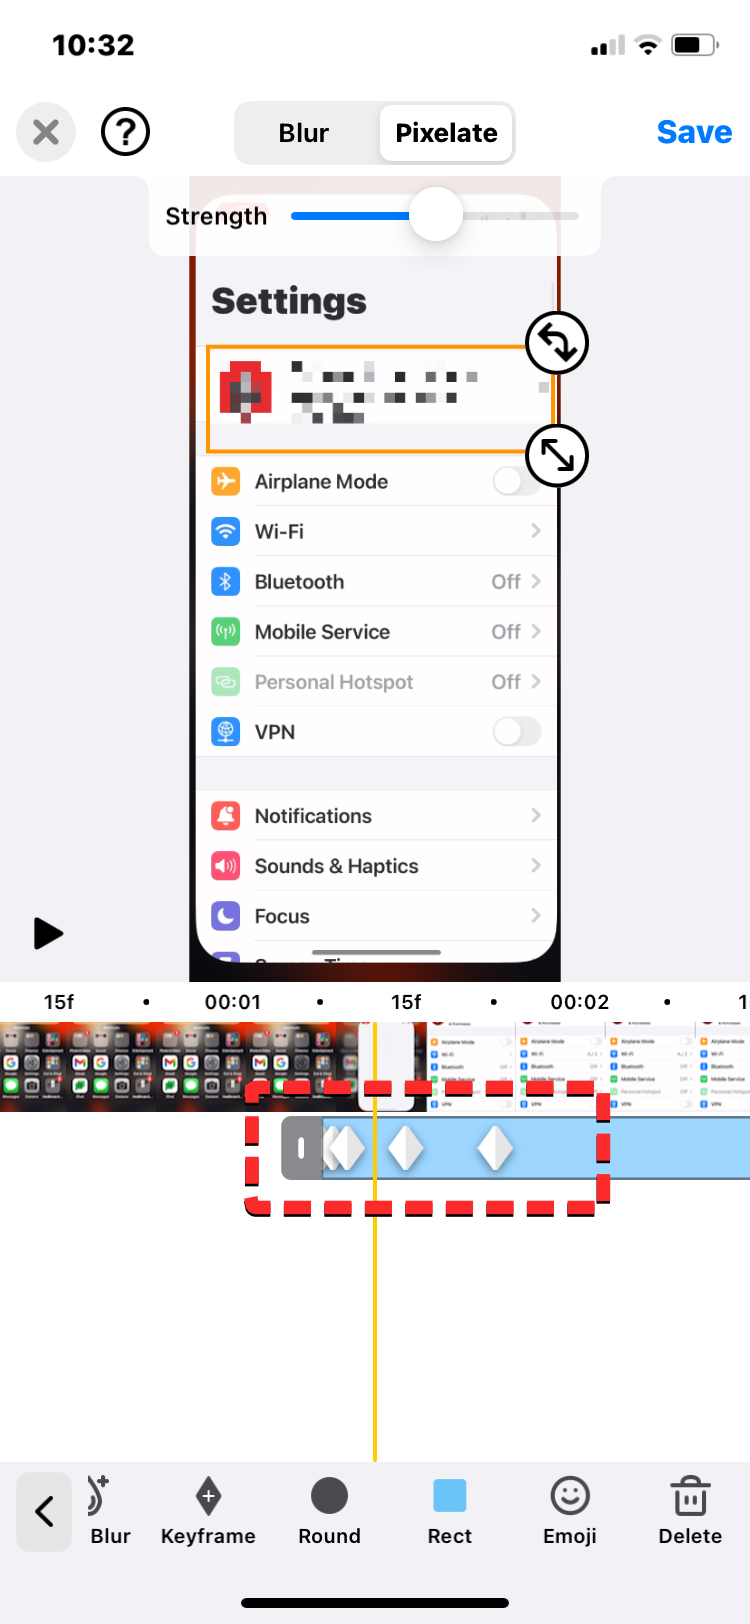
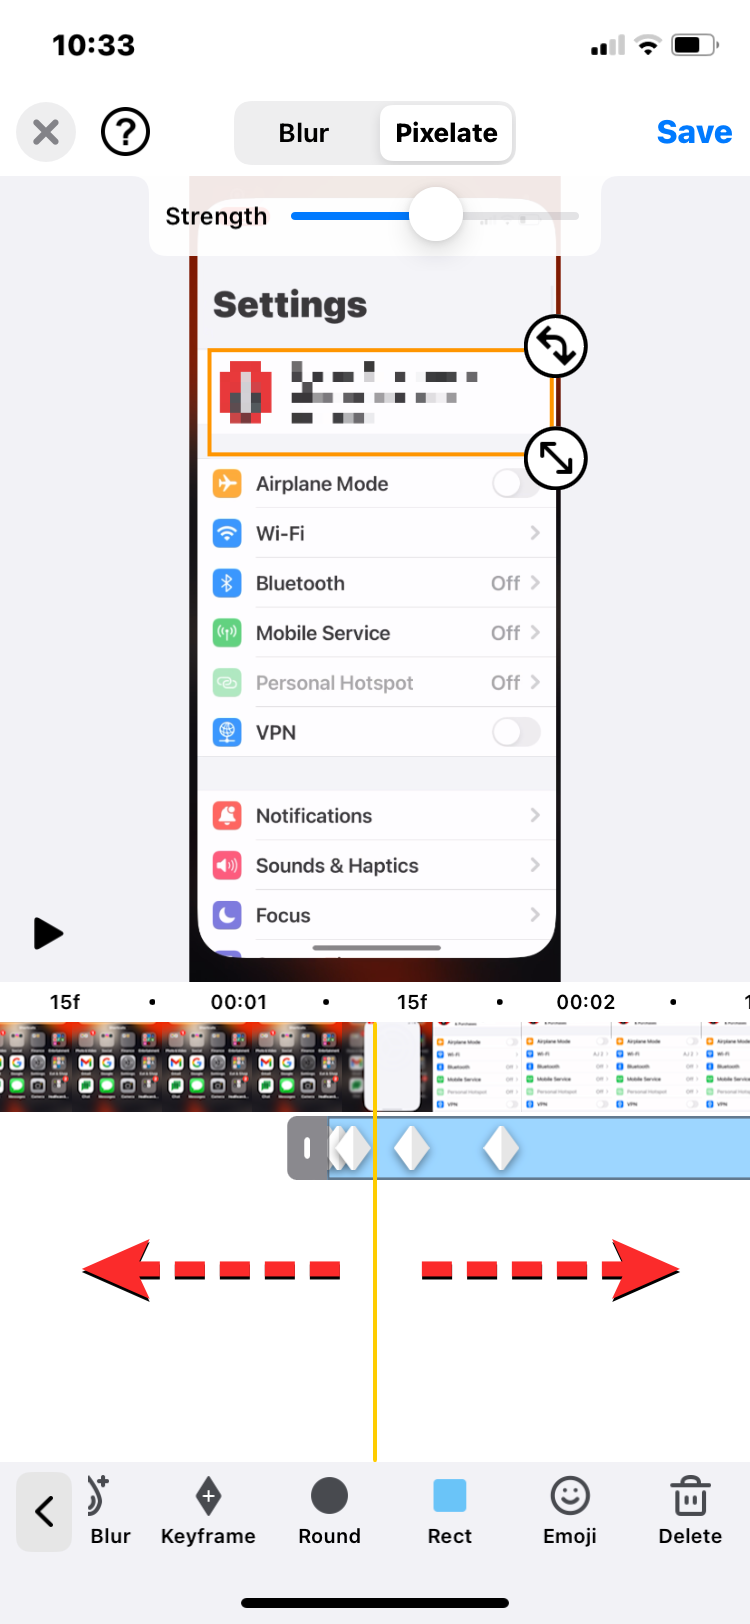
- Once you’ve added the necessary keyframes for hiding the moving object, you can change the duration of the blur effect so that it doesn’t appear inside unwanted frames inside the video. You can skip this step if the object you’re blurring stays in place till the very end. If not, seek to the frame where this object disappears from the video. Now, pinch inwards until the grey end on the right side of the blur timeline is visible. When it does, drag this grey end leftwards and drop it to the last frame you want the blur to appear.
- If there are multiple objects to blur, you can repeat steps 4-11 to apply the blur to other objects. If not, you can jump to the next step directly.
- Once you’ve added the blur effect to the desired objects with keyframes, you can recheck how well the blur has been applied by tapping on the Play icon or by seeking through the frames manually.
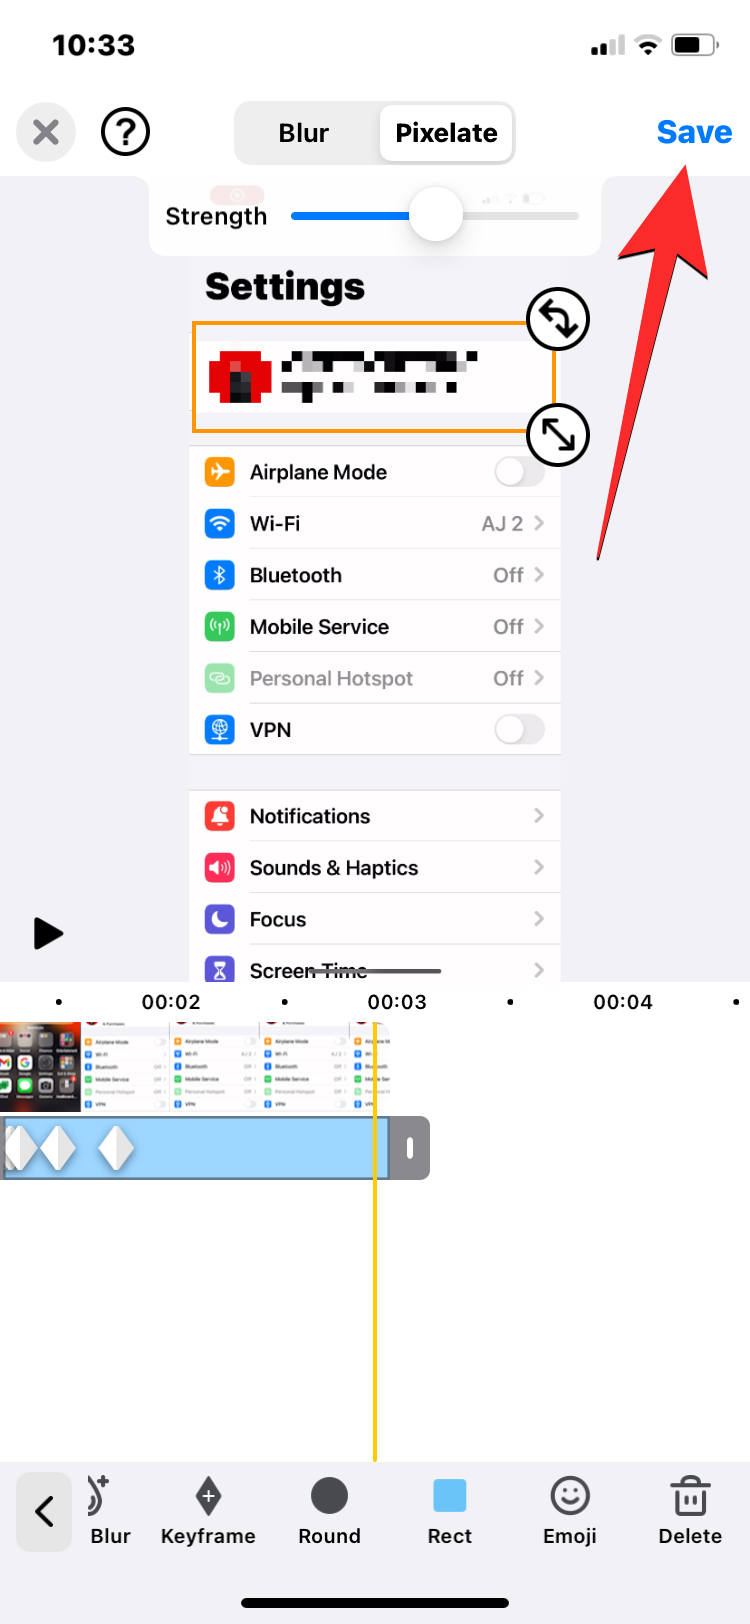
- When everything is set, tap on Save at the top right corner to save this edited video. Your video will now be processed and then saved directly on your iPhone’s Camera roll. You can view it by opening the Photos app on your phone or share this video by tapping on Share.
That’s all you need to know about blurring text and faces inside videos on an iPhone.


