

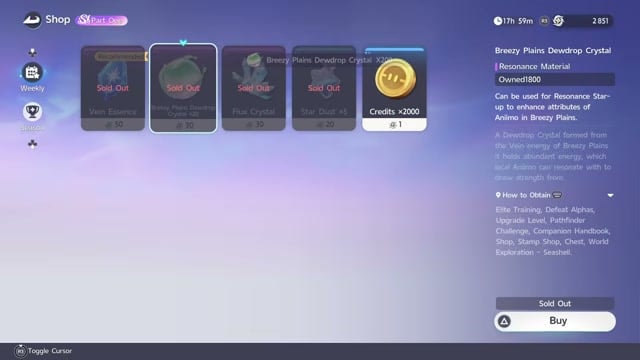
Prioritize Vein Essence, Breezy Plains Dewdrop Crystals, Flux Crystals, Star Dust and Tumblers each week, then collect recurring rewards to fund purchases and upgrades.
Your Season 1 shopping routine starts with limited materials and capture supplies. Secure those purchases first, then use reporting, activity rewards and targeted Primegy spending to support the Aniimo you’re building.
- Weekly materials and Tumblers to prioritize
- Seasonal Stamp purchases and spending unlocks
- Buy Tumblers at Super Claw before nurturing
- Astra’s limited training shop and daily vendor
- Earn Credits by reporting captured Aniimo
- Activities that earn your shopping Stamps
- Collector’s Companion Handbook and Holo-Battle rewards
- Allocate Primegy to the Omega materials you need
- Compare Glimmer purchases with other resource routes
- Stretch supplies with dispatches, hatching and selective upgrades
Weekly materials and Tumblers to prioritize
| Item | Weekly offer |
|---|---|
| Breezy Plains Dewdrop Crystal | Stamp Shop: 10 bundles of 20 at 30 Stamps each; 200 crystals for 300 Stamps. |
| Flux Crystal | Stamp Shop: 5 singles at 30 Stamps each; 150 Stamps total. |
| Star Dust | Stamp Shop: 10 bundles of 5 at 20 Stamps each; 50 Star Dust for 200 Stamps. |
| Vein Essence | Stamp Shop: 10 singles at 50 Stamps each; 500 Stamps for the allowance. |
| Irisalis Petal | Stamp Shop: 4 singles at 50 Stamps each; 200 Stamps for the allowance. |
| Credits | Stamp Shop: 2,000 Credits per Stamp, with no purchase limit. |
| Tumbler | Super Claw: a weekly capture-supply purchase. |
The Stamp Shop is under Season 1 → Season Hub → Stamp Shop → Weekly, and its currency is Windborn Stamps. Buying the four principal material allotments costs 1,150 Stamps; that subtotal excludes Irisalis Petals and Credits.
Vein Essence carries the shop’s Recommended label and supports nurturing. That substitution lets you finish an upgrade without spending energy farming its specific stone.
Keep Irisalis Petals as an additional weekly option, after the material and Tumbler priorities. Leave the unlimited Credit exchange for a specific shortfall: catching and reporting Aniimo gives you another way to earn that currency.
The currencies serve different jobs. Credits cover broad account expenses; activity currencies buy goods in their associated shops. Glimmer is flexible but scarce, while Primegy governs time-gated reward claims.
Open the vendor directory before converting currency and check whether you can farm the item you need.
Seasonal Stamp purchases and spending unlocks
The Stamp Shop’s Season or Limited Time selection uses cumulative Stamp spending to unlock offers. Reaching a threshold opens the purchase; you still pay the item’s separate price. The Limited label sits beside its cost.
| Item | Stamps spent to unlock | Purchase cost in Stamps |
|---|---|---|
| Sparkling Egg | 300 | 200 |
| Sparkling Cube | 2,500 | 500 |
| Flameplated Dragon Shield | 3,500 | 600 |
| Prismana Orb | 7,000 | 900 |
| Phenomena Crystal | 11,500 | 1,500 |
The Sparkling Egg is the offering associated with a random Sparkling reward. You don’t need to buy an unlocked seasonal item ahead of weekly materials simply because it becomes available. These limited purchases can wait until needed within the shop period, and the Limited Time Shop refreshes with each new Part.
Buy Tumblers at Super Claw before nurturing
A Tumbler catches up to ten Aniimo simultaneously. A nurturing group containing twenty Aniimo can therefore be covered with two Tumblers. Stock them before you begin nurturing, even if that activity isn’t part of your routine yet.
STEP 1/5
20%
Open the vendor directory
Open Shop, with Corner Shop → Exchange as the destination for the vendor list.
STEP 2/5
40%
Select Super Claw

Choose Super Claw, labeled Aniipod Exchange, to bring up its tracked destination on the Astra map.
STEP 3/5
60%
Teleport to Astra
Use the destination’s teleport route to reach the area near the storefront.
STEP 4/5
80%
Reach the storefront
Turn behind your arrival direction and cross the nearby platform to reach Super Claw.
STEP 5/5
100%
Buy the weekly Tumblers
Interact with the NPC to open Aniipod Shop and purchase its weekly Tumbler Aniipods.
The shop also displays Aniipod Track, Aniipod Hyper, Aniipod Mega and Aniipod Pro. Keep those choices separate from the Tumbler purchase you’re making for nurturing.
Astra’s limited training shop and daily vendor
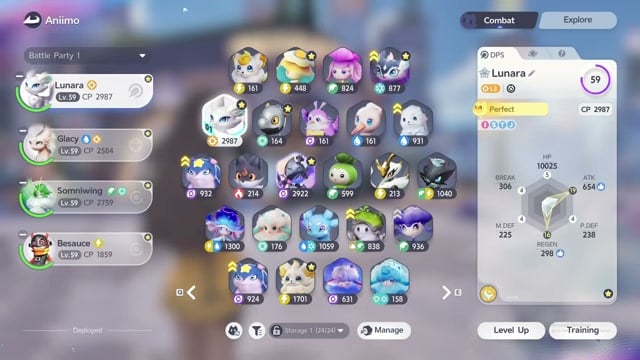
Across the street from Super Claw, Coilstrike Club opens the Aniimo Training Item Shop. Its limited supplies use the sandwich currency earned through the Star-Crossed Tea Party. This isn’t weekly stock, so buy against the materials your current upgrades need.
Training materials bought with sandwich currency
| Coilstrike Club item | Limited-shop purchase |
|---|---|
| Star Dust | 50 for 200 sandwich currency. |
| Star Sand | 20 for 400 sandwich currency. |
| Flux Crystal | 20 for 600 sandwich currency. |
| Breezy Plains Dewdrop Crystal | Available for sandwich currency. |
These quantities describe purchases, not the shop’s full allowances. After shopping, look in Mailbox for an awarded Astra Coilstrike Club Spending Reward; that message contains a Coilstrike Coupon. Claim it if it has arrived.
The nearby Mysterious Vendor has a daily shop. Its Events listing opens a map, and it also appears in the Corner Shop → Exchange directory. Follow its Astra marker toward the square’s tree and circular garden, where the interaction option is Trade.
Daily supplies bought with Credits
| Daily vendor item | Quantity and Credit cost |
|---|---|
| Psyche Fruit | 3 daily for 420,000 Credits total. |
| Starcryst Essence | The two-item purchase costs 1,200,000 Credits. |
Psyche Fruits reroll stats, making the daily Credit purchase an option when you’re preparing to refine a build. Buy Growth Fruits when a particular Aniimo needs an immediate level increase; skip an automatic daily purchase when you don’t have that need.
Earn Credits by reporting captured Aniimo
Before spending Stamps on a Credit shortfall, prepare Research Expert and submit your captures. The passive improves reporting payouts, so setting it up before a report keeps those captures working harder for you.
STEP 1/3
33%
Find Research Expert
Open Character → Talents → Passive Talents and select Research Expert to upgrade the reporting passive.
STEP 2/3
67%
Report your captures
Submit captured Aniimo at the hub research machine. At Breezy Plains Outpost, the Research Console sits beside the Hatchinator.
STEP 3/3
100%
Check the credited payout
Leave the reporting screen to see the amount with the passive adjustment; the initial reward display can omit it.
New species and form registrations can add reporting bonuses, too. Your payout therefore reflects what you’re submitting, not a fixed daily income.
Activities that earn your shopping Stamps
Your Stamp income comes from several activities, with an allowance attached to each. Choose activities you can complete and collect their associated rewards. The allowances describe individual activities; linked actions such as nurturing and Wild Surge aren’t a basis for calculating a combined weekly payout.
Stamp earning actions and weekly allowances
| Activity | Earning action | Weekly Stamp allowance |
|---|---|---|
| Branch Nurture | Nurture a Branch to trigger Wild Surge. | Up to 300. |
| Wild Surge | Trigger a Wild Surge and claim Bloom rewards. | Up to 300. |
| Catch Report | Capture Aniimo and submit reports. | Up to 400. |
| Defeat Alphas | Defeat Alphas across Idyll. | Up to 300. |
| Holo-Battle Sim | Challenge themed stages. | Up to 180. |
| Holo-Battle Interlink | Challenge consecutive Alpha Aniimo with a party. | Up to 300. |
| Operation: Egg Heist | Explore its maze for rare eggs. | Up to 600. |
| Home Orders | Complete orders. | Up to 600. |
| Star-Crossed Tea Party | Rest at the activity. | Up to 200. |
Stamp Rush, accessible through Season Hub, has its own 1,000-Stamp weekly target. Its track also states a requirement of four Season Stamps for one blind box. Keep those track requirements separate from your shop spending calculations.
For the Star-Crossed Tea Party, head to ChillBeanz in Astra. It’s a nightly activity, and its entry appears in the second Events tab while available. It’s also the activity that funds your sandwich-currency purchases at Coilstrike Club.
Collector’s Companion Handbook and Holo-Battle rewards
The Season Hub → Companion Handbook → Quests → Weekly route leads to the tasks that advance your free reward track. Complete the available weekly quests and collect the rewards you reach. The pass has paid rewards as well, but the free track belongs in your F2P routine.
At level ten, the free track awards an Incredible Fulmintis Egg. It works in Outpost or Home Hatchinators and guarantees Elite potential or higher. That is the egg’s baseline reward, distinct from the Perfect result obtainable in the Sparkling Cube hatch example. The paid track includes a Prismana Fulmintis Egg, which isn’t a free-track purchase goal.
Once Holo-Battle Sim is unlocked, attempt achievable clears across Grass Training, Water Training and Fire Training. Each has Easy/Tier 1, Normal/Tier 2, Hard/Tier 3 and Challenge/Tier 4. Start with Easy if you’ve been leaving the mode untouched; you don’t need to clear the highest difficulty to begin collecting rewards.
Reward claims are under Institute Guide → Holo-Battle Sim → Training Incentive, with tracks for each difficulty. Recurring rewards include Sparkling Crystals, Credits, Stamps, Tumblers and upgrade materials. Sparkling Crystals contribute to crafting Sparkling Cubes, giving you a progression route alongside outright purchases.
First-clear bonuses are separate. Once claimed, those bonuses are exhausted, while the recurring rewards become available again after the weekly refresh. Finish the clears within reach and collect their rewards before that opportunity passes.
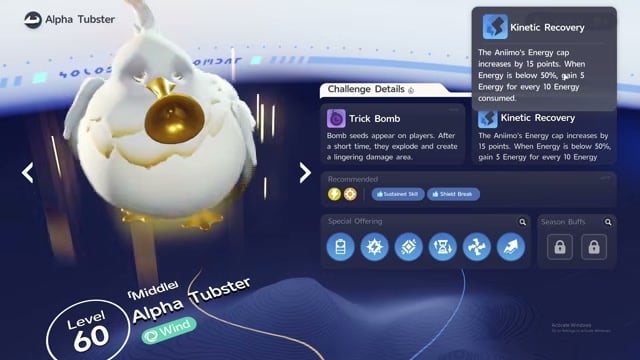
Holo-Battle Interlink is available from the main menu. Build around each boss’s particular weaknesses and aim for its stated three-minute maximum-reward window. The Challenge Rewards panel carries score thresholds extending to sixty stars.
Challenge conditions also affect your approach. Kinetic Recovery raises energy capacity by fifteen and starts energy regeneration below half energy; this belongs to that particular challenge condition. Regular and Prismana Fulmintis share a kit, while the Prismana version has greater resistances.
Allocate Primegy to the Omega materials you need
The weekly encounters are under Main Menu → Institute Guide → Animo Challenge → Alpha Challenge. Pick runs that supply your current upgrades before spending Primegy elsewhere. Their weekly attempts give you options, not a compulsory full-clear schedule.
| Challenge | Listed level | Energy per run | Weekly attempts |
|---|---|---|---|
| Omega Tuckin | 35 | 50 | 3 |
| Omega Infergon | 50 | 50 | 3 |
| Young Omega Sherro | 40 | 50 | 3 |
Omega Tuckin supplies Breezy Plains Dewdrops. Omega Infergon supplies Star Essence, and Young Omega Sherro provides upgrade resources. Infergon and Sherro supplies can disappear quickly when you’re developing Aniimo, so let those needs determine your allocation.
Completing the Infergon and Sherro allowances costs 300 energy. Adding Tuckin brings that allocation to 450 energy. Standard Alpha runs cost 30 energy, giving you another cost to weigh when choosing a material target. The listed encounter levels describe the opponents, not account unlock ranks.
The challenge categories cover Evolution Material, Resonance Star-Up Material, Held Item and Capability Awakening Materials. Use the category matching the upgrade you’re funding. In the held-item option, orange denotes legendary items; continued story progress and character rank make those rewards available.
Compare Glimmer purchases with other resource routes
Skip the weekly Ultra Pod allotment as your F2P default. Its Glimmer cost competes with other purchases, and the stated recurring income includes thirty Glimmer per day. That’s one income source, not your entire supply: exploration and chests also contribute.
| Item or bundle | Glimmer price |
|---|---|
| Sparkling Crystal ×10 | 15. |
| Primegy ×60 | 50. |
| Psyche Fruit | 100. |
| Aniipod Ultra | 200 each; weekly limit of 10. |
| Hair Saloon Card | 300. |
| Redesign Card | 300. |
| Name Change Card | 300. |
| Morph Orb | 300. |
| Kapa Fruit | 1,000. |
| Sparkling Cube | 1,500. |
Reserve Kapa Fruit, also labeled Capafruit, for a Perfect Aniimo you intend to use long term. Bringing Common, Good or Elite potential to the same point consumes more resources. Keep capturing the species you want while seeking a Perfect specimen.
For Psyche Fruit, weigh a Glimmer purchase against the daily Credit vendor. Stat refinement matters when you’re pushing difficult Holo-Battle clears, but each reroll purchase draws from the same currency available for Sparkling Cubes and appearance changes. Those cosmetic options are discretionary spending, not weekly progression purchases.
Sparkling Cube purchases can consume Glimmer quickly. Weekly reward activities and hatching offer adjacent ways to keep progression moving, so don’t make buying Cubes an automatic weekly expense.
The Corner Shop → Exchange → Outpost Vendor route leads to discounted weekly offers. Its displayed goods include Aniipod tiers, Growth items, Rubber Duck and Star Stone. Compare purchases with your Homestead production: some goods become producible earlier, while others require further account development.
Elemental shards are an as-needed purchase in Credit Exchange, without a weekly allowance to clear. Fire, Water, Wind, Ice, Lightning, Earth, Grass and Dark shards each cost 5,000 Credits. Buy for the upgrade in front of you.
If you log in but can’t otherwise spend your energy, the Daily Supply Pack offers a daily purchase for fifty Primegy. Use it for that situation; when you can run the material activities you need, keep your energy focused there.
Paid weekly packs sit outside this F2P routine. One-time top-up bonuses also aren’t recurring free purchases.
Stretch supplies with dispatches, hatching and selective upgrades
When Tracing the Trail: The Shadow of Legend is available, choose its leader for long-term value. Chance Encounter Gift: Energy Resonance grants the leader random potential +1 when that encounter reward occurs. A completed dispatch alone doesn’t guarantee that gain.
STEP 1/5
20%
Open Nimbus Fields
Select Events → Tracing the Trail: The Shadow of Legend → Nimbus Fields to reach the dispatch screen.
STEP 2/5
40%
Read the event rules
Open Event Rules for Investigation Dispatch, Investigation Rewards, Chance Encounter Gifts and Special Individual Bonus.
STEP 3/5
60%
Choose your leader
Open Select Leader and assign an Aniimo you intend to keep developing. Somniwing is one demonstrated choice; use the DPS, Support and Break role filters to find your intended leader.
STEP 4/5
80%
Fill the member slots
Use the Sparkling and Prismana filters when choosing members. Higher-CP members and relevant special individuals can shorten dispatch time; Sparkling and Prismana participation also accelerates special event activation.
STEP 5/5
100%
Confirm deployment
Start the dispatch and look for the running timer on the Nimbus Fields tile to confirm it is underway.
Capability Awakening is the resource-spending route for raising acquired potential. Its displayed upgrades require Starcryst Essence and Star Sand, separate from the conditional dispatch reward. Developing multiple Aniimo can demand a large supply, so spend on the ones you intend to keep using.
Keep eggs from Operation: Egg Heist incubating in Outpost or Home Hatchinators. A Sparkling Cube-assisted hatch produced a Perfect Aniimo in the demonstrated result; that result doesn’t turn the free Handbook egg’s baseline into a universal Perfect guarantee. Keeping incubation running puts the eggs you’ve already earned to work.
For ordinary leveling, a resource-saving option is to stop at level fifty-nine and let daily use supply the final level to sixty. If you have surplus XP, finishing immediately is fine. Some further upgrades require additional creature levels, so weigh that saving against the upgrade you’re trying to reach.
Preserve the limited yellow upgrade material for an Aniimo you intend to develop. A later upgrade node needs two, and an indicated Elite Training reward offers one. Keep up with Homestead’s daily tasks, then return to the core priority: finish the limited weekly material purchases and collect the resources you need to use them.
Related Aniimo guides



Leave a Reply