
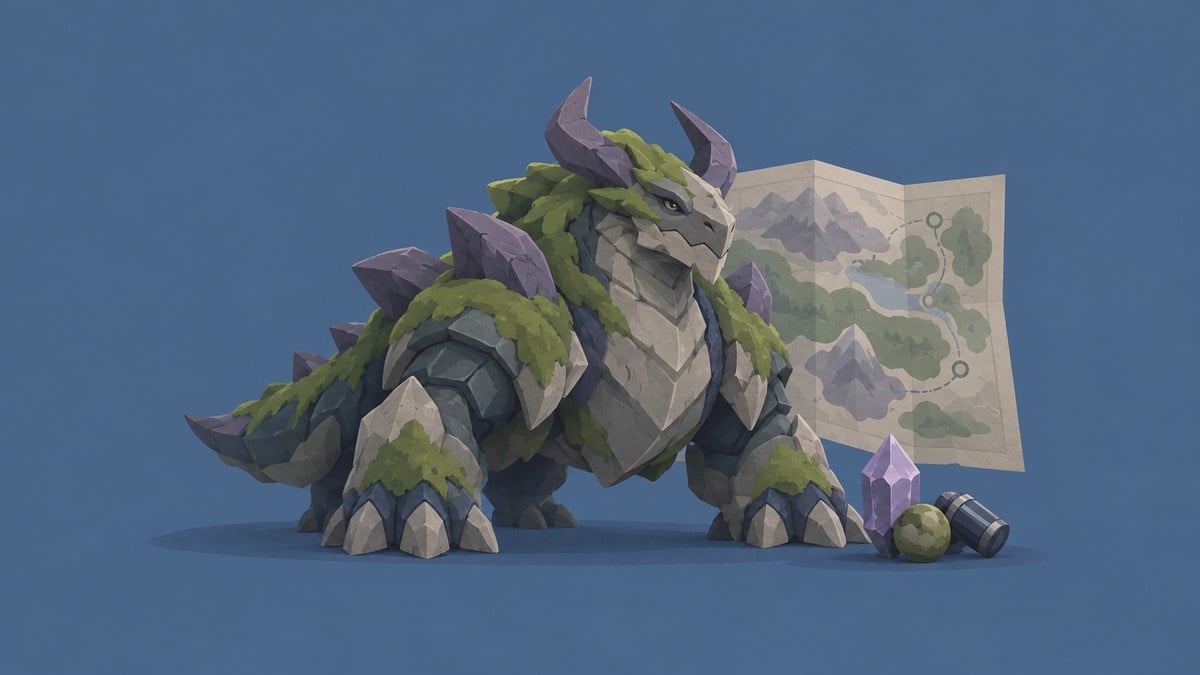
Alpha bosses occupy fixed sites across Breezy Plains; Omega Infergon, Sherro and Tuckin become available after their linked story and regional quests.
Your first clear of an Alpha gives you a shared reward bundle alongside its specific drop, so you get materials with your progression rewards. For an Omega boss, check the relevant area’s quest log for help. You need to finish its linked quests before you can spawn it.
- Alpha and Omega encounter areas
- Turbo’s location and Gust Stones
- Tubster’s location and Dewdrop Crystals
- Stellarys in the star-shaped grassland
- Blazen’s mountain summit and Roar Stones
- Irisal’s story encounter and held-item drops
- Panpanta’s shore and Wave Stones
- Bouldus’s hill and Loam Stones
- Scorchhowl’s monolith and Blaze Stones
- Glynsera’s ice-cave entrance and Freeze Stones
- Leafy’s grove and tornado attack
- Ignitis’s location and damage and healing items
- Luminelle’s location and star materials
- Map markers, reward checks and Grizbo’s cave
- Magmarex’s geyser route and underground arena
- Rookey’s location and Star Sand
- Earthquake Revelation and the sealed Alpha routes
- Geoclaw’s river-cave route and item cores
- Minespine’s Pebbling Mine entrance and Explosive Gloves
- Omega Infergon through the helmet quest
- Omega Sherro through the beach quest
- Omega Tuckin through Binding Oath
- Alpha first clears, repeat rewards and capture
- Held-item effects for choosing farming targets
- Primegy costs and reward-claim planning
- Frequently Asked Questions
Alpha and Omega encounter areas
Bosses and their regional locations
| Encounter | Area |
|---|---|
| Alpha Turbo | Nimbus Fields |
| Alpha Tubster | The Argent Strait |
| Alpha Stellarys | Forest of Falling Stars |
| Alpha Blazen | Blitzwood |
| Alpha Irisal | Sea of Flowers |
| Alpha Panpanta | Echoback Landing |
| Alpha Bouldus | Berylline Vale |
| Alpha Scorchhowl | Beast Fang Ridge |
| Alpha Glynsera | Beast Fang Ridge |
| Alpha Leafy | Mistwoods |
| Alpha Ignitis | Berylline Vale |
| Alpha Luminelle | Tideblossom Coast |
| Alpha Grizbo | Rosetower Woods |
| Alpha Magmarex | Zephyrus Landbridge |
| Alpha Rookey | Russet Highlands |
| Alpha Geoclaw | Northwestern Nimbus Fields |
| Alpha Minespine | Beast Fang Ridge |
| Omega Sherro | Beach |
| Omega Tuckin | Mistwoods |
| Omega Infergon | Russet Highlands |
Blooms and Sanctums serve as fast-travel destinations. Interacting with a Bloom also reveals part of the regional map; nurturing it requires that area’s Bronze Collection Badge.
The Institute Guide lists Alpha and Omega bosses, including their costs and reward drops. Those entries distinguish held items, training and Resonance Star-Up materials, and evolution stones, so you can choose an encounter for the resource you need.
Turbo’s location and Gust Stones
Alpha Turbo is in the field northeast of First Spark Sanctum. This Wind encounter is part of the early tutorial progression. Its listed reward includes Gust Stone ×5, a Wind evolution material; that quantity is not guaranteed on every repeat run.
Tubster’s location and Dewdrop Crystals
Start at First Spark Sanctum. Head southwest for Alpha Tubster, whose listed reward includes Breezy Plains Dewdrop Crystal ×60.
Tubster is Wind, with weaknesses to Lightning and Light. It has an advantage against Dark and Wind, giving you a clear elemental choice when building your team.
Stellarys in the star-shaped grassland
Alpha Stellarys waits in the middle of the star-shaped grassland. Head north from the Outpost for this Dark boss, one of the earlier Alpha encounters.
Blazen’s mountain summit and Roar Stones
Alpha Blazen occupies the summit or ridge of the mountain south of Blitzwood Bloom. Climb up for this Lightning encounter, listed at level 42–44. The first clear awards Roar Stone ×5.
Bring Dark or Ice attacks to target its weaknesses. Blazen has an advantage against Lightning, Light and Wind.
Irisal’s story encounter and held-item drops
Alpha Irisal’s encounter is tied to story progression. Look south of Sea of Flowers Bloom.
The first clear adds Spirited Feather ×1 and Basic Held Item Core ×2 alongside the common reward bundle. Repeat materials include Spirited Feather, Fission Needles and Echoing Grimoire, alongside Carried Item Cores.
Panpanta’s shore and Wave Stones
Alpha Panpanta is a Water boss with a listed encounter range of 36–37. Find it near a shore north of Echoback Landing Bloom. The first clear awards Wave Stone ×5.
Its weaknesses are Lightning, Grass and Ice.
Bouldus’s hill and Loam Stones
Alpha Bouldus occupies a small hill. Head northeast from Mudstone Pass Bloom for this Earth boss, listed at level 39–41 with Loam Stone ×5 among its listed rewards.
Grass and Water target Bouldus’s weaknesses.
Scorchhowl’s monolith and Blaze Stones
Alpha Scorchhowl occupies the center of the three-stone monolith. Use the stones as your landmark east of Sanctum: Water to Ice.
The Fire encounter has a listed range of 29–32 and a listed reward of Blaze Stone ×5. Use Earth or Water against it; Scorchhowl has an advantage against Fire, Grass and Ice.
Glynsera’s ice-cave entrance and Freeze Stones
Vines or ice can obstruct the entrance to Alpha Glynsera’s ice cave. Look for it south of Sanctum: Water to Ice.
Glynsera is an Ice Alpha, and its listed reward includes Freeze Stone ×5.
Leafy’s grove and tornado attack
Alpha Leafy awards Sprout Stone ×5 on the first clear, and Sprout Stone remains a repeat material. Find this Grass encounter in the middle of the grove northeast of Breezy Plains Branch.
Leafy’s multiple tornadoes make close-range attacks dangerous.
Ignitis’s location and damage and healing items
Check Alpha Ignitis’s spawn condition before the trip. Find it southeast of Berylline Vale Bloom.
This Dark Alpha has a listed level range of 44–46. It is weak to Light and Wind and has an advantage against Earth; Finaloon is also a combat option used for this encounter.
Its rewards include Ferocious Fang, Miraculous Fleece and Carried Item Cores.
Luminelle’s location and star materials
Alpha Luminelle’s fight takes more than reaching the encounter site. Find the spot south of Tideblossom Coast Bloom.
The first clear awards Star Dust ×5 and Star Sand ×2, and both materials can drop on repeat runs. Luminelle has a listed encounter range of 53–60, with weaknesses to Dark and Ice and an advantage against Lightning, Light and Wind.
Map markers, reward checks and Grizbo’s cave
The map lookup works for Tubster, Turbo, Blazen, Irisal, Rookey, Bouldus, Panpanta, Scorchhowl, Glynsera, Leafy and Stellarys. An icon points you toward the encounter, while the challenge entry gives you the reward information needed to choose a farming target.
STEP 1/6
17%
Open the world map
Find your target’s regional area on the map.
STEP 2/6
33%
Reveal the Alpha markers
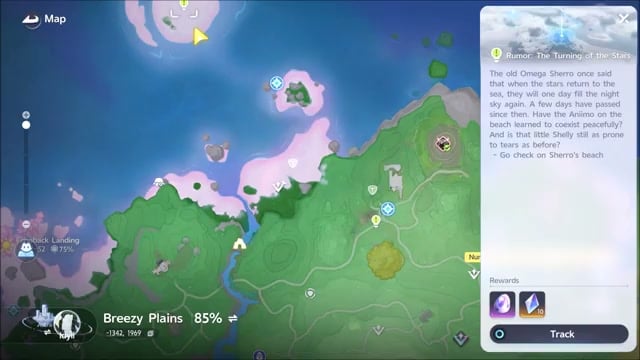
Zoom in slightly if the map is fully zoomed out, because Alpha icons disappear at the widest view.
STEP 3/6
50%
Open the challenge list
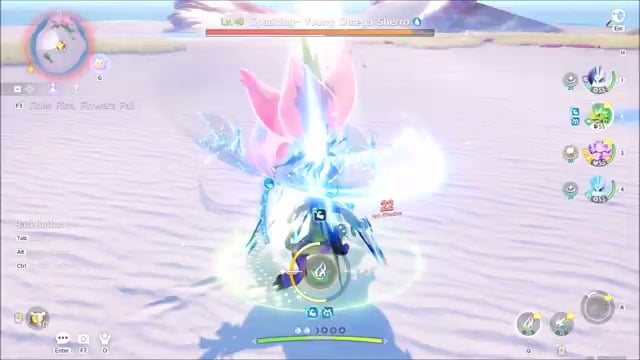
Select Institute Guide > Animo Challenge and choose the target to view its rewards.
STEP 4/6
67%
Track Grizbo when targeting its cave
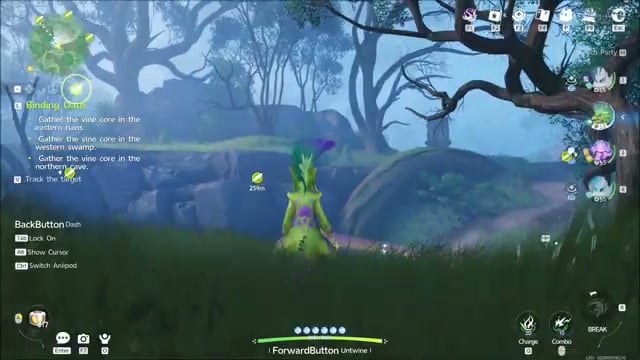
Select Alpha Grizbo’s marker, north of Rosetower Woods Bloom; ordinary Grizbo spawns are separate from the underground Alpha.
STEP 5/6
83%
Find the entrance beneath the marker
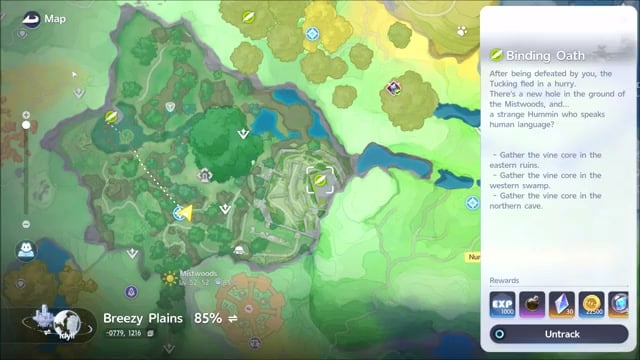
Look for rubble blocking the bare cave as you approach the rock face.
STEP 6/6
100%
Pass the cave obstacles
Magmarex can carry you through the strong wind and use Hustle to break the rocks on this entrance route.
Alpha Grizbo is an encounter with a listed level range of 43–50. It is weak to Grass and Water and has an advantage against Lightning, Fire, Ice and Earth.
Its drops include Gargantuan Horn and Carried Item Cores.
Magmarex’s geyser route and underground arena
Alpha Magmarex occupies its own underground arena. The access route also reaches the connected island area.
STEP 1/3
33%
Reach the geyser route

Magmarex is north of Hot Spring Reef Bloom.
STEP 2/3
67%
Descend through the geyser
Go down through the geyser to enter the underground area.
STEP 3/3
100%
Continue to the arena
Follow the underground route to Alpha Magmarex.
The Fire boss has a listed level range of 46–51. Its listed reward includes Breezy Plains Dewdrop Crystal ×60, while its repeat material pool also includes Dewdrop Crystals.
Use Earth or Water against Magmarex. It has an advantage against Fire, Grass and Ice.
Rookey’s location and Star Sand
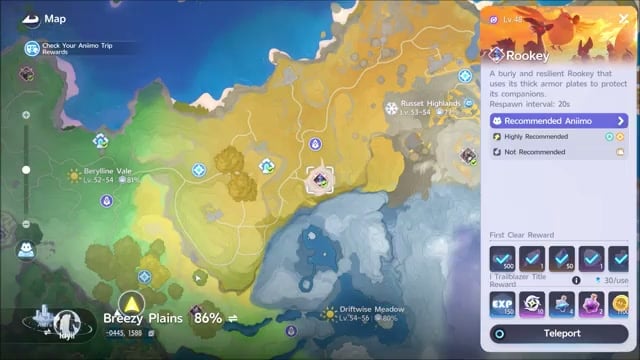
Alpha Rookey has a listed level range of 45–50. Use the Russet Highlands transporter, then look nearby.
Rookey supplies Star Sand. Target its weaknesses to Light and Wind, break its guard during combat, and finish the fight before collecting the rewards; it has an advantage against Earth.
Earthquake Revelation and the sealed Alpha routes
Geoclaw and Minespine share a Branch progression prerequisite, but each has its own underground entrance. Their surface markers don’t put either boss above ground.
STEP 1/3
33%
Reach Breezy Plains Branch
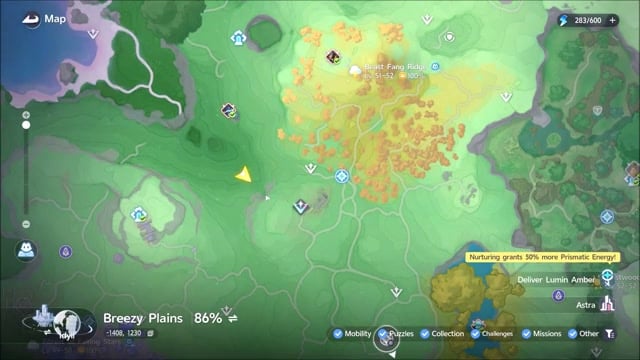
Bring Lumin Amber to Breezy Plains Branch.
STEP 2/3
67%
Nurture the tree
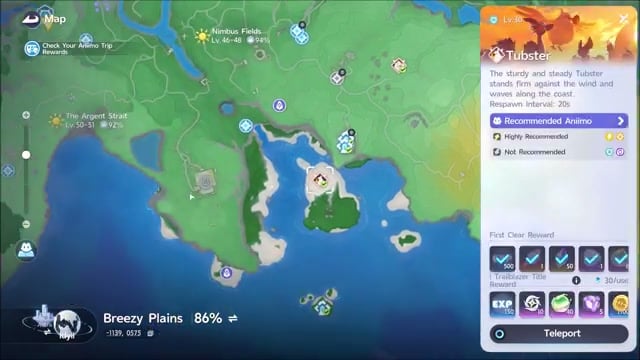
Infuse collected Lumin Amber into the Branch.
STEP 3/3
100%
Unlock Earthquake Revelation
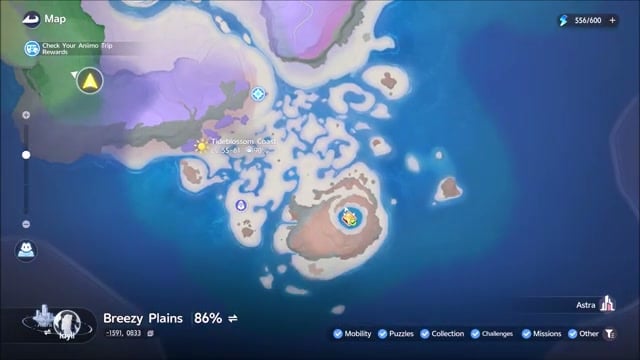
Infuse 120 Lumin Amber to unlock Earthquake Revelation and cave access.
Earthquake Revelation opens the river cave leading to Geoclaw and the separate Pebbling Mine entrance leading to Minespine. Those are two distinct destinations after the shared unlock.
Geoclaw’s river-cave route and item cores
Alpha Geoclaw’s entrance sits near Breezy Plains Branch. Its encounter display gives both the boss level and recommended level as 55.
STEP 1/3
33%
Find the river cave
Approach the newly opened cave in the river near the Branch.
STEP 2/3
67%
Find Geoclaw

Look for Alpha Geoclaw in the underground river cave.
STEP 3/3
100%
Fight Geoclaw
Complete the encounter in the river cave.
Your first clear adds Heartseeker Pendant ×1 and Basic Carried Item Core ×5. Repeat material rewards include Basic, Common and Advanced Carried Item Cores.
Minespine’s Pebbling Mine entrance and Explosive Gloves
Enter the underground Crystal Cave south of Forgotten Mine through Pebbling Mine’s entrance. Look for the orange crystals marking it.
STEP 1/4
25%
Approach the crystal-marked cave
Look for Crystal Cave south of Forgotten Mine.
STEP 2/4
50%
Dig beneath the entrance obstruction
Use Budclaw to dig beneath the low obstruction.
STEP 3/4
75%
Follow the passage beyond the entrance obstacles
Continue through the cave to reach Alpha Minespine.
STEP 4/4
100%
Break its guard during battle
Use guard breaks as openings while completing the fight; Minespine’s listed level range is 29–32.
Minespine is weak to Grass and Water and has an advantage against Lightning, Fire, Ice and Earth. Its drops include Explosive Gloves and Carried Item Cores.
Repeat rewards include Explosive Gloves and Carried Item Cores.
Omega Infergon through the helmet quest
The helmet quest is tied to Omega Infergon. Its helmet sequence comes late in the main story, so follow that story progression until the quest becomes available.
STEP 1/5
20%
Speak with Painter Sorora
Start the helmet quest with Painter Sorora.
STEP 2/5
40%
Progress Helmut’s evolution sequence
Follow the quest involving Helmut’s evolution into Pawney; Sword of Bravery is associated with this quest evolution.
STEP 3/5
60%
Complete the Infergon fight
Finish the fight against Infergon and the remaining quest objectives.
STEP 4/5
80%
Complete the helmet quest
Finish the helmet quest.
STEP 5/5
100%
Return to the arena
Head back to the original encounter location in Russet Highlands for the Omega encounter.
Infergon is weak to Earth and Water and has an advantage against Fire, Grass and Ice. Use elemental counters and Break abilities during combat. Encounters have displayed level 50 and level 55; those values describe separate fights, not a fixed level requirement.
Starcryst Essence is the farming target here. A sequence of three successful reward claims provides three essences.
Omega Sherro through the beach quest
Follow the Shelly sequence.
STEP 1/4
25%
Progress the beach quest
Follow the sequence involving Sissuta, shiny Shelly and Sherro.
STEP 2/4
50%
Find the shiny Shelly
After the three Sissuta leave, locate the shiny Shelly.
STEP 3/4
75%
Follow Shelly along the beach
Stay with it as it moves to the spot where it develops into Sherro.
STEP 4/4
100%
Reach the shell-bound stage
Continue until the sparkling Sherro stays inside its shell and the quest tells you to wait a couple of days.
STEP 1/1
100%
Finish the evolution sequence
Complete the evolution sequence to unlock Omega Sherro.
A strong Lightning or Grass Aniimo is a farming option for the encounter’s Star Sand and Star Dust rewards.
Omega Tuckin through Binding Oath
Open Binding Oath in the Mistwoods Quest Log. Its map guidance tracks three vine cores in the eastern ruins, western swamp and northern cave, while the log provides help.
STEP 1/4
25%
Collect the ruins core
Follow the eastern objective to collect the core in the ruins.
STEP 2/4
50%
Follow the swamp objective
Use the quest marker to reach and collect the vine core in the western swamp.
STEP 3/4
75%
Reach the northern cave
Follow the cave objective for the remaining core; flying up is an approach to this location.
STEP 4/4
100%
Finish Binding Oath
Complete the remaining regional objectives, then return for Omega Tuckin in Mistwoods.
Completing this quest also makes Lumin energy and bonus Sanctum rewards available. That Lumin benefit is separate from Primegy recovery.
Tuckin is weak to Dark, Fire and Wind and has an advantage against Grass, Earth and Water. Finish the fight and collect Dewdrop Crystals.
Alpha first clears, repeat rewards and capture
For Leafy, Luminelle, Irisal and Geoclaw, the shared first-clear bundle is Glimmer ×50, Safaris experience ×500, Irisalis Petal ×1 and Lumin Amber: Breezy Plains ×1. Other covered Alpha first clears also include these reward categories, but the exact quantities belong to the individual encounter.
Boss-specific rewards sit alongside that bundle. Matching evolution stones come from the stone-dropping encounters, while other Alphas supply equipment, crystals or star materials. Repeat runs yield the encounter’s materials; an initial ×5 stone reward or ×60 crystal listing does not set every later payout.
Prepare healing before entering an Alpha encounter, especially when the goal is adding the creature to your roster. Opening a cave and earning boss rewards are separate from a successful recruitment.
After defeating the Alpha, throw the supplied free Aniipod to capture it. The first-clear reward screen and removal of the boss’s undiscovered tracker status show that the clear registered.
Held-item effects for choosing farming targets
Equipment effects and combat roles
| Held item | Effect | Dropped by |
|---|---|---|
| Spirited Feather | Regeneration. | Alpha Irisal |
| Fission Needles | +10% Damage Amp; basic attacks have a 50% chance to deal double damage. | Alpha Irisal |
| Echoing Grimoire | Repeating the same skill consecutively increases damage by 5%, stacking up to five times. | Alpha Irisal |
| Ferocious Fang | Attack damage amplification. | Alpha Ignitis |
| Miraculous Fleece | Transfers 10% of excess healing to the Aniimo with the lowest HP percentage. | Alpha Ignitis |
| Lightning Needle | Continuous Lightning damage equal to 2% of max HP against enemies within 3 meters. | Listed in the Institute Guide |
| Gargantuan Horn | 0.7 additional BREAK per equipped Aniimo level. | Alpha Grizbo |
| Marching Flask | Health plus recovery of 1.4% HP for every 10 meters moved. | Listed in the Institute Guide |
| Capacitous Battery | 30% more Ultimate damage. | Listed in the Institute Guide |
| Heritage Amulet | Shielding for a tank. | Listed in the Institute Guide |
| Avenging Gear | Taking damage grants a Counter Mark, increasing the next BREAK damage by 30%. | Listed in the Institute Guide |
| Heartseeker Pendant | Damage amplification; after a critical hit, a 50% chance to add 10 Might damage. | Alpha Geoclaw |
| Explosive Gloves | Damage amplification, plus another 5% for each 10 EP currently held. | Alpha Minespine |
| Giant Tortoise Shell | 0.7 additional P.DEF and M.DEF per equipped Aniimo level. | Listed in the Institute Guide |
| Auspicious Bell | 20% chance on skill use to gain 5 EP. | Listed in the Institute Guide |
| Supreme Elixir | 50% more final damage. | Listed in the Institute Guide |
Match equipment to what the Aniimo actually does: basic attacks, repeated skills, Break, healing, Ultimate attacks, tanking or energy recovery. Supreme Elixir also carries a restriction that changes whether it belongs on your team at all.
Open held items in your inventory or the Institute Guide’s item library to compare the item you own. These numerical effects describe the displayed stat lines, not a promise that every rarity or enhancement tier carries identical values.
The held-item encounters provide item cores alongside their equipment pools, but cores aren’t a universal reward from every Alpha. Legendary rewards have a low drop chance, and unwanted items can be exchanged when they don’t fit your team.
Choose the Aniimo’s combat role before choosing an equipment farm. That keeps your target tied to a usable item instead of rarity alone.
Primegy costs and reward-claim planning
Before another Omega run, use the challenge tabs to read the remaining weekly reward allowance. A fight being available doesn’t mean its chest will pay out.
Claim costs and Primegy recovery
| Primegy action | Cost or recovery |
|---|---|
| Alpha challenge reward collection | 30 Primegy. |
| Omega reward claim | 50 Primegy. |
| Primegy Battery | Restores 60 Primegy. |
| Natural recovery | 1 Primegy every 6 minutes, stopping at 300. |
| Daily Glimmer refills | Up to six purchases, restoring up to 360 Primegy. |
Open Replenish Primegy from the map to use batteries or buy energy with Glimmer. The dialog includes your daily Glimmer purchase counter, and the Glimmer price rises with further purchases. An example of four refreshes totals approximately 400 Glimmer; that example is not a fixed price schedule for every purchase.
With no weekly claims remaining, an Omega encounter can still allow another fight. In an Infergon encounter after the allowance was exhausted, the acquisition-limit warning appeared at the reward chest, where the extra claim was rejected.
Budget around the material or equipment you want and the Primegy that will recover naturally before you play again. Claim costs and recovery intervals govern your resource spending; they are separate from encounter respawn timing.
Related Aniimo guides
Frequently Asked Questions
Does defeating Omega Infergon also unlock evolution into Infergon?
Defeating Omega Infergon is required, but it doesn’t unlock evolution into Infergon by itself. Your Animo also needs to reach level 48 and have a Perfect potential rating, so that victory completes the requirements if your Animo meets those other two conditions.



Leave a Reply