

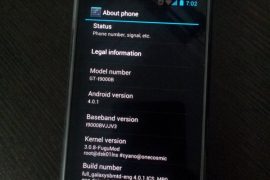
While Samsung would take ages — if they intend to bring the update in first place, which itself is debatable — to release the latest Android 4.0 update to Galaxy S officially via Kies, our beloved developers have already started burning their midnight oil to get you Ice Cream Sandwich love on your very dear very venerable phone in android blogosphere, the Galaxy S.
And their hard work is showing up now in the form of a custom ROM — we’re talking about the first ICS (Android 4.0) port for Galaxy S, made by pretty famous now on Galaxy S development scene, Galnet.
Developers: Galnet was first one to boot ICS on Galaxy S but since then, he and his team has been quite on this. The development came to life only after Onecosmic started working on it and he is the one who took further, making it a bit usable and fixing the touchscreen and doing all the crazy part. After Onecosmic got busy with other stuff, work was resumed by PaulForde, who is responsible for current stage of rom, among with other devs who are working continuously on it right now.
Developers and Donation Link
Here is list to all devs who are currently active on this rom. And we hope you donate them to show your gratitude to them for work they have, while also encouraging them for working more on this development.
Android 4.0 Ice Cream Sandwich (ICS) ROM Status
Update (As of February 12, 2012): RC 4.2 is out — it’s simply one incredible rom, by certain awesome teams of devs.
Big Update: RC1 is out. Features working from this release: Video recording and playback, Hardware Acceleration, Calendar Sync, etc. You may want to celebrate this!! People avoiding the ICS — somehow, I mean — should try this version. Kudos to PaulForde (we’re really thankful to him for this) and Onecosmic.
Almost everything is working — though, of course, there are bugs!
COMPATIBILITY
[error]This guide is applicable only for Samsung’s Galaxy S international version — GT-i9000 and GT-i9000B. Check your phone’s version in Settings – About Phone. It has to be “GT-i9000” or “GT-i9000B” for this Android 4.0 port ROM to be compatible with your phone. Otherwise, simply don’t try this ROM on your android handset — don’t even think about it if you care about your android device.[/error]
WANRING!
[warning]The methods and procedures discussed here are considered risky and you should not attempt anything if you don’t know completely what it is. If any damage occurs to you or your device, we won’t be held liable — you only will be responsible, you’ve been warned!!![/warning]
Installing the Android 4.0 ICS custom ROM isn’t that hard if you’ve already done flashing stuff a couple of times. But even if you’re new to flashing and custom ROMs, don’t worry one bit, we’ve got you covered. Just watch the video below, read the instructions and you are good to do it yourself.
Pre-Installation thoughts:
- Installing/Flashing this ROM will erase your apps and data. So, it’s a very important you back them up, before proceeding further. To backup your apps and important data — bookmarks, contacts, SMS, APNs (internet settings), etc. Restore APN settings if Internet isn’t working for you. This Android backup guide would help you. And if you’ve rooted your Galaxy S, you can save application’s data too, using Titanium backup (free app on android market) to backup apps with data. And use this this app only again to restore those apps with data.
- Drivers! — it’s important you’ve the proper drivers installed. Download links below:
- If you have Samsung’s PC software Kies installed, be sure to exit it before using flashing this ROM, or anything with odin software.
Android 4.0 Ice Cream Sandwich for Galaxy S
Update: The installation process is much different now that what was for the initial release. But you can still watch the video — especially if you’re new to this — to get the idea of flashing and stuff. And the guide below has been duly updated to take care of installation needs of the latest release. So, go ahead!
So, the video below is not to be followed, but if you want to learn about rebooting into recovery, using CWM recovery, and other things, watching the video for once is recommended.
Here’s the video showing the installation of Android 4.0 custom ROM (AOSP port, version alpha4):
Note: There is a brief overview (from 6:58) of Android 4.0 running on Galaxy S in the above video.
How to Install Ice Cream Sandwich on Galaxy S [step-by-step guide]:
- Flash XXJVU Android 2.3.6 based firmware first.
- Install CWM and Root on the XXJVU.
- Download the latest version of “Android 4.0 ROM” from here — let’s call it rom file — and then continue the steps below to flash it without any worries. be careful while downloading since that page has downloads for all version of Galaxy S for which this rom is available. Download one meant for your phone, i9000.
- Transfer the rom file to your phone’s sdcard (don’t use external sdcard, btw). Remember the location where you transfer this files.
- Power Off your Galaxy S. Wait for 5-6 seconds until you feel the vibration to confirm complete switch off.
- Boot into Recovery mode. Then, press and hold these 3 buttons together: VolumeUP+Home+Power till the Galaxy S logo shows up on screen. You’ll boot into CWM recovery soon enough. (In recovery, use Volume keys to scroll up and down and power key to select an option. Use back key to go back.)
- Do Wipe Data/Factory Reset
- Do Wipe Cache Partition
- Go to advanced and do Wipe Dalvik Cache
- Now, flash the rom file. Select install zip from sdcard » choose zip from sdcard » browse through sdcard and select the rom file you downloaded in step 3 and transferred in step 4 above. Select “Yes – Install ______” on the next screen.
- After flashing necessary stuff, phone will boot up into recovery again. You will notice it’s a different recovery, colored blue now, and this is what was flashed in step 10 above to make the phone ready for installation.
- Now, flash the rom file again. Select install zip from sdcard » choose zip from sdcard » browse through sdcard and select the rom file you downloaded in step 3 and transferred in step 4 above. Select “Yes – Install ______” on the next screen.
- Go back and select ‘reboot system now’ to restart the phone. Be patient while phone boots up, it may take between 5 to 15 mins for first boot.
- IF IT FAILS TO BOOT in 15 mins, then, well we got problem here. Do this:
- When the phone is restarting (still booting up) open the back cover and REMOVE the battery. Yes you read it right. Reinsert it after 3-4 seconds and then boot into recovery again.
- In recovery, do a Wipe Data/ Factory Reset. And then, select reboot system now to restart the phone. it should boot up properly now. If it doesn’t, then perhaps you did not follow something correctly.
- Also, if you are not happy with the performance of this rom — maybe because it lacks some apps/features you cared too much for, or reboots itself — I would suggest you to install the Android 4.0 AOKP Rom for Galaxy S, it’s simply damn good.
- [Optional] Support the development and appreciate the hard work put in by the team by donating them. Find donation link given above.
- Also, it’s already rooted. You don’t need to root it.
- Just for your info, Android 4.0 custom ROM is available Galaxy S2 too — find our Installation Guide for Android 4.0 on Galaxy S2 i9100 here.
GOING BACK TO ANDROID 2.3 (Gingerbread) [IMPORTANT!!!]
Btw, if you want to revert back to Android 2.3 Gingerbread firmware from this Android 4.0 custom rom, get (install) the XXJVU firmware, linked in at step 1 above. And if wanted by you, root it as given in step 2.
Overview — Android 4.0 AOSP ROM (version Alpha 4) on Galaxy S
Screenshots:







3,840 responses to “Android 4.0 Ice Cream Sandwich (ICS) Update for Galaxy S i9000 [Custom ROM]”
when i enter in install zip:
choose zip from sdcardapply/sdcard/update zip
toggle singnature
toggle script asserts
choose zip from internal sd card
See updated step 14 above. I hope you’ve downloaded the kernel and transferred to to your sdcard as said in step 3 and 4. Flashing the kernel is easy, just like you flashed the rom in step 13. There should be no problem.
before gingerbread 2.3.6 xwjvz
before gingerbread 2.3.6 xwjvz
thanks for all your help kapil evryting works fine,
thanks for all your help kapil evryting works fine,
For those who fail to at the step 11 (like me, where my flash was a failure and it keep rebooting), here is what u got to do:
1) Remove the battery, put it back, boot into recovery mode, do the above steps no 9 and 10, and then flash the kernel file (not the rom file) using “install zip from sdcard” option from recovery and wait till it finish updating/installing.
2) After flashing the kernel succeed, go back, DON’T REBOOT but select “install zip from sdcard” . This time, select the ROM file like the step 11.
3) Wait till the unpacking and installation complete and ONLY THEN YOU REBOOT your phone.
4) Sit back and enjoy the new firmware. 🙂
For those who fail to at the step 11 (like me, where my flash was a failure and it keep rebooting), here is what u got to do:
1) Remove the battery, put it back, boot into recovery mode, do the above steps no 9 and 10, and then flash the kernel file (not the rom file) using “install zip from sdcard” option from recovery and wait till it finish updating/installing.
2) After flashing the kernel succeed, go back, DON’T REBOOT but select “install zip from sdcard” . This time, select the ROM file like the step 11.
3) Wait till the unpacking and installation complete and ONLY THEN YOU REBOOT your phone.
4) Sit back and enjoy the new firmware. 🙂
It seems that to flash this RC1 rom I need to flash from 2.3.4 into 2.3.5 and then root it, and the flash the RC1 thru CWM. Is there a way to flash 4.0 thru Odin without rooting? I have never done rooting.
Don’t worry. Follow the guide and you’ll be fine. As for what you asked, there is no other way.
Finally, after 2 days of sleepless night, I managed to make it ! First I have made some mistakes which turned my phone unstable.
Below is the succeeded restoration steps .
*** Backed up all my contacts/data with ‘myBackup’ app (I had an unstable ‘Ice cream’ running at that time) to external SD Card and removed it to keep safe.
1) Flashed XWJVZ_2.3.6 using Odin
2) Rooted with CF-Root-XX_OXA_JVZ-v4.3-CWM3RFS
– here I have got a fresh rooted 2.3.6 Android running
3) Flashed CyanogenMode-7 from boot log menu (all the following steps are done through boot log menu only). Somewhere read ‘CyanogenMode’ is good to do before going to ‘icecream’. (I think, it is a custom theme version of 2.3.7 Android)
– now ready to go for ICS.
4) Flashed ICS_4.0.3_r1-RC1-i9000-reupload.zip
– here I got ICS fully functional with 3g (no need to run 3g_fix), but there is no WIFI.
5) To fix WIFI, flashed FuguModICS_GT-I9000_update.zip kernal
– Now everything works. Next I want root the ICS. I need it mainly because ‘myBackup’ app runs only on rooted phone.
6) To root the phone, flashed Superuser-3.0.7-efghi-signed.zip
*** Installed ‘myBackup’ from Google Market, ran restore.
My phone is now fully functional with ICS with all my contacts and other history !
If you have a stable 2.3.6 or similar you can start from step 3.
Thanks Kapil and all other Techies to bring this great piece to light.
Cheers!!!
Oh yeaaah great rom 😉
Now, everything working right. I will make more tests.
Ps. If anyone have the wifi problem just flash with this kernel http://www.multiupload.com/EF8CIAHDI5
Just worked for me
Okay okay… I will update the link in guide myself now. Even though I’ve said there quite clearly that one need to flash the kernel to fix WiFi.
Thanks for highlighting this further up 😉
Update has been done. Everything works.. But the problem is that it is not as fast as the other versions. If you compare with 2.3.5 this works very slow. Why it is like this. It should work faster. Have i missed something during the upgarde???
You haven’t done anything wrong. It’s what it is.
I currently have last beta version of ICS installed and can’t seem to connect my phone to my computer in order to transfer the new ROM. What am I doing wrong?
Don’t worry, I’m clearly an idiot. Mounted using CWM and transferred. Thanks for the excellent tutorial. ICS is awesome.
Its a bug in the beta. You can download the files from your phone directly, and it will be saved at the download folder. Then install from there.
Thats what I did and it works fine
It seems that to flash this RC1 rom I need to flash from 2.3.4 into 2.3.5 and then root it, and the flash the RC1 thru CWM. Is there a way to flash 4.0 thru Odin without rooting? I have never done rooting.
Don’t worry. Follow the guide and you’ll be fine. As for what you asked, there is no other way.
It seems that to flash this RC1 rom I need to flash from 2.3.4 into 2.3.5 and then root it, and the flash the RC1 thru CWM. Is there a way to flash 4.0 thru Odin without rooting? I have never done rooting.
Don’t worry. Follow the guide and you’ll be fine. As for what you asked, there is no other way.
I’m currently using MIUI 1.12.9 on my SGS.
Can I flash this ROM over MIUI?
And, is this ROM stable enough & fast enough for daily use?
Yes you can 🙂
Finally, after 2 days of sleepless night, I managed to make it ! First I have made some mistakes which turned my phone unstable.
Below is the succeeded restoration steps .
*** Backed up all my contacts/data with ‘myBackup’ app (I had an unstable ‘Ice cream’ running at that time) to external SD Card and removed it to keep safe.
1) Flashed XWJVZ_2.3.6 using Odin
2) Rooted with CF-Root-XX_OXA_JVZ-v4.3-CWM3RFS
– here I have got a fresh rooted 2.3.6 Android running
3) Flashed CyanogenMode-7 from boot log menu (all the following steps are done through boot log menu only). Somewhere read ‘CyanogenMode’ is good to do before going to ‘icecream’. (I think, it is a custom theme version of 2.3.7 Android)
– now ready to go for ICS.
4) Flashed ICS_4.0.3_r1-RC1-i9000-reupload.zip
– here I got ICS fully functional with 3g (no need to run 3g_fix), but there is no WIFI.
5) To fix WIFI, flashed FuguModICS_GT-I9000_update.zip kernal
– Now everything works. Next I want root the ICS. I need it mainly because ‘myBackup’ app runs only on rooted phone.
6) To root the phone, flashed Superuser-3.0.7-efghi-signed.zip
*** Installed ‘myBackup’ from Google Market, ran restore.
My phone is now fully functional with ICS with all my contacts and other history !
If you have a stable 2.3.6 or similar you can start from step 3.
Thanks Kapil and all other Techies to bring this great piece to light.
Cheers!!!
Finally, after 2 days of sleepless night, I managed to make it ! First I have made some mistakes which turned my phone unstable.
Below is the succeeded restoration steps .
*** Backed up all my contacts/data with ‘myBackup’ app (I had an unstable ‘Ice cream’ running at that time) to external SD Card and removed it to keep safe.
1) Flashed XWJVZ_2.3.6 using Odin
2) Rooted with CF-Root-XX_OXA_JVZ-v4.3-CWM3RFS
– here I have got a fresh rooted 2.3.6 Android running
3) Flashed CyanogenMode-7 from boot log menu (all the following steps are done through boot log menu only). Somewhere read ‘CyanogenMode’ is good to do before going to ‘icecream’. (I think, it is a custom theme version of 2.3.7 Android)
– now ready to go for ICS.
4) Flashed ICS_4.0.3_r1-RC1-i9000-reupload.zip
– here I got ICS fully functional with 3g (no need to run 3g_fix), but there is no WIFI.
5) To fix WIFI, flashed FuguModICS_GT-I9000_update.zip kernal
– Now everything works. Next I want root the ICS. I need it mainly because ‘myBackup’ app runs only on rooted phone.
6) To root the phone, flashed Superuser-3.0.7-efghi-signed.zip
*** Installed ‘myBackup’ from Google Market, ran restore.
My phone is now fully functional with ICS with all my contacts and other history !
If you have a stable 2.3.6 or similar you can start from step 3.
Thanks Kapil and all other Techies to bring this great piece to light.
Cheers!!!
Oh yeaaah great rom 😉
Now, everything working right. I will make more tests.
Ps. If anyone have the wifi problem just flash with this kernel http://www.multiupload.com/EF8CIAHDI5
Just worked for me
Okay okay… I will update the link in guide myself now. Even though I’ve said there quite clearly that one need to flash the kernel to fix WiFi.
Thanks for highlighting this further up 😉
Oh yeaaah great rom 😉
Now, everything working right. I will make more tests.
Ps. If anyone have the wifi problem just flash with this kernel http://www.multiupload.com/EF8CIAHDI5
Just worked for me
Okay okay… I will update the link in guide myself now. Even though I’ve said there quite clearly that one need to flash the kernel to fix WiFi.
Thanks for highlighting this further up 😉
Hi everybody! thx for the update. i downloaded the zip file but after trying to install it in recovery mode i get the message “installation aborted”. can somebody help?
thx in advance!!!
Problem solved, much better than previous beta 2! Works like a charm, but still some minor bugs! Keep up the good work!
Is this version support Hebrew ?
yes! fully supports hebrew!
תבחר בשפה בעברית, שים לב שהמקלדת שלך תהיה רק בשפה אחת כברירת מחדל.. צריך להוסיף ידנית את המקלדת האנגלית:
הגדרות-שפה וקלט- לחיצה על כפתור ההגדרה של מקלדת אנדרויד- שפות קלט- להוריד את סימון הוי מ”השתמש בשפת המערכת” ולבחור במקלדת בעברית ובמקלדת באנגלית..
זהו, תמיכה מלאה (:
Update has been done. Everything works.. But the problem is that it is not as fast as the other versions. If you compare with 2.3.5 this works very slow. Why it is like this. It should work faster. Have i missed something during the upgarde???
You haven’t done anything wrong. It’s what it is.
Update has been done. Everything works.. But the problem is that it is not as fast as the other versions. If you compare with 2.3.5 this works very slow. Why it is like this. It should work faster. Have i missed something during the upgarde???
You haven’t done anything wrong. It’s what it is.
I currently have last beta version of ICS installed and can’t seem to connect my phone to my computer in order to transfer the new ROM. What am I doing wrong?
Don’t worry, I’m clearly an idiot. Mounted using CWM and transferred. Thanks for the excellent tutorial. ICS is awesome.
Its a bug in the beta. You can download the files from your phone directly, and it will be saved at the download folder. Then install from there.
Thats what I did and it works fine
I currently have last beta version of ICS installed and can’t seem to connect my phone to my computer in order to transfer the new ROM. What am I doing wrong?
Don’t worry, I’m clearly an idiot. Mounted using CWM and transferred. Thanks for the excellent tutorial. ICS is awesome.
Its a bug in the beta. You can download the files from your phone directly, and it will be saved at the download folder. Then install from there.
Thats what I did and it works fine
I’m currently using MIUI 1.12.9 on my SGS.
Can I flash this ROM over MIUI?
And, is this ROM stable enough & fast enough for daily use?
Yes you can 🙂
I’m currently using MIUI 1.12.9 on my SGS.
Can I flash this ROM over MIUI?
And, is this ROM stable enough & fast enough for daily use?
Yes you can 🙂
Hi everybody! thx for the update. i downloaded the zip file but after trying to install it in recovery mode i get the message “installation aborted”. can somebody help?
thx in advance!!!
Problem solved, much better than previous beta 2! Works like a charm, but still some minor bugs! Keep up the good work!
Hi everybody! thx for the update. i downloaded the zip file but after trying to install it in recovery mode i get the message “installation aborted”. can somebody help?
thx in advance!!!
Problem solved, much better than previous beta 2! Works like a charm, but still some minor bugs! Keep up the good work!
does it also works with the galaxy s plus?
and does it support german language?
Ja, sind sehr viele Sprachen enthalten wie auch bei 2.3 und 2.2
Is this version support Hebrew ?
yes! fully supports hebrew!
תבחר בשפה בעברית, שים לב שהמקלדת שלך תהיה רק בשפה אחת כברירת מחדל.. צריך להוסיף ידנית את המקלדת האנגלית:
הגדרות-שפה וקלט- לחיצה על כפתור ההגדרה של מקלדת אנדרויד- שפות קלט- להוריד את סימון הוי מ”השתמש בשפת המערכת” ולבחור במקלדת בעברית ובמקלדת באנגלית..
זהו, תמיכה מלאה (:
Is this version support Hebrew ?
yes! fully supports hebrew!
תבחר בשפה בעברית, שים לב שהמקלדת שלך תהיה רק בשפה אחת כברירת מחדל.. צריך להוסיף ידנית את המקלדת האנגלית:
הגדרות-שפה וקלט- לחיצה על כפתור ההגדרה של מקלדת אנדרויד- שפות קלט- להוריד את סימון הוי מ”השתמש בשפת המערכת” ולבחור במקלדת בעברית ובמקלדת באנגלית..
זהו, תמיכה מלאה (:
I have on question, when i download apps from the market in i open them after they are installed (googlr docs, google reader, dropbox) the ics layout isnt applied to apps that are optimized for ics instead i get the normal gingerbread look:(
does it also works with the galaxy s plus?
does it also works with the galaxy s plus?
and does it support german language?
Ja, sind sehr viele Sprachen enthalten wie auch bei 2.3 und 2.2
and does it support german language?
Ja, sind sehr viele Sprachen enthalten wie auch bei 2.3 und 2.2
I have on question, when i download apps from the market in i open them after they are installed (googlr docs, google reader, dropbox) the ics layout isnt applied to apps that are optimized for ics instead i get the normal gingerbread look:(
I have on question, when i download apps from the market in i open them after they are installed (googlr docs, google reader, dropbox) the ics layout isnt applied to apps that are optimized for ics instead i get the normal gingerbread look:(
Lag fIX?
HOW CAN I LAGFIX THIS VERSION?
THE QUADRANT IS SO LOW 🙁
No lagfix.
Is there any way to make thst rom works faster?
Asphalt 6 is so sllow. Is it rfs or ext4?
Help guys
Dear Kapil,
First of all, thanks for the guide.
However, i got 2 issue here that i need your assistance:
1) it seems that i can’t access to my external sd. Tried installing astro file manager and android file manager. Both failed to connect to the external. USB connection to the pc is the only way that i can do that.
2) for the typing, how can i get the ‘copy/paste’ option?
thanx.
1. Isn’t it the external_sd folder in your normal sdcard folder? Look for that.
2. I didn’t get your ques. Btw, every file manager has a copy paste option. Just long press on file. Either it’s directly visible or is under the edit option. I hope that’s what you’re asking for.
hy Kapil…can you tell me how i make to see my sd card..nothing work..:(( please help..
Lag fIX?
HOW CAN I LAGFIX THIS VERSION?
THE QUADRANT IS SO LOW 🙁
No lagfix.
Lag fIX?
HOW CAN I LAGFIX THIS VERSION?
THE QUADRANT IS SO LOW 🙁
No lagfix.
nice rom!
thx!
however there are two things i cant really get to work properly..
syncronising is auto switching off after about 5 minutes (like for google, whatsapp)
and the idea behind the new contact layout.. google contacts and phone contacts in seperate apps?
i dont find a “show only contacts with number” option..
any ideas?
merry xmas and thx!
Is there any way to make thst rom works faster?
Asphalt 6 is so sllow. Is it rfs or ext4?
Help guys
Is there any way to make thst rom works faster?
Asphalt 6 is so sllow. Is it rfs or ext4?
Help guys
Dear Kapil,
First of all, thanks for the guide.
However, i got 2 issue here that i need your assistance:
1) it seems that i can’t access to my external sd. Tried installing astro file manager and android file manager. Both failed to connect to the external. USB connection to the pc is the only way that i can do that.
2) for the typing, how can i get the ‘copy/paste’ option?
thanx.
1. Isn’t it the external_sd folder in your normal sdcard folder? Look for that.
2. I didn’t get your ques. Btw, every file manager has a copy paste option. Just long press on file. Either it’s directly visible or is under the edit option. I hope that’s what you’re asking for.
hy Kapil…can you tell me how i make to see my sd card..nothing work..:(( please help..
Dear Kapil,
First of all, thanks for the guide.
However, i got 2 issue here that i need your assistance:
1) it seems that i can’t access to my external sd. Tried installing astro file manager and android file manager. Both failed to connect to the external. USB connection to the pc is the only way that i can do that.
2) for the typing, how can i get the ‘copy/paste’ option?
thanx.
1. Isn’t it the external_sd folder in your normal sdcard folder? Look for that.
2. I didn’t get your ques. Btw, every file manager has a copy paste option. Just long press on file. Either it’s directly visible or is under the edit option. I hope that’s what you’re asking for.
hy Kapil…can you tell me how i make to see my sd card..nothing work..:(( please help..