Clipchamp is a great video editor app. It is free for the most part, has a decent set of tools and features to work with, and has an intuitive UI that makes the editing process a whole lot of fun.
It may have come to the attention of Windows users after being acquired by Microsoft in 2021, and its subsequent release as part of Windows 11 22H2 bundles, but Clipchamp is one of the best editing tools for light and medium video editing. Although there is a paid subscription that one can get that unlocks cloud storage and the whole audio-video library, it is not all that necessary. The free features are sufficient to get the work done, be it in terms of video or audio.
In this guide, we take a look at how you can add audio to Clipchamp and edit it to suit your creative needs.
Related: How to do green screen on Clipchamp
How to add stock music and audio to Clipchamp
- Firstly, press Start, type Clipchamp to search for the software, and then open the Clipchamp app by clicking on its name in the result.

- Select Create a new video.

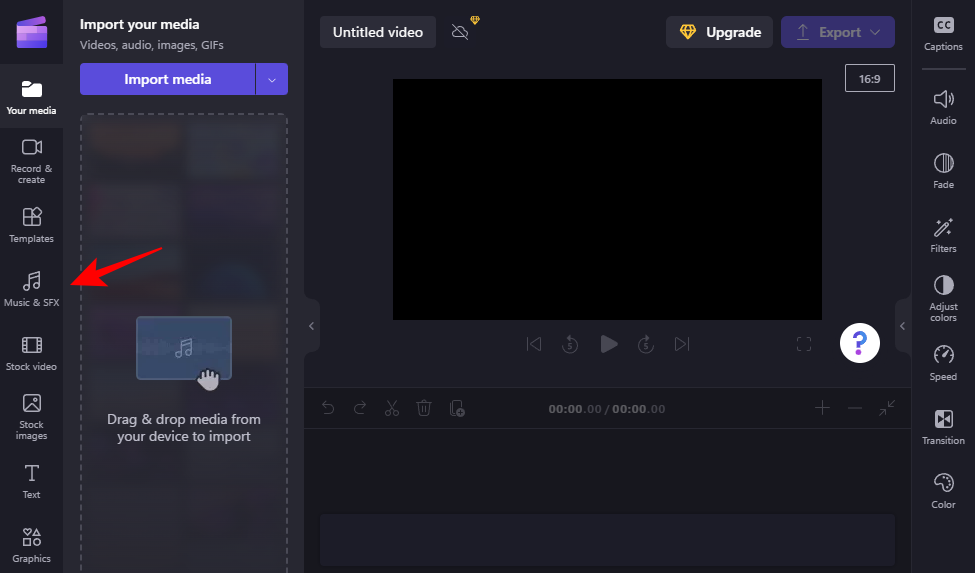
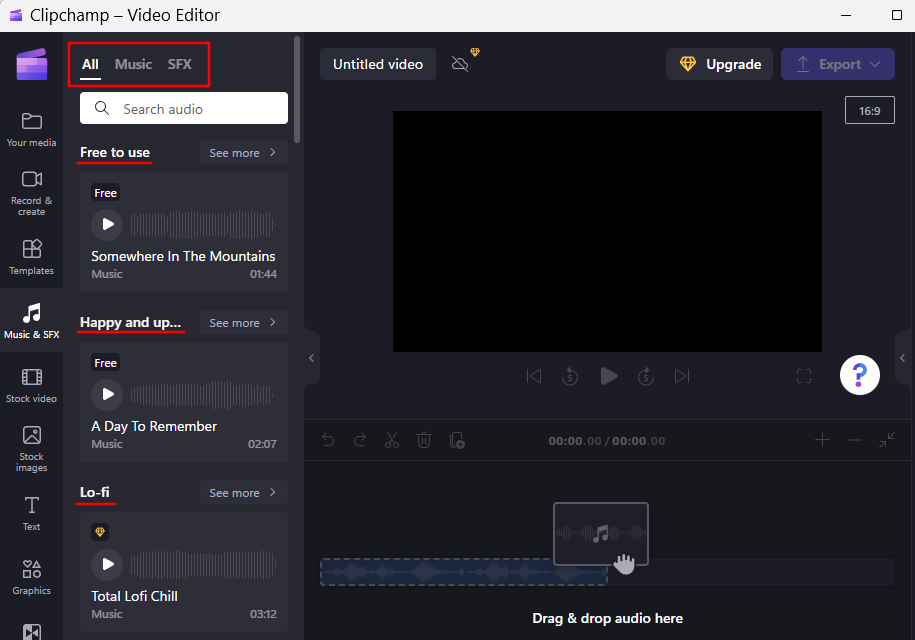
- Now, in the left pane, click on Music & SFX.
- You can search for audio files using keywords in the search bar.
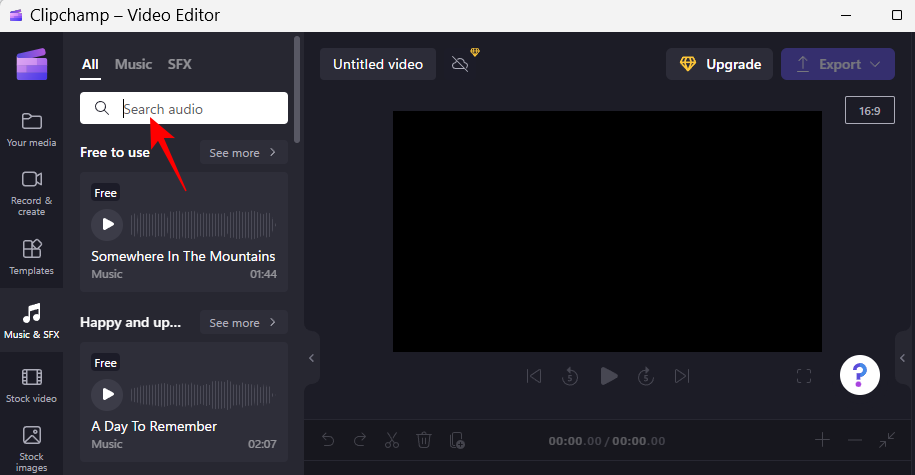
- Or go through the categories to find something that works for you.
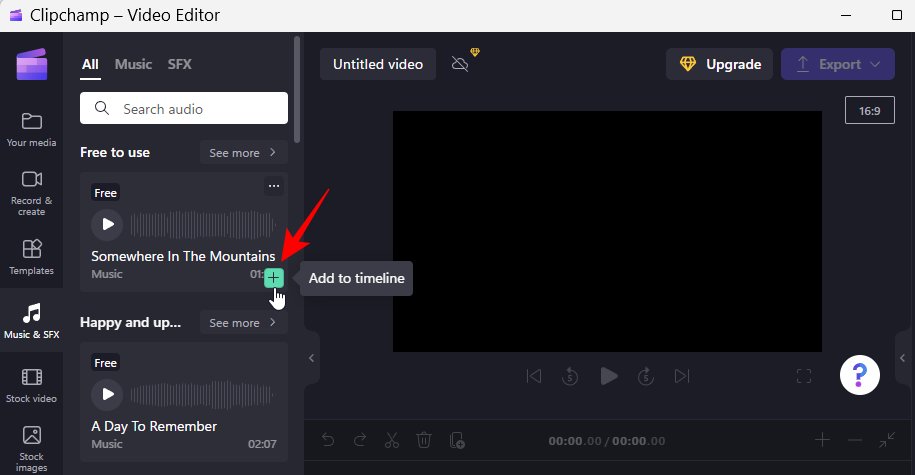
- Use the play button to listen to a track. Once you’ve found a track you like, hover over it and click on the + sign to add it to your timeline.
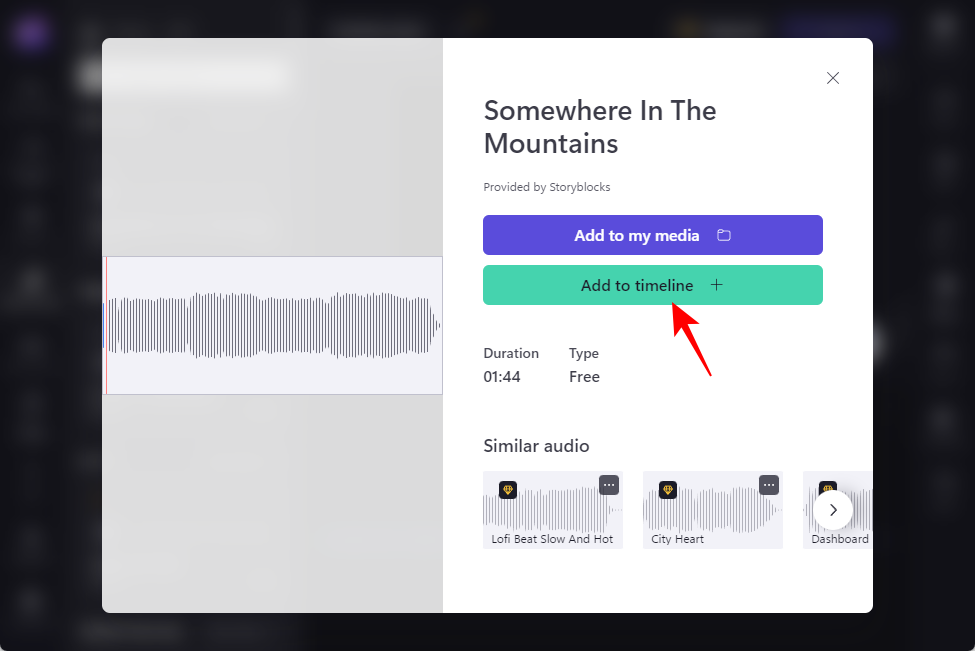
- Alternatively, click on the three-dot icon to preview the audio.

- You will also get recommendations for similar tracks as well as details about the file. Click on “Add to my media” to add it to the current project. Or simply click Add to timeline to send it directly there.
- You can also simply drag and drop the stock audio to your timeline.
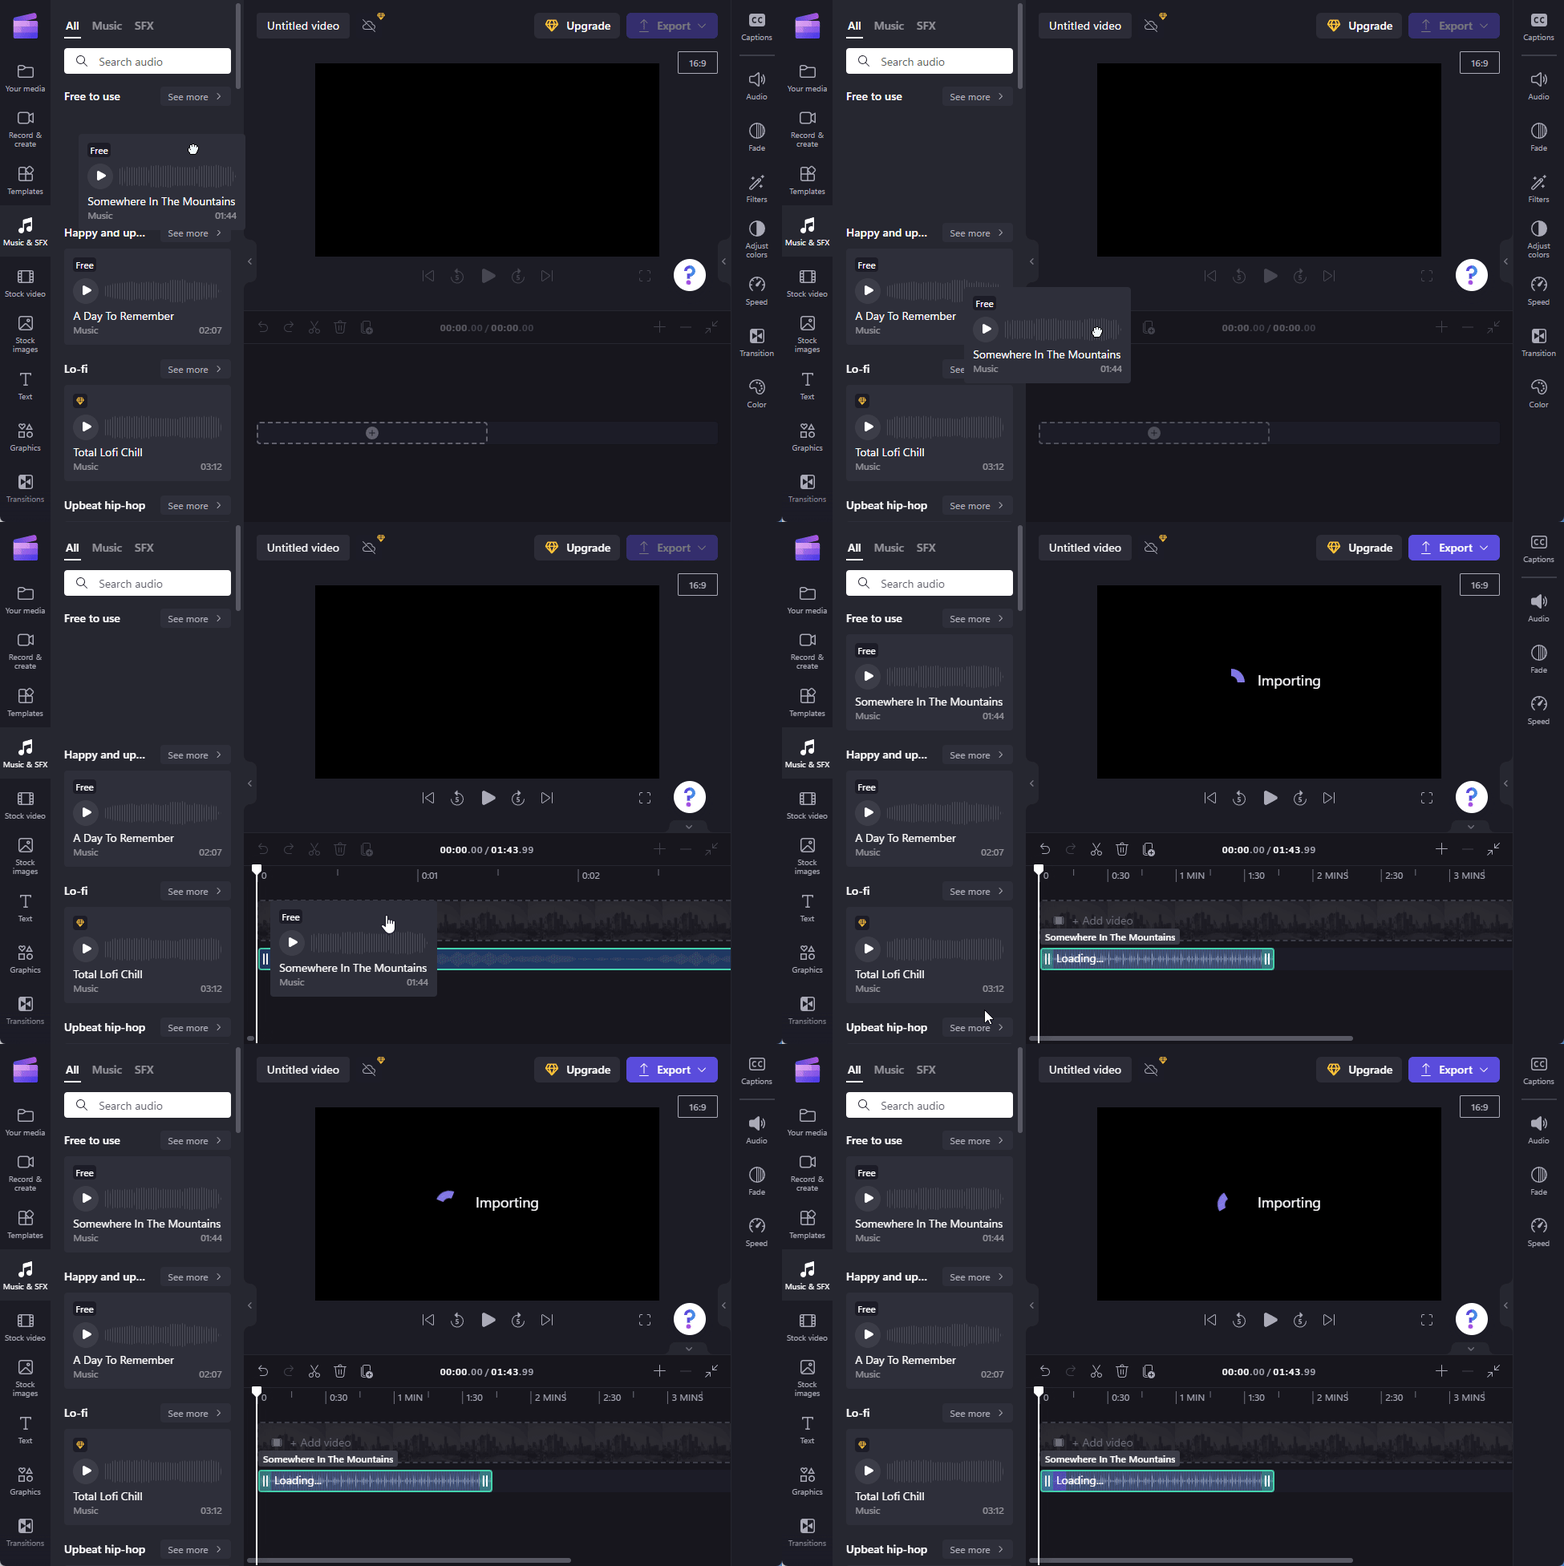
- Once done, wait for the track to download and be added to the timeline.

Related: How to crop a video on Windows 11
How to add your own music and audio in Clipchamp
Besides stock images from Clipchamp’s library, you can also add your own audio and music. Here’s how:
- Click on Import media.

- Then navigate to your file, select it, and click Open.
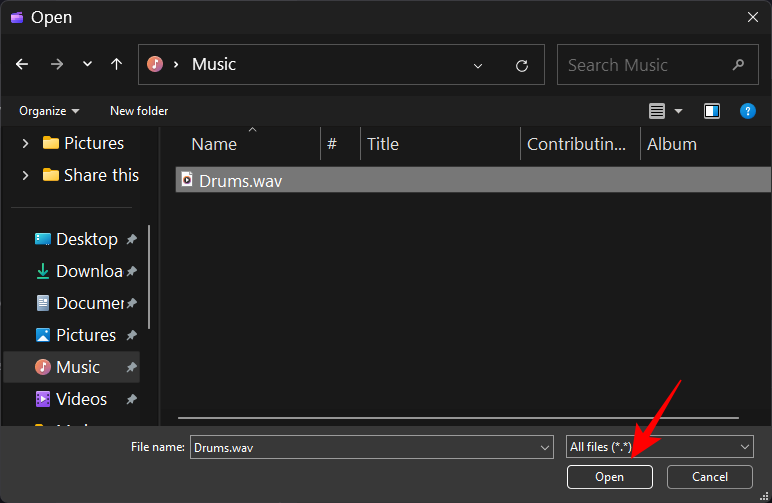
- Alternatively, simply drag your audio file to Clipchamp.

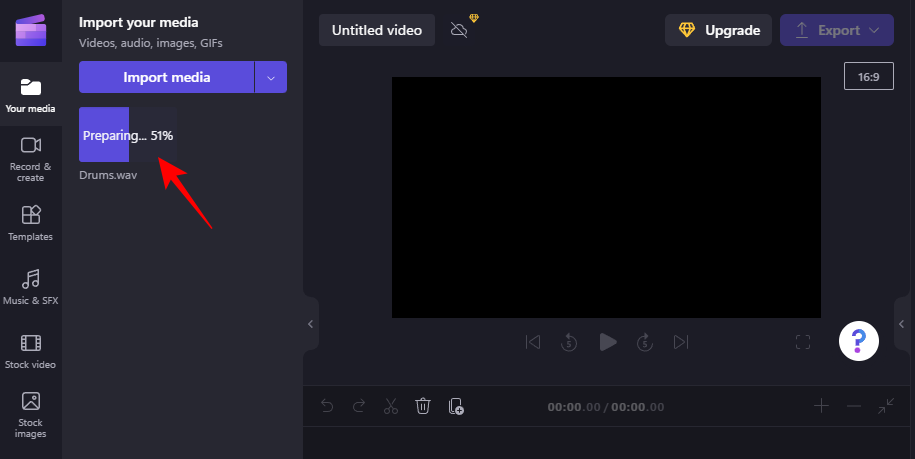
- Then wait for it to be imported.
- There are other options to add audio that can be accessed from the arrow to the right of “Import media”.
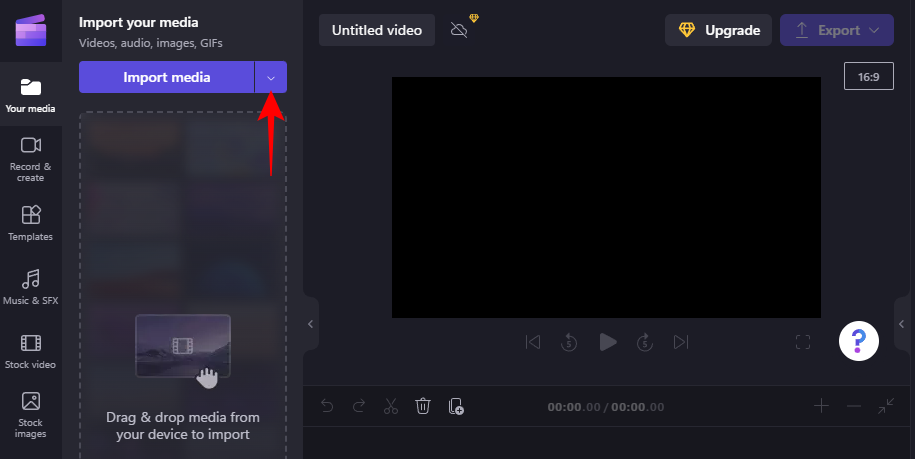
- Here, you can choose popular cloud storages such as OneDrive, Google Drive, Google Photos, and Dropbox, as well as use your phone and scan the QR code to upload media from your phone.

- Once imported, drag and drop it into the timeline.

- Or hover over the file and click on the + icon to do the same.

Related: How to Uninstall Apps on Windows 11
How to separate audio from video in Clipchamp
You don’t only have to add audio files separately. If you have a video whose audio you want to isolate, Clipchamp provides a way to do that too. Here’s how to separate audio from a video in Clipchamp.
- Firstly, make sure to import your video into Clipchamp (by clicking on “Import media” or simply the drag-and-drop method). Then add this video to the timeline.
- Once your video is in the timeline, click to select it and then click on Audio in the right pane.

- Then click on Detach audio.

- Wait for the audio to be detached. Depending on the length of the video, this can take some time.

- Once done, you will see a separate audio channel appear in the timeline.

- The file will also be downloaded automatically to your “Downloads” folder.

- If you want to get rid of the video, select the video channel and press Delete. You will then only be left with the audio, just as though you had imported it separately.
How to add voiceovers in Clipchamp
Clipchamp allows you to use the text-to-speech function that is available in 70 languages and has a total of 170 unique accents and voices to choose from. Here’s how to use this computer-generated AI voiceover feature in Clipchamp:
- In your project, click on Record & create in the left pane.
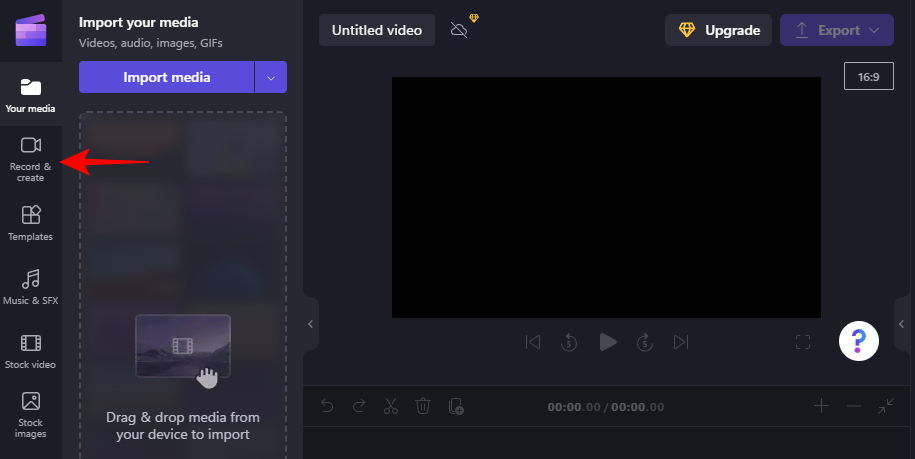
- Click on Text to speech.

- Select your language from the drop-down menu under “Language”.
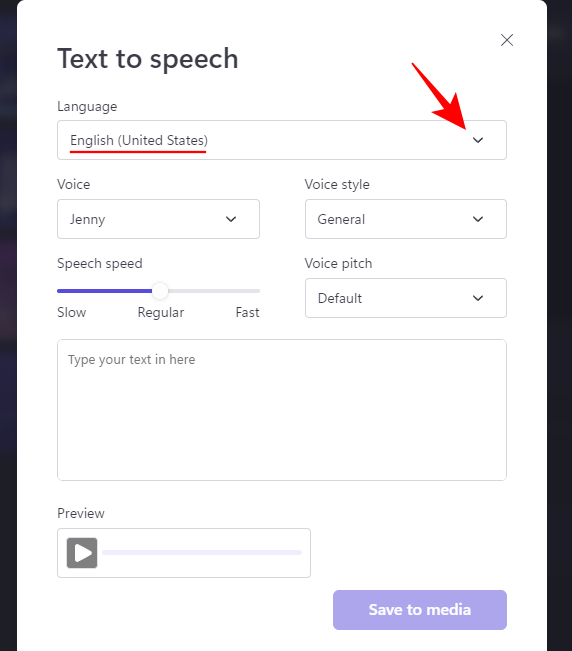
- Find a “Voice” and “Voice style” that suits your material.
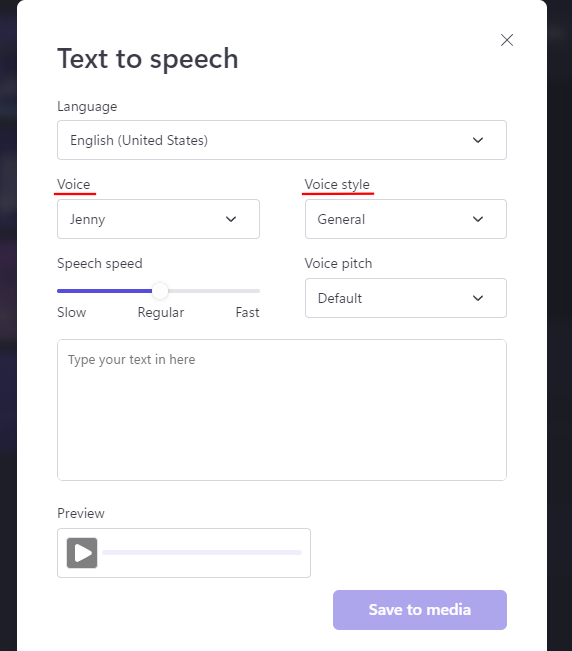
- Use the “Speech speed” slider to speed up or slow down and change the pitch from the “Voice pitch” drop-down options.

- Enter the text you want the voice to read out. Then click on Preview to see how it sounds.

- Go back and make the necessary adjustments until it is to your liking. Then click on Save to media.
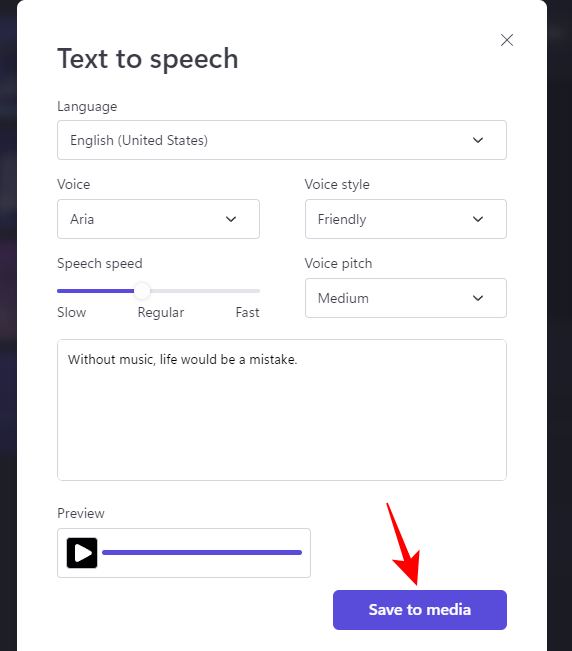
- Finally, add this to the timeline as before.
How to edit audio in Clipchamp
Once you’ve added your audio clip, be it stock, your own audio file, or a voiceover, it can be edited easily with a few basic tools. Here’s how to:
Trim audio
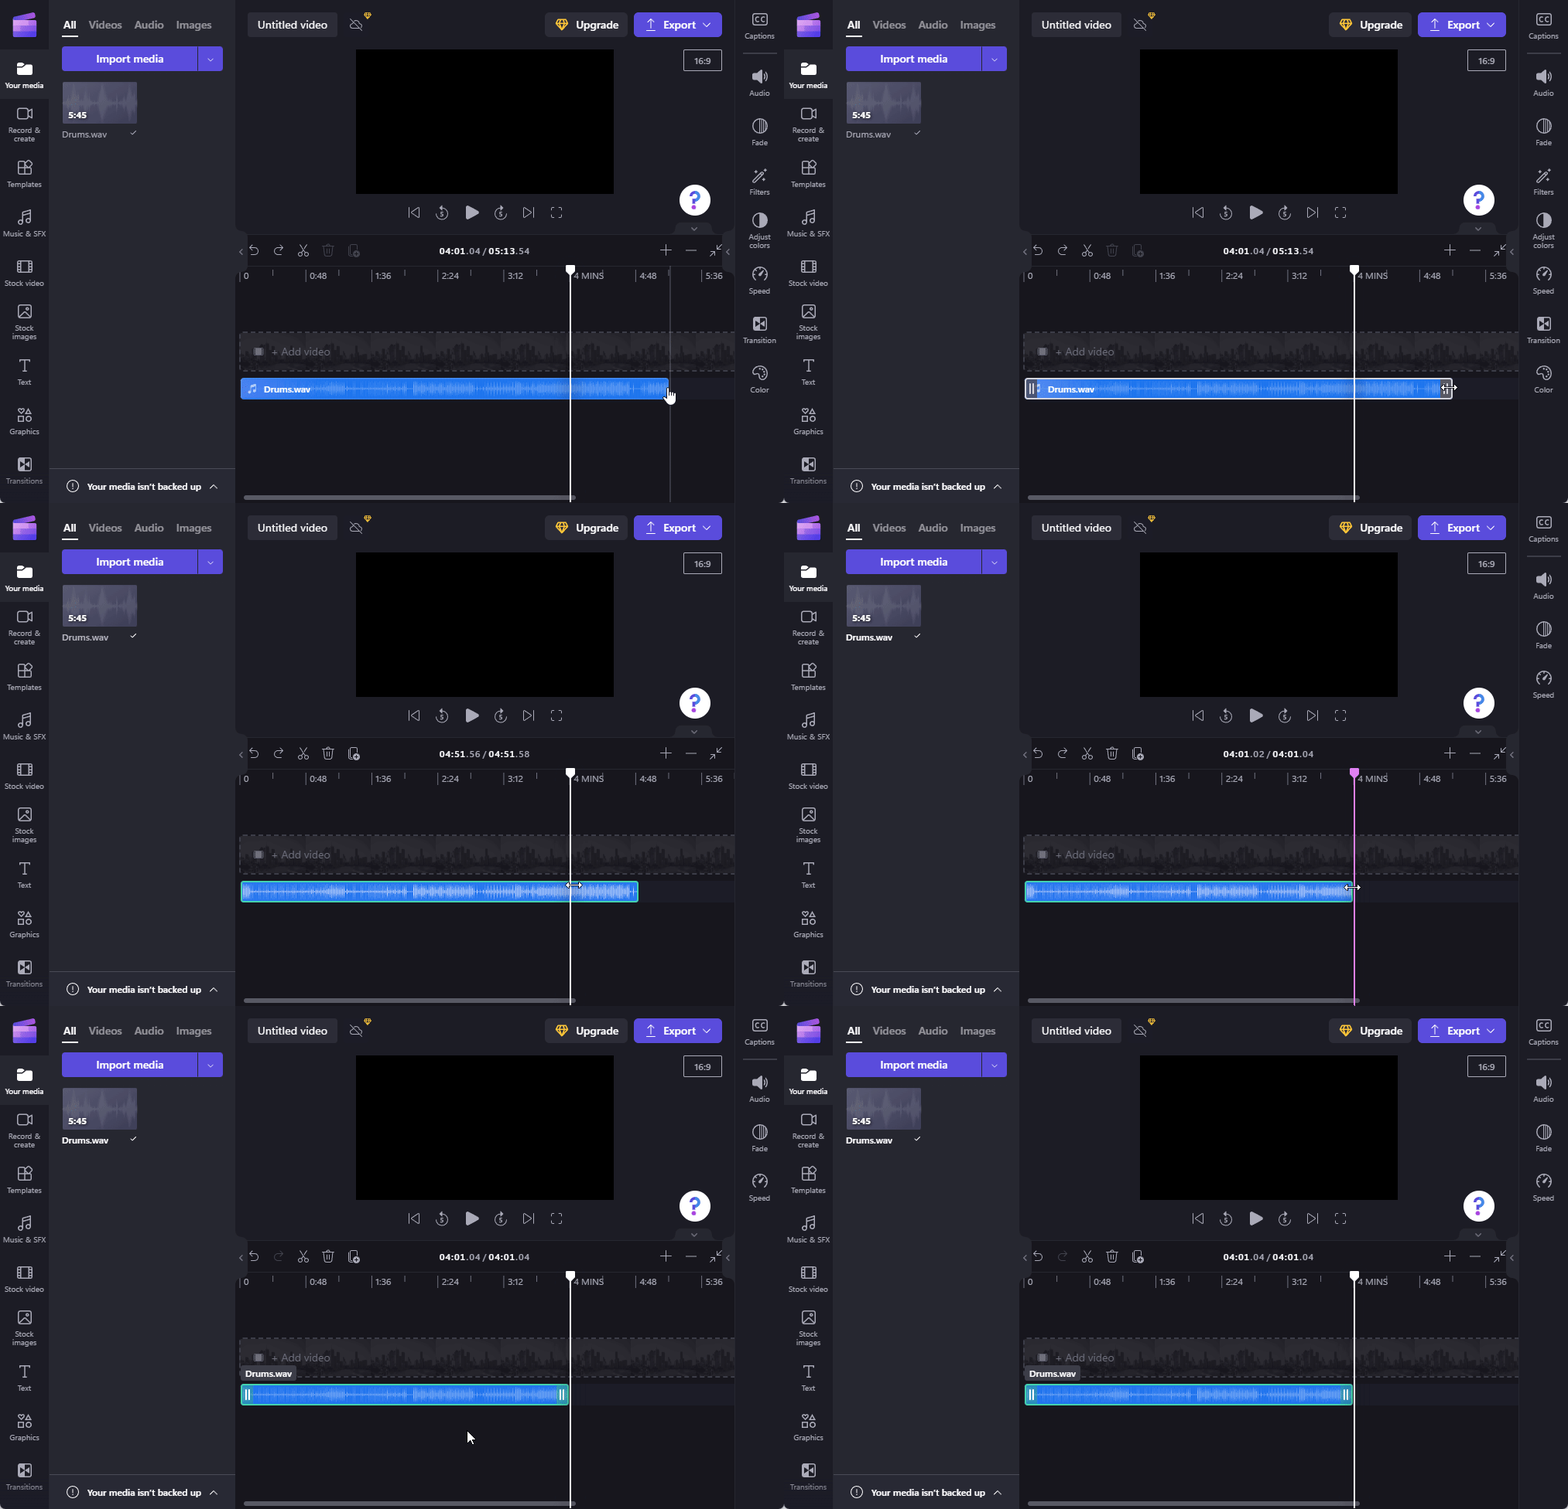
- To trim the audio, go to either edge of the audio in the timeline and drag it inward.

- If you have a relatively long audio clip and you want to trim it to the perfect second, use the + icon in the timeline toolbar to expand the timeline.

- Then drag the edge to trim it.

- The audio file can also be snapped to the current position of the playhead (you will see it turn purple when it is ready to snap).
Split audio
- To split a file, stop the playhead to the position where you want to split. Then click on the scissors icon in the timeline toolbar.

- Alternatively, press S, or right-click on the timeline and select Split.
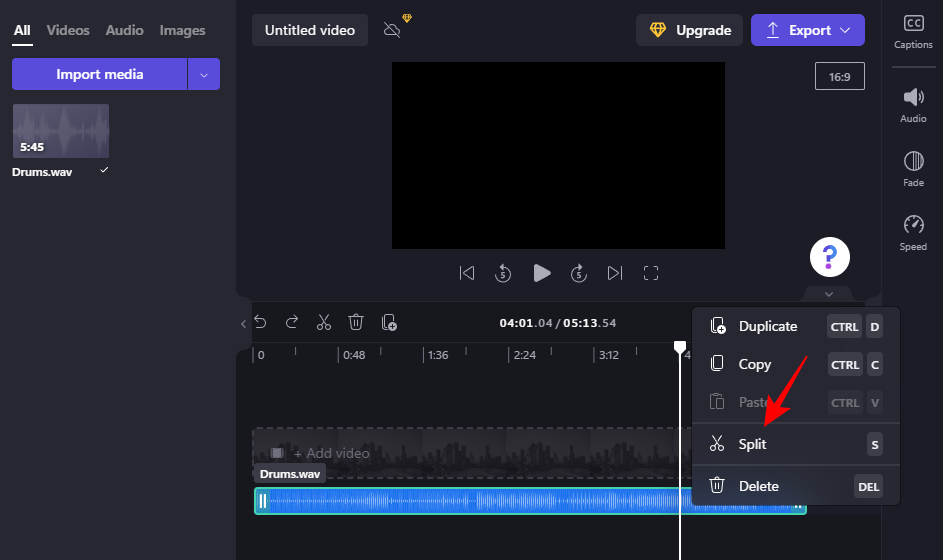
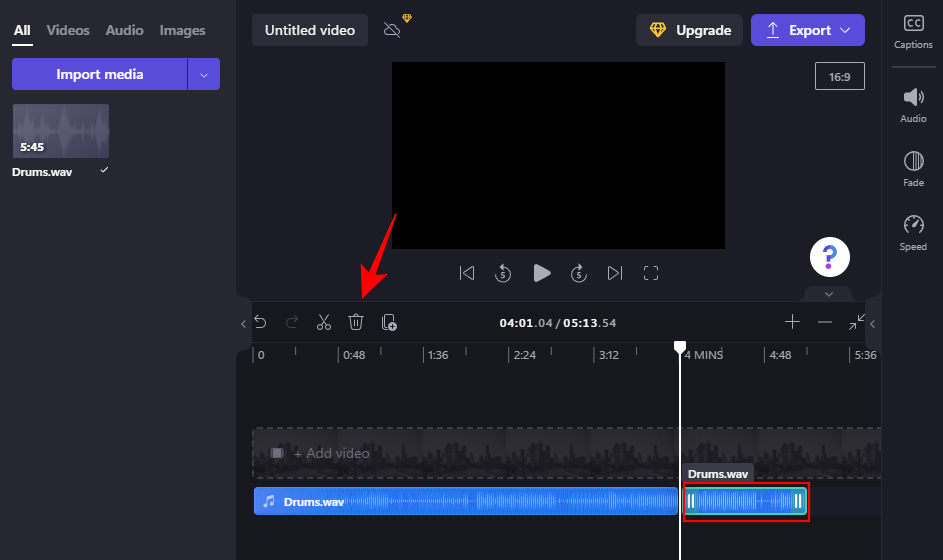
This will split the file at the current position. - The split function can also be used to trim a file. All you have to do is split the audio file to where you want to trim the audio to. Then simply delete the part that you do not want (by pressing Delete or clicking on the trashcan icon).
Adjust volume
- Select the audio file in the timeline by clicking on it. Then click on Audio in the right pane.

- Then drag the slider to adjust the volume.

Fade in and fade out audio
Fading the audio in and out can soften the listener’s experience as the audio gradually comes in and goes out.
- To add fade in and fade out, first click on the audio in the timeline. Then click on Fade in the right pane.
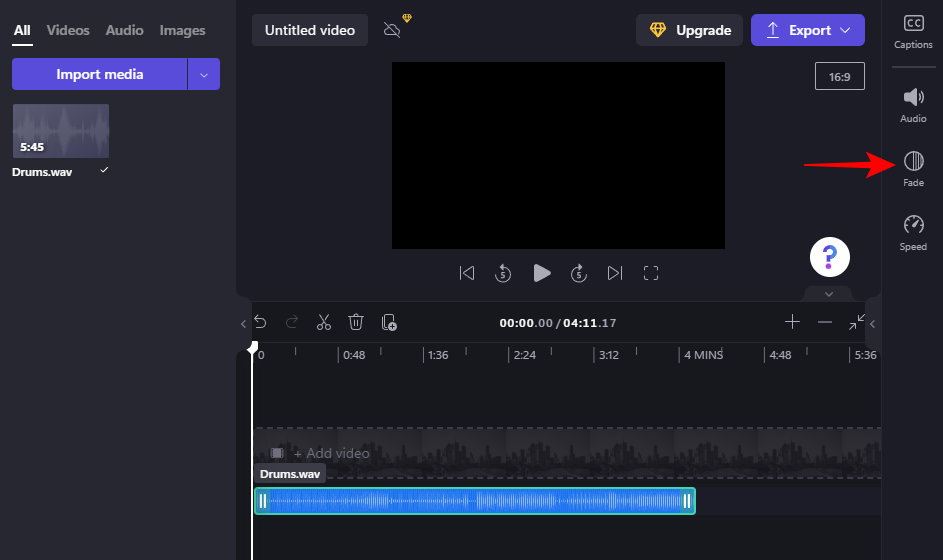
- Then drag the “Fade in” and “Fade out” sliders to determine the length of the effect.

Edit speed of music or audio
Clipchamp also lets you speed your audio up or slow it down.
- To access this option, select the audio track in the timeline and then click on Speed in the right pane.
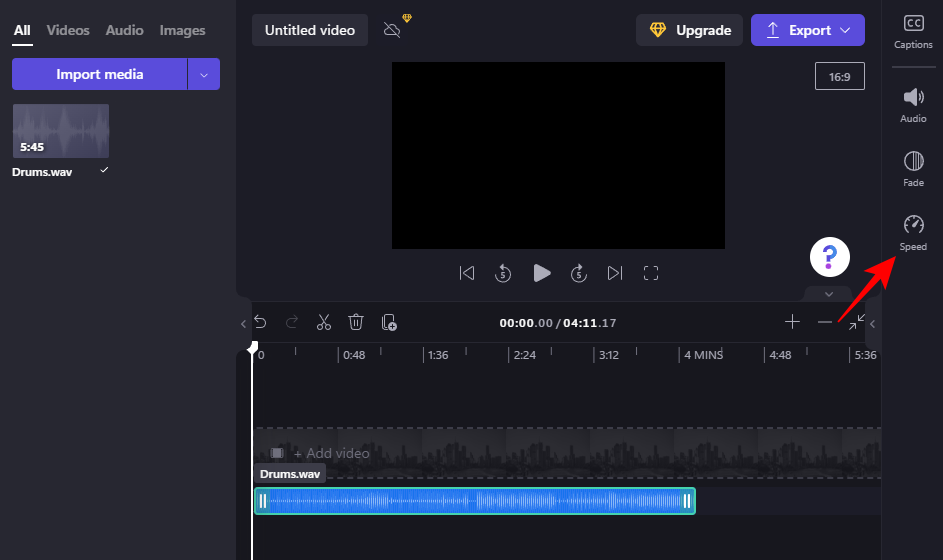
- Here, as before, use the slider to adjust the speed of the audio.

How to add audio visualizer to video in Clipchamp
Clipchamp can also automatically generate animated sound waves based on the content of the audio file and display them as visuals. All this can be done with an audio visualizer effect that is added to your video.
Here’s how to add the audio visualizer to add some fun animated audio-visuals to your video:
- Import audio as shown before. Then click on Graphics in the left pane.
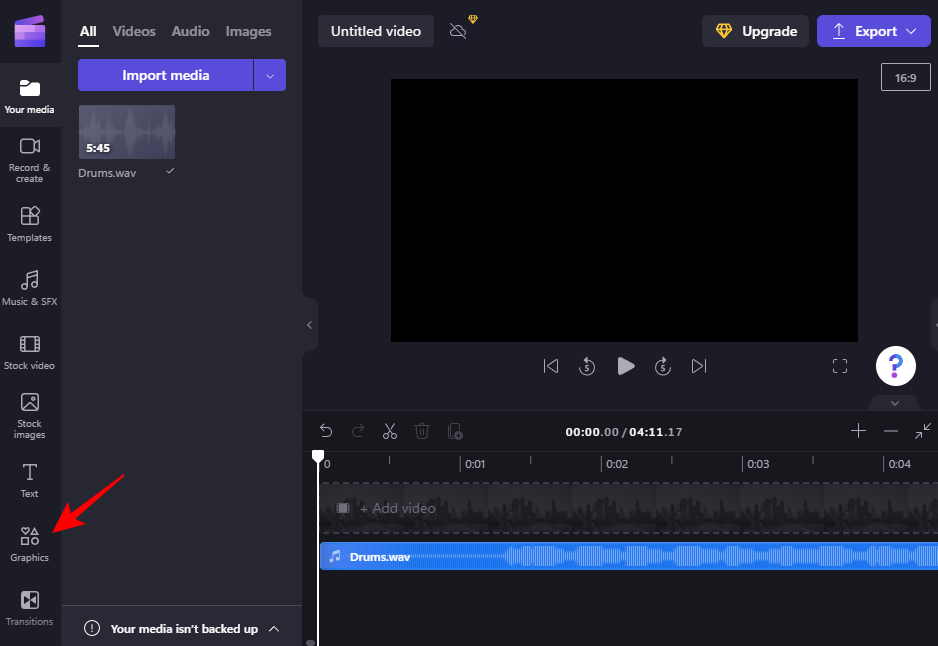
- Click on the “see more” arrow under Frames & overlays.

- Then scroll down the list and click on the + icon on Audio visualizer to add it to the timeline (or drag and drop it there).
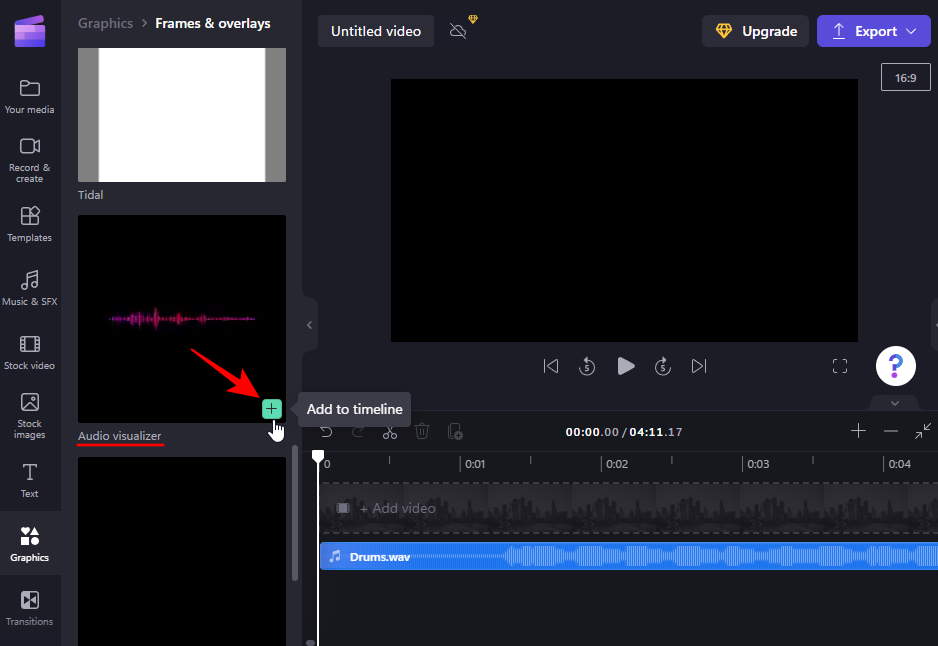
- To extend the audio visualizer effect, drag its right edge to the length of the audio.

- After all the editing, once you’re ready to save your audio/video, click on Export in the top right corner.

- Then select a resolution.

- Your audio/video will be saved as an MP4 file.
FAQs
In this section, we answer a few commonly asked queries about adding and editing audio in Clipchamp.
How do I import audio into Clipchamp?
There are a few ways to import audio in Clipchamp. The most common way is to simply drag and drop the audio file in Clipchamp. Or else, you can click on the Import button, or use additional import options by clicking on the arrow next to the Import button. Refer to the guide above to know more.
What audio files does Clipchamp support?
There is a variety of audio file formats that are supported by Clipchamp. However, most of them will be converted first by Clipchamp (automatically) to work with. If you want to speed up your work and bypass this conversion, use .mp3, .ogg, and .wav file formats.
Why can’t I hear audio in Clipchamp?
If you’re not able to hear any audio in Clipchamp, you can try logging out and logging back in to see if the audio is fixed. Also, make sure that you still have the files in the location from where they were imported. If they’re moved or deleted, Clipchamp may not be able to load them up again.
Can I record my own audio in Clipchamp?
Unfortunately, this is a feature that hasn’t come out yet. Clipchamp is currently in the process of developing this and one can expect this to appear as an update sometime soon.
Where can I get audio from?
Apart from the Clipchamp stock audio/video library, you can get royalty-free audio files from a number of online websites for your personal and commercial use. Some of these are given below:
These are but a few websites where you can download and use audio files for free. A simple google search about free audio files will yield many more results.
So these were the ways that you can import audio in Clipchamp and use its tools to edit them to your liking. For a native video editor, Clipchamp’s features and free stock files are more than enough for light to moderate editing, especially when you don’t want to dole out a subscription fee for anything else.
Related: How to Rotate a Video in Windows 11


