Your iPhone can do a lot of things besides phone calls and text messages. If you deal with a lot of documents regularly, you can use your iPhone’s camera to scan documents directly into PDF files so that you can transfer them to your PC or share them with others.
In this post, we’ll explain all the ways you can scan a document on your iPhone.
Method 1: Using the Files app
iOS has a native document scanner that you can access inside the Files app and any document you scan using this tool is saved directly as a PDF within the app.
- Open the Files app on your iPhone and navigate to the folder in which you want to save the document you’re about to scan.
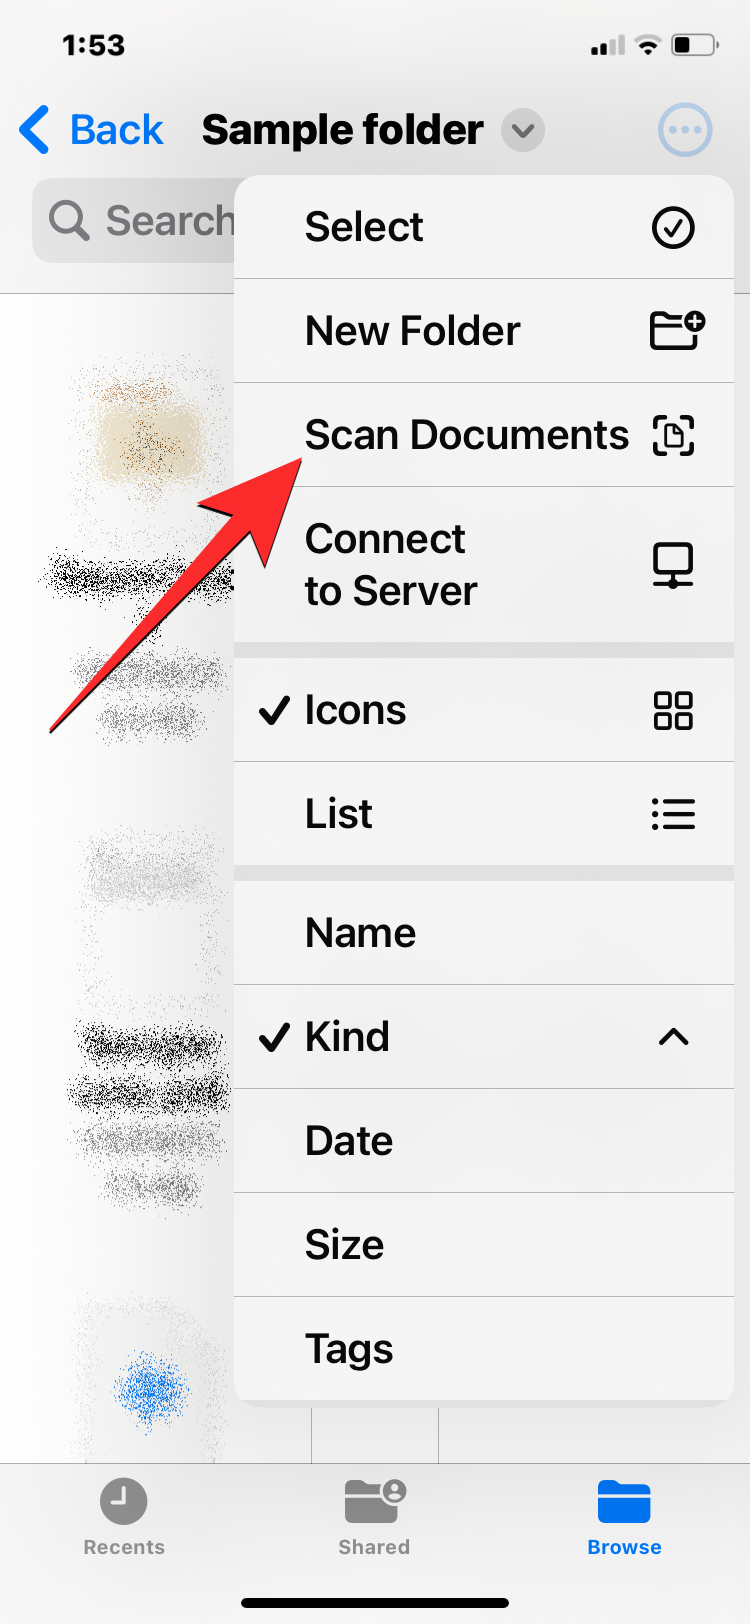
- Inside this folder, tap on the 3-dots icon at the top right corner and select Scan Documents.
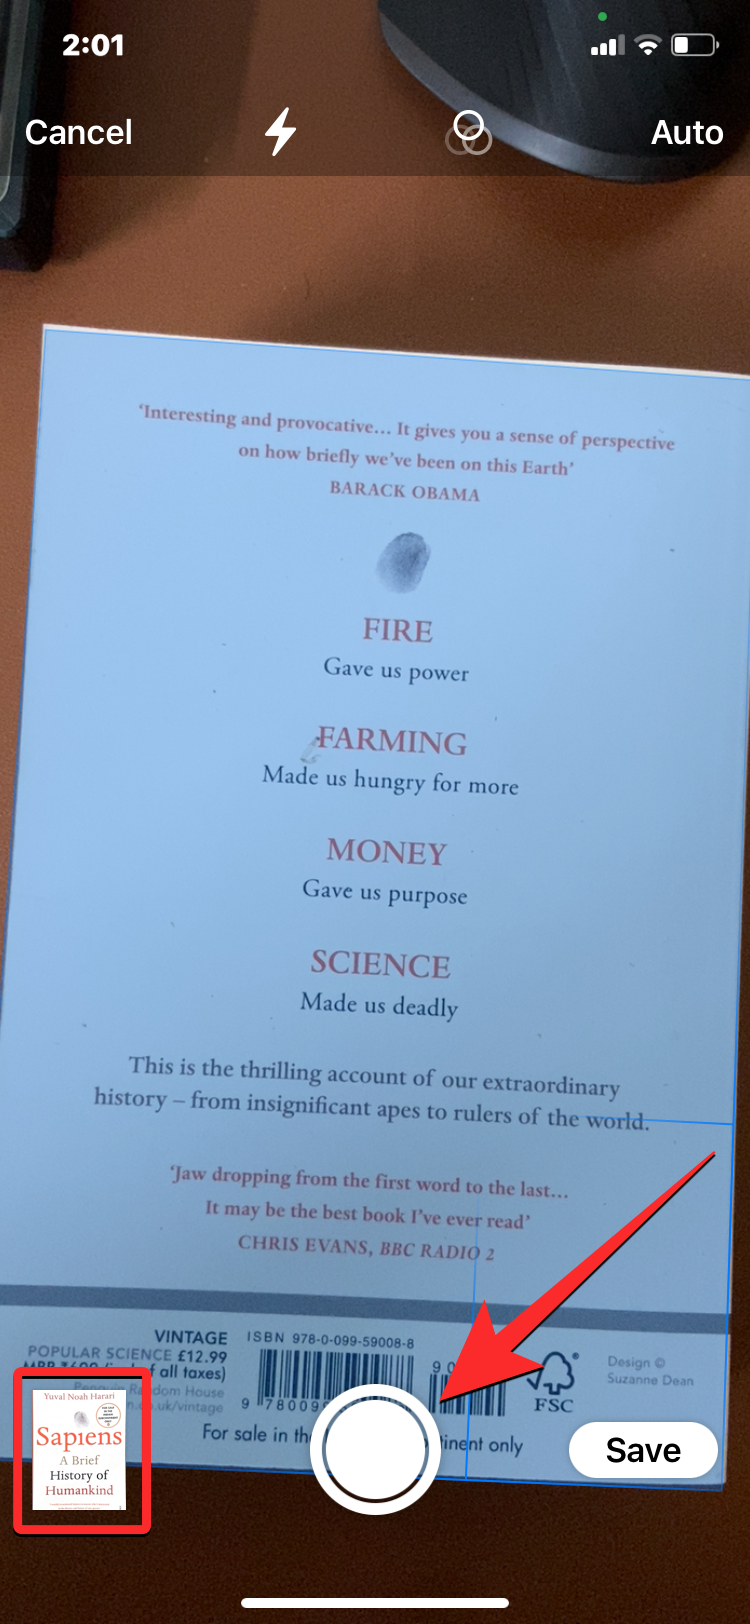
- When the camera interface opens, point the camera towards the document you wish to scan. Make sure you hold the iPhone precisely above the center of the page and all the edges of the page are visible inside the viewfinder.
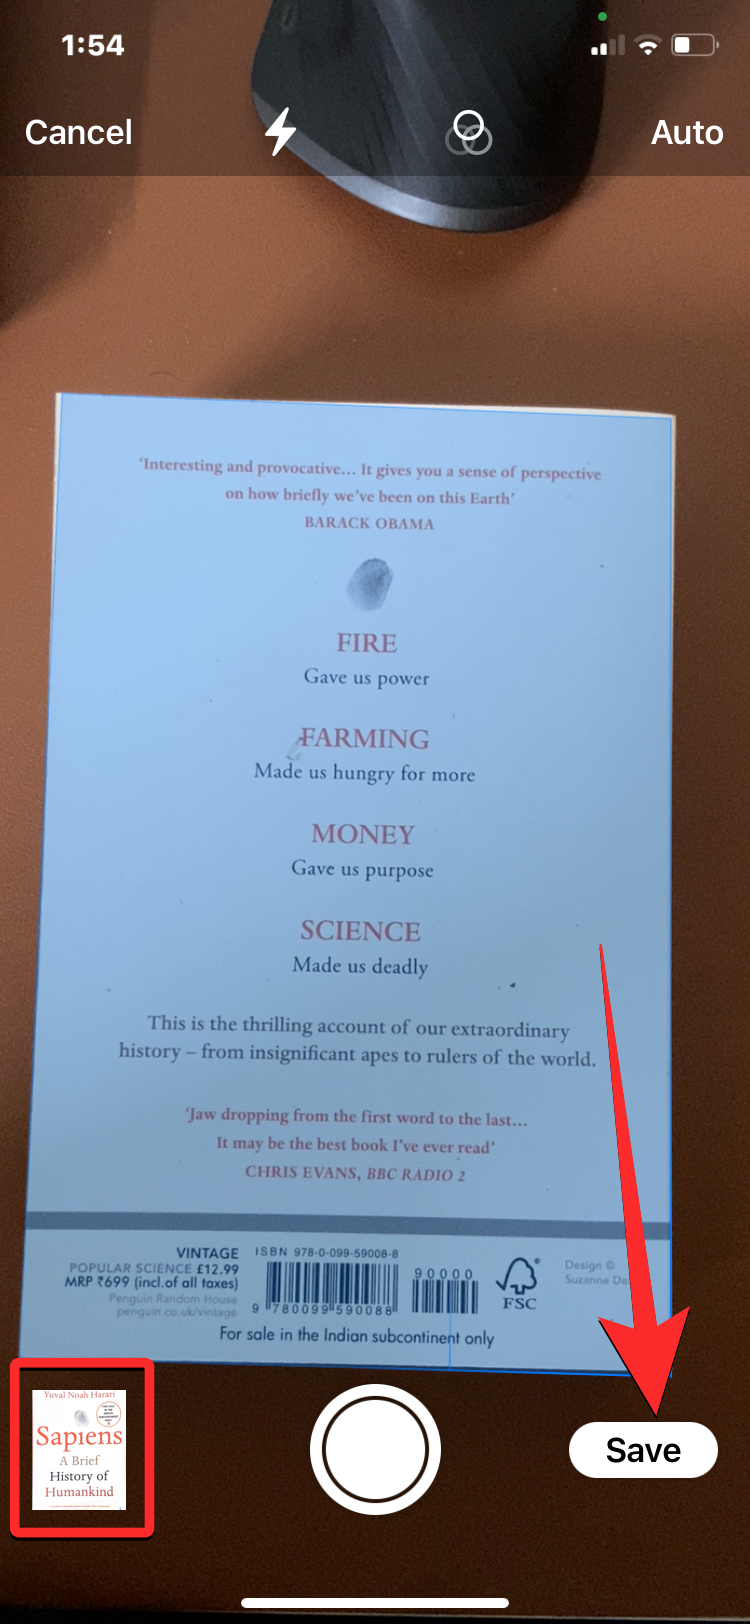
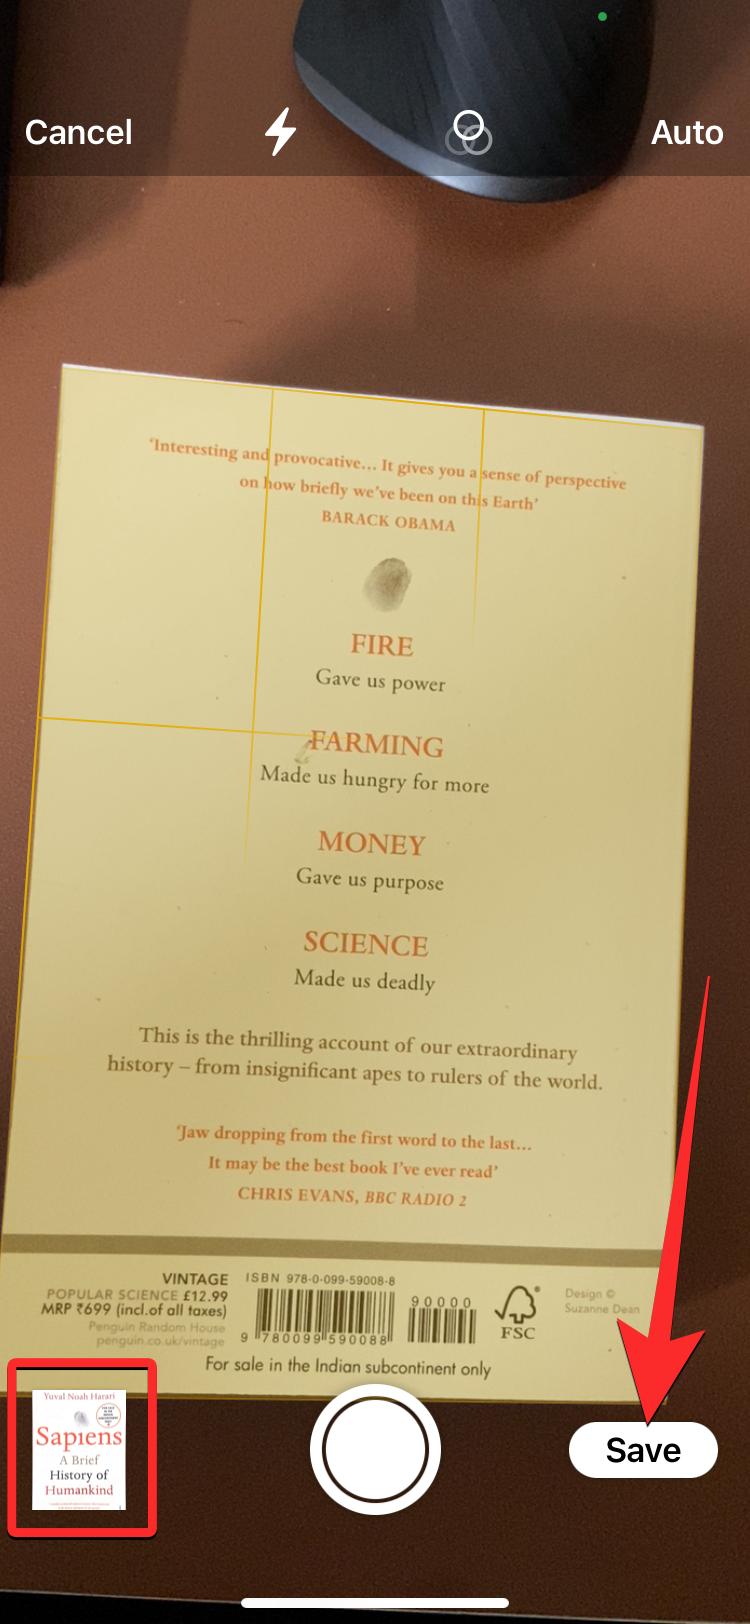
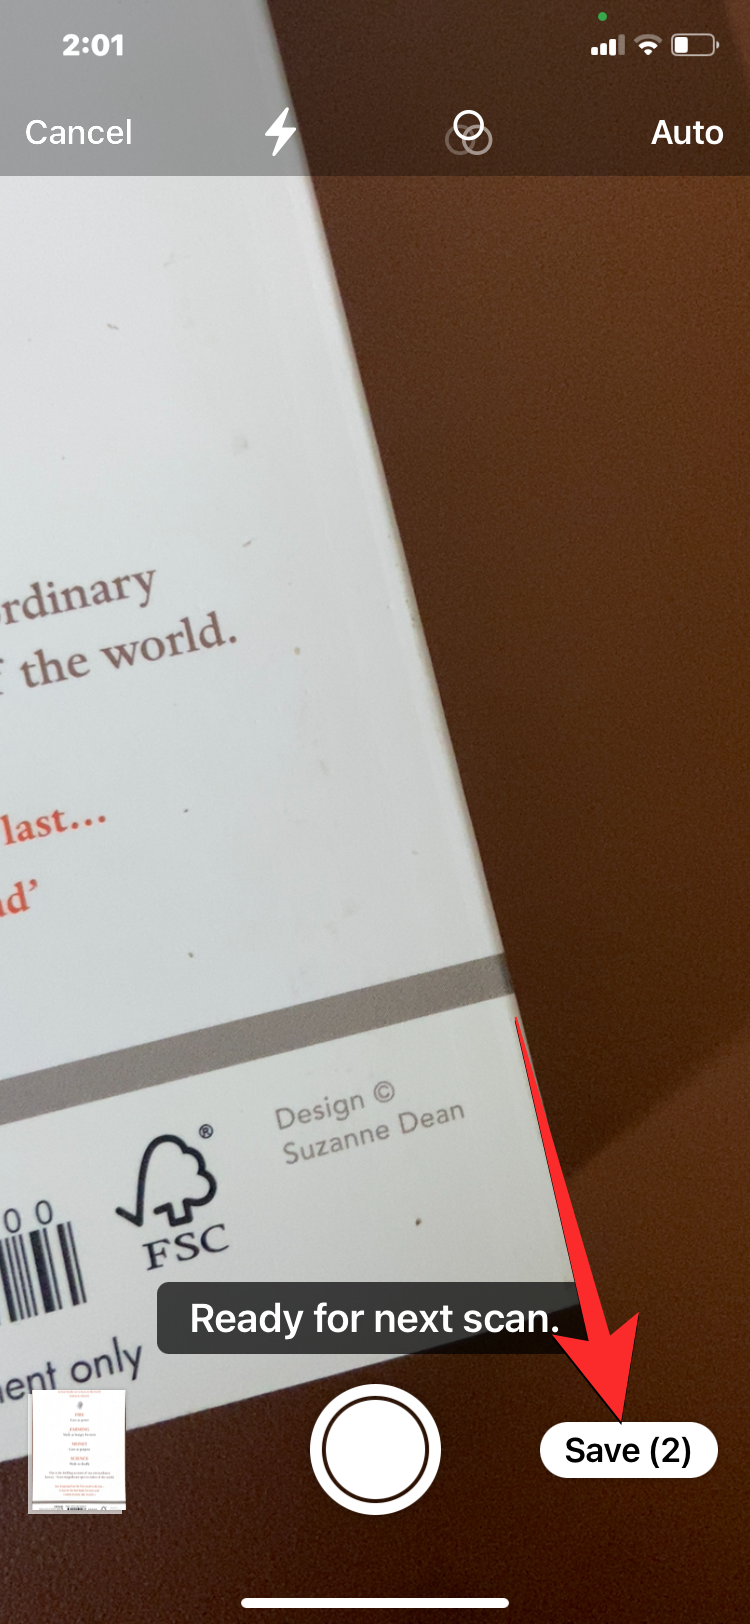
- As soon as the scanner detects a scannable page, it will automatically capture the scan. If not, tap on the Shutter button at the bottom to capture the scan manually.
- To check the scanned page, tap on its thumbnail at the bottom left corner. If not, you can continue scanning more pages of the document by repeating steps 3-4 above.
- When you’re done scanning all the required pages, tap on Save at the bottom right corner.
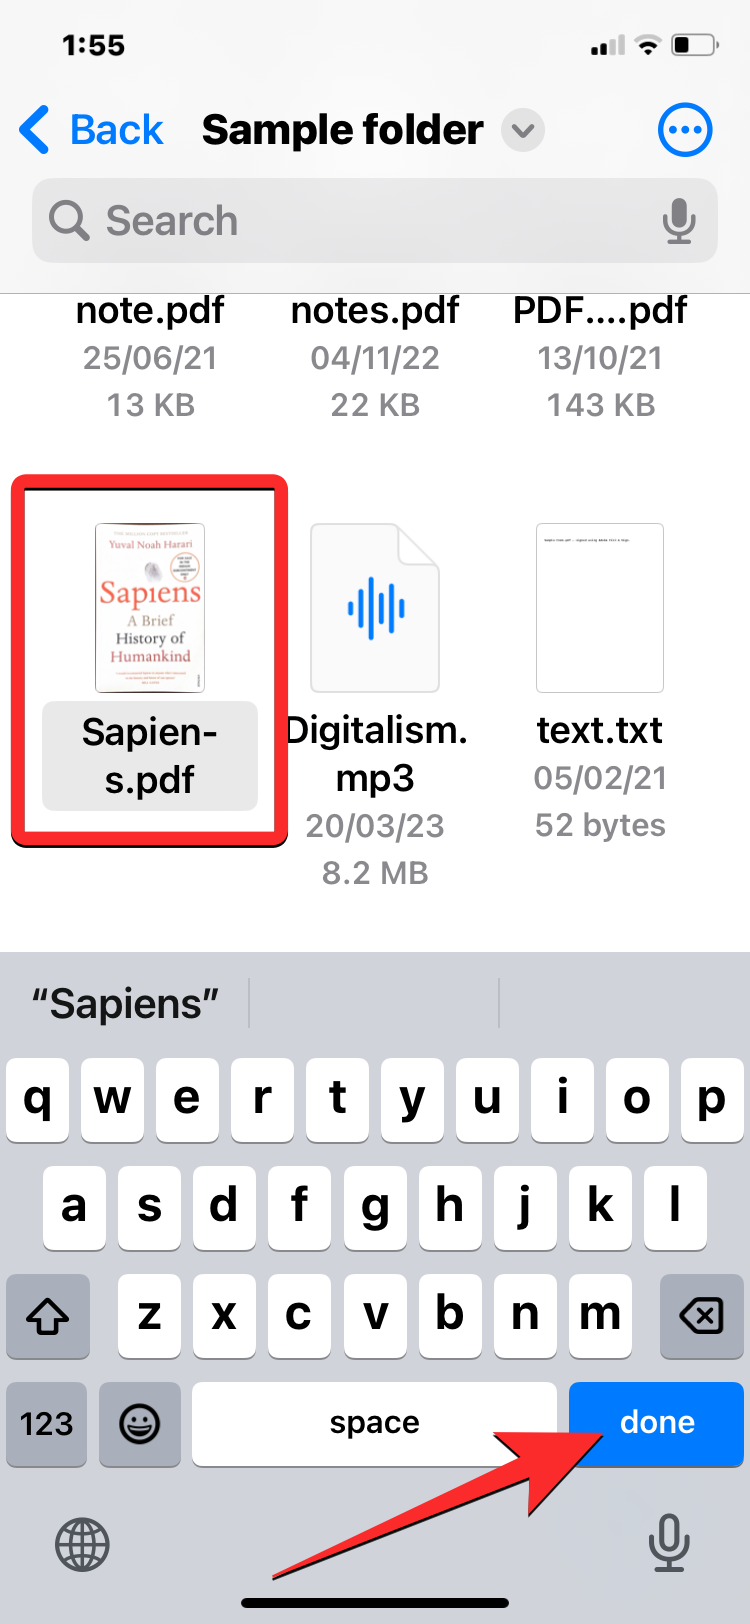
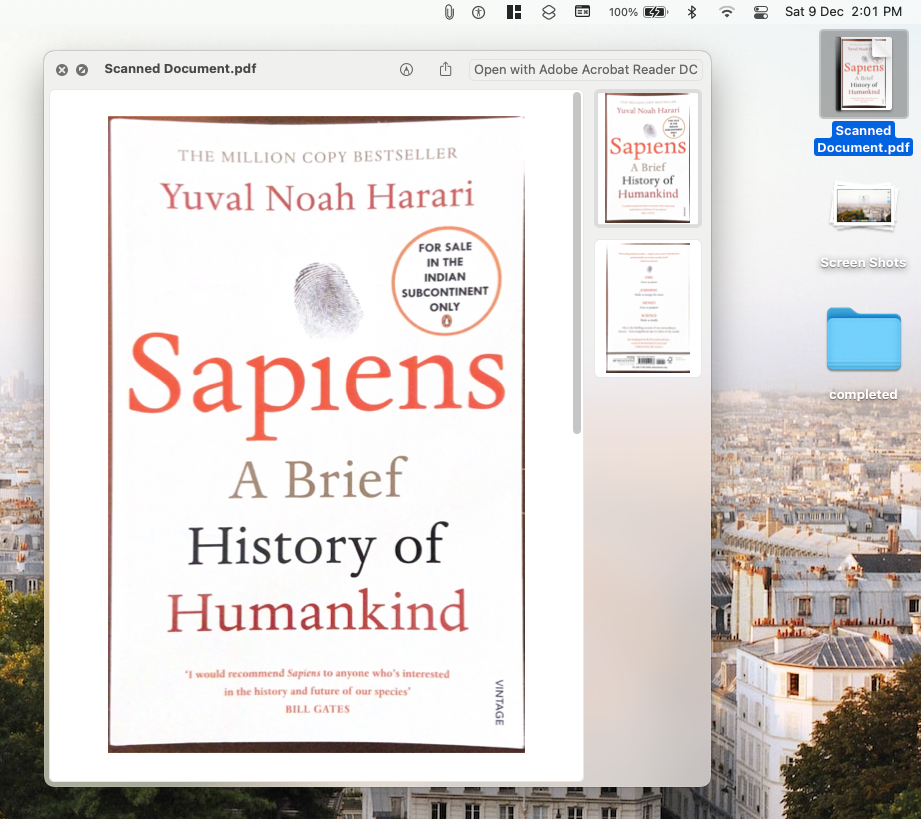
- The scanned document will appear inside the desired folder with a thumbnail. On this screen, type the preferred name for this PDF file and then tap on Done on the keyboard.
- The Files app will now show the scanned document inside the selected folder.
Method 2: Using the Notes app
Besides Files, the native Notes app on iOS also offers document scanning functionality and it works similarly to the above method.
- Open the Notes app on your iPhone.
- Select a note to open it or create a new note.
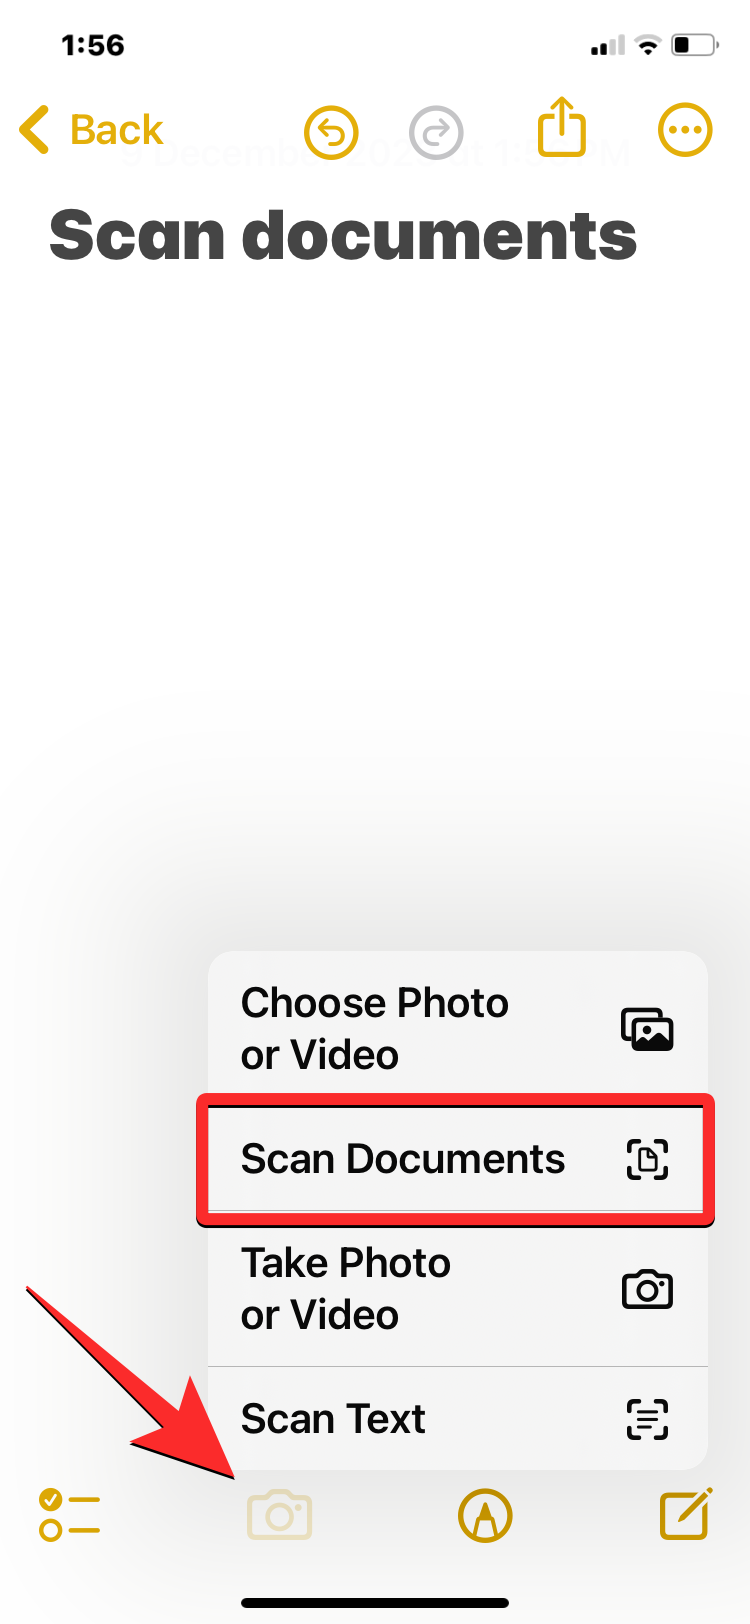
- When the selected note opens, tap on the Camera icon at the bottom and select Scan Documents.
- When the camera interface opens, point the camera towards the document you wish to scan. Make sure you hold the iPhone precisely above the center of the page and all the edges of the page are visible inside the viewfinder.
- As soon as the scanner detects a scannable page, it will automatically capture the scan. If not, tap on the Shutter button at the bottom to capture the scan manually.
- To check the scanned page, tap on its thumbnail at the bottom left corner. If not, you can continue scanning more pages of the document by repeating steps 4-5 above.
- When you’re done scanning all the required pages, tap on Save at the bottom right corner.
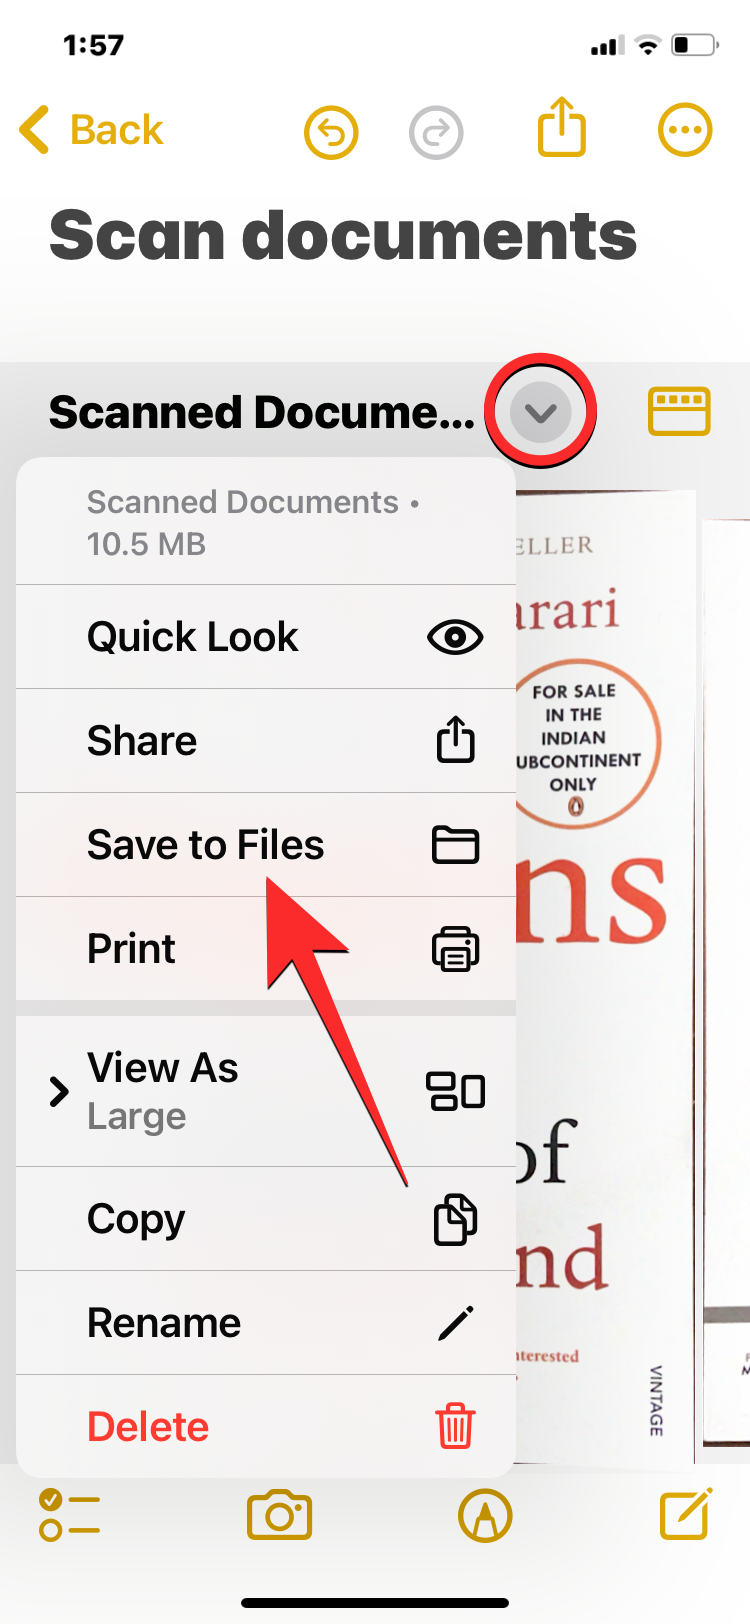
- The scanned document will appear inside the selected note.
- To save it as a PDF file, tap on the down arrow adjacent to the scanned document’s title and select Save to Files.
- When the Files app opens, navigate to the desired folder, rename the PDF file to your preferred file name, and tap on Save.
- Both the Notes app and Files app will now show the scanned document.
Method 3: Using Continuity Camera (On a Mac)
Apple also allows you to scan your documents and attach them directly to any work that you might be doing on your Mac using Continuity Camera. The tool can be used to scan documents and make them appear automatically inside a supported app on your Mac.
Which Mac apps does it work on
Continuity Camera will work inside the following apps on your Mac:
- Finder
- Notes
- Messages
- Keynote 8.2 or later
- Numbers 5.2 or later
- Pages 7.2 or later
- TextEdit
Preparation
Before using the Continuity Camera on your Mac and iPhone:
- Make sure both the Mac and iPhone have WiFi and Bluetooth turned ON
- Both devices are signed in to the same Apple ID
- Ensure that the Mac and iPhone are running on the latest versions of macOS (works on macOS Mojave or newer) and iOS (works on iOS 12 or later)
How to scan documents with Continuity Camera
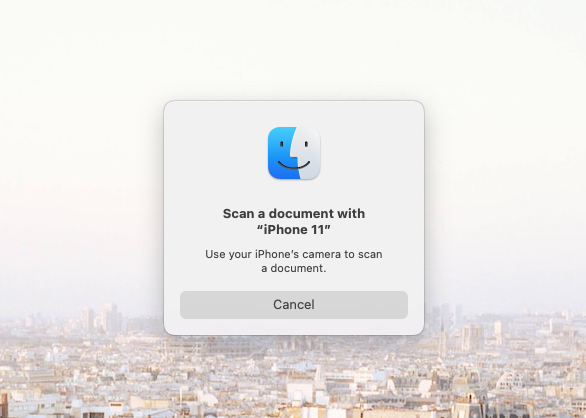
- Open any of the supported apps listed above on your Mac. You can also scan a document directly to your desktop without opening any app.
- Inside the supported app, right-click or Control-click and select Scan Documents under “iPhone <model name>”. If you want to add the document to your desktop, right-click or Control-click on your desktop and go to Import from iPhone > Scan Documents.

- A dialog box will appear on your Mac with the message “Scan a document with iPhone”.
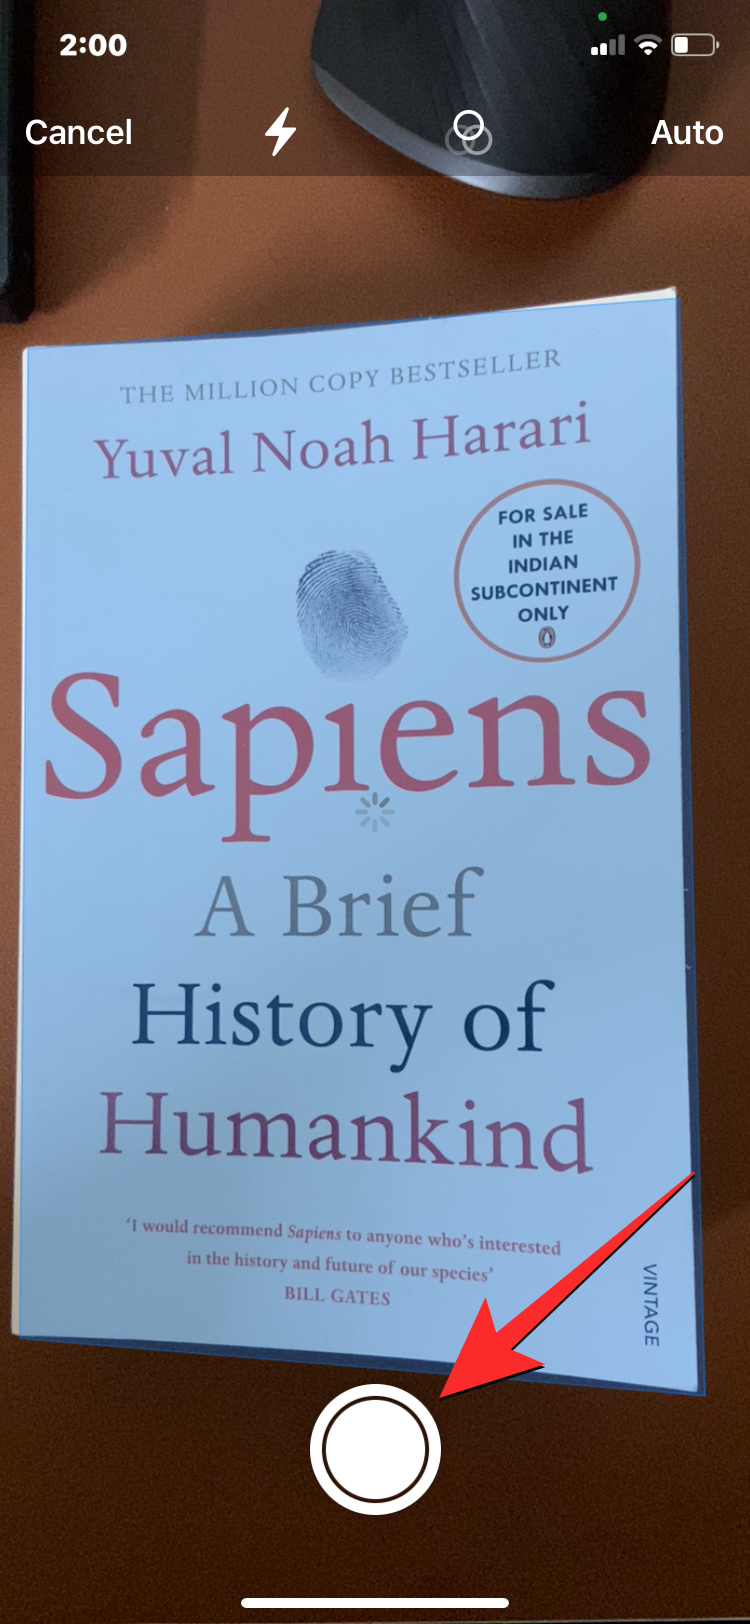
- On your iPhone, the camera interface will open. When that happens, point the camera towards the document you wish to scan. Make sure you hold the iPhone precisely above the center of the page and all the edges of the page are visible inside the viewfinder.
- As soon as the scanner detects a scannable page, it will automatically capture the scan. If not, tap on the Shutter button at the bottom to capture the scan manually.
- To check the scanned page, tap on its thumbnail at the bottom left corner. If not, you can continue scanning more pages of the document by repeating steps 4-5 above.
- When you’re done scanning all the required pages, tap on Save at the bottom right corner.
- The scanned document will appear inside the selected app on your Mac or on your desktop, depending on where you choose to import it.
Method 4: Using the Adobe Scan app
The Adobe Scan app is a good third-party alternative to scan documents on an iPhone.
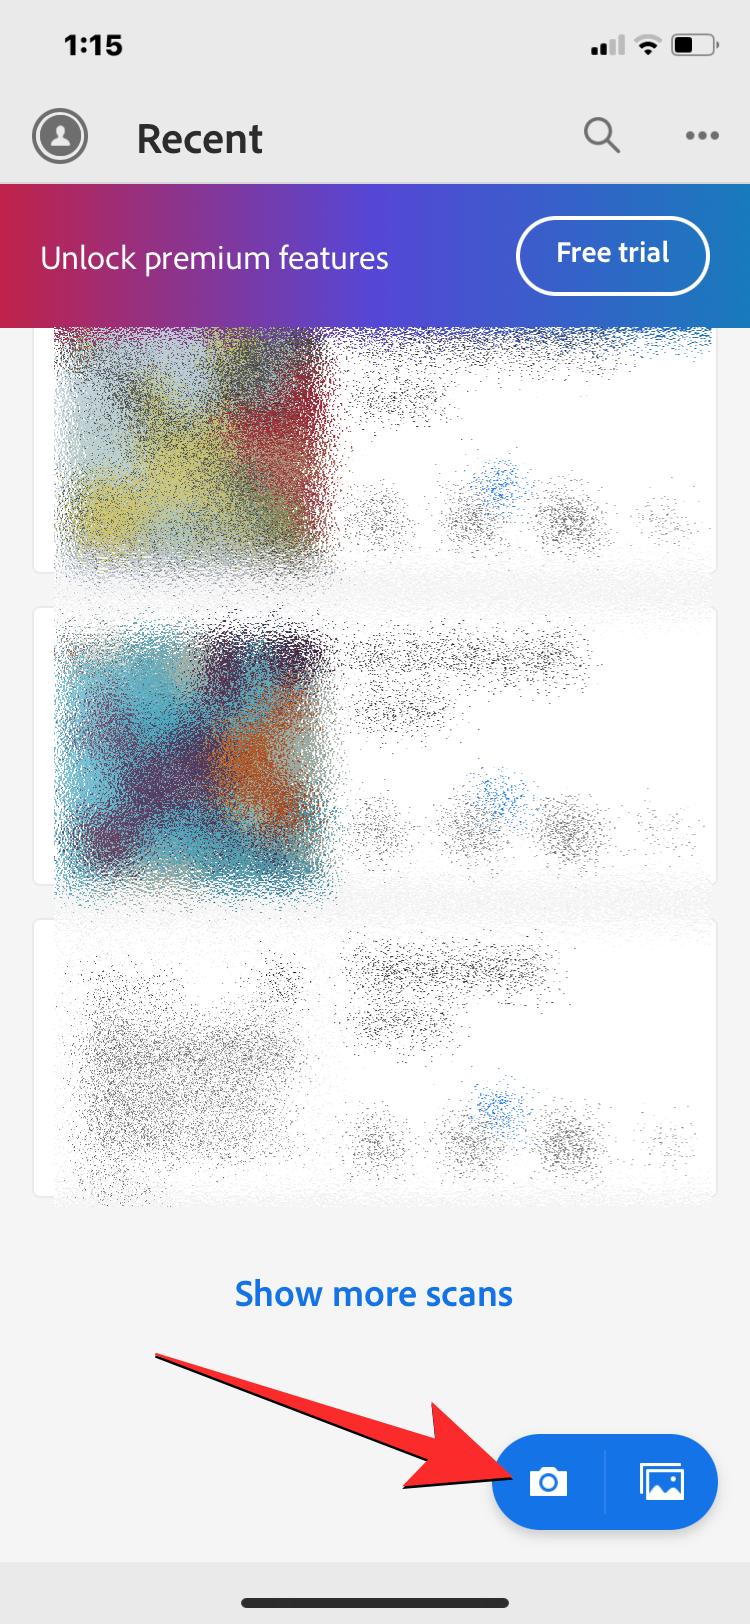
- Download and install the Adobe Scan app on your iPhone from the App Store. Once installed, open the app and sign in to start using it.
- Inside Adobe Scan, tap on the camera icon at the bottom right.
- This will open the app’s scanner tool with the Document tab selected. Besides documents, you will also be able to choose the following tabs to scan different page forms – books, ID cards, business cards, forms, and whiteboards.
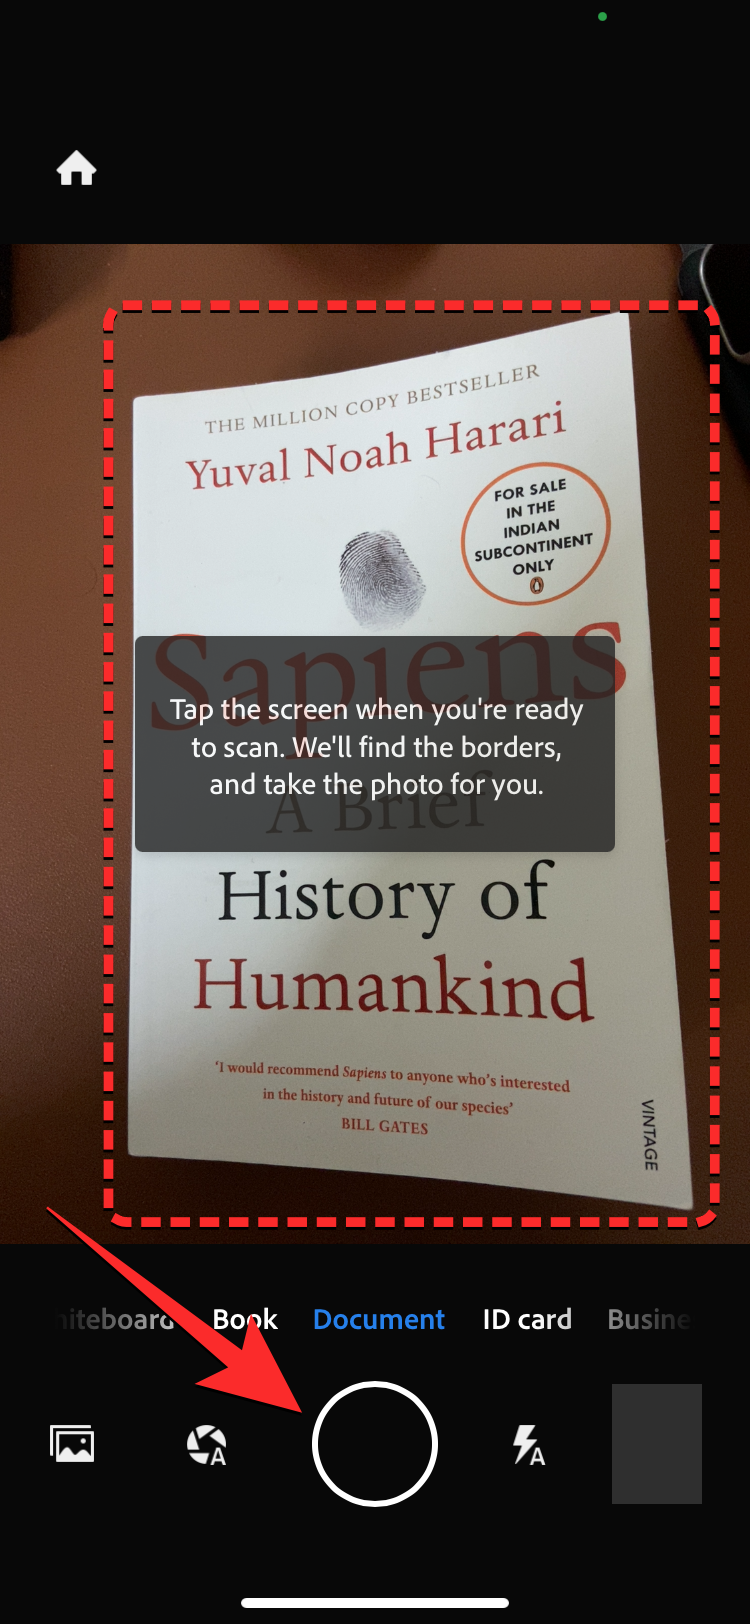
- Now point the camera towards the document you wish to scan. Make sure you hold the iPhone precisely above the center of the page and all the edges of the page are visible inside the viewfinder.
- To start scanning, tap anywhere on the screen so that the app automatically detects and scans the page. If that doesn’t happen, tap on the shutter button at the bottom.
- The scanned page will now appear at the top and you can make quick edits to the page by dragging the corners and the sides so the outline runs along the edges of the page correctly.
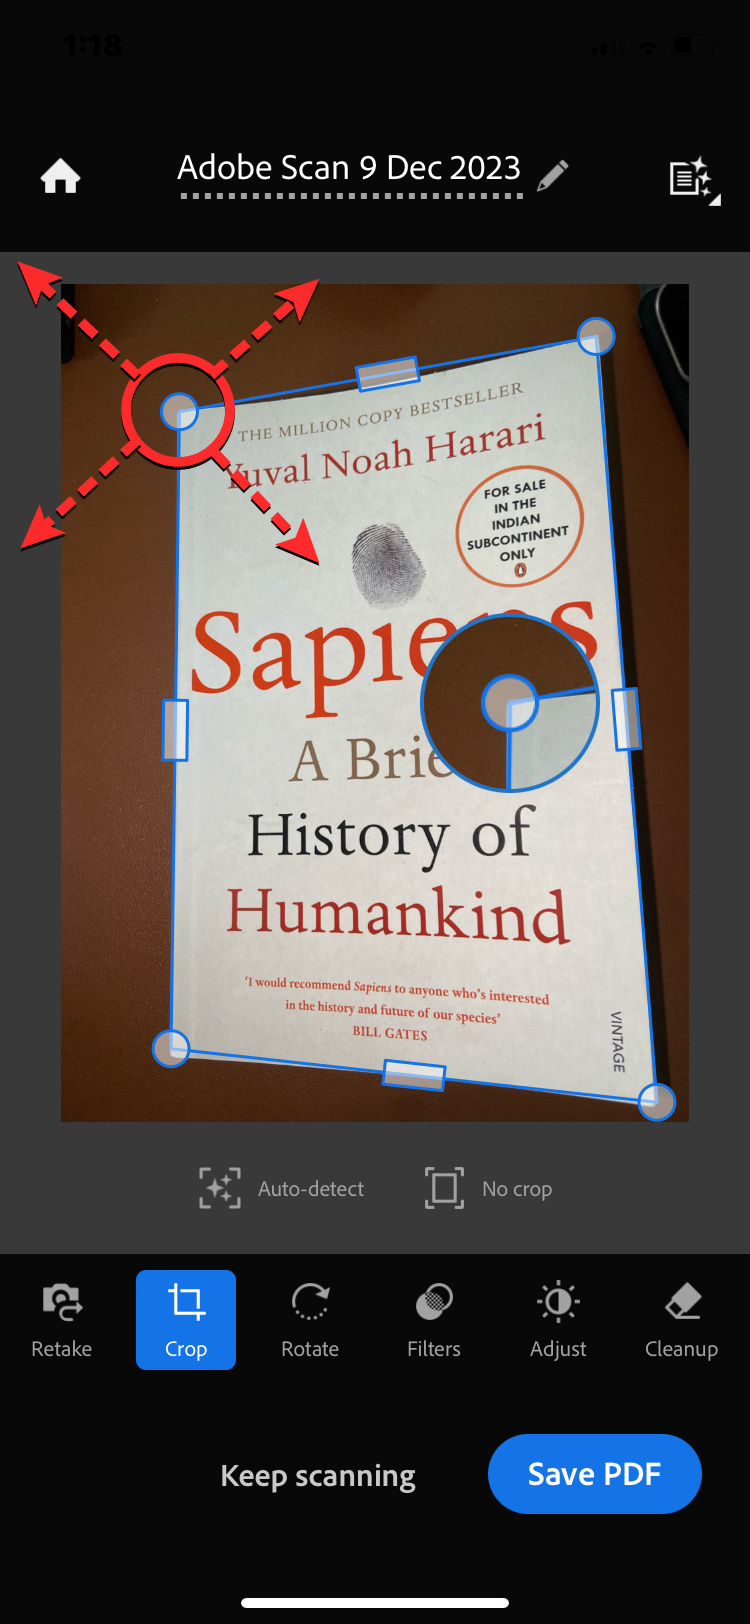
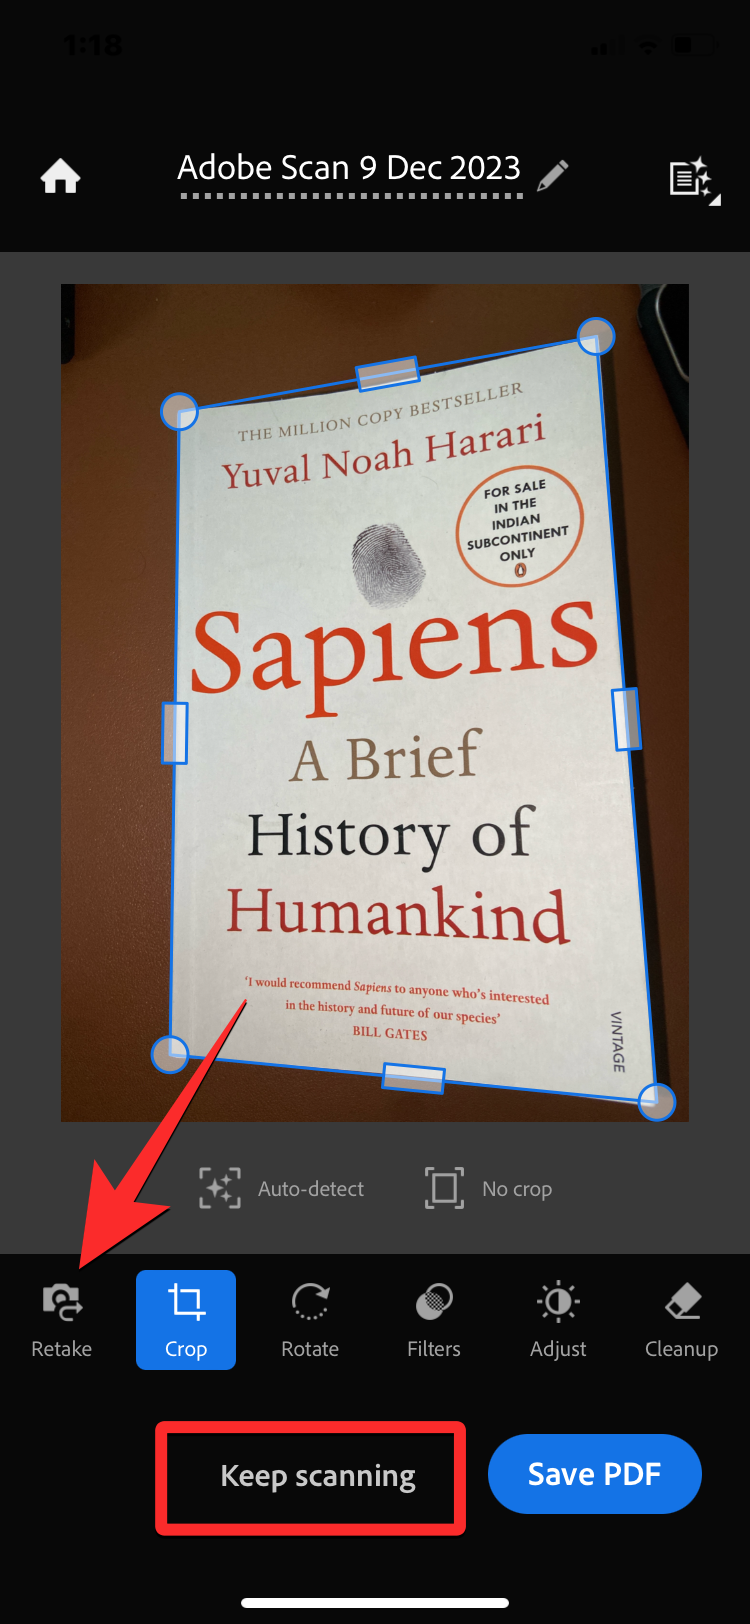
- If the scanned preview looks alright, tap on Keep scanning to scan more pages. If not, tap on the Retake tab at the bottom left corner.
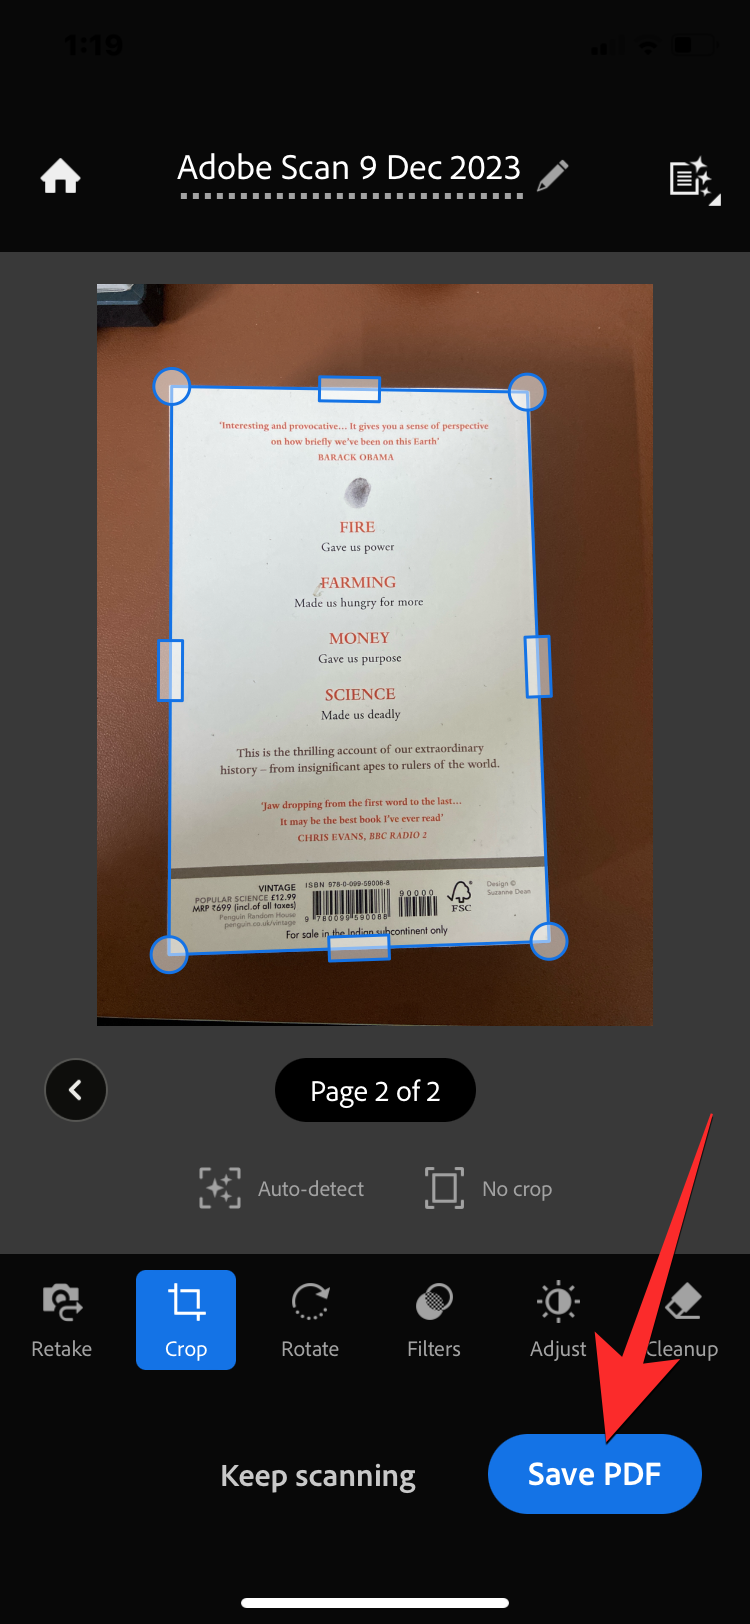
- Once you’ve scanned the required set of pages, tap on Save PDF.
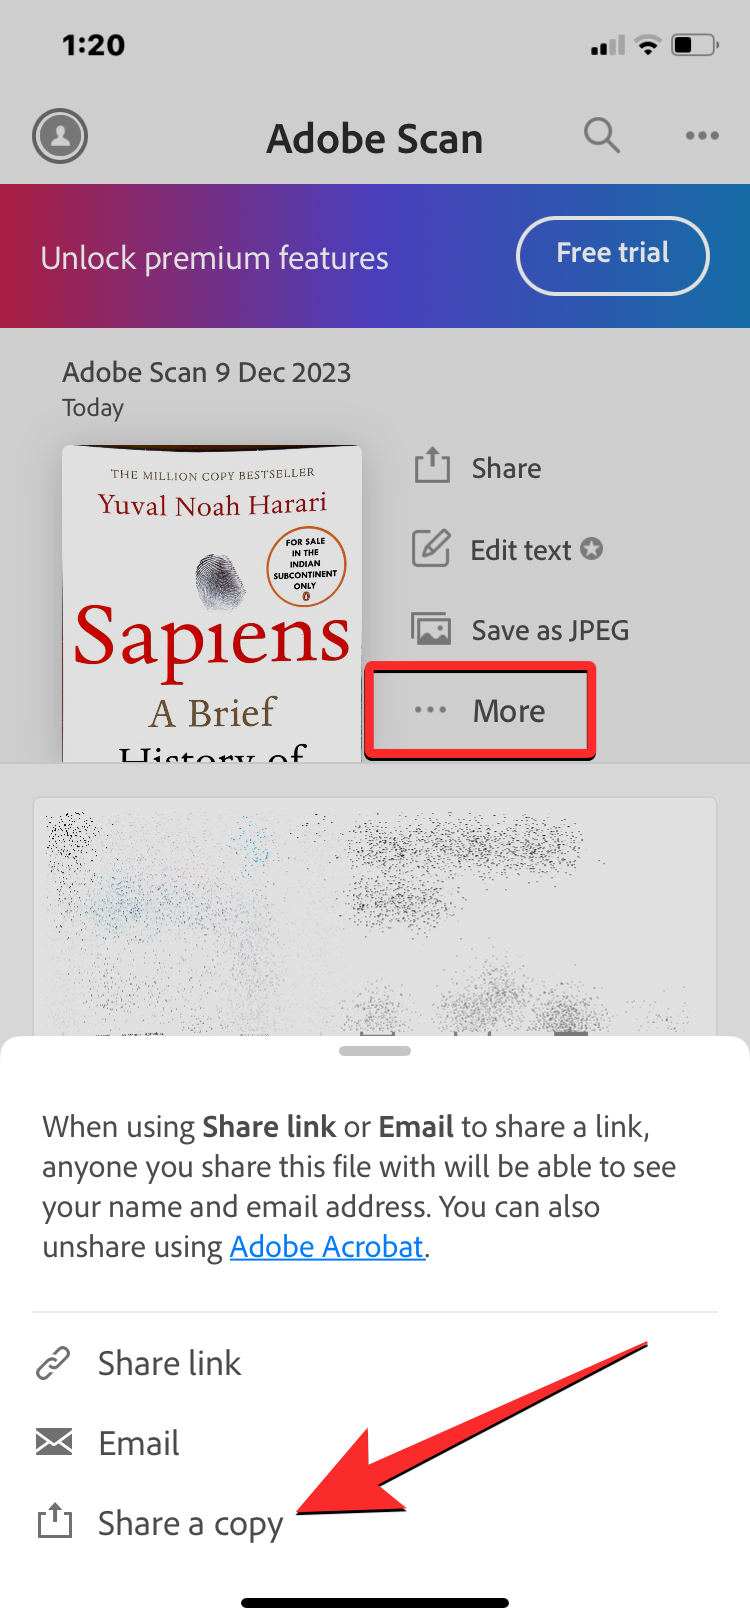
- The scanned document will now appear at the top of the app’s home screen. To save the PDF on your iPhone, select … More > Share a copy > Save to Files.
- When the Files app opens, navigate to your desired location, rename the PDF file, and tap on Save.
- The scanned document will now be saved on your iPhone and you’ll be able to access anytime it inside the Files app.
Method 5: Using the Google Drive app
Google Drive also offers a built-in scanner tool that you can use to scan documents and these files are saved directly inside your Google Drive account, making it easier to share them with others online.
- Download and install the Google Drive app on your iPhone from the App Store. Once installed, open the app and sign in to start using it.
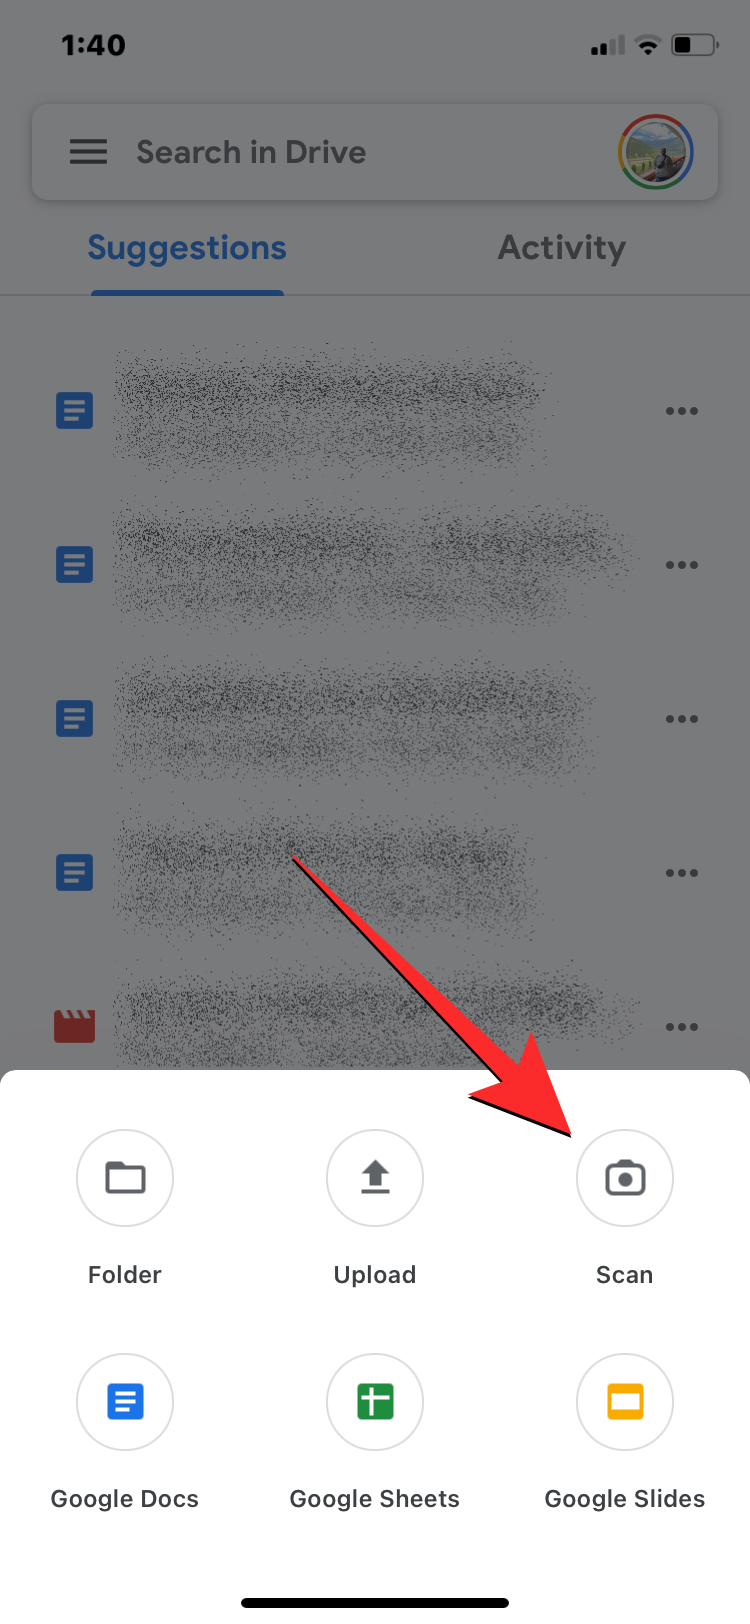
- Inside Google Drive, tap on the + button at the bottom right corner and select Scan.
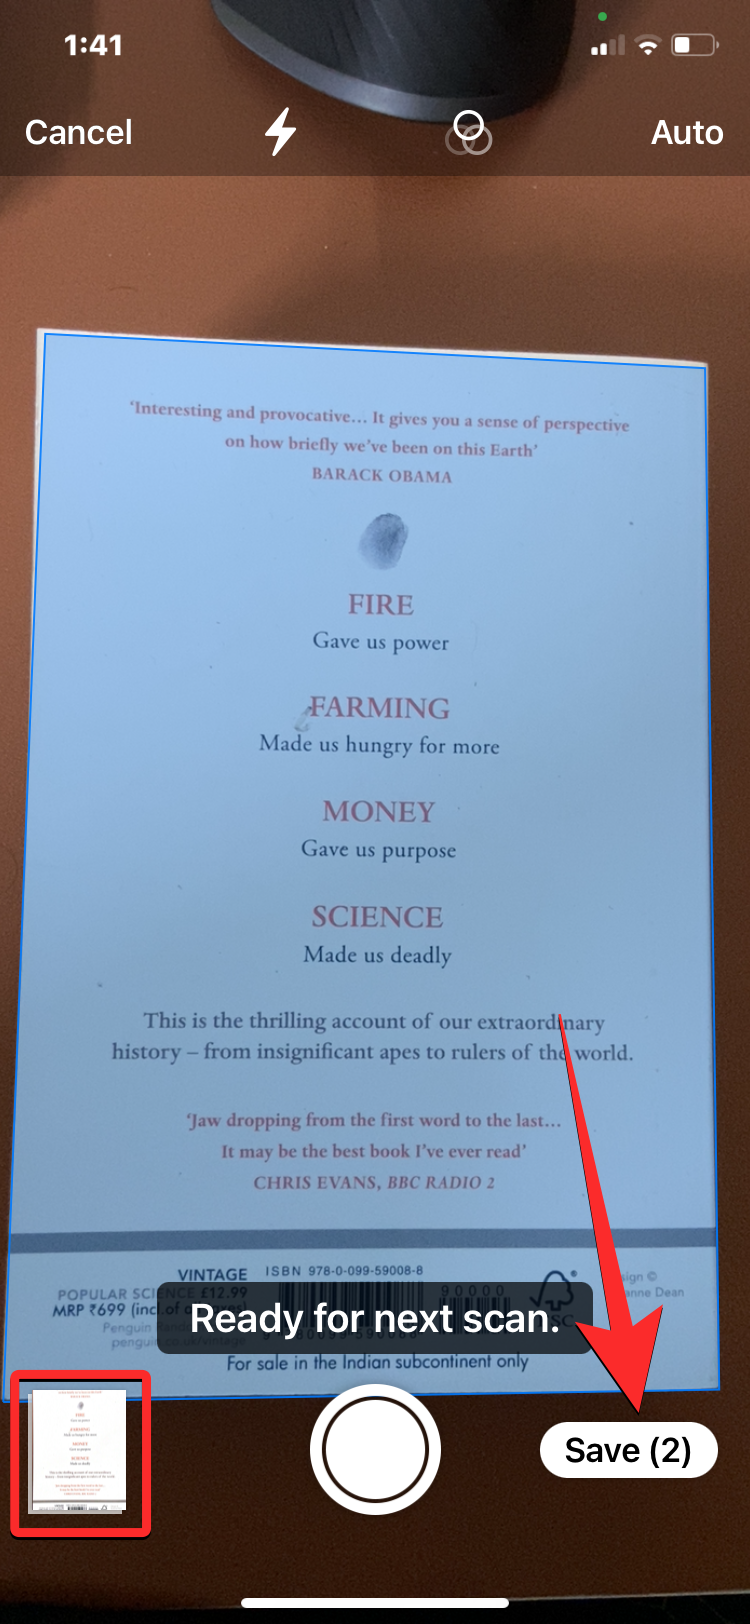
- When the camera interface opens, point the camera towards the document you wish to scan. Make sure you hold the iPhone precisely above the center of the page and all the edges of the page are visible inside the viewfinder.
- As soon as the scanner detects a scannable page, it will automatically capture the scan. If not, tap on the Shutter button at the bottom to capture the scan manually.
- To check the scanned page, tap on its thumbnail at the bottom left corner. If not, you can continue scanning more pages of the document by repeating steps 3-4 above.
- When you’re done scanning all the required pages, tap on Save at the bottom right corner.
- Now, rename the file name as you wish and then tap on Save.

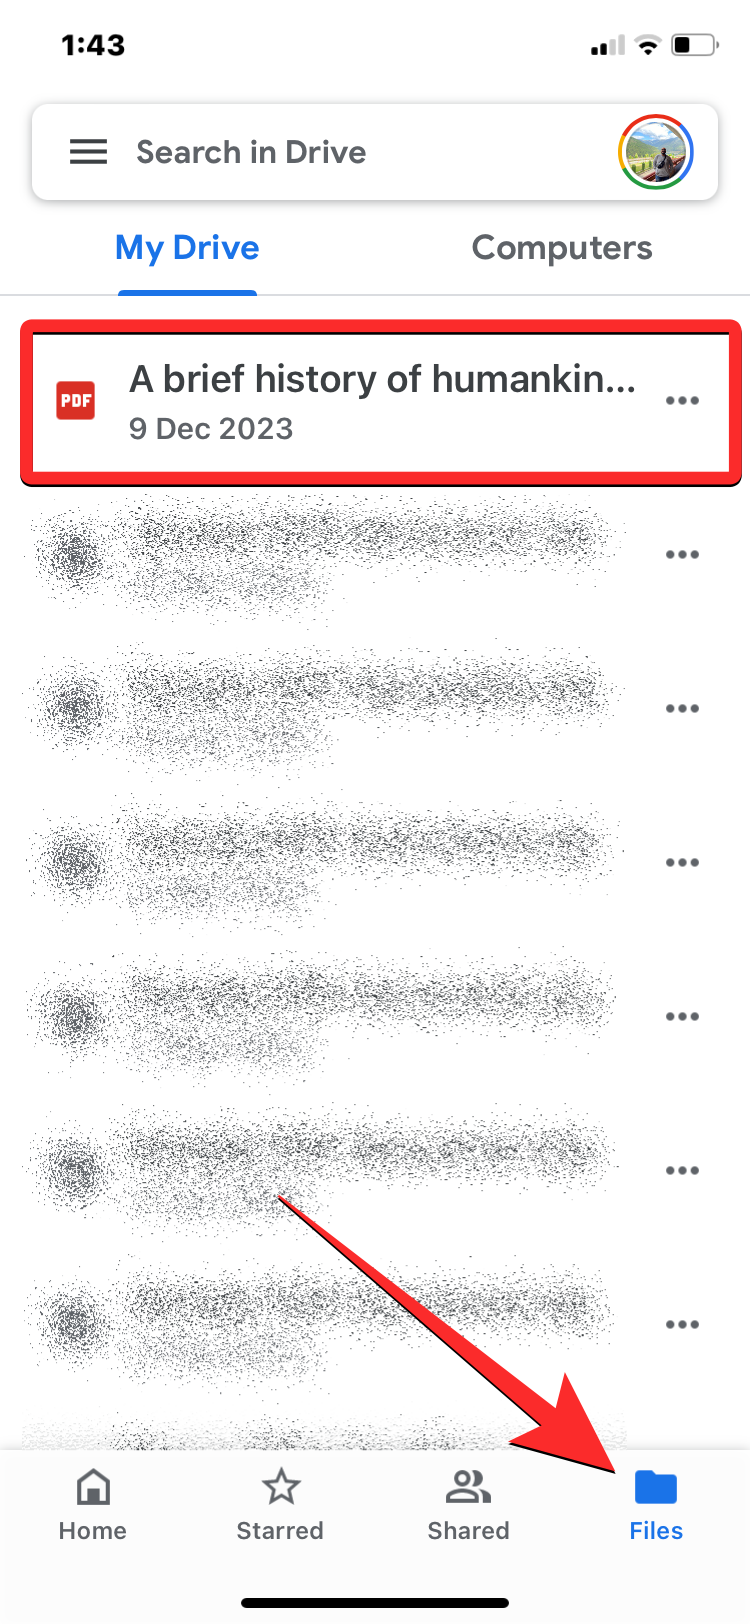
- The scanned document will now be saved to your Google Drive and you can access it inside the Files tab at the bottom right corner.
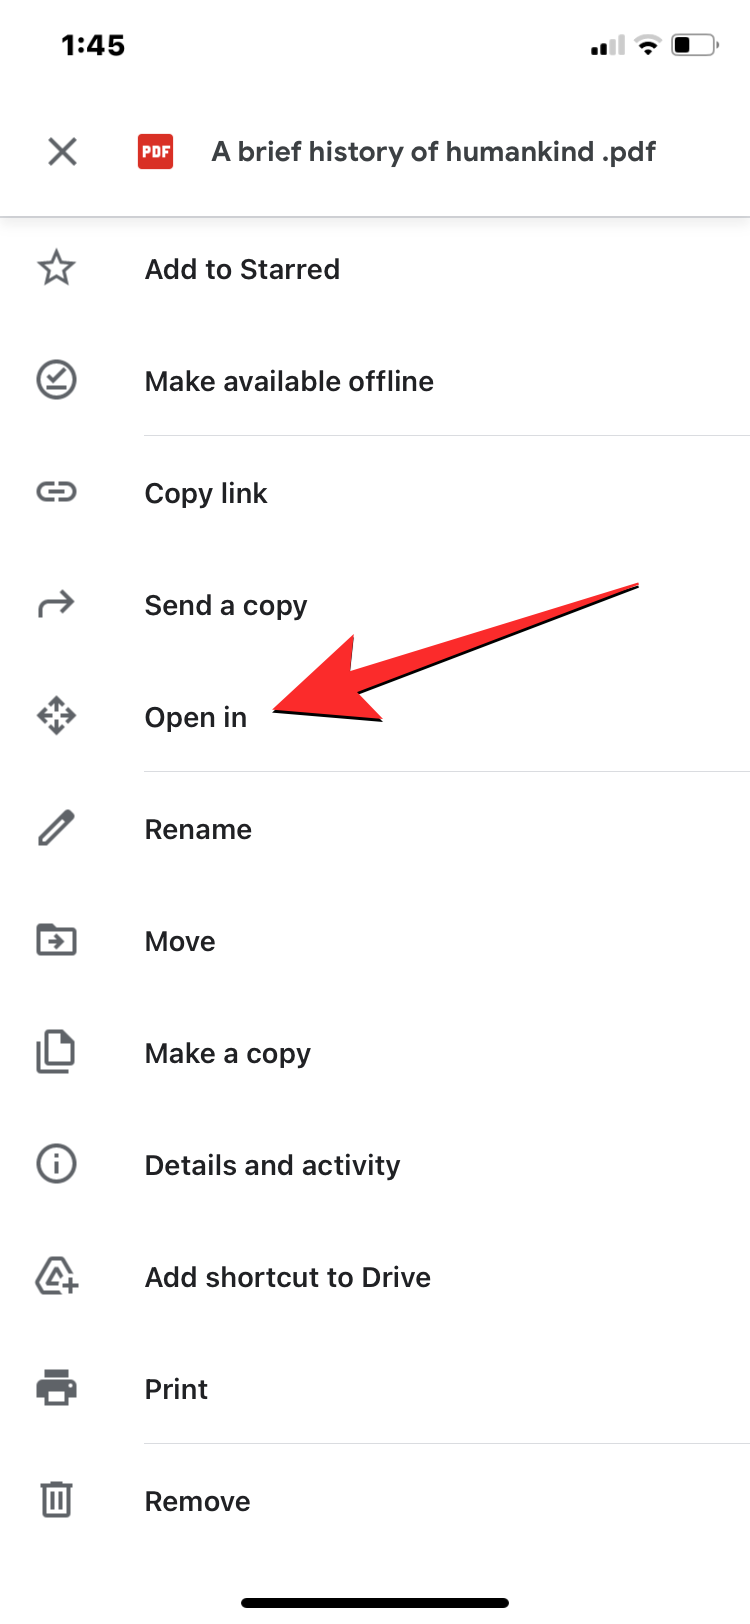
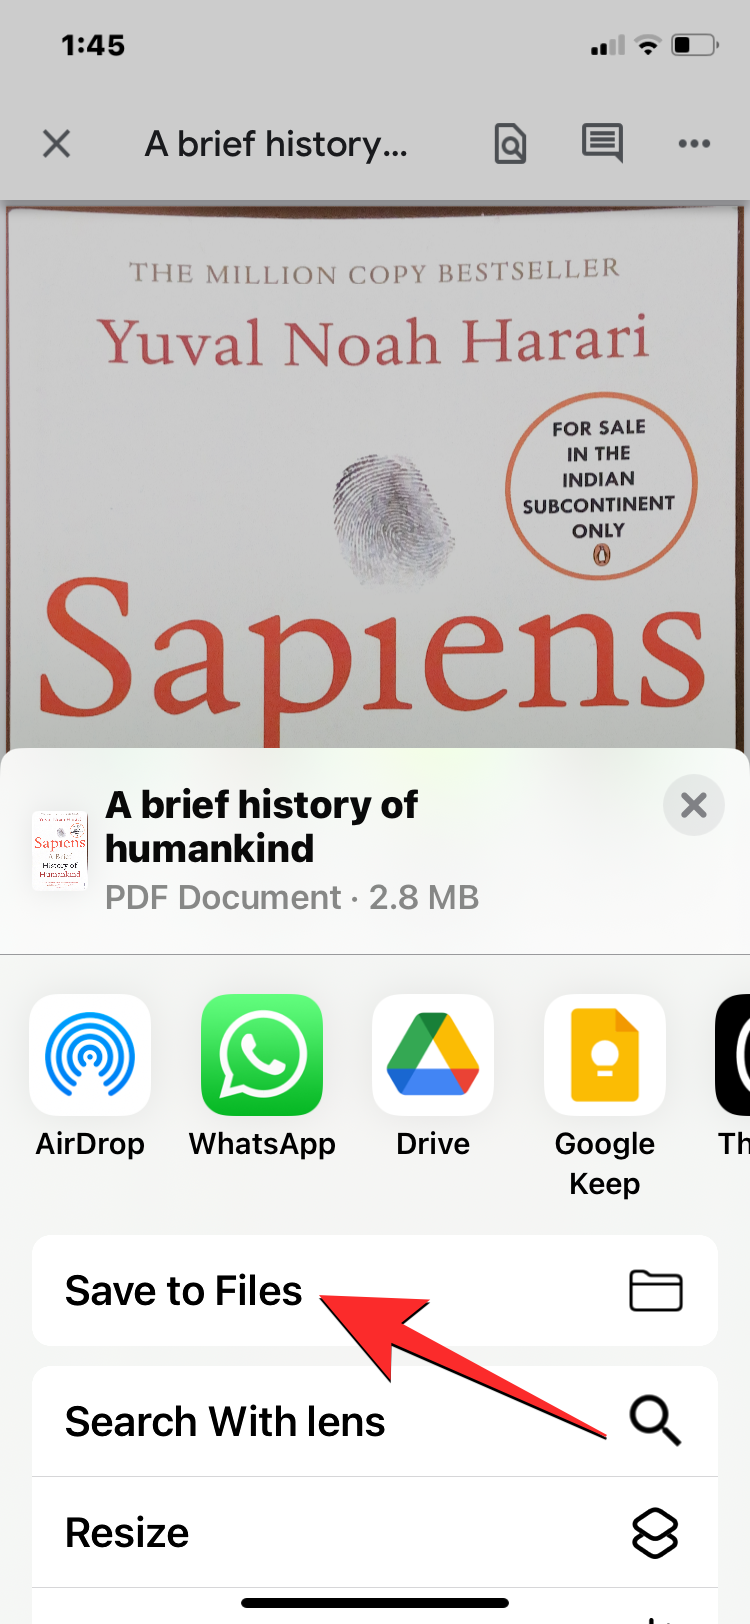
- To save this file on your iPhone, open it and go to the 3-dots icon > Open in > Save to Files.
- When the Files app opens, navigate to your desired location, rename the PDF file, and tap on Save.
- The scanned document will now be saved on your iPhone and you’ll be able to access anytime it inside the Files app.
With these methods, you can easily scan documents with ease on your iPhone.