Malware is a sneaky term for harmful software like viruses and spyware that wants to mess with your system or snatch your data. It’s super important to regularly check your Windows PC for malware to catch any bad stuff early. This way, you can keep your computer running smoothly and your personal info safe. Let’s make sure we keep those digital troublemakers away!
What is Malware?
Malware is basically a catch-all phrase for any nasty software or file that wants to sneak into a system or server and cause trouble. These troublemakers are pretty sneaky, considering they’re made to slip past defenses like protections and firewalls. That’s why there are special tools out there to catch them and kick them out of infected systems.
When it comes to the types of computer malware, think of it like a lineup of usual suspects: viruses, trojan horses, worms, ransomware, and spyware. Each one messes with your system in its own unique way. Some might mess with your data, others lock up your files and demand a ransom, and some are just out to perform digital vandalism, aiming to destroy data.
How to scan for malware on Windows 11 [2 methods explained]
If you suspect that your system has been infected with malware, then here’s how you can scan and remove the same on your computer.
Method 1: Using Microsoft Windows Defender
Windows Defender is the in-build security tool by Microsoft that is quite comprehensive and the only Anti-Virus you need in most cases. Here’s how you can scan your PC using Windows Defender.
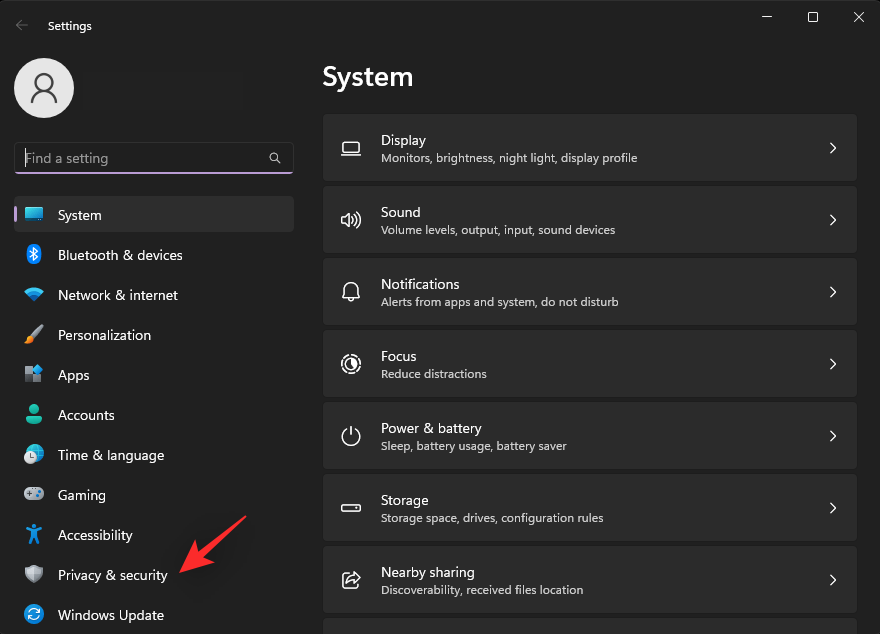
- Press
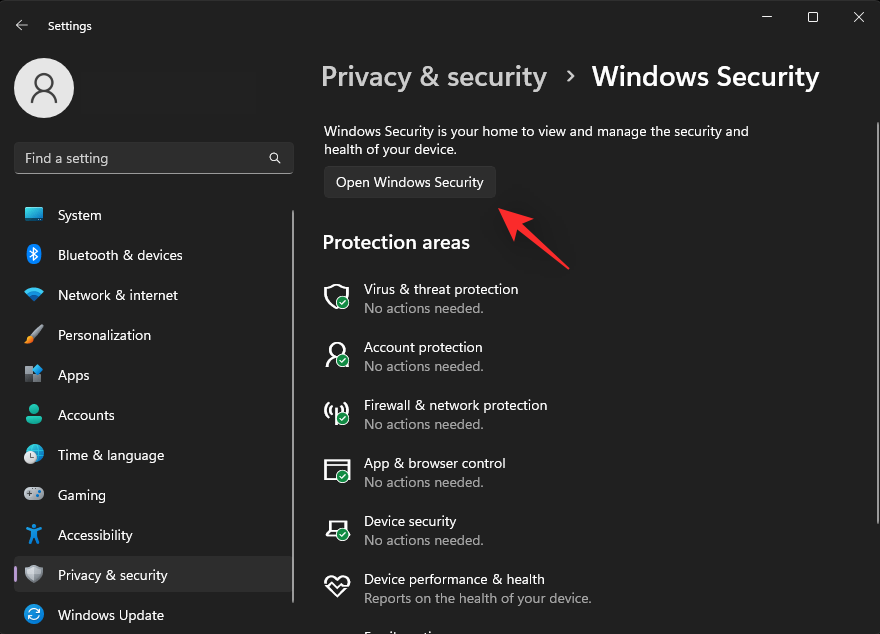
Windows + iand click Privacy & security.
- Click Windows Security.
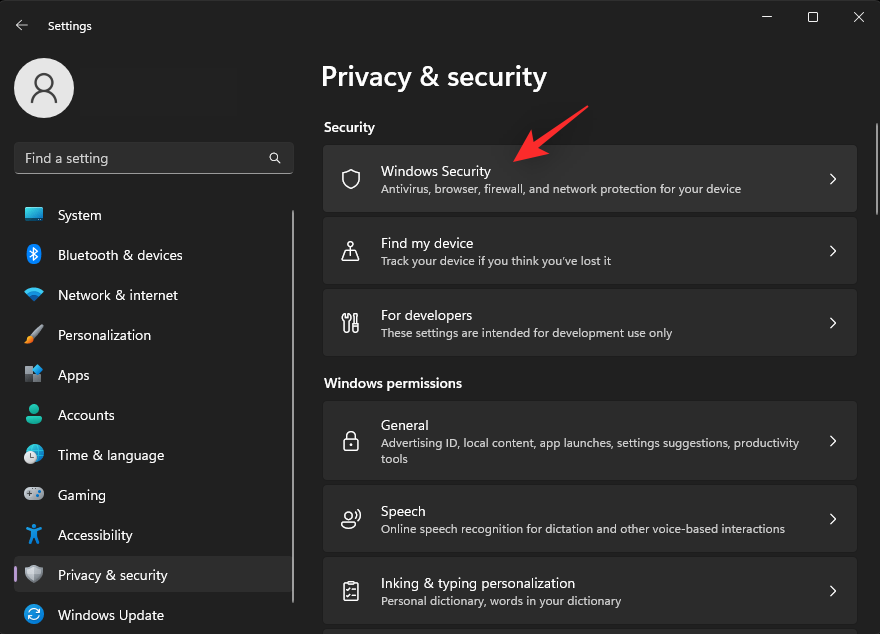
- Now click Open Windows Security.
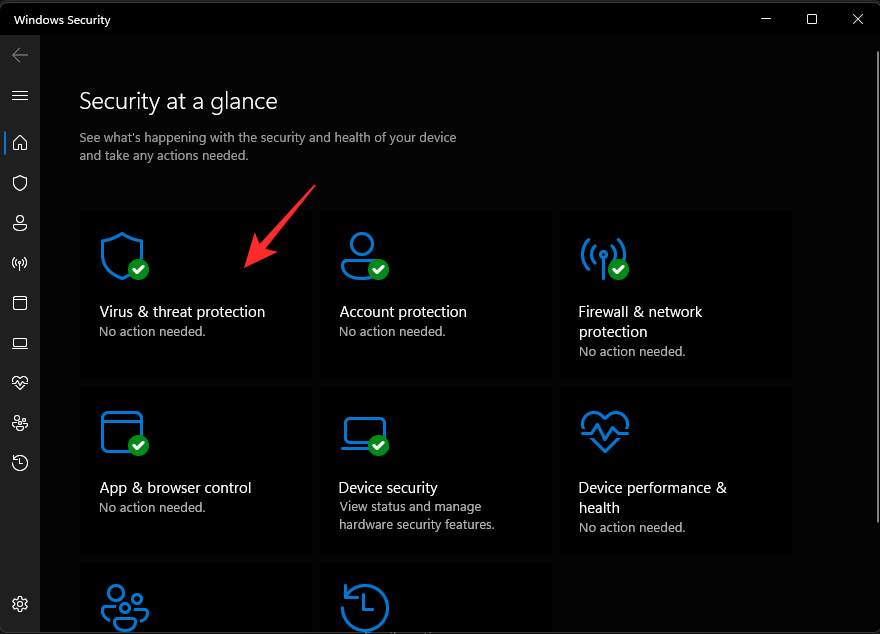
- Click Virus & threat protection.
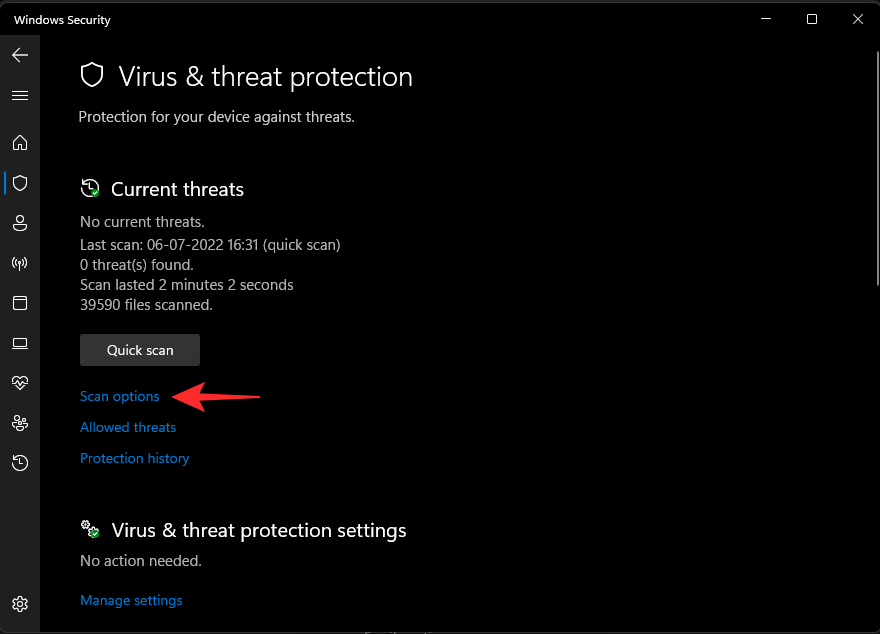
- Click and select Scan options.
- Now choose the type of scan you wish to perform from the following choices.
- Quick scan: This is a quick way to scan your system. Microsoft Defender looks for infections and compromised files in the most frequent locations used by malware.
- Full scan: This is a full scan of your system (excluding whitelisted locations) which checks all files and programs running on your system.
- Custom scan: You can use this scan if you suspect malware to exist in a particular location. You can also use custom scans to scan specific folders, drives, and partitions.
- Microsoft Defender Antivirus (offline scan): Some infections can be nasty and can not be removed through traditional means. In such cases, you can use the offline scan which runs in a special environment and uses the latest security definitions to check your PC for infections.
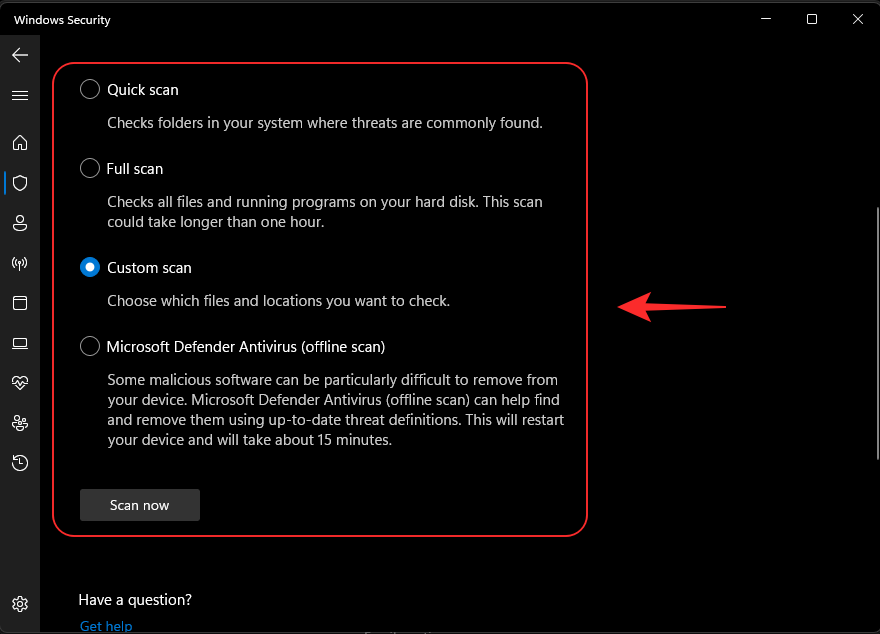
- Click Scan now once you’ve made your choice.
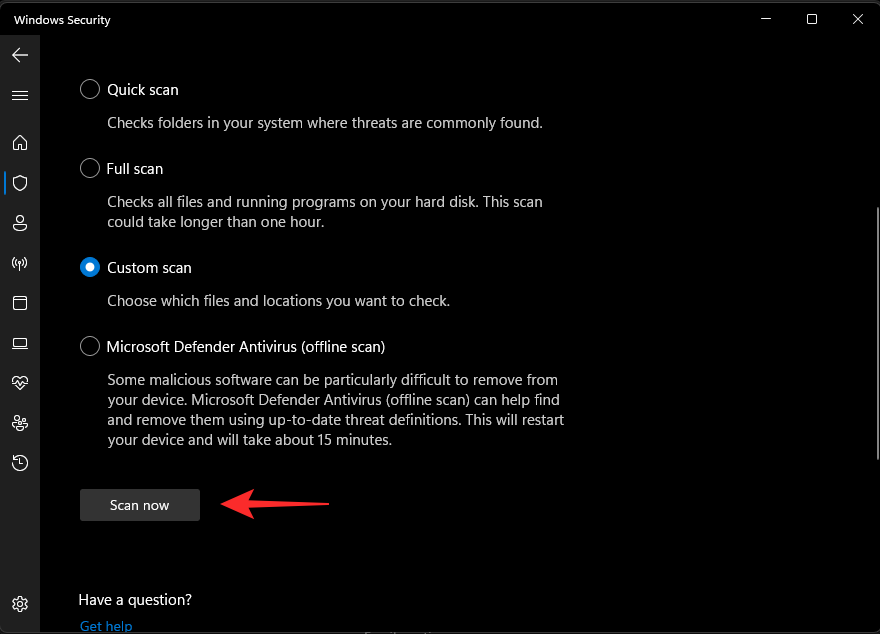
And that’s it! The chosen scan will now be initiated on your PC and you can continue working as usual, unless you are running an offline scan. The scan will check for infections in the background and notify you once it is complete. You can then check the report for quarantined items and deal with them accordingly.
Method 2: Using Microsoft Safety Scanner app
Malware, those pesky digital intruders, can wreak havoc on your computer. But don’t fret! The Microsoft Safety Scanner stands as a reliable tool to safeguard your system. Let’s delve into how you can utilize this tool effectively.
- Download Microsoft Safety Scanner app from Microsoft from here. Download the 32-bit or 64-bit version of the app depending on the PC’s own architecture (32-bit or 64-bit, that is).

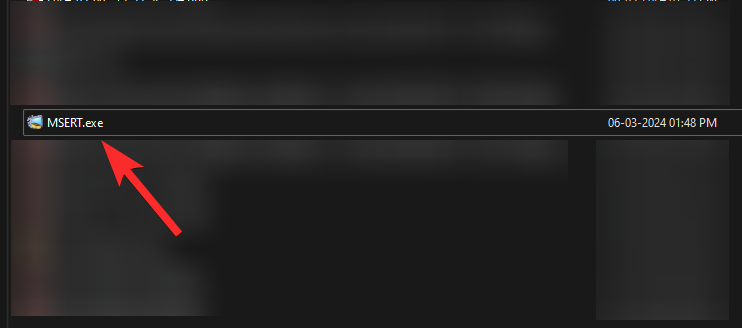
- Once downloaded, double-click on the MSERT file to start the scanning process.
- Allow the administrator permission.
- Accept the End user license agreement and then click Next.
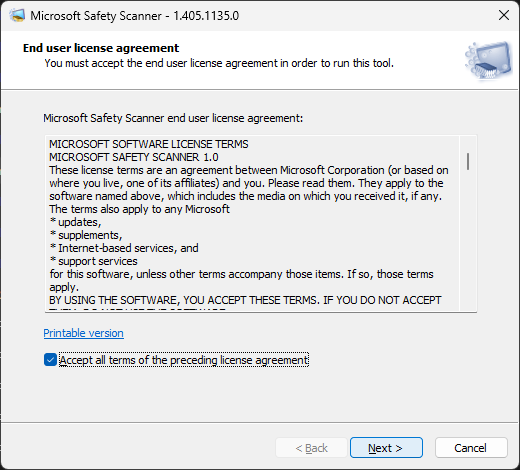
- Click Next again.

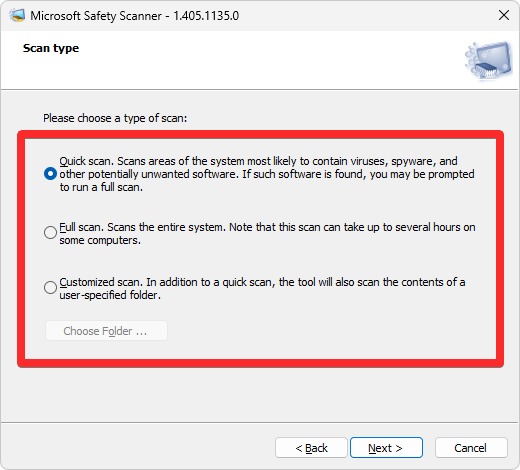
- Select from the three options:
- Quick Scan: A swift inspection of areas most likely to harbor malware.
- Full Scan: A meticulous, deep dive into your entire system.
- Customized Scan: Target specific folders or drives of your choosing.
- Let the scan run. It may take some time. If your scan uncovers no threats, breathe a sigh of relief! Your system appears to be in the clear. If malware is detected, the Microsoft Safety Scanner will endeavor to remove it. However, further steps or specialized tools might be necessary in complex cases.
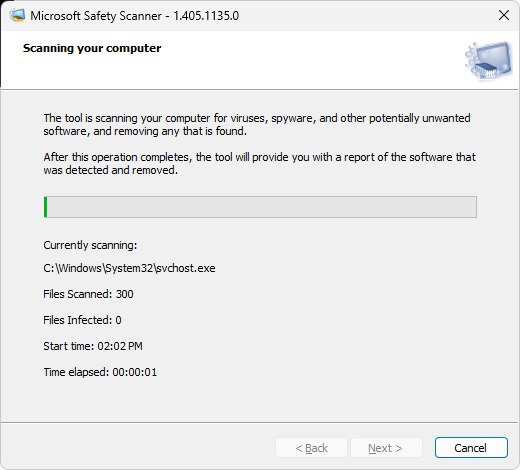
Note: The Microsoft Safety Scanner is a formidable on-demand tool, but it doesn’t substitute for a dedicated antivirus program offering real-time protection. The scanner works best when its definitions are up-to-date, therefore download a fresh copy for each use.
Method 3: Using Malwarebytes app
You can also use a third-party tool to scan and protect your system from malware. We recommend using Malwarebytes, but you can use one of the other alternatives mentioned below as well. Let’s take a look at how you can use Malwarebytes on your system.
- Download Malwarebytes using this link. Double click and run the setup once it has been downloaded to your PC.
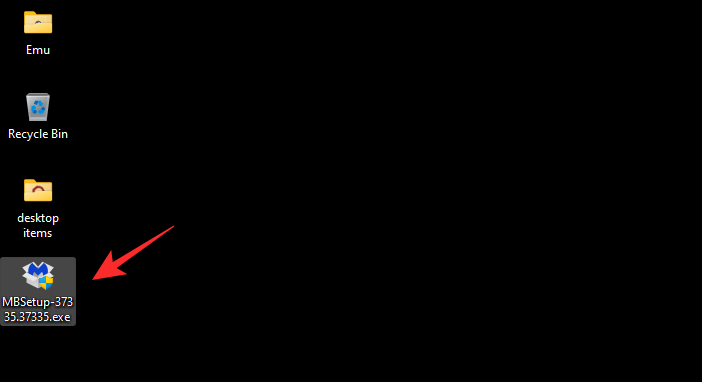
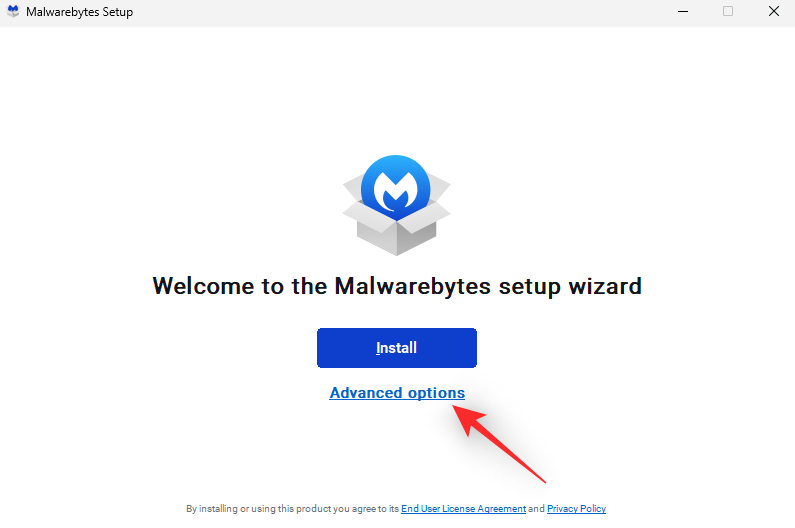
- Click Advanced options.
- Click Browse and choose an install directory for Malwarebytes.
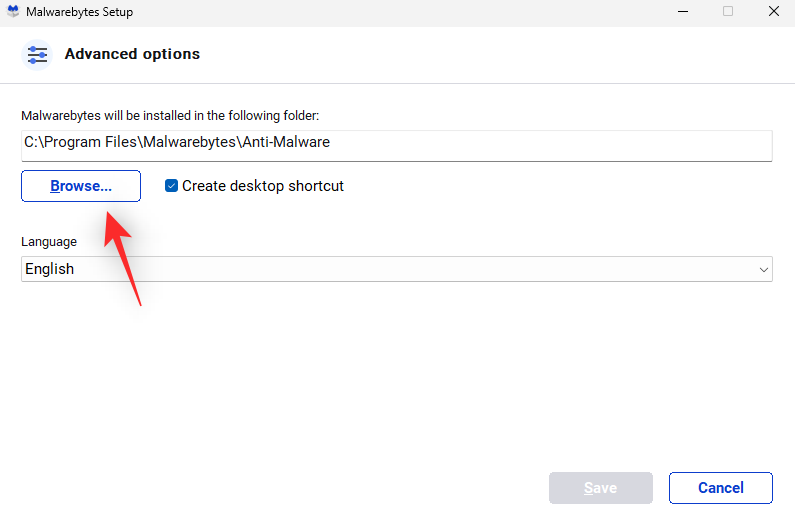
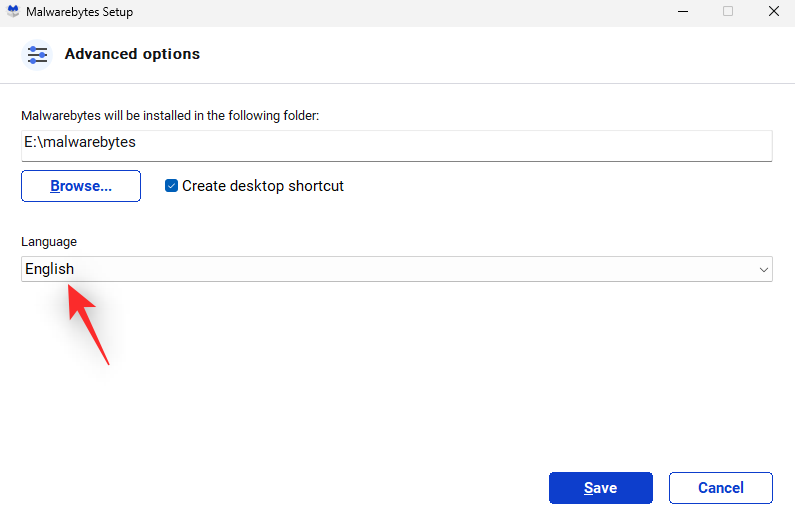
- Click the drop-down menu for Language and choose your desired language.
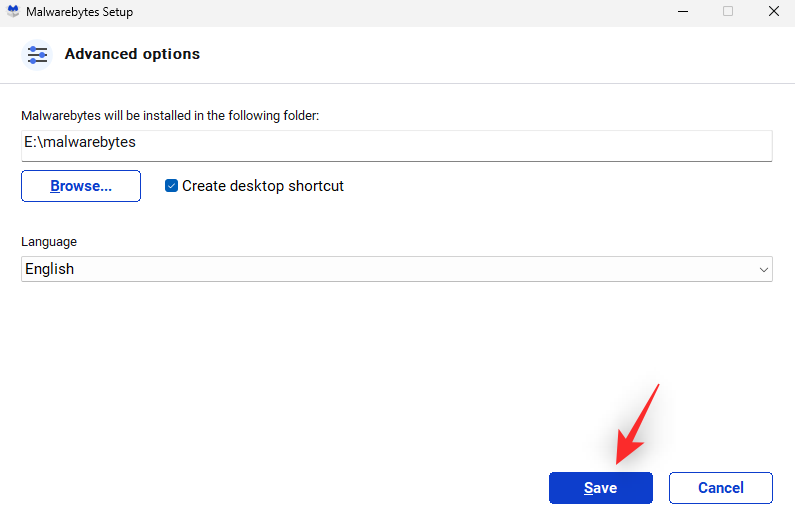
- Click Save.
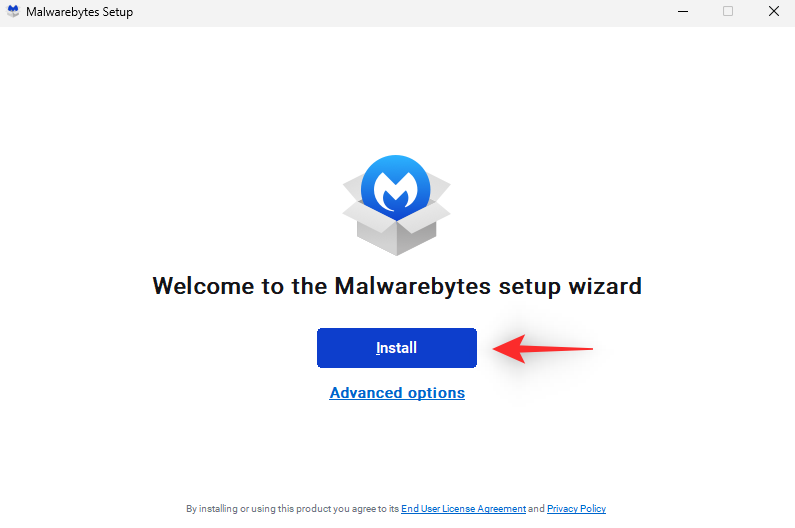
- Now click Install.
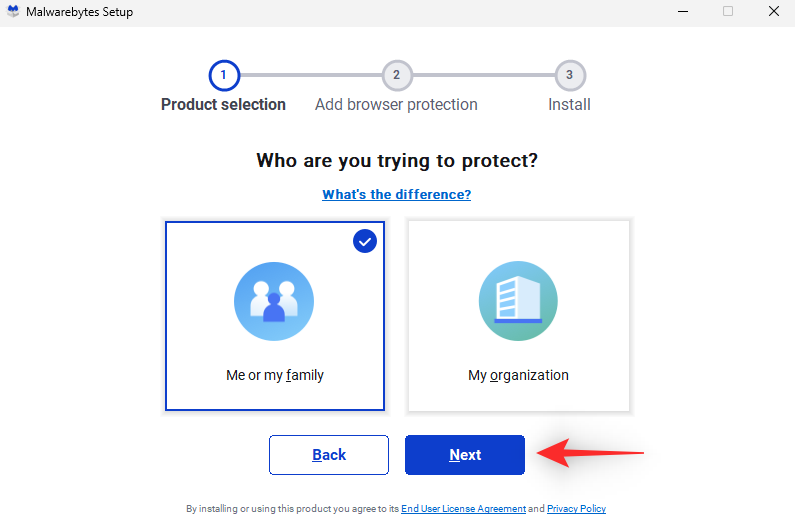
- Select one of the following options depending on how you wish to use Malwarebytes.
- Me or my family
- My organization
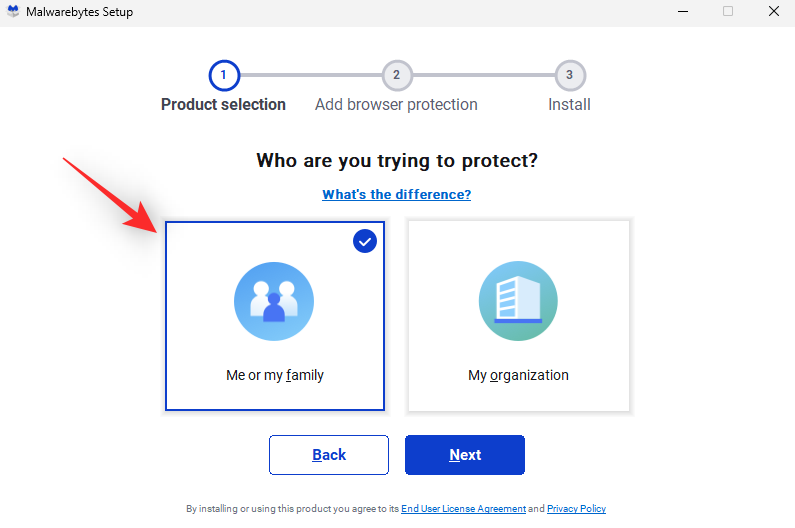
- Click Next.
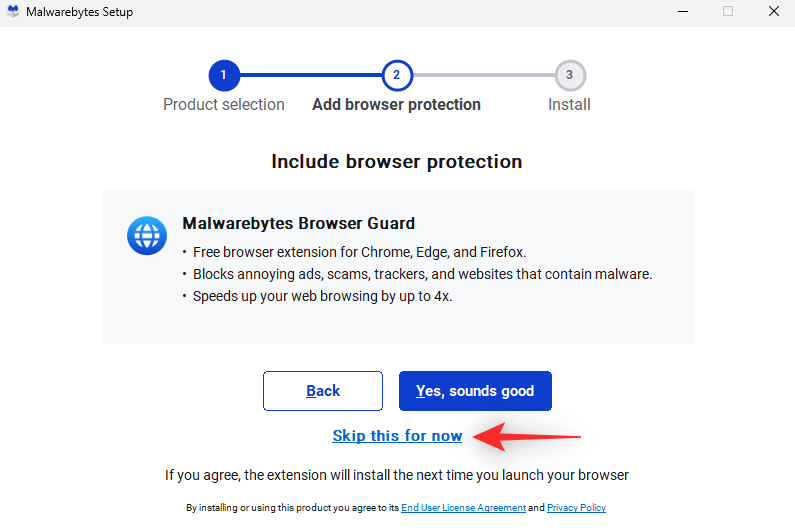
- Malwarebytes will now offer to install a browser extension for popular browsers. If you wish to install it on your system then click Yes, sounds good, or Skip this for now if you wish to skip it.
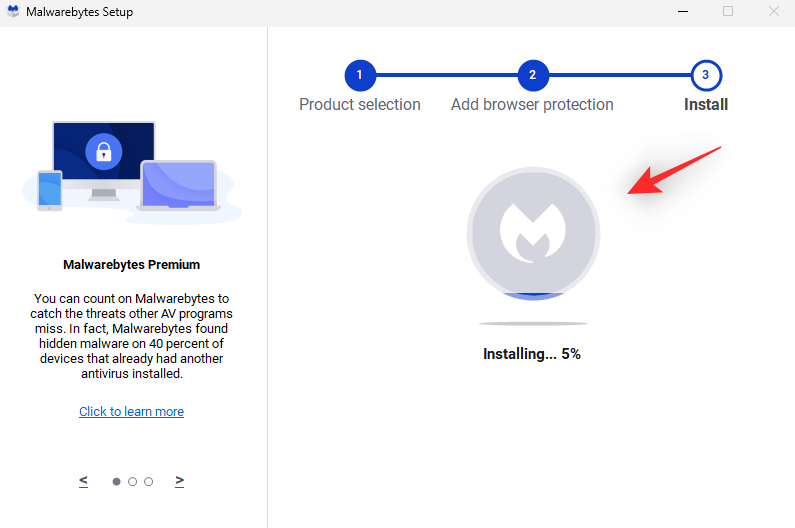
- Malwarebytes will now install on your system. This can take some time depending on the available resources and your network bandwidth.
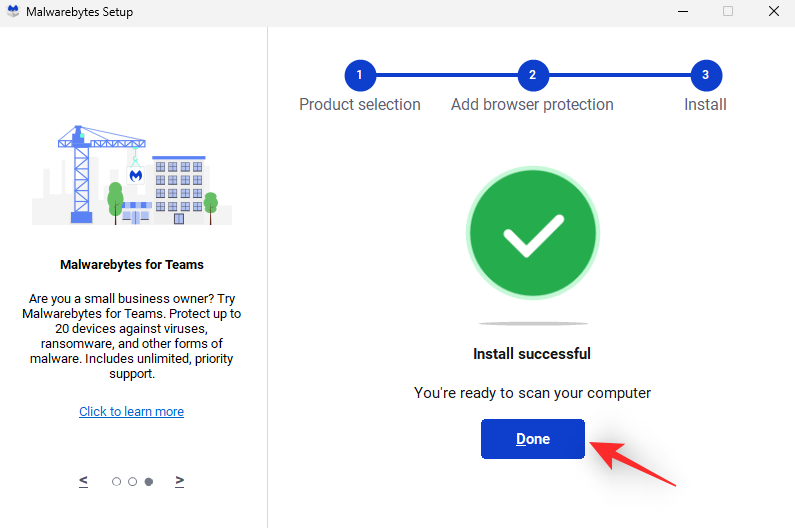
- Once the installation finishes, click Done.
- Malwarebytes should automatically launch on your system now. Once launched, click the Scanner widget.
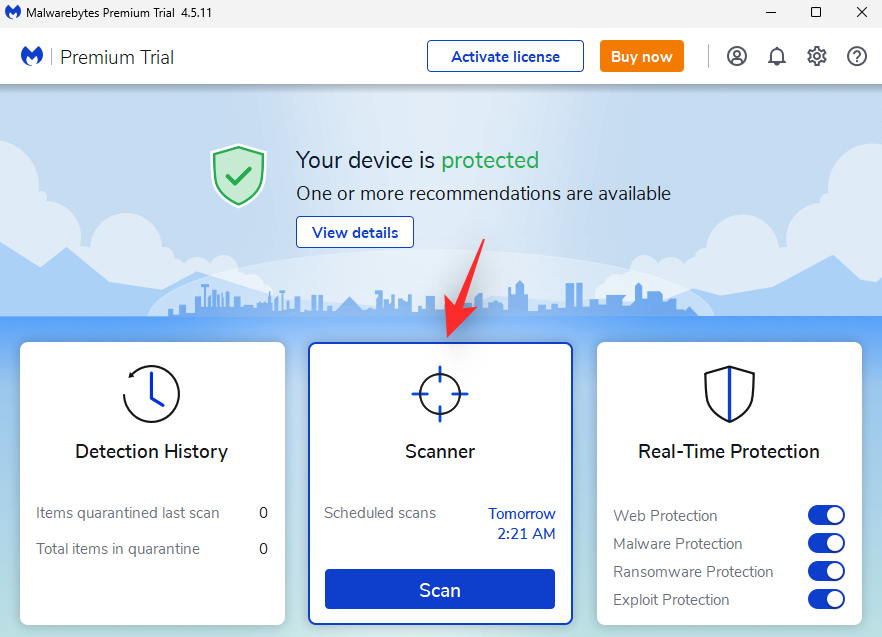
Note: Do not click Scan as it will initiate a quick scan on your system instead. - Click Advanced scanners.
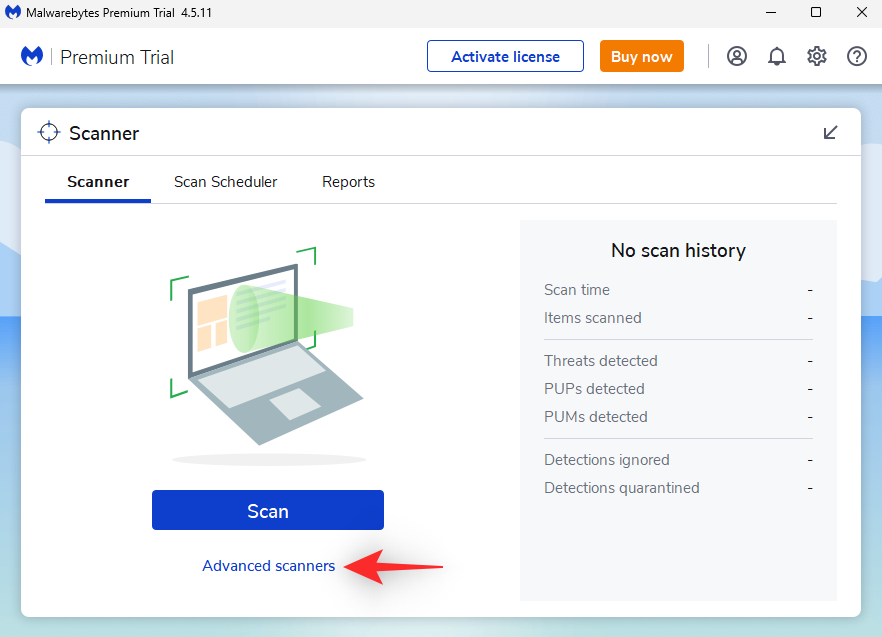
- Click and select the type of scan you wish to perform on your system from the following options.
- Quick Scan
- Custom Scan
- If you selected Quick Scan then simply click Scan under the same (else, jump to the next step for the “Custom scan” option). This will initiate a quick scan of your system and will check for infections in commonly found places. You can now skip the steps below and wait for the scan to complete. Malwarebytes will automatically notify you once it is done and present you with a report for the same. You can then choose to handle your quarantined items as needed.
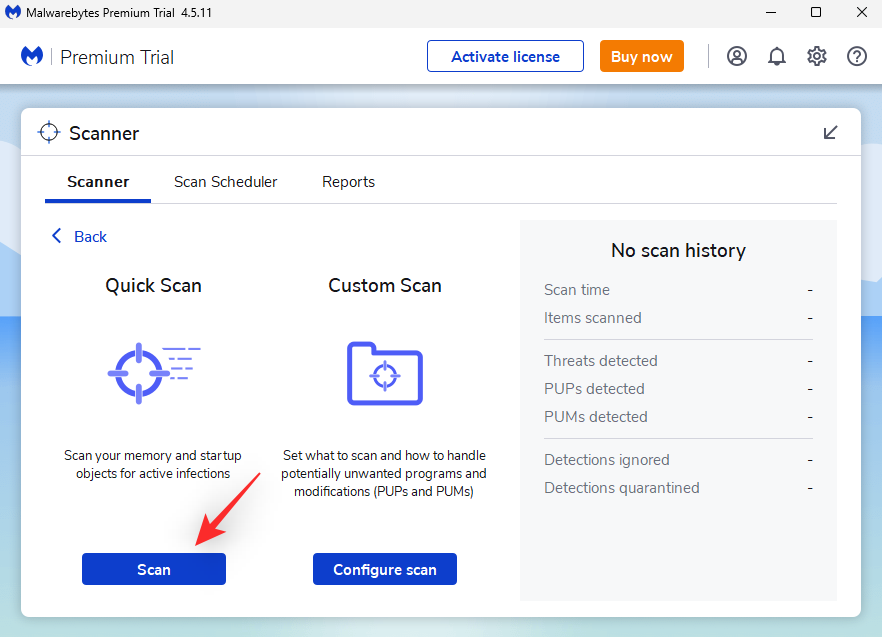
- If you selected Custom Scan then click Configure Scan instead.
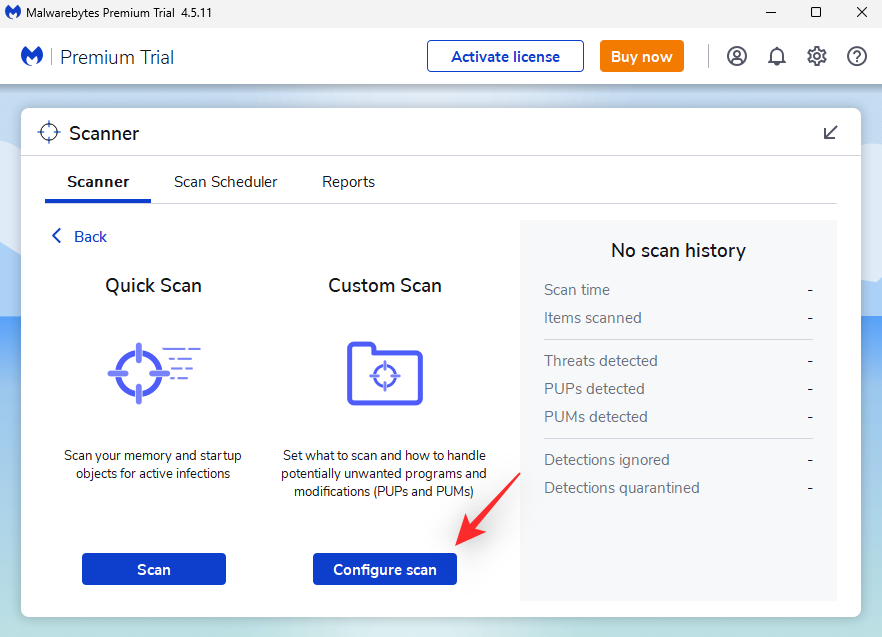
- Now check the boxes for the following options depending on how thorough you wish your scan to be.
- Scan memory objects
- Scan registry and startup items
- Scan within archives
- Scan for rootkits
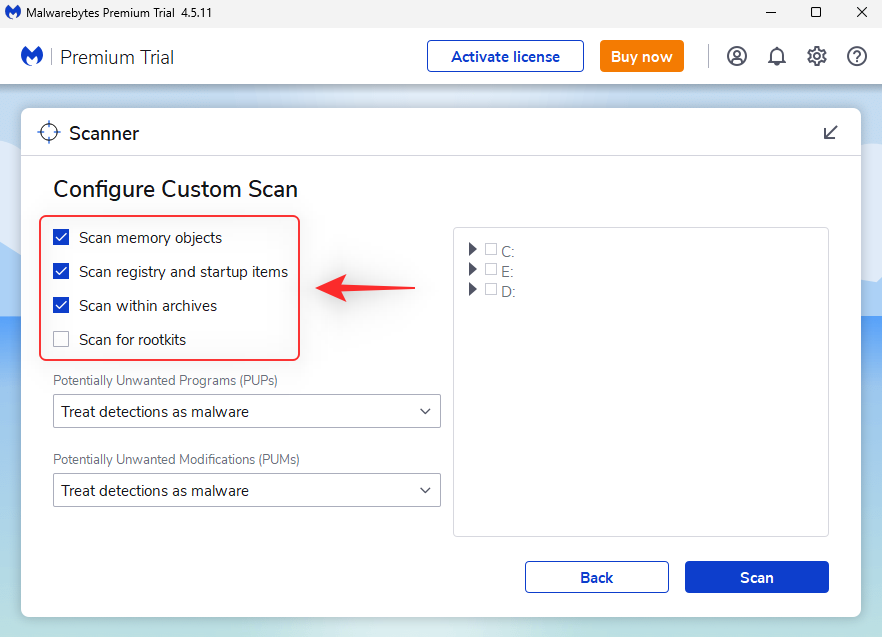
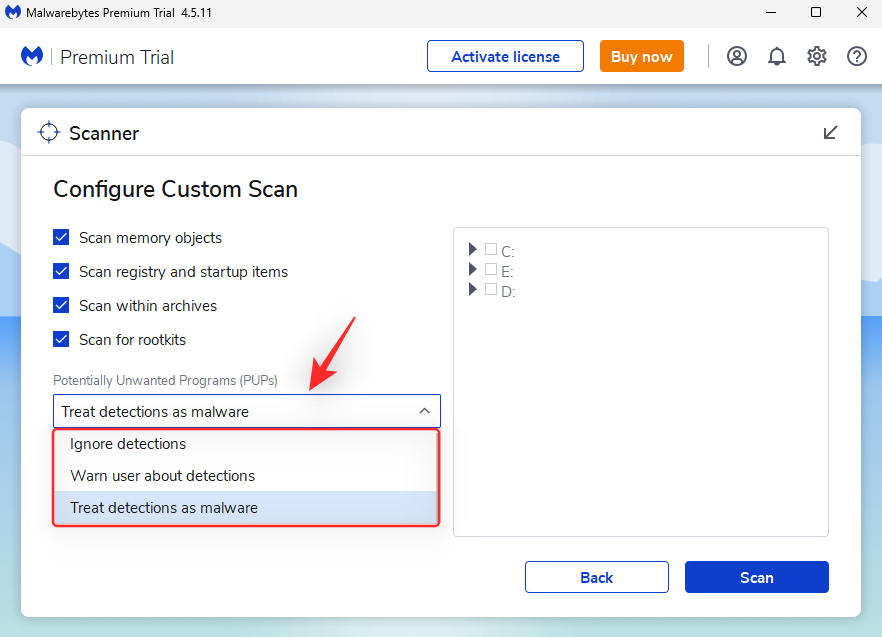
- Now click the drop-down menu for Potentially Unwanted Programs (PUPs) and choose one of the following options depending on how you want such programs to be treated. PUPs are commonly found in malicious software and programs with ulterior motives. They aren’t as serious as malware infections but can still steal and log your data in the background.
- Treat detections as malware: This option will quarantine all PUPs found on your system during the scan.
- Warn user about detections: This option will report you of found PUPs on your system without quarantining them.
- Ignore detections: This option will ignore all PUPs found on your system.
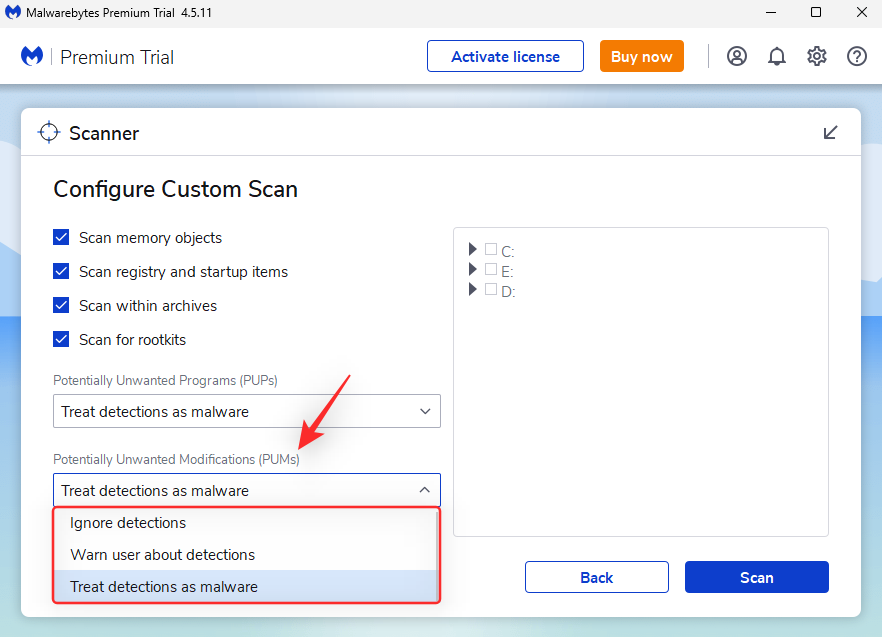
- Similarly, click the drop-down menu for Potentially Unwanted Modifications (PUMs) and select an appropriate option. PUMs are malicious modifications that might exist on your system. Such modifications can compromise security, whitelist infections, and enable the running of restricted programs and scripts.
- Treat detections as malware: PUMs will be quarantined during the scan.
- Warn user about detections: PUMs will not be quarantined and fixed during the scan. You will only be notified about them in the final report.
- Ignore detections: PUMs found on your system will be ignored.
- Now check the boxes for the drives you wish to include in the scan on your right.
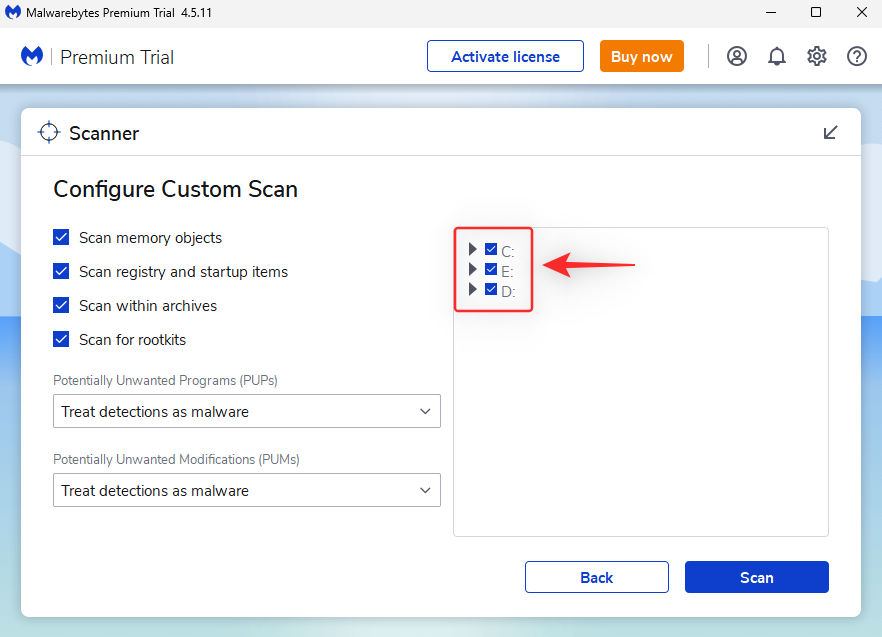
- You can double-click a drive and expand it to specify a custom directory where you wish to perform the scan. Once you’ve selected all the locations you wish to scan, click Scan.
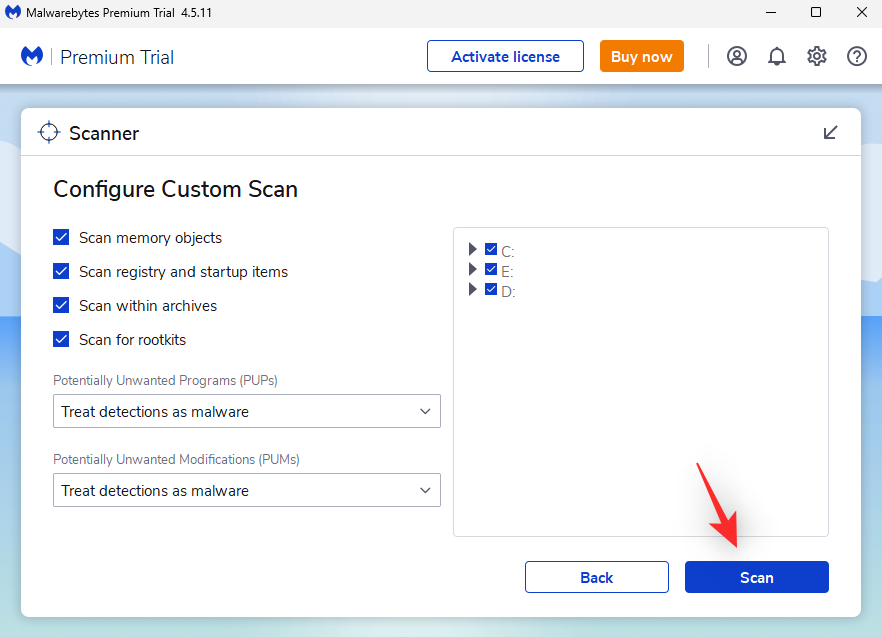
- Malwarebytes will now perform a custom scan on your system. You can continue using your PC as usual while the scan happens in the background. Once completed, Malwarebytes will present you with a final report of scanned files and quarantined items. You can then choose to treat your quarantined items as needed.
And that’s how you can use Malwarebytes to scan your system for infections on Windows 11.
Other third-party alternatives
The world of Anti-Viruses has been saturated with numerous clients and tools that all claim to free your PC of malware infections. Thus it can be a bit daunting when looking for alternatives that better fit your current needs. Here are our top 3 recommended alternatives for a third-party Anti-Virus for Windows 11.
Norton AntiVirus
Norton is a long-standing security provider for all platforms be it Windows, Mac, Android or iOS. The company has been in the business since 1991 and offers comprehensive security plans for both individuals and organizations.
Avast Antivirus
Avast is another antivirus on the market with comprehensive protection under its free plan. The tool also offers paid plans with enhanced security features for all its users. Avast Antivirus is available for Windows, Mac, Android, Linux, and iOS.
AVG
Our last pick is the AVG antivirus. Although not as popular as our other picks, AVG offers a suite of comprehensive scan options under its free plan. It also has a simple UI which makes it easier for novice users. It is currently available for Windows, Mac, and Android.
How to whitelist a file from being scanned by Windows Defender
There might be times when Windows Defender misidentifies a file as malware on your system. This could be a custom script, app, or program that you have been working on. In such cases, you can choose to whitelist the same from all future scans to ensure that the concerned file or folder is no longer misidentified on your system. Follow the steps below to help you whitelist a directory for Windows Defender.
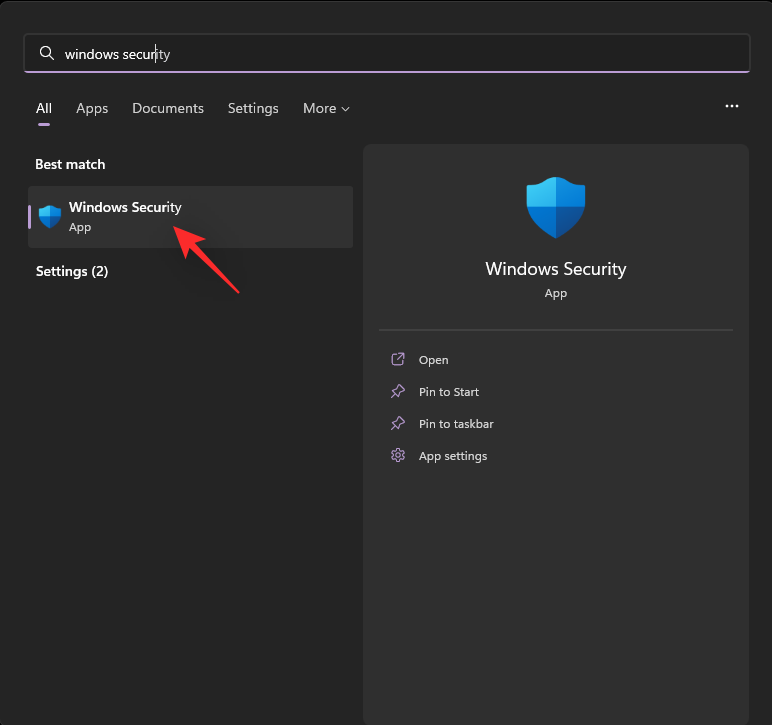
- Launch the Start menu and search for Windows Security. Click and launch the same from your search results.
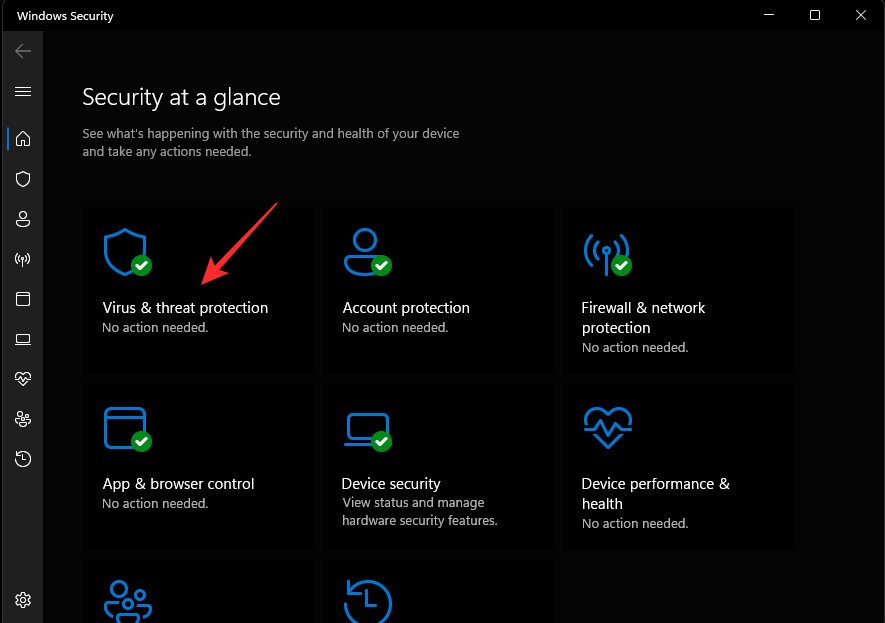
- Click Virus & threat protection.
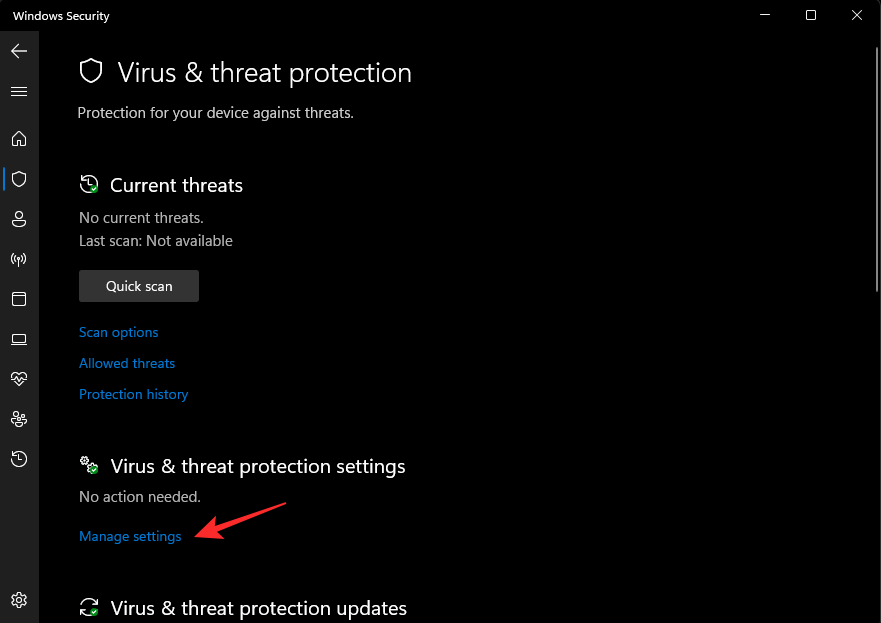
- Now click Manage settings under Virus & threat protection settings.
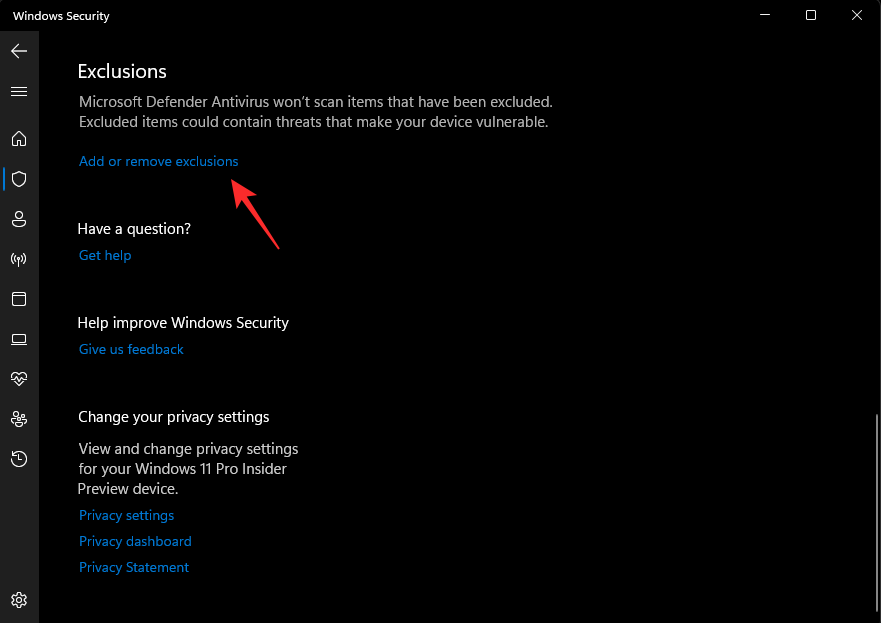
- Scroll to the bottom to find Exclusions. Click Add or remove exclusions.
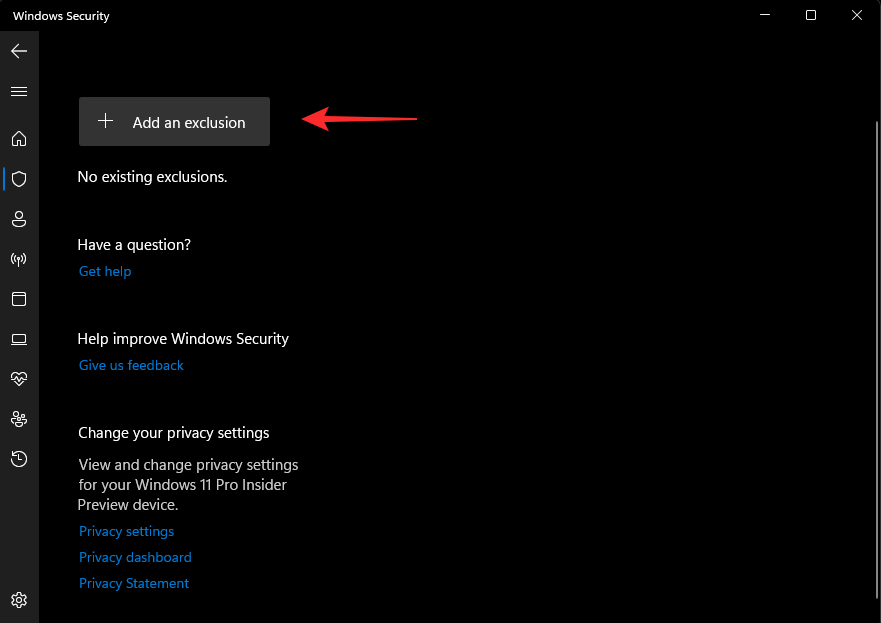
- Click + Add an exclusion.
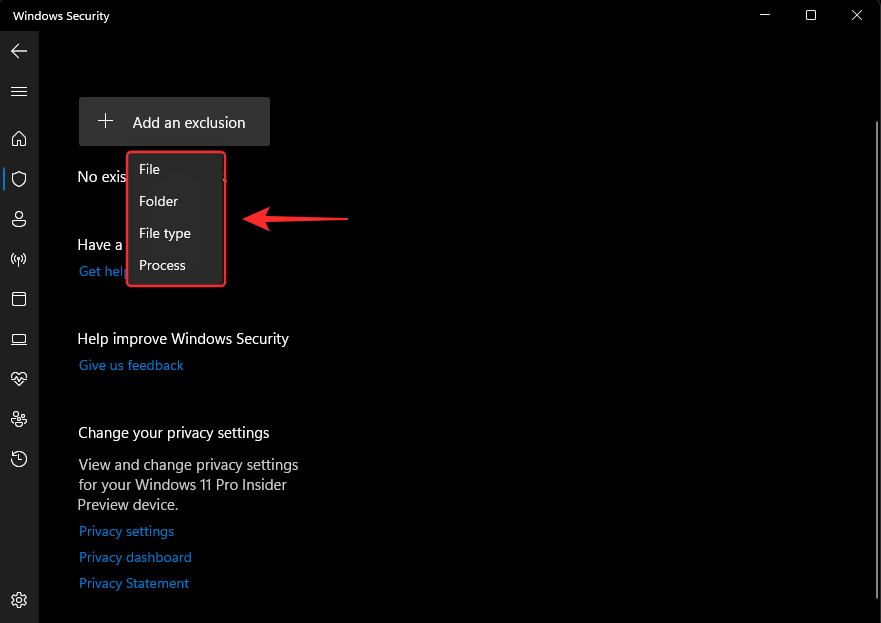
- Now select one of the following options depending on the type of item you wish to exclude from scans. We will be using a Folder for this example.
- File
- Folder
- File type
- Process
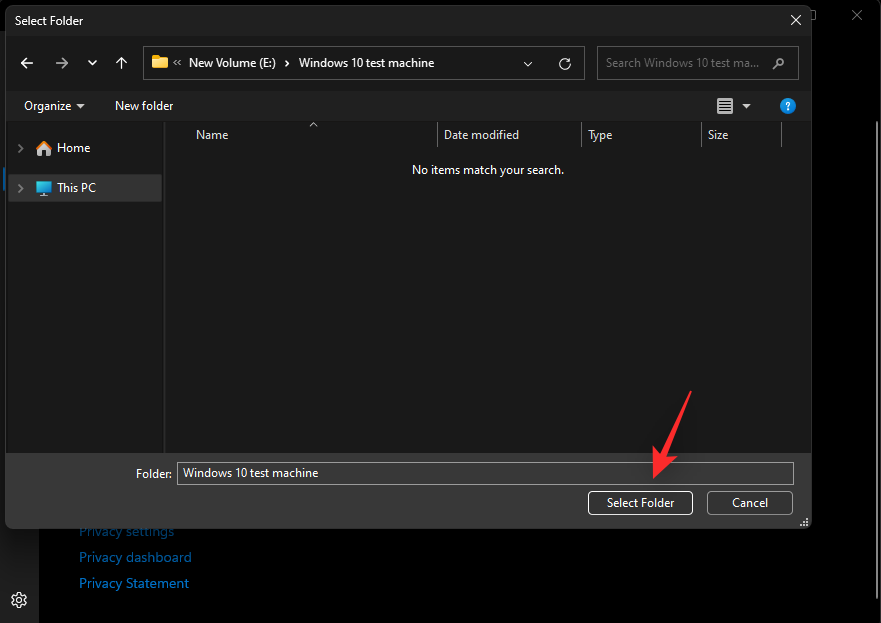
- Navigate and choose the desired folder you wish to exclude from scans. Click Select Folder.
- And that’s it! The selected item will now be added to your list of exclusions.
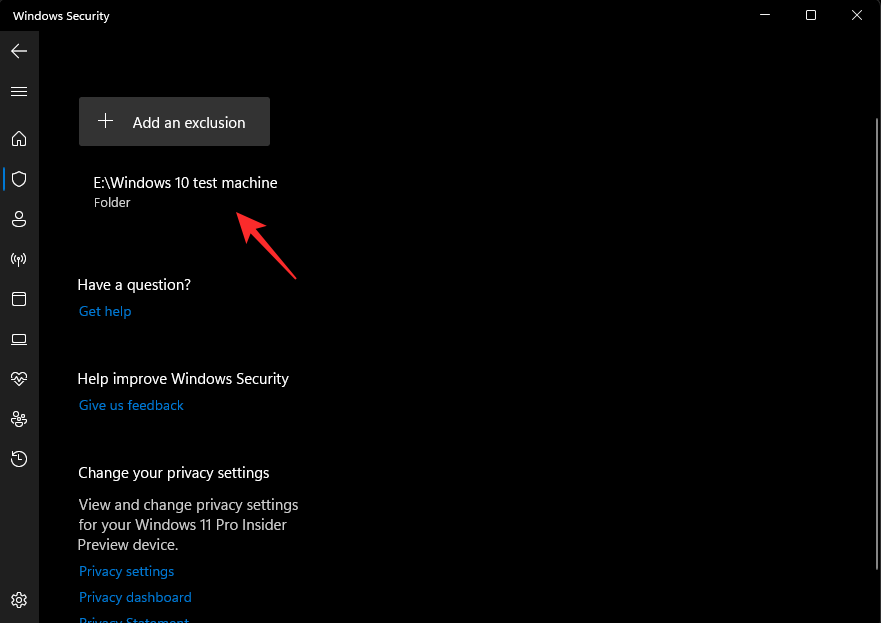
- Continue excluding more items on your PC using the steps above if needed. Simply close the Windows Security app once you’re done.
What are the symptoms of a malware-affected system?
There is no definitive list of symptoms that you can always check to verify if your system has been infected or not. Depending on your system and setup you might have a lot of symptoms to diagnose your issue or no symptoms at all. Here are some common signs that you can look for if you suspect your system to be infected with malware.
- High resource usage
- Random crashes
- Random BSODs
- Fans ramping up even if your PC is idle
- Captcha verification needed to access common websites
- Slow network speeds on a specific device
- Unusually warm or hot PC
- PC randomly freezing or hanging
- Missing files or data
- Unidentified programs running on your system
- Unidentified programs installed on your system
- Changes to your system settings
- Compromised social media and email accounts
- Pop-up ads where there should be no ads
- Browser redirects to phishing versions of common websites
If your system shows either of these symptoms it would be a good idea to perform a malware scan as soon as possible.
Should you keep more than one Anti-Virus on your PC?
No, having multiple Antiviruses does not offer any additional protection and only plagues your system with high resource usage. Running multiple malware scans in the background can be quite taxing on most PCs and can significantly reduce the life of your SSDs. Thus we recommend you use only one Antivirus on your system.
We hope this post helped you easily scan your Windows 11 PC for malware. If you face any issues or have any more questions, feel free to drop them in the comments below.


