Since its inception, Google has been doing all it can to be more inclusive. Its mobile operating system, Android, is laden with accessibility features, and it continues to push out new apps and services to make the environment more welcoming. Today, we’ll take a look at one such venture; tell you all you need to know one of the finest accessibility apps out there: Google Live Transcribe.
Related: How to Set Google Keep Reminders for Home and Work Locations
What is Google Live Transcribe
Google Live Transcribe is an accessibility app/feature that is meant to offer respite to help individuals who are deaf or hard of hearing. The app is excellent at canceling out ambient disturbances and converts speech and sound to text on your screen.
Not only does Google Live Transcribe give you an edge in day-to-day conversations through speech-to-text, but it also brings you a potentially life-saving option in the form of ‘Sound notifications.’ It notifies you about alerts in your home, such as the smoke alarm or when your baby cries. By properly configuring the two portions of the app, you can have complete peace of mind, in and outside your home.
How does Live Transcribe translate sound?
Speech to text applications have been around a while now, but the way Google Live Transcribe handles ambient sound is truly out of the ordinary. When you’re in an active conversation with someone or are surrounded by people, it’s important to read the subtler notes, which aren’t necessarily texts. Google Live Transcribe reads these sounds whenever possible and shows them as text on your screen.

For example, if it recognizes the sound of people laughing, it’ll show that clearly on your screen. Similarly, you can hear the doorbell, music, and even the fire alarm.
Related: Some Google Keep tips to know
How to get Google Live Transcribe
If you have a Google or Samsung device, you already have the app or feature pre-installed on your device. You can access it by going into ‘Accessibility’ in settings or tapping the separate app icon on the app drawer.
Else, if you don’t see the Live Transcribe application on your smartphone, you could simply go to the Google Play Store and get it for free. Click on this link to download the Live Transcribe app.
Related: 10 Best Google Lens Image Search Tips and Tricks
How to use Live Transcribe to convert speech to text
Now that you know a little about Live Transcribe, we’ll tell you how you could use it to your advantage.
Since it’s an accessibility feature, Google has made Live Transcript as straightforward and clutterless as possible. All you have to do is launch the app or service, give it access to your microphone, and you’ll be set.
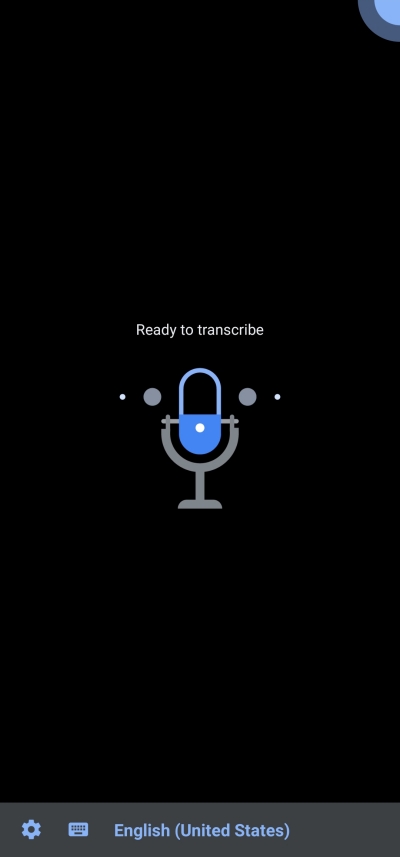
It’ll automatically start changing speech into text. The font size, by default, is quite big, which makes the whole thing easy to read. Also, you can scroll down to the next page by tapping on the down arrow at the bottom right corner of the window.

If you notice carefully, you’ll also find a little pulsating icon at the top-right corner of your screen. That meter indicates the noise level of your surrounding: ambient noise. Additionally, you could also copy the entire or bits of the transcript if you wish. Simply press and hold the text you want to copy and tap on ‘Copy’ when the options bar pops up.
Related: How To Use Google Assistant To Run Tasker Tasks
How to reply back using Google Live Transcribe
If you don’t feel comfortable replying back, verbally, you could use Google Live Transcribe to get your message across.
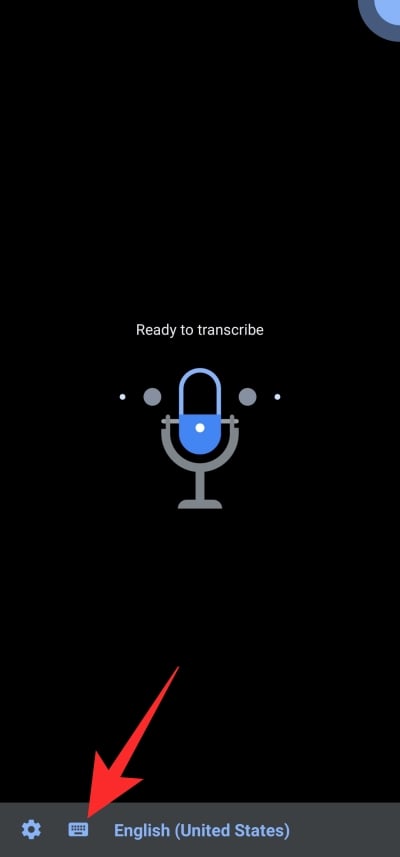
To reply, first, launch the Google Live Transcribe app and tap on the keyboard button right in front of you.
Now, type the reply on the screen and show it to the people conversing with you.
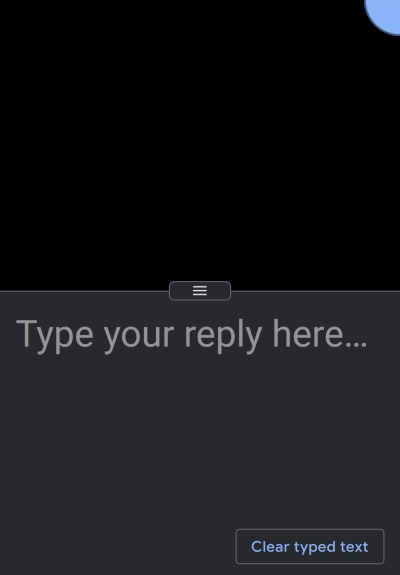
To go back, simply hit the back button.
How to configure sound notifications
Configuring sound notifications is rather straightforward. All you have to do is place the phone in the concerned room, minimize the ambient sound, and ensure that nothing is blocking the phone. When it detects a menacing sound, it’ll vibrate the phone and will trigger your flash, if supported. Additionally, if you have a connected wearable device, you’ll get the notification on that device as well.
To turn it on, launch Google Live Transcribe and tap on the settings icon.
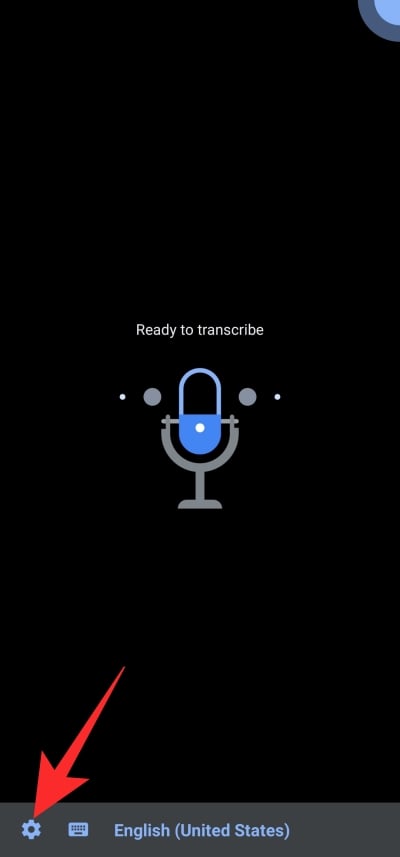
Now, tap on ‘Open sound notifications.’

Hit ‘Next’ and ‘Turn on,’ respectively, to configure the service. You could also choose to ‘Try a demo’ to see the feature in action yourself.

Related: How To Indent on Google Docs App and Web
Other little tips for Google Live Transcribe app
Now that you’re familiar with the most important settings, check out some of the little settings that may come in handy.
Save your transcripts
If you’re one of the many people who love to keep track of their conversations, you might end up getting frustrated with Google’s Live Transcribe app. Despite being a speech-to-text app, it doesn’t allow you to export transcripts as text files, which is a bit of a shocker. There is a ‘Save transcript’ toggle inside the app, but that only saves transcripts, locally, on the app, for three days.

You cannot access the files from outside of the app if you feel like it. Although inconvenient, it’s possible to save your transcripts to your device, in a separate text file. All you have to do is press and hold a word of the on-screen transcript and move the selection slider as you see fit.

Now, tap on ‘Copy’ to copy the text snippets and then paste them to your favorite word editor — Google Docs — for example. Finally, save the text file as usual.
Change text size
The default text size of the Google Live Transcribe Application is quite big, so, it’s understandable if you’re looking for a more understated feel. Thankfully, there’s a pretty straightforward way to increase or decrease the text size of the transcripts.
After launching Live Transcribe, tap on the Settings button and locate the ‘Text size’ slider. Pick from one of the five options.

Alternatively, you could go to ‘More Settings,’ where right at the top, you’ll see the option ‘Text size.’ Tap on it and pick from one of the five presets.
Hide offensive words
By default, Google’s speech-to-text system is pretty inclusive, meaning that it will recognize pretty much everything you throw at it, including profanity. If you’re not too thrilled with the idea of seeing the offensive words on your screen, you could turn on Live Transcribe’s built-in profanity filter.
To turn on the profanity filter, first, launch the Google Transcribe app and tap on the Settings button, and go to ‘More Settings.’

Scroll down until you see the ‘Advanced’ section.

Tap on it, and hit the toggle next to ‘Hide profanity.’

That’s it.
Change language
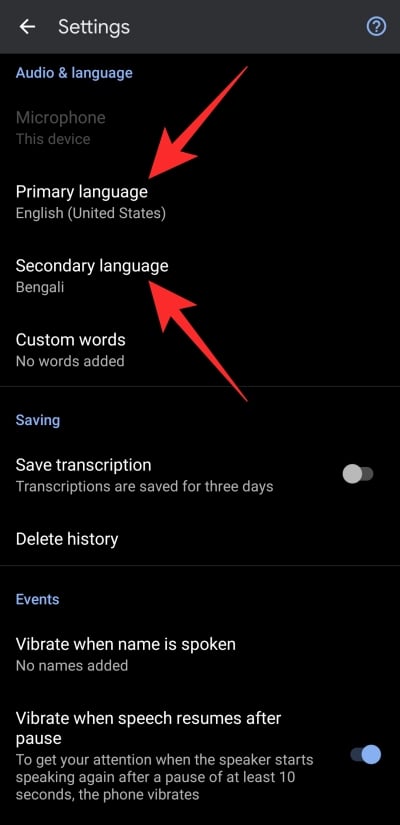
Since Google Live Transcribe is essentially a speech recognition tool, you’ll need to define the language dictionaries beforehand. For example, if your friends and families speak a mixture of English and Spanish at times, you could set English as the primary language and Spanish as secondary.
To do so, tap on the Settings icon and go to ‘More Settings.’

Now, tap on ‘Primary language’ and ‘Secondary language’ to change them, one by one.
Related: How To Block Someone on Google Chat and Hangouts Apps
Cut the chatter
Google’s next-level speech recognition opens up new avenues in Live Transcribe, and the ability to filter out a specific name is certainly one of them. When the name of the person is spoken during a conversation, your smartphone will vibrate automatically, prompting you to pay attention.
Configuring this setting is also pretty straightforward. First, launch the application and tap on the Settings button at the bottom of your screen, and go to ‘More Settings.’

Now, scroll down and locate the ‘Events’ banner. Tap on ‘Vibrate when name is spoken.’
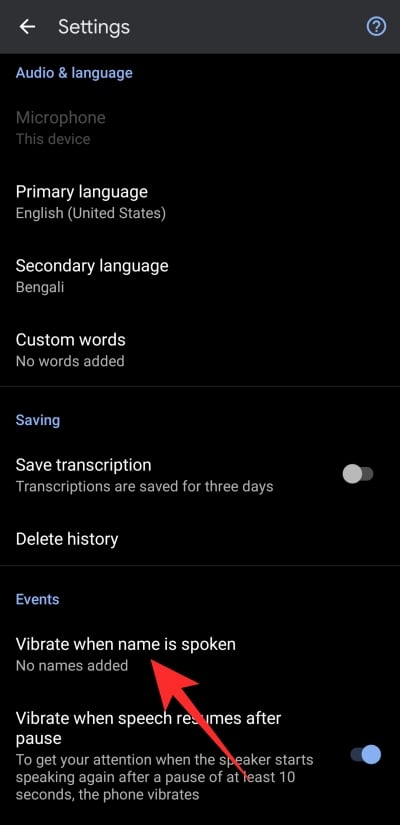
Tap on ‘Add name’ on the next page to turn it on.

Disable/Enable sound labels
Previously, we discussed how Google Live Transcribe manages to translate the sound around you to help you gel with the surroundings. It manages the desired results using sound labels, which get triggered when a specific sound signature is recognized. However, if you don’t find the labels to be as informative as they are intended to be, you could turn them off pretty easily.
After launching the application, tap on the Settings button at the bottom portion of the screen and go to ‘More Settings.’

Finally, under the ‘Events’ banner, toggle on/off ‘Show sound labels.’
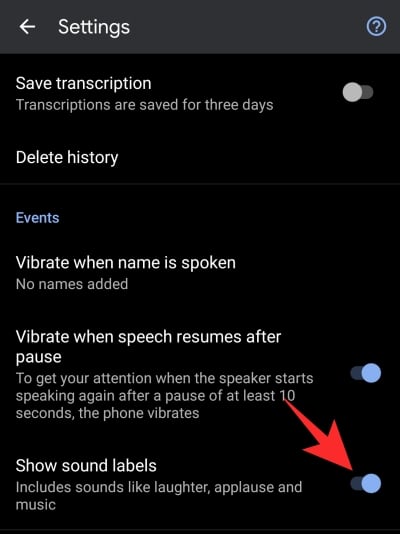
Sound labels would be turned off immediately.


