
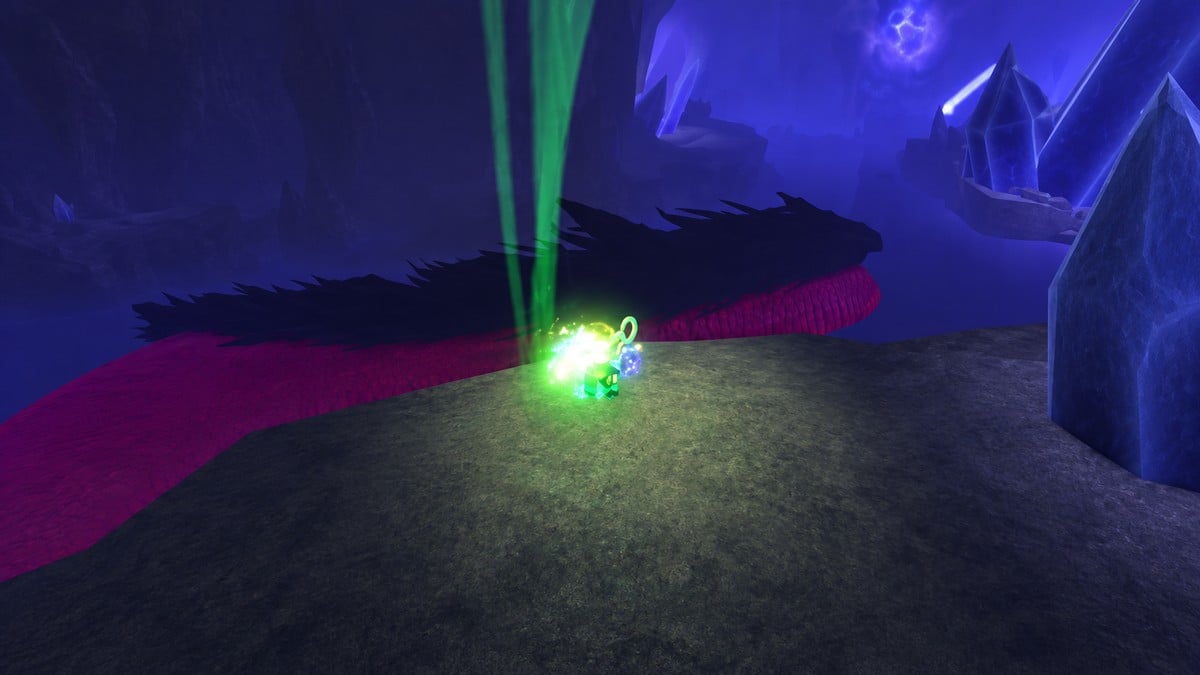
Complete Vaelor’s quests, unlock Obsidian Trench, finish its Bestiary including Skolopendra, then buy Chasm-Stalker from the central crystal pedestal.
The Chasm-Stalker unlock takes you through Mariana’s Veil’s regional fishing quests before sending you deeper into Obsidian Trench. Keep your regional rods available, because the descendant objectives and the gate riddle require specific equipment.
- Prepare Mariana’s Veil access and find Vaelor
- Complete the Mariana’s Veil descendant quests
- How to unlock Chasm-Stalker in Fisch
- Finish the Scylla quests and open the Obsidian gate
- Track the Obsidian Trench Bestiary and suppression
- Catch Veiled Charybdis and defeat Skolopendra
- Purchase Chasm-Stalker and equip the rod
- Frequently Asked Questions
Prepare Mariana’s Veil access and find Vaelor
Chasm-Stalker arrived with the September 19, 2026 Mariana’s Awakening update. Its questline starts with Vaelor, who stands on Roslit Bay’s shoreline near the dock marked Mariana’s Veil Location, at approximately -1415, 134, 482.
Vaelor’s opening stage, Chart the Veil, requires discovering all of Mariana’s Veil. After that comes Worthy of the Abyss, which sends you to his descendants across its deeper areas. You’ll need access through Veil of the Forsaken to finish their objectives.
If that older area is still closed, the prerequisite route begins at the south end of Calm Zone. A crack in the wall leads through a tunnel and a stone obstacle course to a large gate. Its pedestals require Magma Leviathan from Volcanic Vents, Frozen Leviathan from Challenger’s Deep, and Crowned Anglerfish from Abyssal Zenith. Placing those fish opens access to the Rainbow Pool.
The entrance at the back of Calm Zone leads to a chess-statue puzzle. Standing behind a statue moves it forward; standing in front moves it back. A statue glows green when it reaches its correct position.
The opened trapdoor leads to a room with a countdown to the initial Scylla boss fight. During the fight, collect the three white-marked bow pieces around the pool while avoiding Scylla’s health-damaging fireballs. The assembly point sits above the entrance, where placing all three pieces defeats the boss.
Death sends you back to the chess puzzle. You only need to defeat this initial boss once to fish in Veil of the Forsaken; the later Scylla Hunts are separate fishing encounters.
Complete the Mariana’s Veil descendant quests
Five descendants have regional objectives for you: Ignis, Glacius, Tenebris, Luminis, and Resonus. You can work through Volcanic Vents, Challenger’s Deep, Abyssal Zenith, Calm Zone, and Veil of the Forsaken in that sequence without treating it as an enforced quest order.
How to unlock Chasm-Stalker in Fisch
Finish the regional catches, solve the Scylla gate riddle, and tackle the encounters required for the trench Bestiary.
STEP 1/24
4%
Start the descendant questline at Roslit Bay

Speak to Vaelor near the Mariana’s Veil entrance to begin the questline..
STEP 2/24
8%
Reach Ignis in Volcanic Vents
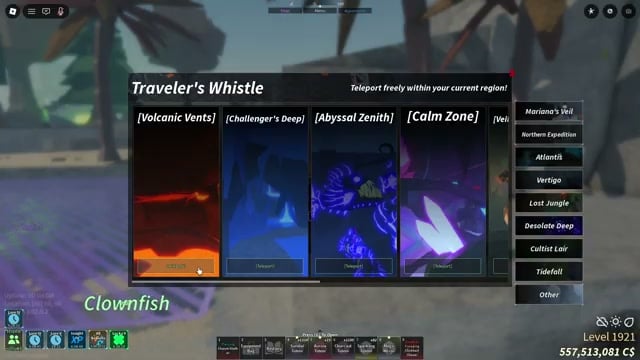
Follow the star marker across the lava platforms to Ignis, at approximately -3146, -2034, 4141, for Cinder and Ash..
STEP 3/24
12%
Complete Ignis’s Volcanic Rod catches
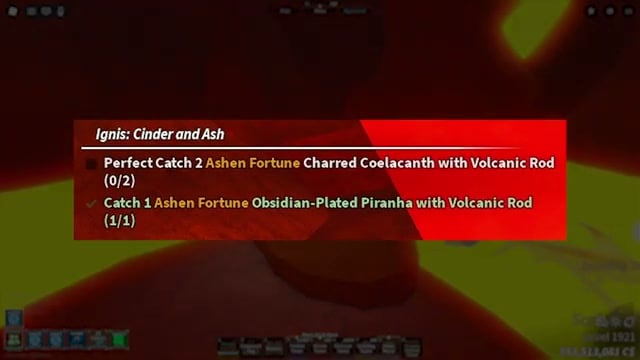
Use the Volcanic Rod to perfect catch two Ashen Fortune Charred Coelacanth and catch one Ashen Fortune Obsidian-Plated Piranha. Completing the quest awards Volcanic Gauntlets..
STEP 4/24
17%
Find Glacius in Challenger’s Deep
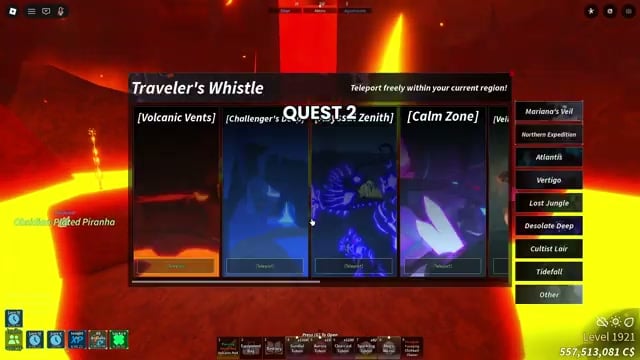
Travel to Glacius, at approximately 730, -3363, -1692, and accept Frozen Veins..
STEP 5/24
21%
Finish Glacius’s chilled catches

With Challenger’s Rod, catch three Chilled Hoarfrost Halibut and perfect catch one Chilled Glacial Gulper. Speak to Glacius again to finish the quest and receive Challenger’s Gauntlets..
STEP 6/24
25%
Reach Tenebris in Abyssal Zenith
Jump and glide to Tenebris for Twisted Wrath; Rod of The Zenith, which his objectives require, is available to purchase in this area..
STEP 7/24
29%
Land Tenebris’s Wrath fish
Use Rod of The Zenith to catch two Wrath Lumin-Lure Lanternfish and perfect catch one Wrath Void-Drifter Jelly, earning Abyssal Gauntlets..
STEP 8/24
33%
Accept Luminis’s Calm Zone quest
Find the white-hooded Luminis in Calm Zone and accept Shifting Colors..
STEP 9/24
38%
Complete the Prismize objectives
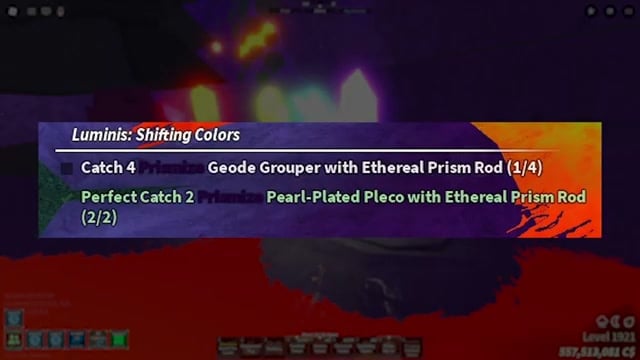
With Ethereal Prism Rod, catch four Prismize Geode Grouper and perfect catch two Prismize Pearl-Plated Pleco to earn Calm Gauntlets..
STEP 10/24
42%
Find Resonus in Veil of the Forsaken

Follow the glowing tunnels to Resonus on a rock pillar and accept Phantom Frequencies..
STEP 11/24
46%
Make Resonus’s perfect catches
Use Leviathan’s Fang Rod to perfect catch five Gargoyle Goby and three Wraith-Whisper Ray, earning Veiled Gauntlets..
STEP 12/24
50%
Equip the combined Mariana’s Gauntlets
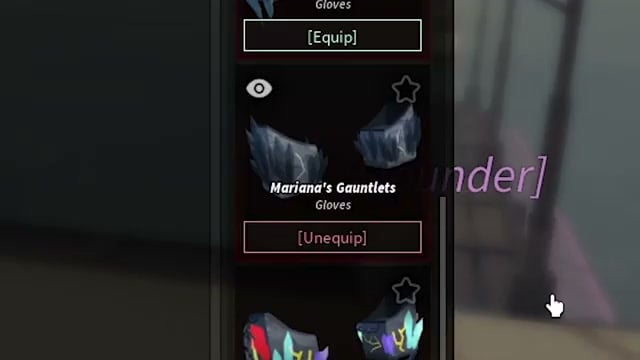
Finishing the descendant set unlocks Mariana’s Gauntlets, which combine the regional gauntlet passives in weakened form..
STEP 13/24
54%
Begin the Scylla quests and Obsidian gate route
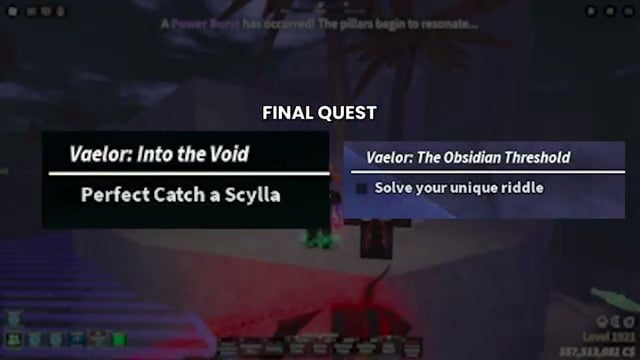
Return to Vaelor in Roslit Bay for the remaining stages, Into the Void and The Obsidian Threshold..
STEP 14/24
58%
Complete the Into the Void fishing objective
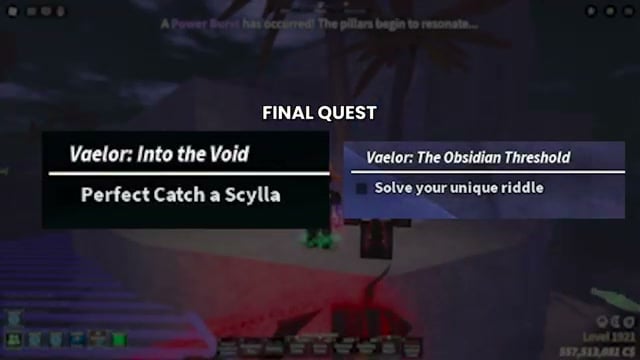
Return to Veil of the Forsaken and land the Scylla required by your active quest..
STEP 15/24
62%
Jump into the central abyss

After completing the Scylla objective, jump into the central abyss to reach Obsidian Pocket..
STEP 16/24
67%
Read your personal gate riddle
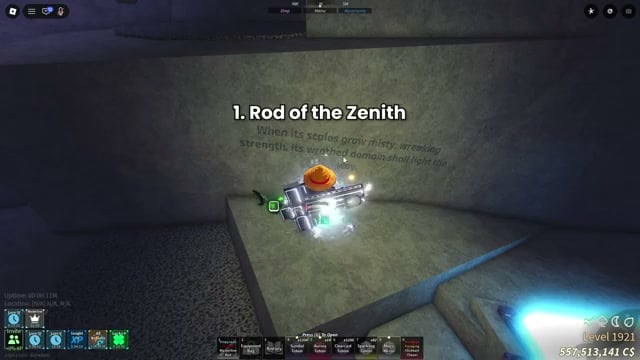
Examine the colored inscriptions around the illuminated circular altar to identify the rod and mutation requested for your catch..
STEP 17/24
71%
Catch the Scylla requested by your riddle
Use the corresponding rod to catch a Scylla with the requested mutation; this riddle catch does not need to be perfect..
STEP 18/24
75%
Present the catch at the altar

Return to Obsidian Pocket and stand on the gate’s altar with your riddle catch to advance its opening..
STEP 19/24
79%
Descend into Obsidian Trench

Drop through the opened hatch to enter Obsidian Trench..
STEP 20/24
83%
Catch Veiled Charybdis and begin the awakening route

Hook Charybdis in the trench rivers to start the Veiled Charybdis fishing encounter..
STEP 21/24
88%
Watch both encounter bars

Track your fishing progress while keeping the separate lower hazard bar low..
STEP 22/24
92%
Briefly miss tracking to lower the hazard
Allow a brief tracking miss during the reel to reduce the lower bar before resuming the catch..
STEP 23/24
96%
Avoid the encounter’s whirlpools

Steer clear of whirlpools because they interfere with the fishing bar and can remove your rod control..
STEP 24/24
100%
Keep catching Veiled Charybdis to awaken Skolopendra

Continue landing Veiled Charybdis until the trench crystals turn deep red and the awakening alert announces Skolopendra..
The regional targets span several rarities. Hoarfrost Halibut, Void-Drifter Jelly, and Wraith-Whisper Ray are Legendary; Glacial Gulper, Lumin-Lure Lanternfish, and Geode Grouper are Rare. Pearl-Plated Pleco and Gargoyle Goby are Common. Their Bestiary entries provide catch information while you work on the required mutations.
For the Abyssal Zenith objectives, Mutated Sharky helps with obtaining mutations. The resulting Abyssal Gauntlets display mutation information above the cage when you approach it, which is useful when a quest asks for a particular mutation.
In Calm Zone, use the Ethereal Prism Rod with Seaweed bait for the fishing objectives. Fish from your position instead of casting directly over a roaming fish; targeting the roaming model doesn’t work for this quest.
If you need Resonus’s required rod, Leviathan’s Fang Rod costs 350,000 C$ at the Veil of the Forsaken entrance, beside the door.
Finish the Scylla quests and open the Obsidian gate
The first Scylla fishing objective belongs to Into the Void. Pay attention to its catch-quality requirement before committing to a hunt.
Scylla Hunts occur naturally, and you can also trigger one using a Sundial Totem. Each hunt lasts 15 minutes, with only one player able to catch its Scylla. It prefers Shark Head bait and accepts any time, weather, or season.
Inside Obsidian Pocket, The Obsidian Threshold gives you a personal riddle associated with the Crevice Wall. The clue about misty scales and a wrathful domain points to Wrath, which calls for Rod of The Zenith. The other supplied pairings are Prismize with Ethereal Prism Rod, Ashen with Volcanic Rod, and Chilled with Challenger’s Rod. A separate inscription also hints at Leviathan’s Fang Rod.
Speak to Vaelor again for your personal riddle’s answer before choosing the rod for your next Scylla hunt.
The gate progression includes activating the five layer gems associated with the regions you completed. With those gems lit, the Abyss Gate opens access to the trench.
Track the Obsidian Trench Bestiary and suppression
Entering the trench automatically applies Trench Suppression, lowering your rod’s lure speed. Glowing white crystals provide temporary relief: approach an available crystal and use Absorb before settling into a fishing spot, then return for relief as needed.
The trench’s 12-entry Bestiary contains ten standard catches and two special encounters. Standard fishing can fill the ordinary entries, while the final encounters have their own mechanics.
Required fish and encounter types
| Fish | Entry type |
|---|---|
| Pumice Puffer | Standard catch |
| Scoria Scorpionfish | Standard catch |
| Ash-Cloud Angelfish | Standard catch |
| Obsidian Gaveltooth | Standard catch |
| Cinder-Crust Gar | Standard catch |
| Tectonic Toadfish | Standard catch |
| Basalt Behemoth | Standard catch |
| Magma-Glass Marlin | Standard catch |
| Shatter-Tooth Shark | Standard catch |
| Shatterjaw Shark | Standard catch |
| Veiled Charybdis | Special encounter |
| Skolopendra | Special encounter |
If you own Toxinburst Rod, its additional-fish passive gives you another way to collect entries alongside the fish you reel in. A harpoon is also an option for heavier targets such as Tectonic Toadfish. For the special encounters, Fabulous Rod with Luminous Larva is an available setup.
Press H on keyboard to open the Bestiary and track the trench page. Finishing it produces a 100% completion announcement, fills every entry, and awards the Obsidian Chunk Bobber. That completion clears the rod’s Bestiary requirement.
Catch Veiled Charybdis and defeat Skolopendra
For Veiled Charybdis, line up its preferences with Night and either Meteor or Stag Beetle bait. Luminous Larva also serves as a fallback when those preferred baits aren’t available. The lower meter in this encounter demands attention throughout the reel.
Skolopendra’s awakening is catch-triggered, not timed, so waiting in the trench alone won’t summon it. Once it awakens, you must catch and defeat it through a dedicated boss minigame to fill its Bestiary entry. Its preferences are Kraken Tentacle bait and Rain.
Purchase Chasm-Stalker and equip the rod
Boss beaten, questline finished, Bestiary complete: head for the floating rod crystal on the illuminated shop pedestal in the center of Obsidian Trench. Use its prompt to make Chasm-Stalker Rod available in the shop, pay the displayed amount and equip [Chasm-Stalker].
You’re holding a segmented black-and-red centipede, with hooked limbs and diamond markings down its center. Long antennae and glowing orange eyes sit on its horned head.
Base stats and mutation chance
| Attribute | Value |
|---|---|
| Lure Speed | 135% |
| Luck | 278% |
| Control | 0.3 |
| Resilience | 80% |
| Maximum weight | Infinite |
| Myriapodic mutation chance | 35% |
Chasm-Stalker grants a Myriapodic mutation. Your catches with Chasm-Stalker Rod have roughly a 35% chance of receiving Myriapodic, and the rod has an exclusive streak system. Chasm-Stalker’s Max Kg stat is infKg.
Using Chasm-Stalker removes the trench’s lure-speed penalty, so you can fish here without worrying about the crystal.
Related Fisch guides
Frequently Asked Questions
Does leaving the server reset the Veil of the Forsaken gate?
No. The older Veil of the Forsaken prerequisite gate stays open after you leave, and its progress saves, although each player must open it personally. Those persistence rules concern the older Veil gate and do not establish how the new Obsidian gate behaves.
Where can I set my spawn while working through Veil of the Forsaken?
Access Veil of the Forsaken through the Calm Zone Inn Keeper. Veil of the Forsaken has no Inn Keeper of its own.



Leave a Reply