
The strongest endgame setup is the Ultra Speed Tank with Flywire, Blast Boot, Shot Pot, Shiver, and a fast brush or roller, but Tactical and Power each have viable late-game builds built around control and burst damage.
Endgame in Splatoon Raiders rewards movement, gadget uptime, and fast boss setup more than raw weapon damage alone. Once you are pushing post-story content like the Hidden Ruins and Bottomless Buffet, the best builds lean hard into Gadget Part Slots, Gadget Damage, and relics that keep your tank abilities active.
There are strong setups for all three tanks, but they are not equal in comfort. Ultra Speed Tank has the highest ceiling because it turns mobility into damage, ink access, and escape tools, while Ultra Tactical Tank plays steadier and Ultra Power Tank asks you to commit harder for burst damage.
Endgame tank build ranking
| Tank | Recommended build |
|---|---|
| Ultra Speed Tank | Flywire, Blast Boot, Shot Pot, Shiver, fast brush or fast roller |
| Ultra Tactical Tank | Hi-Fiver, Shot Pot, Splatellites, Shiver, easy-control weapon |
| Ultra Power Tank | Splatellites, Splatchet, Shellacker, Shiver, burst or AoE weapon |
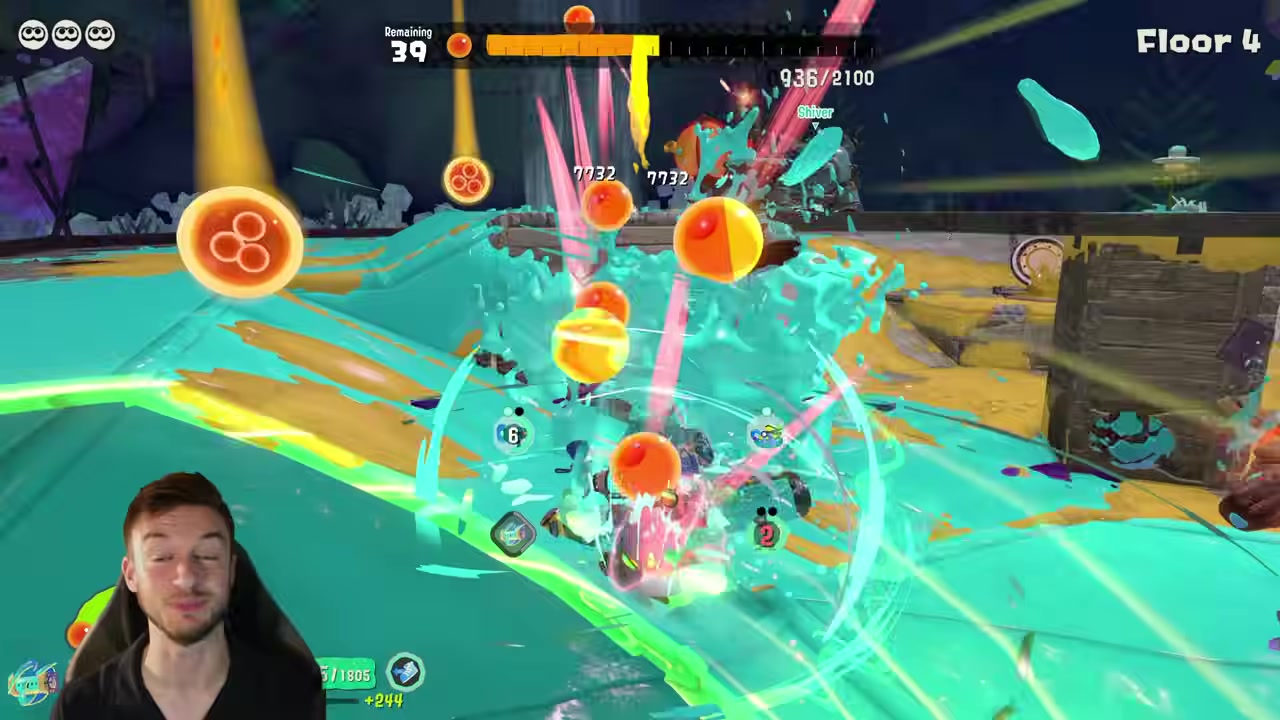
Ultra Speed Tank is the overall winner because its best gadgets let you attack, reposition, trigger tank abilities, and recover cooldowns in the same loop. Ultra Tactical Tank is the safer control option when you want ink coverage and steady multi-hit damage, while Ultra Power Tank is still viable but less forgiving in the hardest rooms because its strongest attacks carry charge and wind-up pressure.
Ultra Speed Tank Flywire build
| Slot | Pick |
|---|---|
| Tank | Ultra Speed Tank |
| Core gadgets | Flywire, Blast Boot, Shot Pot |
| Flywire parts | Damage Surge, Tank-Ability Activation, Double Trouble, Charge-In Damage Up, Explosion Area Up, Victory Cooldown, Other-Gadget Cooldown |
| Blast Boot parts | Damage Surge, Freeze, Cooldown Reduced, Ink Resupply, Explosive Damage Up, Explosion Area Up, Faster Jump or Explosive Jump |
| Shot Pot parts | Fire Rate Up, Range Up, Explosive Placement, Auto Trigger on Hit, Double Trouble |
| Relic powers | Speed Pro, Tactical Pro, Power Pro, Speed Up, Gadget Recovery (Speed), gadget recovery while submerged |
| Bot buddy | Shiver’s Showstopper with Big Bite Royal |
| Weapons | Touring Brush, Prime Engine Roller, Turbine Roller, Balloon Roller, other fast rollers |
The Ultra Speed Tank build is built around Flywire and Blast Boot stacking Damage Surge. Flywire is the opener: snap to a target, create space, trigger your tank ability, and start your damage window before the room fully collapses around you. It also helps that Flywire can lock onto a target in front of you quickly, which pairs especially well with close-range weapons like brushes.
KEY!Damage Surge is the reason this setup gets silly. Strong rolls can give 50%, 60%, or higher damage boosts, and the Flywire and Blast Boot boosts stack. Since Damage Surge has a 5-second cooldown, Double Trouble on Flywire is huge: the extra charge helps you keep the damage boost rolling instead of waiting around exposed.
Tank-Ability Activation is just as important. It triggers your tank ability when you use the gadget, which means you do not have to spend two seconds swimming underground to turn it on in a high-pressure room. With Speed Pro, that activation lets you move faster, create ink as you swim, pass through enemy ink more safely, and keep your gadget loop alive.
Blast Boot is your burst, freeze, and emergency exit button. Use it to jump into packed enemies, freeze priority targets, refill a little ink with Ink Resupply, or hop out when you are cornered. A small jump boost is usually enough for wall clears, while Faster Jump makes the move come out sooner and Explosive Jump adds a close-range blast at your feet.
Shot Pot fills the gaps by handling enemies you do not want to chase, especially flying threats. Explosive Placement turns throws into grenade-like pressure, while Auto Trigger on Hit keeps the gadget firing through normal attacks instead of forcing another manual input. If you roll Other-Gadget Cooldown on Flywire, those Flywire charges also help bring Blast Boot and Shot Pot back sooner.
The play loop is simple: open with Flywire, stack Damage Surge, keep moving, then use Blast Boot for freeze, burst, or escape. In chaotic endgame fights, delete ranged attackers and flying enemies first; letting them chip away while you deal with the crowd is how Speed Tank runs fall apart.
Ultra Tactical Tank Choice-Fiver build
| Slot | Pick |
|---|---|
| Tank | Ultra Tactical Tank |
| Core gadgets | Hi-Fiver, Shot Pot, Splatellites |
| Hi-Fiver parts | Line Damage Up, Ink Resupply, Freeze, Duration Up, Victory Cooldown |
| Shot Pot parts | Fire Rate Up, Range Up, Explosive Placement, Auto Trigger on Hit, Double Trouble |
| Splatellites parts | Area increase, More Splatellites, Auto Trigger on Hit, Scorch, Duration Up |
| Avoid | Orbital Range Up on Splatellites |
| Bot buddy | Shiver’s Showstopper with Big Bite Royal |
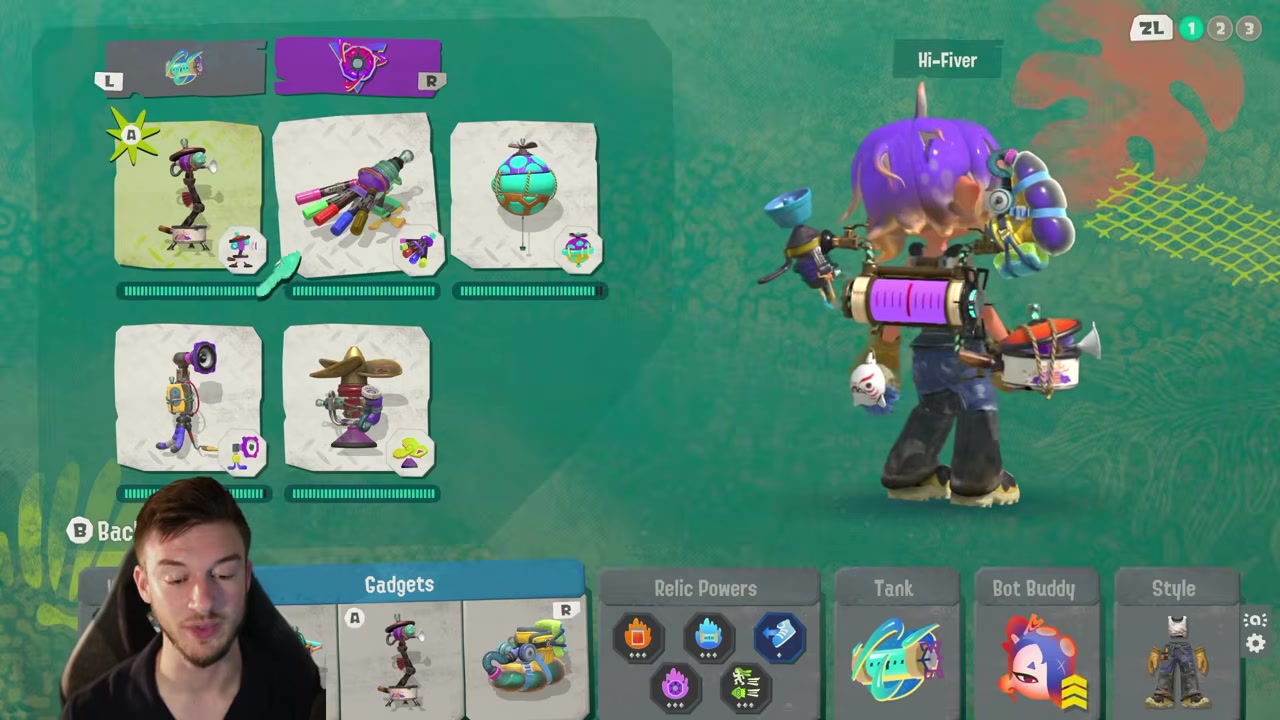
Ultra Tactical Tank is the control build. It does not get the Speed Tank’s effortless ink trail, so it leans on Hi-Fiver for damage and ink, Shot Pot for pressure, and Splatellites for coverage that keeps your escape paths open.
Hi-Fiver works like a close-range shotgun. Jump with your bot, fire downward, and use the multi-hit line damage to refill ink through Ink Resupply while shredding enemies in front of you. Freeze is strong here because the gadget hits multiple times, so even a 20% freeze chance gets more rolls than it looks like on paper.
Splatellites are what make Tactical feel safe instead of stiff. Increase their area, add More Splatellites, and run Auto Trigger on Hit so they keep appearing while you attack. Duration Up can push the uptime close to permanent on good rolls, and Scorch adds extra burn pressure while the orbiting ink keeps routes open.
The one trap is Orbital Range Up. It can push the Splatellites pattern far enough away that swimming through your own coverage becomes less comfortable, which hurts the exact survivability this build is trying to create.
Ultra Power Tank burst build
| Slot | Pick |
|---|---|
| Tank | Ultra Power Tank |
| Core gadgets | Splatellites, Splatchet, Shellacker |
| Splatellites parts | Area increase, More Splatellites, Auto Trigger on Hit, Scorch, Duration Up |
| Splatchet parts | Damage increase, Reduced Damage Taken, Victory Cooldown |
| Shellacker role | Highest damage option, charge burst, ink added below shots |
| Shellacker tradeoff | Damage taken reduction can reach 90%, but late enemies still punish the charge window |
| Bot buddy | Shiver’s Showstopper with Big Bite Royal |
Ultra Power Tank can absolutely clear endgame content, but it is the least comfortable of the three when enemy damage spikes. Its best tools hit hard, yet Splatchet and Shellacker both ask you to survive during committed attack animations.
Splatellites do the same job here that they do for Tactical: they create ink space around a tank that cannot rely on Speed Pro movement. Keep the orbiting coverage active, then use Splatchet as the more comfortable burst tool by stacking damage and Reduced Damage Taken.
Shellacker is the greedier pick. It has the highest damage ceiling, and the charge can be protected heavily, but taking only 10% damage still hurts when high-level Salmonids are hitting hard. Use it when you know the timing of the room or boss phase; otherwise, Splatchet is easier to weave into real fights.
Shiver, brushes, rollers, and brellas
Shiver is the best general bot buddy for these endgame builds because Shiver’s Showstopper freezes a large area and sets bosses up for boosted damage. Freeze lines up perfectly with Damage Surge, Blast Boot, and weapon relics that increase damage against frozen targets, which is why Shiver works across Speed, Tactical, and Power.
Big Man’s Showstopper with Manta Dance can apply Scorch, and Frye can fit offense-heavy clears, especially if you prefer broader damage pressure. For these setups, though, Shiver is cleaner because freeze gives you a safer boss window instead of asking for extra setup.
For weapons, Touring Brush is the easiest match for Speed Tank because it behaves like a close-range shotgun and can be held to create paint when you need to escape. Fast rollers are just as strong if the swing speed feels good; Prime Engine Roller is especially nasty when you can chain jump attacks in a straight line, then roll into a boss when you are already in its face.
Splattershots are the comfort pick if you want something simple and reliable. Food-Stall Brella is also strong because it fires like a tighter shotgun and can launch a shield forward, letting you shoot from behind it as it pushes through danger. Steam Blaster is a valid AoE choice for clustered enemies, while dualies, sloshers, and splatlings work if their rhythm fits you.
Press ZL on every weapon before equipping it to inspect its relics; some bonuses only work against scorched Salmonids, while others can add tank-class perks like Squid Endurance.
Upgrade priorities for endgame builds
KEY!Spend early endgame skill points on Gadget Part Slots and Gadget Damage before Weapon Damage. These builds get their power from parts like Damage Surge, Tank-Ability Activation, Double Trouble, Freeze, and Auto Trigger on Hit, so more part space changes the whole build faster than a small weapon upgrade.
HP is useful, but it should not eat your early endgame investment unless the Limiter forces balance. The better plan is to kill, freeze, refill ink, and move before enemies get extended hits on you.
Set builds from Gear > Tanks on the Hideout ship between raids, then save finished loadouts in Gear > Presets with - and swap them with L/R. Once the three post-game tank Pro relics are unlocked by clearing the post-game islands with different tanks, work Speed Pro, Tactical Pro, and Power Pro into the presets that benefit from their tank abilities.
Frequently Asked Questions
Which tank is best for Splatoon Raiders endgame?
Ultra Speed Tank is the best endgame tank once you can run the full Flywire, Blast Boot, and Shot Pot package. Its early-game weakness fades because endgame parts turn movement into stacked damage, tank activation, ink access, and escape routes.
Is Power Tank bad in the post-game?
No. Ultra Power Tank is still usable for burst and AoE damage, especially with Splatchet and Shellacker. It falls behind Speed and Tactical because its strongest attacks can leave you committed while late-game enemies are already swinging.
What is the best bot buddy for endgame builds?
Shiver is the best general pick because Big Bite Royal freezes bosses and packed enemies in a large area. That freeze window gives every tank a cleaner chance to unload boosted gadget and weapon damage.
Which weapons work best with these builds?
Touring Brush and fast rollers such as Prime Engine Roller are the best fit for the Speed build. Splattershots, brellas, Steam Blaster, dualies, sloshers, and splatlings are usable alternatives if their attack timing feels better to you.
Why is Damage Surge so important?
Damage Surge turns gadget use into a damage window instead of just movement or utility. Because Flywire and Blast Boot can both carry it and the boosts stack, Speed Tank can keep re-entering fights with much higher burst than its base weapon damage suggests.
Video help






Leave a Reply