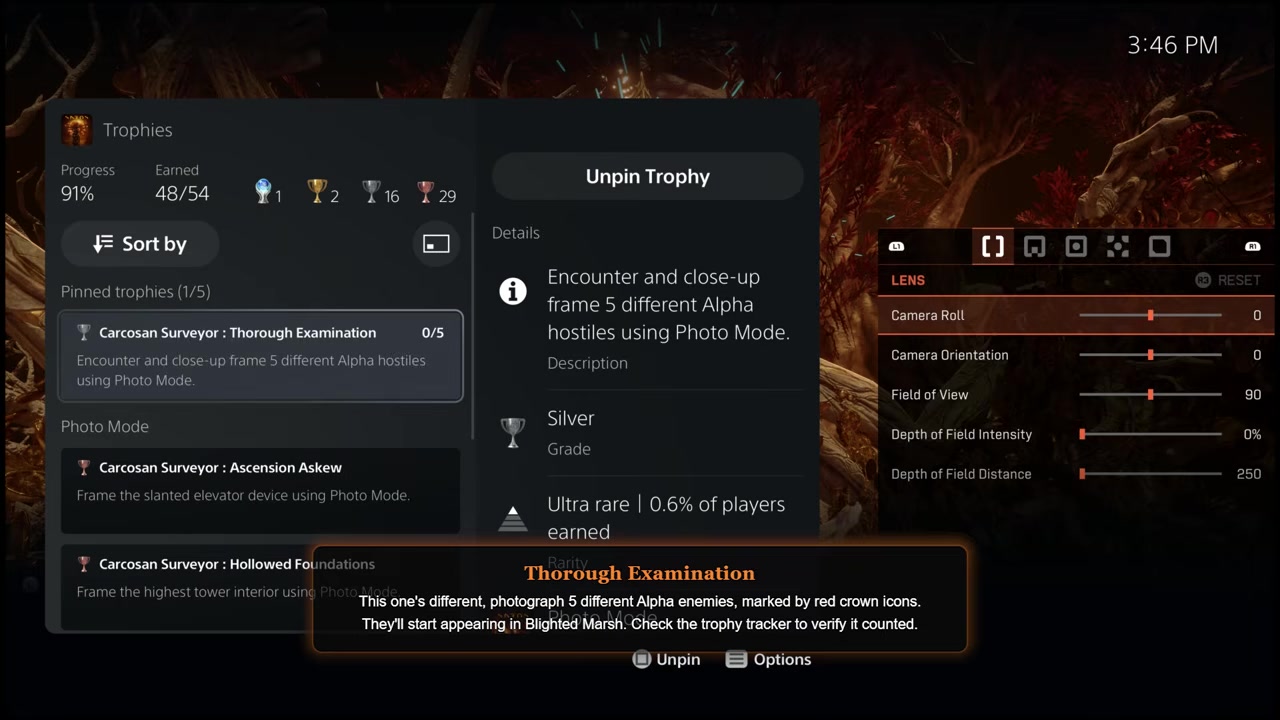
Saros’ free Photo Mode update adds 9 separate DLC trophies, and you unlock them by entering Photo Mode and framing eight required landmarks plus five different Alpha hostiles.
Saros Photo Mode arrived through the 1.005.1 / 01.005.001 title update, commonly listed as a free Photo Mode DLC pack. Its 9 trophies sit in a separate DLC list, so they are not needed for the base-game platinum, but they do count toward restoring full 100% completion.
You can do this on an existing save and clean up anything missed through chapter select. The trigger is generous in one way and picky in another: you usually only need to open Photo Mode and frame the subject, not save an actual photo, but several trophies may need small camera-position adjustments before they pop.
Photo Mode trophy setup

Before starting, make sure your game is updated to the Photo Mode patch and load a save with access to the relevant biomes. You do not need a fresh playthrough for these trophies, and you do not need to defeat bosses during this clean-up route.
The Thorough Examination trophy works differently because it tracks 5 different Alpha hostiles. Treat those as a parallel objective while moving through the route, and photograph each Alpha before killing it.
Saros Photo Mode trophy checklist
| Trophy | What to frame | Where to go | Trigger note |
|---|---|---|---|
| Carcosan Surveyor : Locked and Forgotten | Entrance of the first Overlord lair | Shattered Rise, at the boss door | Stand a little back and adjust the camera until it pops. |
| Carcosan Surveyor : Buried Deep | Active underground mining operation / spinning blade mechanism | Ancient Depths, after the sundial path | The path may be left or right; frame the large wheel/blade. |
| Carcosan Surveyor : Menacing Threshold | Nightmare Gate entrance | Shattered Descent, one level above the bottom | Drop one level, not all the way down, for a clean angle. |
| Carcosan Surveyor : Ascension Askew | Slanted elevator device | Blighted Marsh, after opening the elevator with two keys | Easier from below, but it can still pop from above. |
| Carcosan Surveyor : Hollowed Foundations | Highest tower interior / tentacles | Desecrated Forest, in the Hollowed Foundations route | Take the lift near the end and frame the tentacles. |
| Carcosan Surveyor : Lighting the Path | Beacon of the giant communication device / alien machine | Acolytes Haven, after the longer left route and elevator | Do not grapple straight to the boss area; take the longer route. |
| Carcosan Surveyor : Ringing a Bell | Central tuning fork device | Cathedral, after destroying two tuning forks | Frame the third tuning fork when it appears. |
| Carcosan Surveyor : Gaze of Corruption | Throne of Carcosa | Yellow Shore, at the beach end | Frame the throne sitting out in the water. |
| Carcosan Surveyor : Thorough Examination | 5 different Alpha hostiles | Across later biomes, starting around Blighted Marsh | Use close framing and check the trophy tracker after each one. |
This is the full 9-trophy Photo Mode DLC set: 8 landmark photos plus 1 Alpha hostile photo tracker. Some listed trophy names come from early trophy database/community references rather than direct in-game screenshot confirmation, so the wording may be reported rather than fully independently verified in every case, but the targets and route are consistent.
How to photograph every Saros Photo Mode trophy target
STEP 1/9
Frame the Shattered Rise boss door
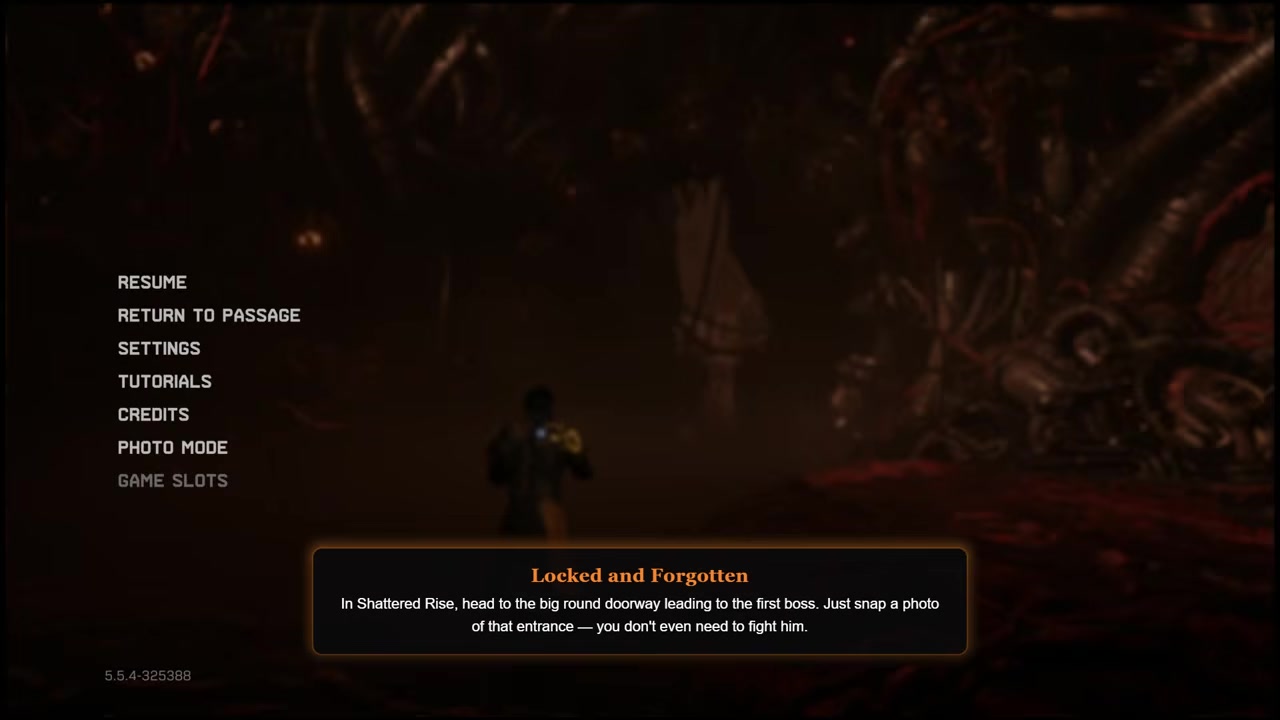
At the end of Shattered Rise, stop before the boss door, enter Photo Mode, and frame the doorway from slightly farther back.
STEP 2/9
Photograph the Ancient Depths spinning mechanism
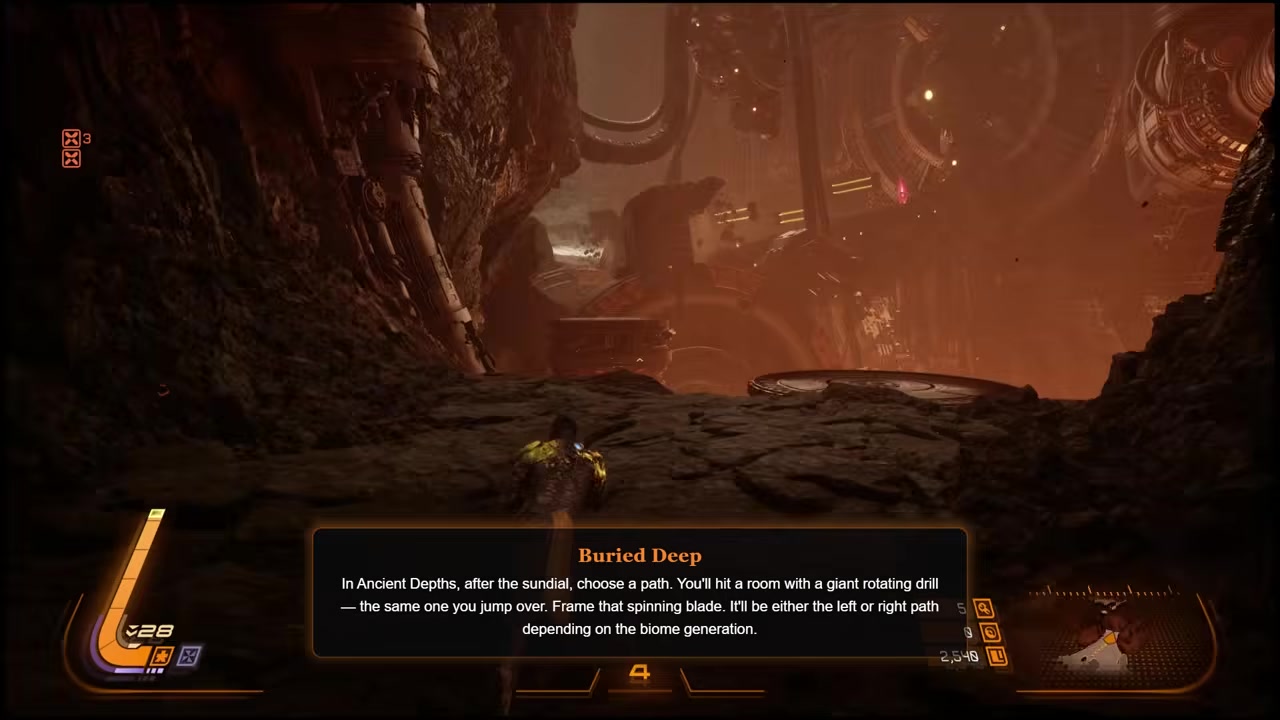
After using the sundial, take whichever path leads to the large spinning wheel or blade, then frame the active mining device.
STEP 3/9
Shoot the Shattered Descent Nightmare Gate
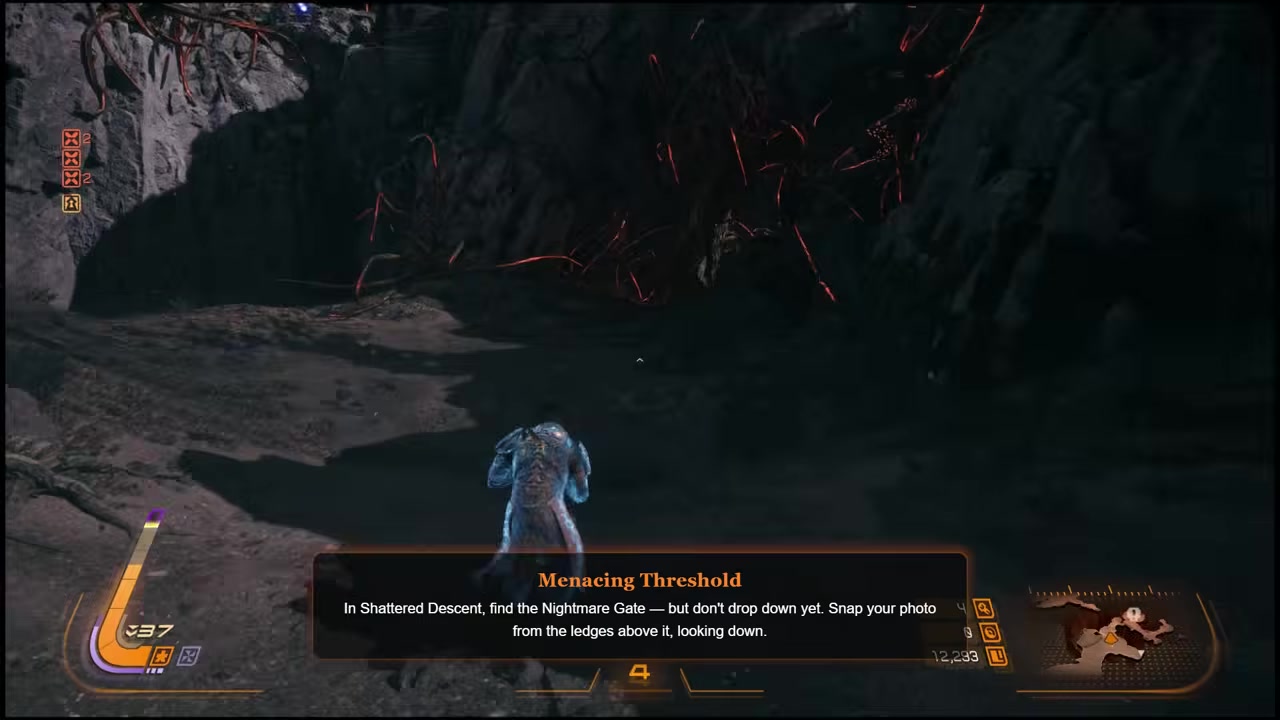
Find the Nightmare Gate and drop only one level down so the gate entrance stays clearly visible in Photo Mode.
STEP 4/9
Start photographing Alpha hostiles
STEP 5/9
Frame the Blighted Marsh angled elevator
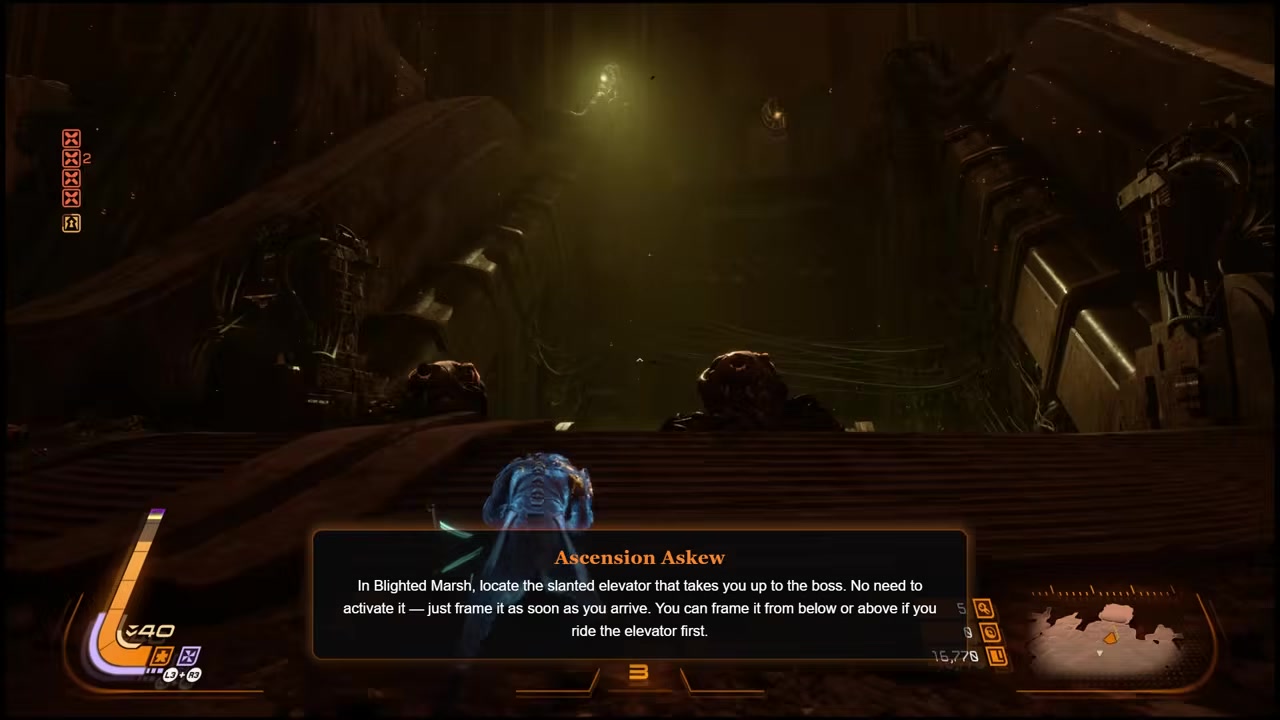
After using the two keys to open the slanted elevator, photograph the elevator area from below or from above if you already rode it.
STEP 6/9
Capture the Hollowed Foundations tentacles
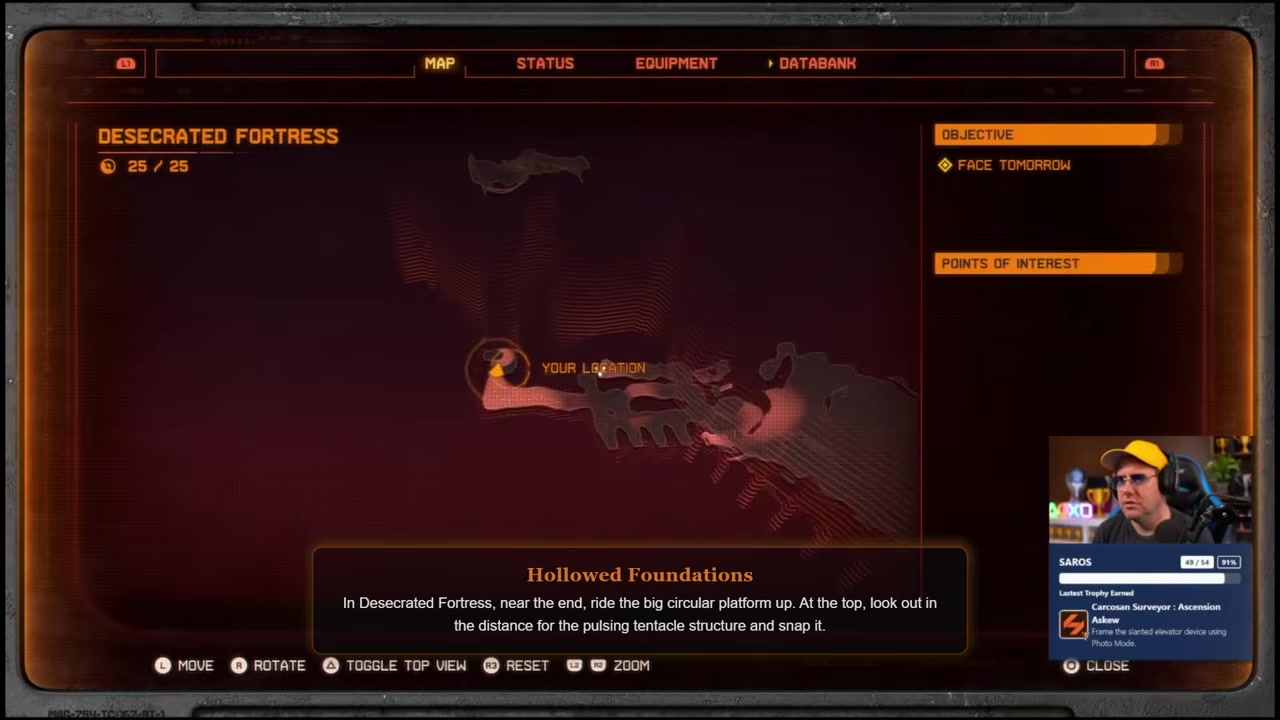
In the Desecrated Forest route, take the lift near the end and frame the tentacles inside the tower area.
STEP 7/9
Photograph the Acolytes Haven alien machine
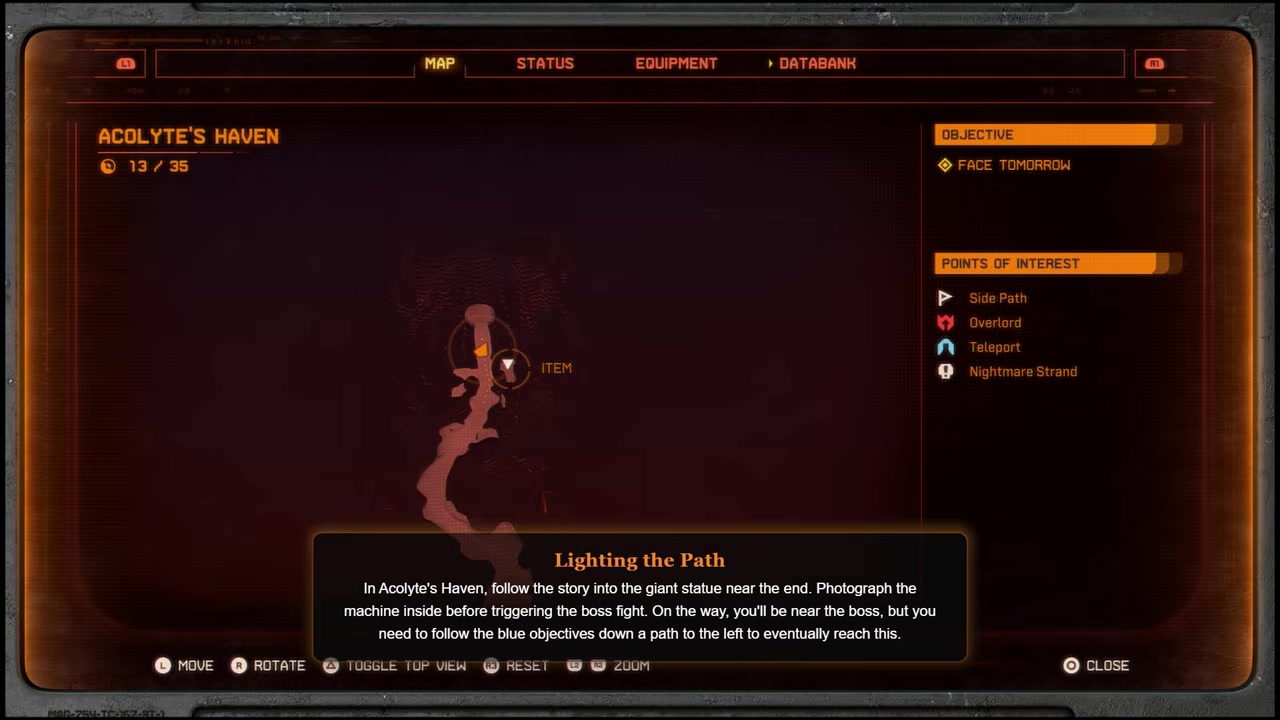
Near the boss approach, take the longer left-hand route instead of grappling over, ride the elevator, and frame the alien machine in the distance.
STEP 8/9
Frame the Cathedral tuning fork
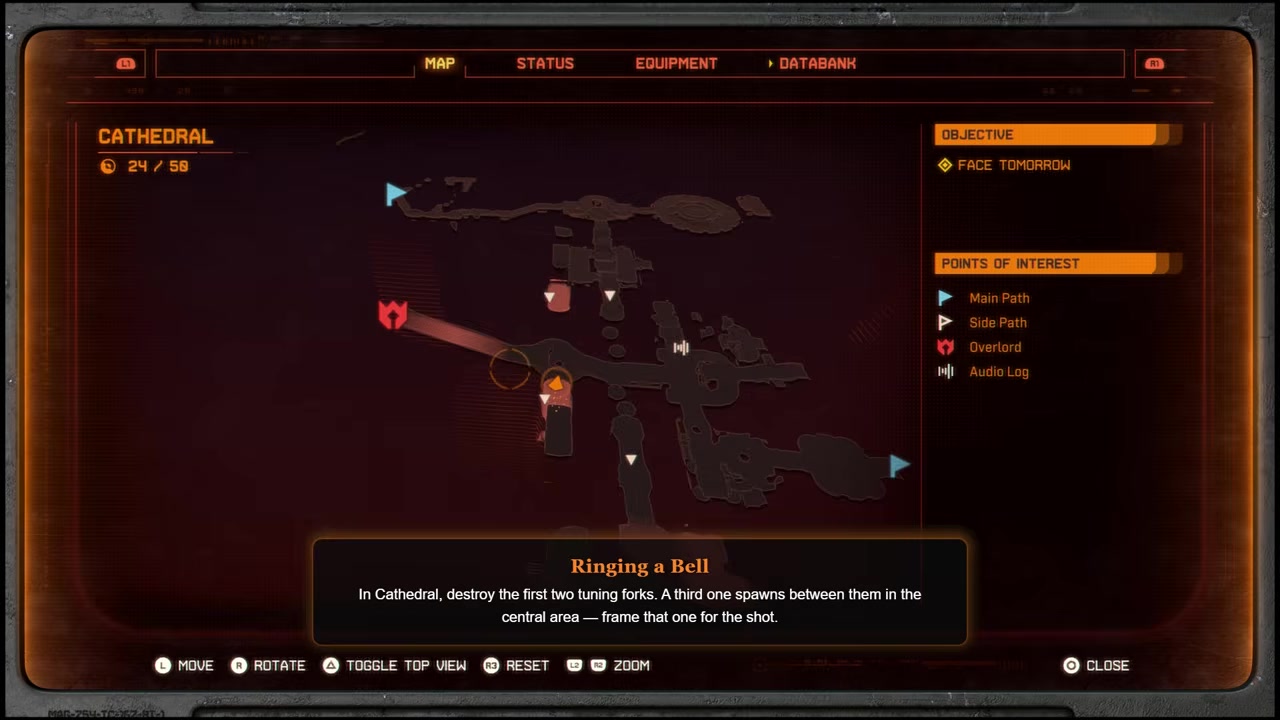
After destroying two tuning forks in the Cathedral, photograph the third central tuning fork device when it appears.
STEP 9/9
Shoot the Yellow Shore throne
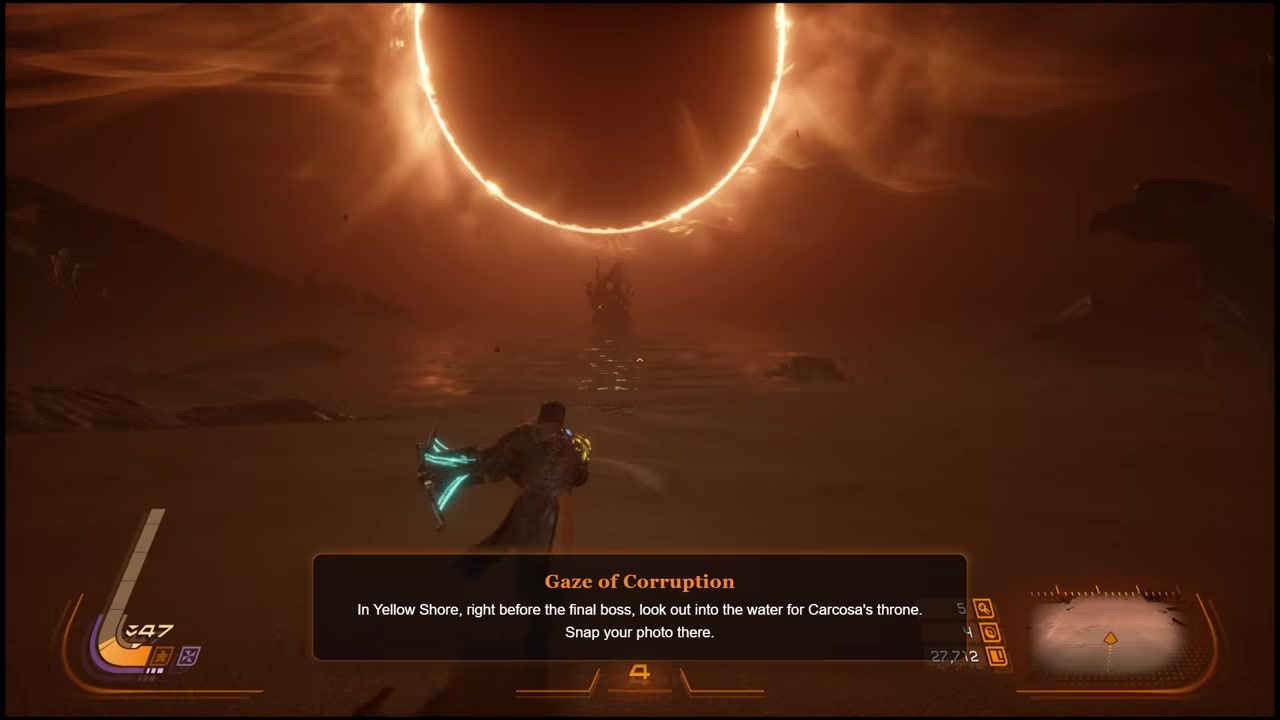
Travel to the end of Yellow Shore, reach the beach, and frame the throne of Carcosa out in the water.
After every Alpha photo, check the trophy tracker immediately so you know whether that hostile counted before you move too far ahead.
Video help
Thorough Examination Alpha hostile trophy
| Requirement | What to look for | How to confirm it counted |
|---|---|---|
| 5 different Alpha hostiles | Enemy with a red crown icon on the minimap and over its head | Open the trophy tracker and look for the counter to increase. |
| Photo before the kill | An Alpha that is still alive and close enough to frame clearly | If the tracker stays the same, retry before moving on if possible. |
| Close framing | The Alpha itself, not just the room or nearby smaller enemy | Stay in Photo Mode for a moment and adjust the camera if needed. |
Carcosan Surveyor : Thorough Examination asks for photos of 5 different Alpha hostiles. These are not a fixed landmark set like the boss door or throne, so do not treat one showcase run as a guaranteed spawn map.
Alpha enemies are marked with a red crown icon on the minimap and above the enemy. When you see one, photograph it before killing it, use a close frame, wait briefly in Photo Mode, then check your trophy tracker to confirm the count moved up.
You should encounter enough Alpha while moving through Blighted Marsh, Acolytes Haven, and Cathedral, but exact enemy positions can vary. If one does not count, do not assume the trophy is broken; use a closer shot on the next Alpha and keep verifying with the tracker.
Fix missed Photo Mode trophy triggers

If that still fails, relocate your character nearby and try the same subject again from a cleaner angle. For the Ancient Depths trophy, follow the sundial route that actually contains the big wheel or blade rather than relying on a fixed left/right direction, since early runs report that side can vary.
Missed trophies can be cleaned up through chapter select after finishing the game. You also do not need to fight bosses during this trophy run, so you can enter a biome, reach the photo target, trigger the trophy, and leave once it pops.
For Blighted Marsh, do not panic if you ride the angled elevator before taking the photo. The lower angle appears easier, but the elevator trophy can still trigger from above as long as you frame the elevator area clearly enough.
Frequently Asked Questions
Do the Photo Mode DLC trophies affect the Saros platinum?
No. The 9 Photo Mode trophies are in a separate DLC trophy list, so they are not required for the base-game platinum. They do matter if you want your overall Saros completion back to 100%.
Do you have to save an actual photo for the trophies?
No. The trophy evidence points to framing the required subject in Photo Mode as the trigger. You do not need to save a photo, but you may need to keep the camera on the subject briefly and adjust the angle.
Can you unlock the trophies after finishing the game?
Yes. You can use an existing save and clean up missed Photo Mode trophies through chapter select. The route does not require boss kills.
Are Alpha hostile locations fixed?
Not reliably. Alpha hostiles are marked by the red crown icon, but their exact positions may not match every run. Photograph 5 different marked Alpha enemies and check the trophy tracker after each attempt.
What should you do if a Photo Mode trophy does not pop?
Keep the correct landmark centered, move the camera slightly, zoom in if needed, and wait in Photo Mode for a moment. If it still does not trigger, reposition your character nearby and retry the same subject from another angle.


Leave a Reply