


[info]This guide is applicable only for Samsung’s Galaxy S international version (i9000). If yours is Vibrant/Captivate/Fascinate/Epic 4G or any other Galaxy S variant, then this ROM — and Guide — is not for you, and that’s for definite.[/info]
[warning]The methods and procedures discussed here are considered risky and you should not attempt if you don’t know completely what it is. If any damage occurs to you or your device, we won’t be held liable. You only will be responsible — you’ve been warned. Okay![/warning]
UPDATE: Chainfire’s Root method is much better than the previous method. So, we recommend using the latest method of Chainfire, which is here.
This is rooting guide for the leaked XXJVK Android 2.3.3 ROM for Galaxy S
Here’s what you need to do to root your XXJVK Android 2.3.3 firmware on Galaxy S:
- Download CF-Root kernel. File name – CF-Root-XX_OXA_JVK-v3.1-CWM3RFS.zip. Download Link. Size 6.7 MB.
- Unzip the above file. You will get the .tar file – CF-Root-XX_OXA_JVK-v3.1-CWM3RFS.tar. We will be flashing this .tar file using ODIN to gain root access and install the CWM alongside.
- Download Odin. File name – Odin3 v1.7. Download Link. Extract the zip file to get Odin3 1.7.exe. Run Odin by double clicking on it.
- Switch Off your phone. Wait for vibration to confirm complete switch off.
- Boot your phone in Download Mode — Press and hold VolumeDOWN+HOME+POWER keys together.
- Connect your phone to PC now. You’ll notice “Added! !” message in the message box.
- On Odin, click the PDA tab and select the .tar file you got in step 2 — CF-Root-XX_OXA_JVK-v3.1-CWM3RFS.tar
- Make sure “Repartition” button is NOT checked. Leave the “Auto Reboot” and “F. Reset Time” buttons checked.
- Double check step 7 and step 8.
- Click the Start button on Odin to begin installing the CF Root kernel.
- After the CF Root is installed, phone will restart.
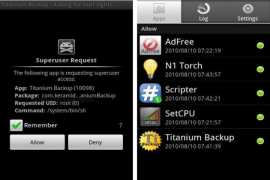
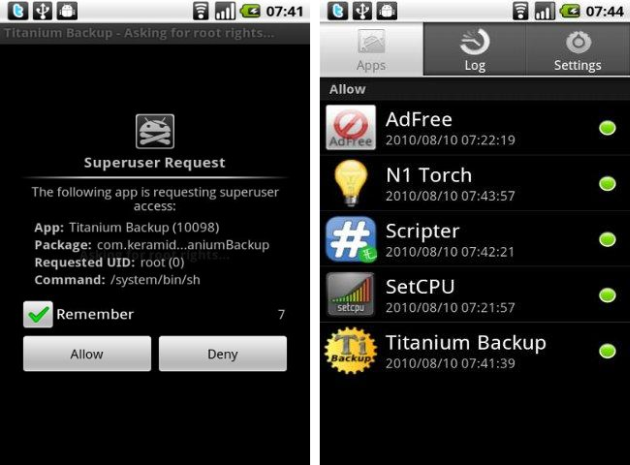
- Your phone is rooted now. Note that surperuser app is there.
ClockworkMod [CWM] Recovery:
To boot into ClockworkMod Recovery — power Off your phone completely and then, press and hold (till Galaxy S logo appears): VolumeUP+HOME+POWER. You’ll enter the CWM recovery. You can use this to:
- Backup your ROMs
- Restore backed up ROMs
- Delete Backups
- Flash update.zip files
- Flash custom themes
- Flash kernels (zImage, zImage in TAR, zImage in ZIP, zImage in TAR in ZIP)
PREVIOUS METHOD — DON’T USE NOW. Use the method given above instead.
Installation Steps:
- Download the required stuff:
- CF-Root-XW_OXX_JV1 kernel – Download Link: Mediafire.
- Odin3 v1.7 – Download link: MediaFire.
- Kernel_XXJVK – Download Link: Multiupload.
- Now, on your computer, extract the ‘CF-Root-XW_OXX_JV1-v1.3-BusyBox-1.17.1_NO-CWM’ file we downloaded in step 1.1, so that we get the ‘.tar’ file which we’ll use in step 10
- Double click on ‘Kernel_XXJVK’ and select ‘Extract’.
- Switch Off your Galaxy S. Wait for the little vibration to confirm complete switch Off.
- Get your Galaxy S in Download Mode — Press and hold these keys together – Volume Down + Home + Power. The device will enter the Download mode.
- Now, extract the file — Odin-1.7with.pit.512.803.zip — given step 1.3 above. From the extracted files, open Odin3 1.7 from double clicking on it. The other two files are useless here.
- Plug-in USB cable to connect your Galaxy S to PC. You should get the “Added! !” notification in the message box in Odin.
- In Odin, the first thing you need to do is uncheck the Re-Partition box.
- Keep the ‘Auto Reboot’ and ‘F. Reset Time’ boxes checked.
- Now, click the PDA tab and select the file we extracted in step 2 — ‘CF-Root-XW_OXX_JV1-v1.3-BusyBox-1.17.1.tar’.
- Click Start now to flash. It would take just a minute or two. And the phone will boot automatically.
- Your phone is now rooted. Check for Superuser app in the app drawer.
- Now, switch off your phone and put it into download mode again. We will flash the file we extracted in step 3 to get back to XXJVK kernel.
- Open Odin and click on ‘Reset’ button.
- Plug-in USB cable to connect your Galaxy S to PC. You should get the “Added! !” notification in the message box in Odin.
- Uncheck the ‘Re-Partition’ box. But keep the ‘Auto Reboot’ and ‘F. Reset Time’ boxes checked.
- Click the ‘PDA’ button and select the file we extracted in step 3 — ‘Kernel_XXJVK.tar’.
- Now click ‘Start’ and wait for your Galaxy S to boot.
How to Root Installation Video Guide
The video below was made for rooting the new leaked ROM, XWJVB. It’s also based on the chainfire’s method but uses the root file applicable for XWJVB. But this video is helpful for those who want to root XXJVK too, because only one file changes while the method remains completely same. So, you can use this video to watch the method for rooting your XXJVK Galaxy S.
[coming soon (uploading….)]
Thanks to XDA member ChainFire for his awesome work and Ramad for instructions.
Via XDA



151 responses to “Rooting and Installing Clockworkmod Recovery on XXJVK Android 2.3.3 ROM for Galaxy S”
I think there is an error linking to the files. The 1 is linking to Kernel XXJVK and no.3 is linking to a Speedmod Kernel.
I’ve fixed the link now. Thanks!
I have bricked the phone with this PDA. Odin returned fail and then the black screen of death appeared.
Any ideas ? Will I get into download mode with the resisor hack ?
I think there is an error linking to the files. The 1 is linking to Kernel XXJVK and no.3 is linking to a Speedmod Kernel.
I’ve fixed the link now. Thanks!
I have bricked the phone with this PDA. Odin returned fail and then the black screen of death appeared.
Any ideas ? Will I get into download mode with the resisor hack ?
Hi I have a GT-I9000B galaxys Brazil digital tv. Version: I9000XXJVE, Kerne l: 2.6.32.9 not mind losing if everything is going digital tv optimum. thanks
sorry..but do i have to root galaxy first or flash with rom then root???
sorry..but do i have to root galaxy first,then flash with the rom….or flash with the rom,then root the galaxy ????
Flash the ROM first, and then root it.
Hi I have a GT-I9000B galaxys Brazil digital tv. Version: I9000XXJVE, Kerne l: 2.6.32.9 not mind losing if everything is going digital tv optimum. thanks
sorry..but do i have to root galaxy first or flash with rom then root???
sorry..but do i have to root galaxy first,then flash with the rom….or flash with the rom,then root the galaxy ????
Flash the ROM first, and then root it.
help!my phone is stucked at ‘galaxy s’ boot up after installation.what should i do?
Latest news. The resistor hack worked and started my phone into download mode. The second rooting attempt also worked.
Nice to hear that you got your SGS working again 🙂
When I extract the CF-Root-XW_OXX_JV1 kernel I only get another rar file. When I extract that, I get a z1 file. Is this correct??
No, that is not correct. Check out the video for help.
Ok thanks. Should it work with Winrar or should I get 7-Zip as you use?
Winrar shouldn’t be any problem, but anyway use 7-Zip 😉
help!my phone is stucked at ‘galaxy s’ boot up after installation.what should i do?
Got it all done fine now thanks.
Finding it much quicker and smoother than Froyo. Thank you very much for supplying the links and guides.
Tojj
Thank you for this guide!
I use kernel 2.6.35.7-I9000XWJV1-CL31216 version 2.3.2 build GINGERBREAD.XWJV1
can I root using this procedure directly from 2.3.2 ?
I’ve noticed that for both files you load using the PDA option in Odin,
I thought the kernel suppose to be loaded using the PHONE option???
Thanks
I’m confused if you already know this or not, but this guide is for rooting XXJVK Android 2.3.3 build, which is newer and BETTER than the one you’re using [XWJV1].
So first flash the latest ROM using the guide in the following link: https://nerdschalk.com/how-to-install-xxjvk-android-2-3-3-rom-on-samsung-galaxy-s-instructions/
After flashing — follow the instructions given above to root your new ROM — which is XXJVK Android 2.3.3 Gingerbread build.
And NO, “Kernel” goes to the PDA option and “Modem or Phone” files goes to the Phone option. Don’t worry you should be good if you follow the instructions carefully. Okay!
Latest news. The resistor hack worked and started my phone into download mode. The second rooting attempt also worked.
Nice to hear that you got your SGS working again 🙂
When I extract the CF-Root-XW_OXX_JV1 kernel I only get another rar file. When I extract that, I get a z1 file. Is this correct??
No, that is not correct. Check out the video for help.
Ok thanks. Should it work with Winrar or should I get 7-Zip as you use?
Winrar shouldn’t be any problem, but anyway use 7-Zip 😉
Got it all done fine now thanks.
Finding it much quicker and smoother than Froyo. Thank you very much for supplying the links and guides.
Tojj
Thank you for this guide!
I use kernel 2.6.35.7-I9000XWJV1-CL31216 version 2.3.2 build GINGERBREAD.XWJV1
can I root using this procedure directly from 2.3.2 ?
I’ve noticed that for both files you load using the PDA option in Odin,
I thought the kernel suppose to be loaded using the PHONE option???
Thanks
I’m confused if you already know this or not, but this guide is for rooting XXJVK Android 2.3.3 build, which is newer and BETTER than the one you’re using [XWJV1].
So first flash the latest ROM using the guide in the following link: https://nerdschalk.com/how-to-install-xxjvk-android-2-3-3-rom-on-samsung-galaxy-s-instructions/
After flashing — follow the instructions given above to root your new ROM — which is XXJVK Android 2.3.3 Gingerbread build.
And NO, “Kernel” goes to the PDA option and “Modem or Phone” files goes to the Phone option. Don’t worry you should be good if you follow the instructions carefully. Okay!
i just upgrade mine to 2.3.3 but it’s not rooted so can i just start from step 7 – 10? will it work?
i just upgrade mine to 2.3.3 but it’s not rooted so can i just start from step 7 – 10? will it work?
I have upgraded to Gingerbread 2.3.3 and also rooted my phone with above process. Thanks for providing very simple procedure.
But I am not able to find any lagfix for Gingerbread 2.3.3, can u please tell me where do I find that?
Well, JVK (android 2.3.3) has no lagfix installed. If you’re looking to go back to Froyo, wait for a couple of hours, we’ll have the guide for that soon. We’ll be using EZRom for that. EZRom will install the stock Samsung Froyo ROM (JVE) on your phone that will be already rooted and with superuser, titanium backup and CWM already installed. Okay!
I have upgraded to Gingerbread 2.3.3 and also rooted my phone with above process. Thanks for providing very simple procedure.
But I am not able to find any lagfix for Gingerbread 2.3.3, can u please tell me where do I find that?
Well, JVK (android 2.3.3) has no lagfix installed. If you’re looking to go back to Froyo, wait for a couple of hours, we’ll have the guide for that soon. We’ll be using EZRom for that. EZRom will install the stock Samsung Froyo ROM (JVE) on your phone that will be already rooted and with superuser, titanium backup and CWM already installed. Okay!
My phone cant connect to the Net and so i cant verify my account… HELP!!
Is it after applying the root on XXJVK? Was it connecting before? Some problems have been reported with JVK — one among them being with the 3G. I guess, you can use WiFi network to connect to internet. Lemme know how does it work out?
Hi!
I just installed this rom and i’m wondering, because all gingerbread anims are missing..why? ( eg. crt screen off) any solution?
My phone cant connect to the Net and so i cant verify my account… HELP!!
Is it after applying the root on XXJVK? Was it connecting before? Some problems have been reported with JVK — one among them being with the 3G. I guess, you can use WiFi network to connect to internet. Lemme know how does it work out?
Hi!
I just installed this rom and i’m wondering, because all gingerbread anims are missing..why? ( eg. crt screen off) any solution?
Hi guys
I wonder if you could help me.After I rooted my phone, the phone screen won’t auto rotate and kernel version still showing is JV1.As far I am aware is the all point of step 2 to get my kernel name back to JVK?So guys could you help me on this matter, let me know where I went wrong or everyone are experiencing the same problem like me.
Hi guys
I wonder if you could help me.After I rooted my phone, the phone screen won’t auto rotate and kernel version still showing is JV1.As far I am aware is the all point of step 2 to get my kernel name back to JVK?So guys could you help me on this matter, let me know where I went wrong or everyone are experiencing the same problem like me.
Flash the ROM first, and then root it.!!!!
I have flashed my rom. Initially screen rotation was working but after rooting the rom auto screen rotation stop working. Aslo I have checked kernel and it show is JV1.Tell if I am wrong, I thought after flashing a phone to kernel JVK as said on procedure no 13 above now phone kernel should show as JVK intead of JV1.
Flash the ROM first, and then root it.!!!!
I have flashed my rom. Initially screen rotation was working but after rooting the rom auto screen rotation stop working. Aslo I have checked kernel and it show is JV1.Tell if I am wrong, I thought after flashing a phone to kernel JVK as said on procedure no 13 above now phone kernel should show as JVK intead of JV1.
Will this Kernel XXJVK work on a Bell i9000UGJG9, build number ECLAIR.UGJG9?
Will this Kernel XXJVK work on a Bell i9000UGJG9, build number ECLAIR.UGJG9?
Hi,
I have a little question. I installed the ROM XXJVK last week and I was wondering : will I loose my datas if I want to root it ?
And do I have to do the steps after the step 12 ? Because if I re-install the kernel, won’t I loose my datas ?
Thanks for the reply.
Hi,
I have a little question. I installed the ROM XXJVK last week and I was wondering : will I loose my datas if I want to root it ?
And do I have to do the steps after the step 12 ? Because if I re-install the kernel, won’t I loose my datas ?
Thanks for the reply.
After the upgrade to 2.3.3 I am very fast running battery will not last me even a day with minimal use of the phone. does anyone know how to fix it? THX
After the upgrade to 2.3.3 I am very fast running battery will not last me even a day with minimal use of the phone. does anyone know how to fix it? THX
Hi,
When I tried to flash with kernel.tar i.e. last step with files that you have given it FAILED..! however the cf root was done.
Any reason why.? Is the file that you provided is right..?
Hi,
When I tried to flash with kernel.tar i.e. last step with files that you have given it FAILED..! however the cf root was done.
Any reason why.? Is the file that you provided is right..?
How to unroot back on default system ??? THX
Hi,
I just made the upgrade : I am root and all my datas are OK !
Thank you for the tuto ^^
We’re glad!
go will back unroot ?
Flash the ROM again. By default, it’s unrooted.
OK thanks 😉
How to unroot back on default system ??? THX
Hi,
I just made the upgrade : I am root and all my datas are OK !
Thank you for the tuto ^^
We’re glad!
go will back unroot ?
Flash the ROM again. By default, it’s unrooted.
OK thanks 😉