A little while ago we published a guide on how to install XXLPB on your Galaxy S2. In case you aren’t aware, XXLPB is the latest Android 4.0.3 ICS firmware leaked for the Galaxy S2.
Now, those of you who have already flashed the XXLPB firmware, and are waiting for a safe step by step guide to root their Galaxy S2 on XXLPB ─ here’s a handy guide. Read on..
Compatibility
This procedure is compatible only and only with Samsung Galaxy S2, model number i9100. It’s not compatible with any other device. Check your device’s model number in: Settings » About phone. Also, make sure you are on XXLPB firmware as well.
Warning!
Read everything carefully and thoroughly. The methods and procedures discussed here are considered risky and you should not attempt anything if you don’t know completely what it is. If any damage occurs to you or your device, we won’t be held liable — you only will be responsible, you’ve been warned!!!
Step by Step Instructions:
- Download CF-Root kernel. File name – CF-Root-SGS2_XX_OXX_LPB-v5.2-CWM5.zip. Size 6.23 MB.
→ Download Link - Unzip the above file once. You will get the .tar file – CF-Root-SGS2_XX_OXX_LPB-v5.2-CWM5.tar.
DO NOT extract the .tar file (this might show up as a zip file as well, but do not extract it). You need to flash the .tar file using Odin to gain root access and install the ClockWorkMod Recovery (CWM) alongside. (If you’re getting a zImage file, it means you’ve extracted the .tar file too! — and that’s not a right thing to do. Use 7-zip (free software) to extract.) - Download Odin3 v1.83. Filename: Odin3-v1.83.exe. Size: 416 KB.
- Switch off your phone. Wait for vibration to confirm complete switch off.
- Now, put the Galaxy S2 in Download Mode — press and hold these keys together:Volume Down + Home + Power. You’ll see a ‘Warning!‘ screen.. press Volume Up to continue.
- Open Odin now by double clicking on Odin3 v1.83.exe file you got in step 3.
- Connect your phone to PC now. You should get the message “Added! !” under Odin’s message box in the bottom left (Check screenshot after step 9). If you don’t get this message, then probably there is a problem with drivers. Make sure you’ve the drivers installed.
- On Odin, click the PDA tab and select the .tar file you got in step 2 — CF-Root-SGS2_XX_OXX_LPB-v5.2-CWM5.tar (as shown in screenshot after step 9)
- Double check step 7 and step 8. Your Odin’s screen should look like this (screenshot below):
- Click the Start button on Odin to flash the CF-Root kernel (after double checking the ODIN screen). After flashing is complete, you’ll get a PASS message (with green background).
IMPORTANT Note: If ODIN gets stuck and doesn’t seem to be doing anything, or you get a FAIL message (with red background) in ODIN, do the following:
Disconnect the phone from the PC, close ODIN, remove battery, re-insert it, turn phone on in Download mode again, and do the procedure again from Step 5.
And btw, upon successful flashing cf-root kernel file on your Galaxy S2, you Odin’s screen should look like this:
- After CF-Root is installed, phone will restart automatically. When the Galaxy S2 logo shows up on phone, you can disconnect the cable from phone.
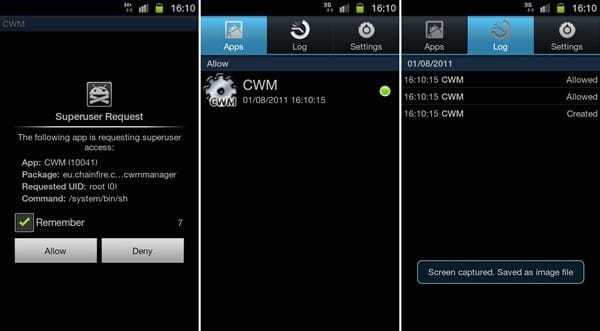
- Your phone is rooted now. The superuser app is included which allows you to give root access to applications. Also, CWM based recovery has been automatically installed too. Use the CWM app in app drawer to boot into recovery and do rom backups and restore. Happy flashing!
That’s it. You’ve now got a rooted XXLPB firmware. Thanks to Chainfire as always, for his quick CF-Root updates. Add your comments to the Comments section below if you have any problems.


![Solution For Quiz - Where Did the Dragon Hall Deal a Major Blow to the Khitan Navy [Where Winds Meet]](/content/images/2026/01/1-15.png)


Discussion