
Update [January 04]: We have now updated the guide with the latest TWRP 3.2.3-1 version. The latest Magisk v18.0 has been added too.
Update [September 21]: Now that the OxygenOS 9.0 update that brings the Android 9 Pie update to OnePlus 6 is available, let us tell you that the root guide given below works very well with the Android 9 update too.
We have updated the guide to include Magisk 17.2 download below because that’s the latest version of Magisk root package right now and is confirmed to be working with OnePlus 6 Android 9 update.
Original article:
Ever since the Android OS went mainstream, users have tried to push the software and hardware capabilities of their devices to the very limits. Nothing has been more beneficial to the Android community than the ability to root their devices and gain full control. Most devices these days need a custom recovery menu such as TWRP installed in order to be able to install the SuperSU files required to gain superuser access.
On the OnePlus 6, it is far easier to unlock the bootloader as compared to some of the other Android OEMs. If you’ve got your hands on the latest flagship killer of 2018 and want to push the phenomenal hardware of the OnePlus 6 to the absolute limits, here’s how you can not only install a custom recovery on your device but root it as well.
Related:

OnePlus 6 TWRP recovery
Download both the ZIP and IMG files required to install TWRP recovery on the OnePlus 6 from below:
- TWRP .IMG file:
- Android 9 Pie – boot_op6_ob3_twrp.img
- Android 8.0 Oreo – twrp-3.2.3-1-enchilada.img
- TWRP .ZIP file – twrp-installer-enchilada-3.2.3-1.zip
OnePlus 6 Root
Warning!
Do not try anything given on this page if you do not know completely what you are doing. In case any damage occurs, we won’t be held responsible.
Compatibility
The download files and the process for installing TWRP and rooting given on this page are compatible only with the OnePlus 6. Do not try this on any other device as you might end up damaging your device and permanently brick it.
Let’s see how to install TWRP first, and then root the OnePlus 6. (If you are on Android 9 Pie update, you can root the device without needing TWRP, see that method in a separate section below, and in which case, ignore the guide right below that uses TWRP.)
- Make sure you have unlocked the bootloader of your OnePlus 6.
- Download the required files:
- TWRP recovery from above
- Magisk 18.0 root package
- DM Verity disabler
- Make sure you have enabled USB Debugging on your OnePlus 6 device. You may need to re-do it after unlocking the bootloader.
- Connect your OnePlus 6 device to PC using the USB cable that came with it.
- Transfer the required files to your OnePlus 6, which are, TWRP ZIP file, Magisk, and DM Verity disabler.
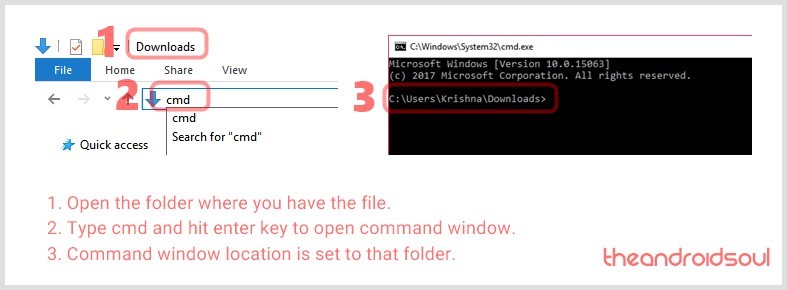
- Now open a command window inside the folder where you have the TWRP file from above. For this, go that folder, and then type cmd in the address bar of that folder’s window, and then hit the enter key. A command window will open up, and its location will be that folder.
- Connect your OnePlus 6 device to the PC.
- Run the following command into the command window we opened above to boot your device into bootloader/fastboot mode:
adb reboot bootloader
└ If you get a permission dialogue on your OnePlus 6 to “Allow USB debugging”, tap OK.
- Once your OnePlus 6 boots into bootloader mode, run the command below to install TWRP temporarily and access it right away.
fastboot boot <name of twrp file here>.img
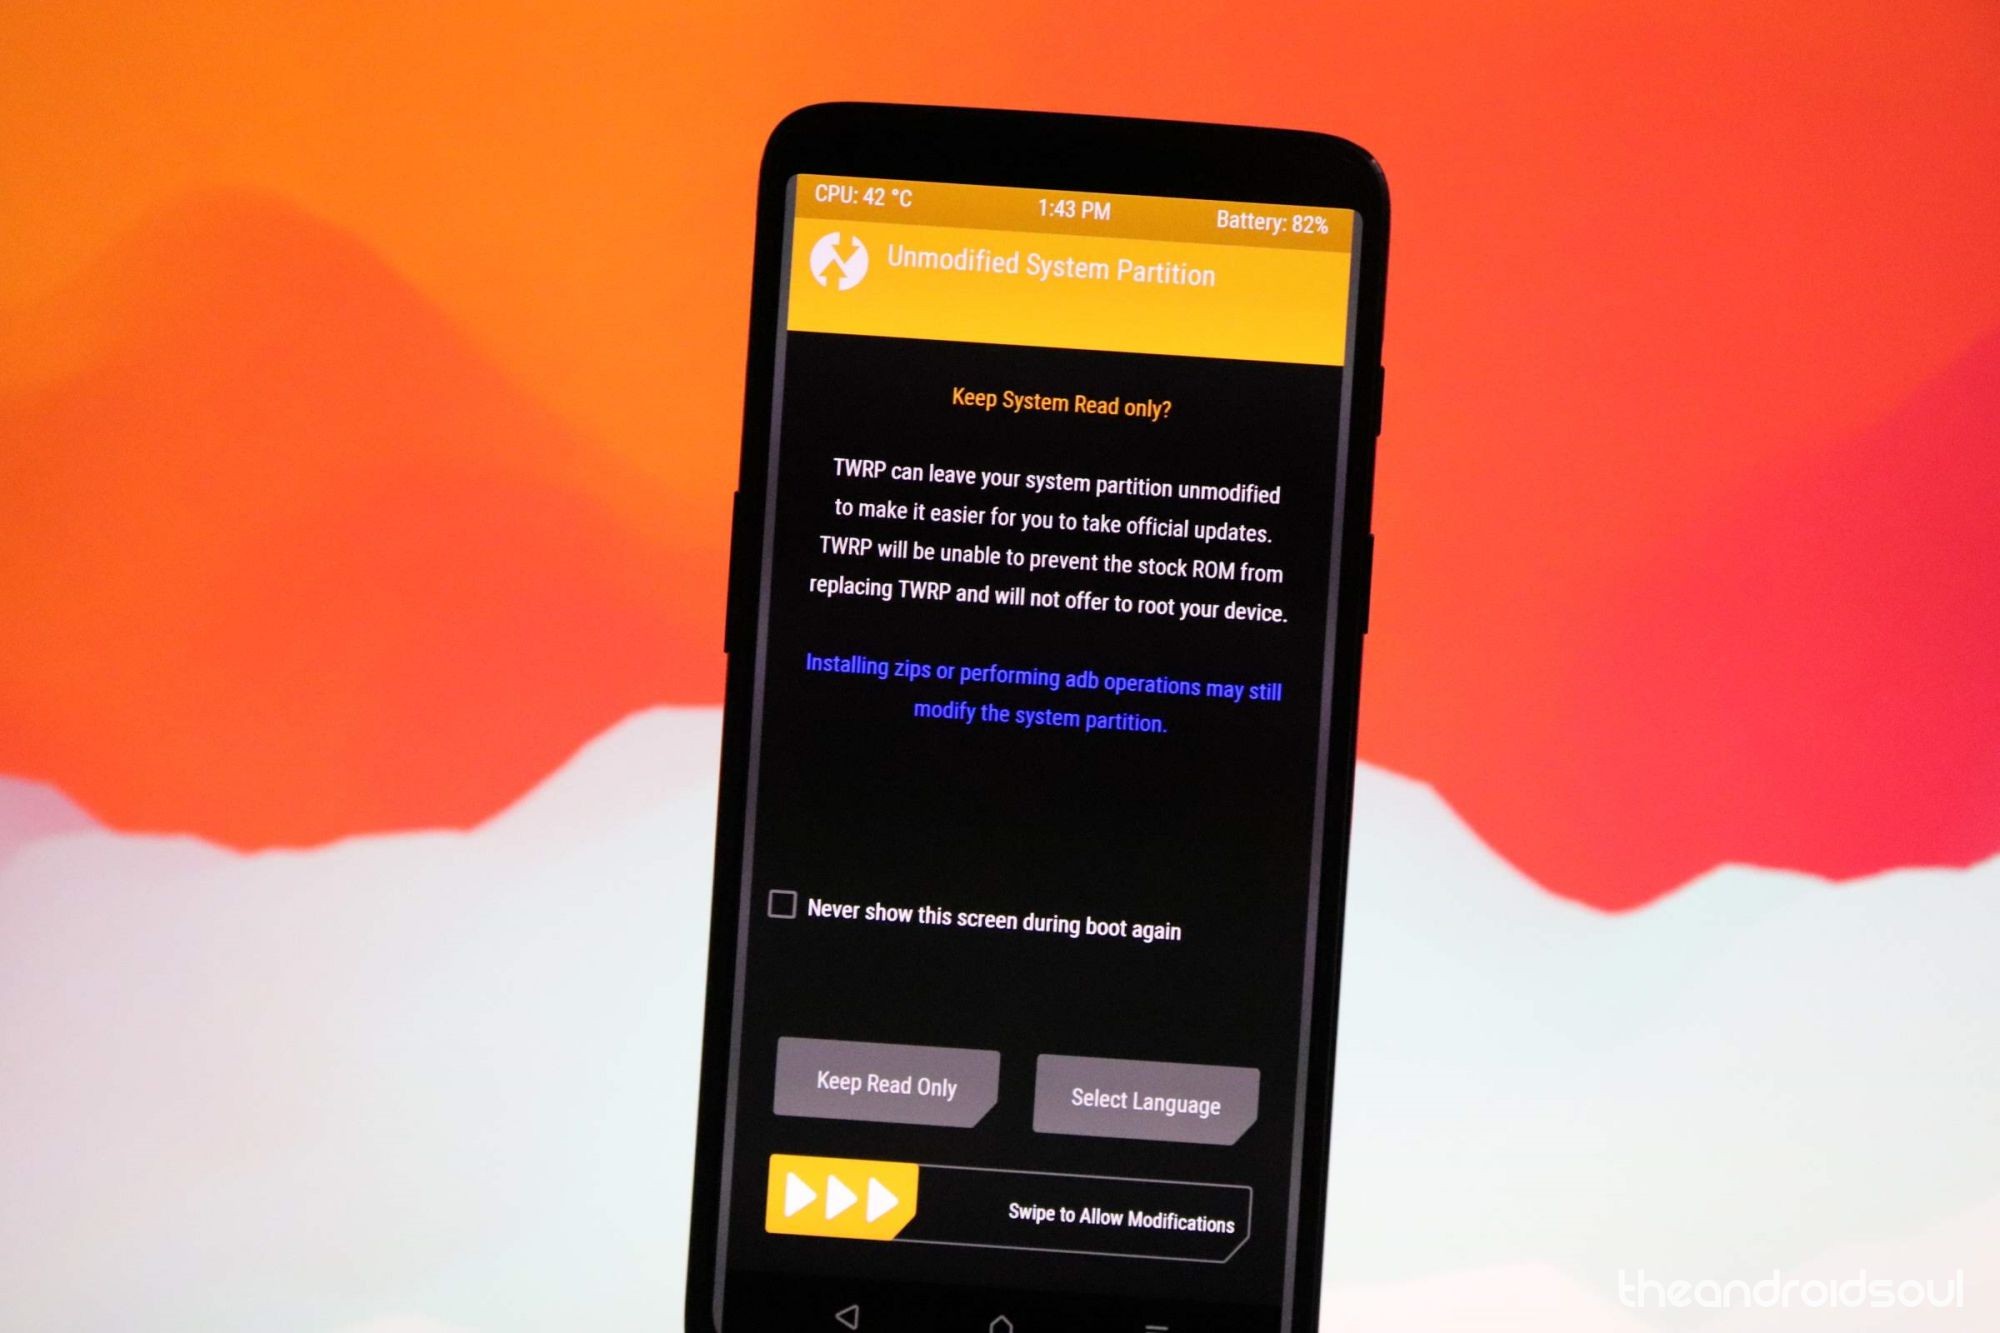
- The device will reboot to recovery mode and you will see TWRP recovery right there. Tap on ‘Keep Read Only’ button now to do not allow system modifications.
- You will see TWRP recovery now. Now we will install the TWRP recovery permanently. For this, in TWRP, tap on the Install button, and then select the TWRP ZIP file you transferred earlier.
- [Careful!] Now, reboot back to TWRP again. Tap on the home button, then on the Reboot button, and then on the Recovery button to restart the device into TWRP. Now TWRP recovery is permanently installed.
- Time to root your OnePlus 6 device. Install the magisk file to root the device, but if you don’t want to root, you still need to install the DM Verity disabler file to prevent the device from bootlooping when starting to Android from TWRP.
→ To install, go back to the home screen of TWRP and tap on Install button, and then select the Magisk file (or DM verity disabler if you don’t want to root), and then confirm the installation on the next screen. - Reboot now and your OnePlus 6 will start to Android. If you installed Magisk, you can verify root access on your OnePlus 6 using a root checker app.


Check out: OnePlus 6 firmware download
Do let us know if you need any help regarding getting root access on the OnePlus 6.


15 responses to “How to root OnePlus 6”
I got into crashdump mode, please help.
This guide is going to cause a lot of people to ruin their phones. Currently there is only one version of TWRP that works with Android Pie and that is bluspark. Version you have above no longer works unless you are on Oreo
https://forum.xda-developers.com/showpost.php?p=77628189&postcount=438
Please update this guide
In method 2#, how do we install magisk 17.2 from zip file? After rebooting we can only install APK file. ?
Hi,
With the first method, the oneplus6 don’t reboot, after the 10′ step: he stay in the oneplus waiting logo.
With the second method, at the 8′ step, he never restart: he stay on a black screen with a white led.
I tried to root my OnePlus6 with Android Pie, can you help me ?
It didnt work i need help pls
hi, will it work with 9.0.2? thanks
Thanks for writing this guide and for keeping it up to date!
I just followed to get Root with TWRP and I’d like to add something that seems missing.
Using a OP6 with current version 9.0.3., the TWRP image provided in the beginning of the article does not boot, the device gets stuck on the fastboot screen.
What worked for me instead, was getting the image file from the official TWRP Download site that corresponded with the ZIP file that I wanted to flash.
For example, I used “fastboot boot twrp-3.2.3-1-enchilada.img” to boot into TWRP and then flashed twrp-installer-enchilada-3.2.3-1.zip from TWRP before rebooting and all was well.
Hope this helps people rooting their OP6 in 2019 🙂
Problem: Yesterday I was un-install Magisk because I was downloading an OTA update. The problem is now while un-installing Magisk it asked me if I wanted to restore image or just uninstall, I just uninstalled.
Now my phone won’t boot into the OS. I can get access to TWRP & was able thankfully see the contents of my phone & was able to pull the contents off my phone.
It boots once then reboots into TWRP.
How do I get my phone to boot back into the OS?
Flash Magisk & see what happens or Flash a ROM?
Thanks for the help.
Once your OnePlus 6 boots into bootloader mode, run the command below to install TWRP temporarily and access it right away..img
fastboot boot
The device will reboot to recovery mode and you will see TWRP recovery right there.
————————–
My device does leave the fastboot screen, then goes to the “fastboot mode” icon, but does not restart into twrp recovery (or restart at all). A restart resolves the issue, but I’m stuck at that step for rooting the device. Any tips?
Do I *need* the DM Verity disabler file if I root my phone using magisk? I installed magisk earlier then rooted it a few days ago and then installed the DM Verity disabler file. That’s when my phone wouldn’t boot back up. I restored the phone – finally, and want to try this again. Do need that DM Verity file?
Also, I’m not switching between roms or anything, just normal updates.. if that matters.
it didnt work, so i tried doing some things for myself, and that even ruined it even further.
Basically now, I have no OS installed, and i cant put the oxygen.zip os on the phone. ADB or my pc wont see the device or anything. I have no ways to put it there.
This guide is WRONG. It ruined my Oneplus 6!
What went wrong?
also, i wanna use the ADB to push it into the phone, but whenever i connect the cable from my phone to my pc, the phone shuts down. Its so weird. Havent seen it anywhere else on the internet
I finally got it over. But i still have one problem – i get the “Failed to mount ‘/vendor’ Which has always been the problem. Is this a mistake with my device? i see other people on forums havent gotten it fixed either.