What to know
- You must locate and hack all five power terminals to disable the emergency lockdown.
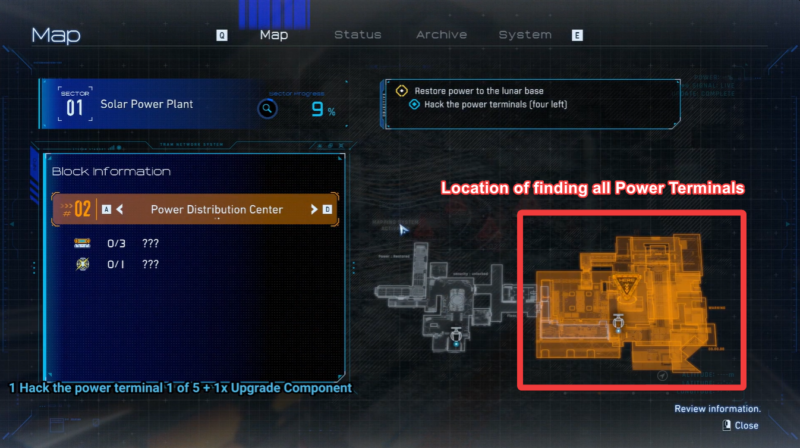
- The quest begins inside the Solar Power Plant’s Power Distribution Center.
- Each terminal introduces new traversal tools and combat mechanics.
- A final manual reboot is required after all terminals are hacked.
You step into one of Pragmata’s more mechanically layered objectives with the “Restore the Power to Lunar Base” quest, where progression is tightly tied to exploration, environmental awareness, and tool usage. The power terminals are not simply placed in obvious spots—they are deliberately positioned to test your navigation skills, combat readiness, and ability to interpret the environment.
Pragmata all power terminal locations – Restore power to Lunar Base
| Terminal | Area Description | Key Requirement | Reward/Unlock |
|---|---|---|---|
| Terminal 1 | Near laser wall in Solar Plant | Navigate laser segment | Access to terminal system |
| Terminal 2 | Lower room (left drop) | Shockwave Gun usage | Weapon unlock |
| Terminal 3 | Upper platform via elevator | Activate elevator system | Vertical progression |
| Terminal 4 | Lower platform with yellow pipes | Platforming + traversal | Stasis Net unlock |
| Terminal 5 | Sealed combat room (roof terminal) | Combat or stealth hack | Upgrade Component |
Terminal 1 – Upgrade component
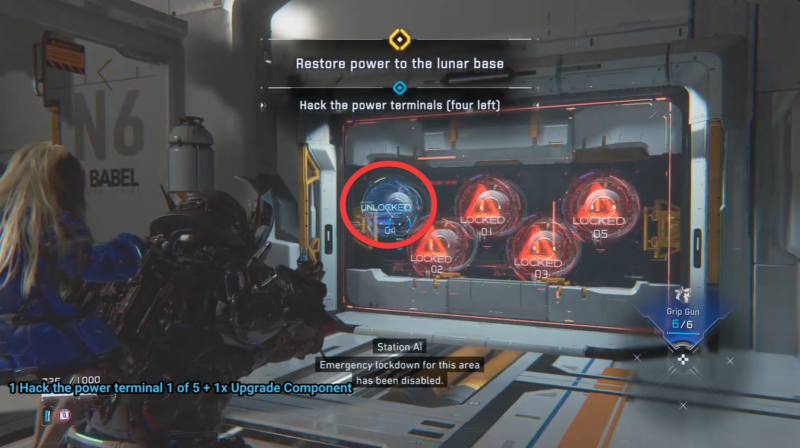
The quest begins in the Power Distribution Center, a central hub that visually anchors the entire objective.
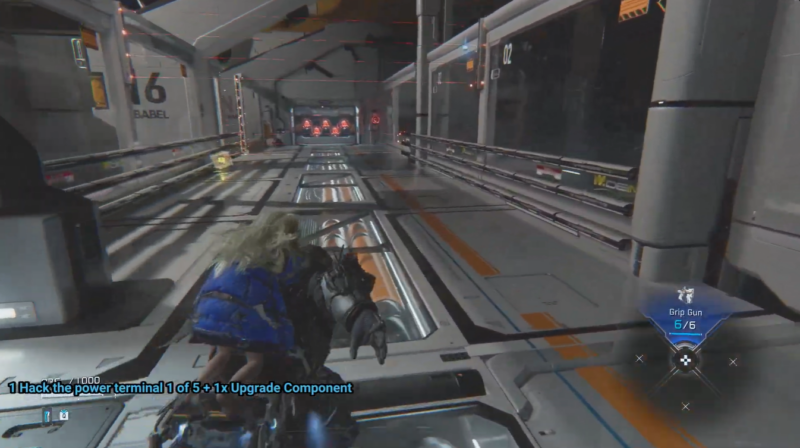
Right in front of a laser-blocked section, you’ll find a power terminal board displaying all five locks, which serves as your main reference point. This board is crucial because it confirms your progress as you move through the area.
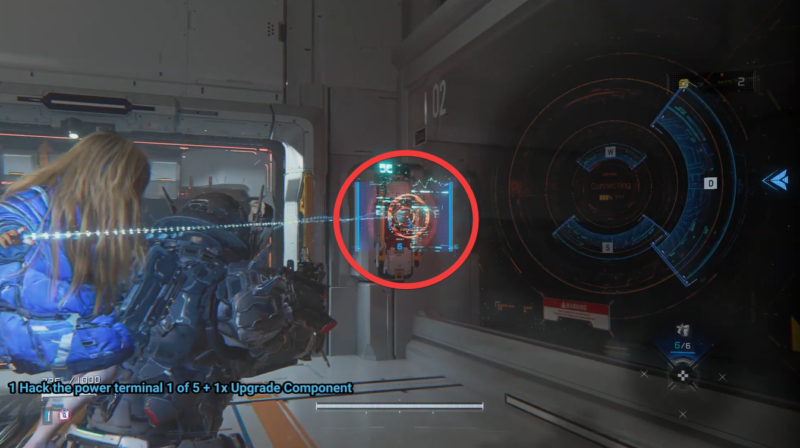
From this initial location, Terminal 1 is positioned to the right side of the laser wall, making it the most accessible starting point. The environment here teaches you how to maneuver around hazards while also rewarding exploration with an Upgrade Component, setting the tone for the rest of the sequence.
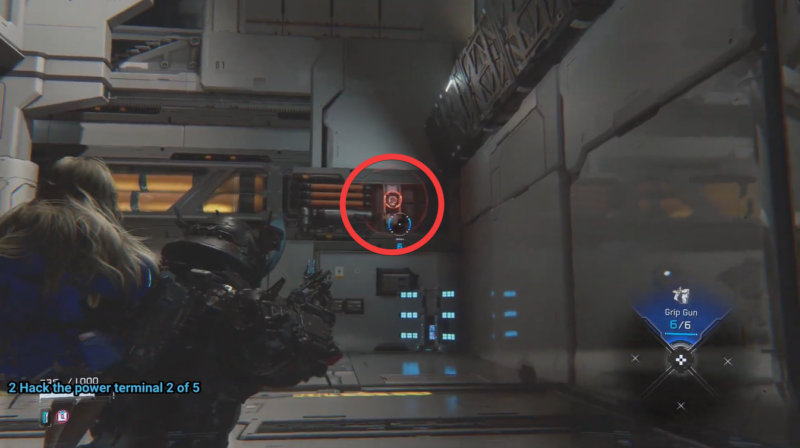
Terminal 2 – Shockwave Gun unlock
As you explore further, the level design subtly pushes you leftward, where a drop leads into a lower chamber.
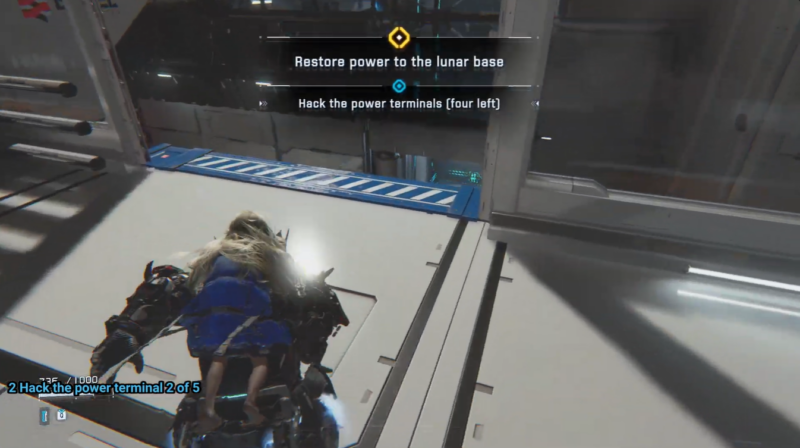
This is where the Shockwave Gun is introduced, marking a shift from pure navigation into combat-enabled progression.
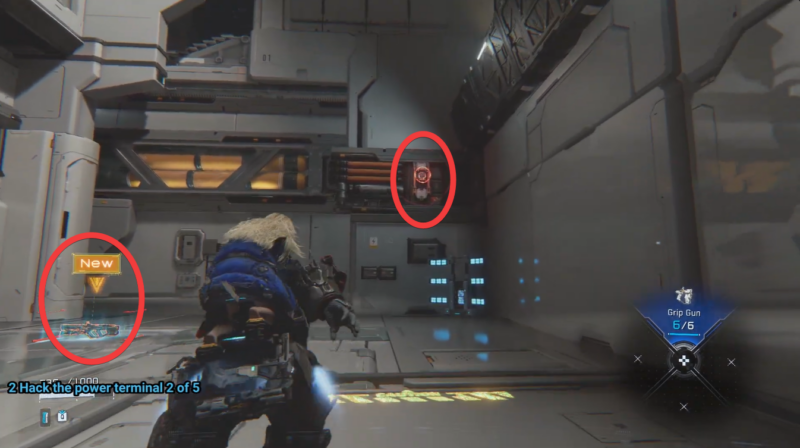
The second terminal is located within this same area, and you are expected to complete a short weapon tutorial before interacting with it. This design ensures that you understand the mechanics before advancing, making this terminal less about discovery and more about mastery.
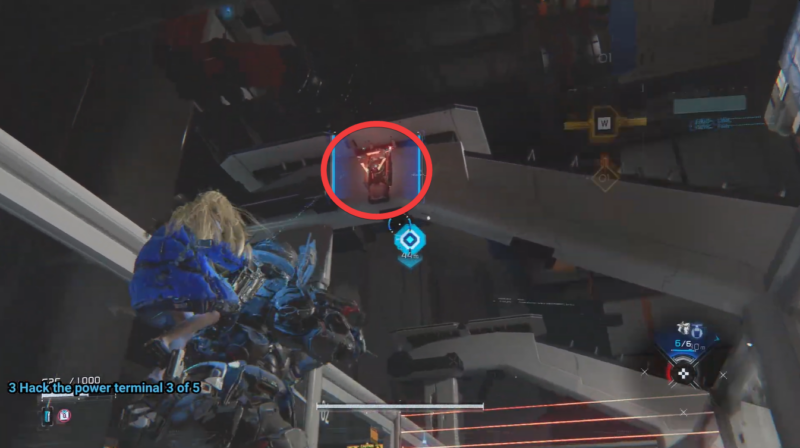
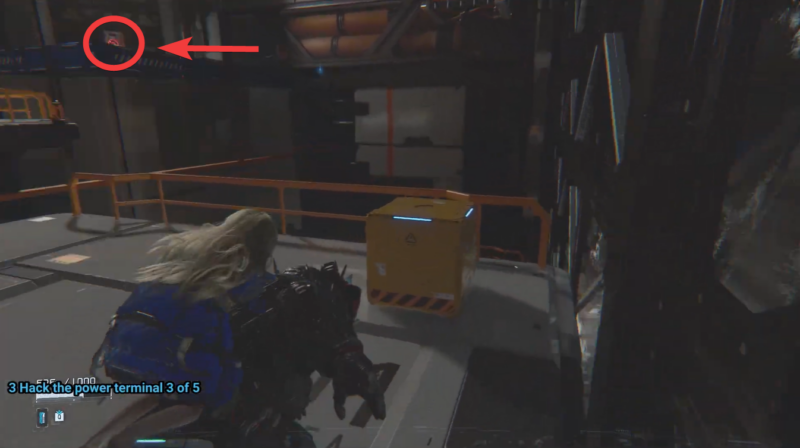
Terminal 3 – Elevator mechanic
The third terminal requires a bit more environmental awareness. Near the main terminal board, there is a red activation box mounted on an elevated wall directly opposite it. This object is easy to miss if you are not actively scanning your surroundings.
Once activated, the elevator system becomes operational, allowing you to revisit the lower level where the second terminal was located.
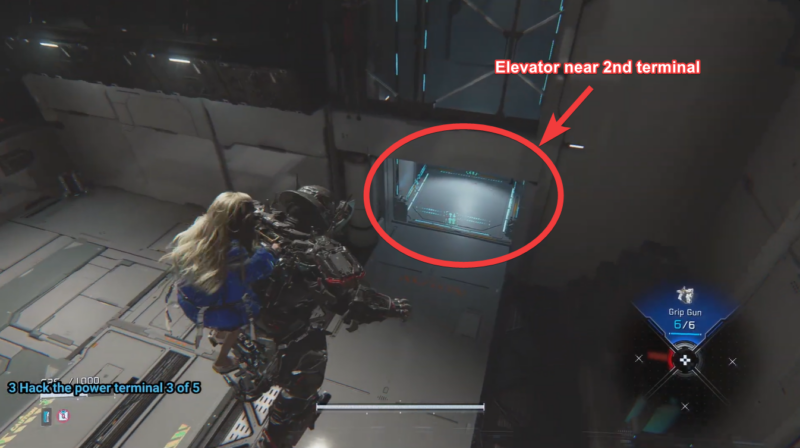
From there, you can ride upward to reach a higher platform, where the third terminal sits on the far-right side.
This segment highlights how Pragmata blends backtracking with newly unlocked traversal options, encouraging you to rethink previously explored areas.
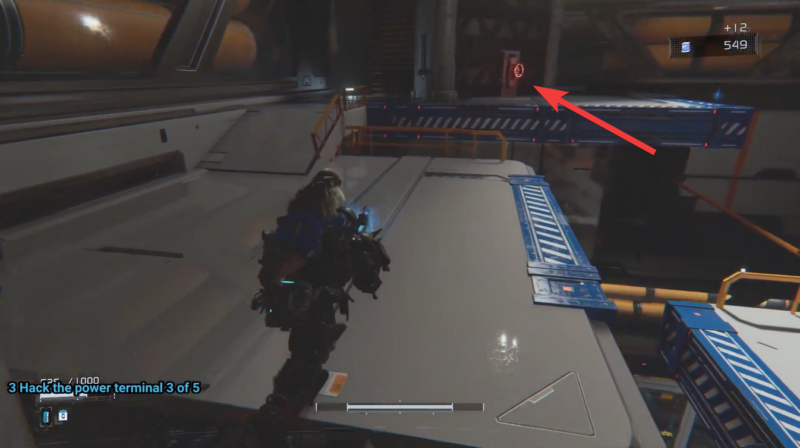
Terminal 4 – Stasis Net
After hacking the third terminal, the flow of movement shifts again. Turning 180 degrees from your current position leads you toward a platforming sequence, requiring careful jumps across structures.
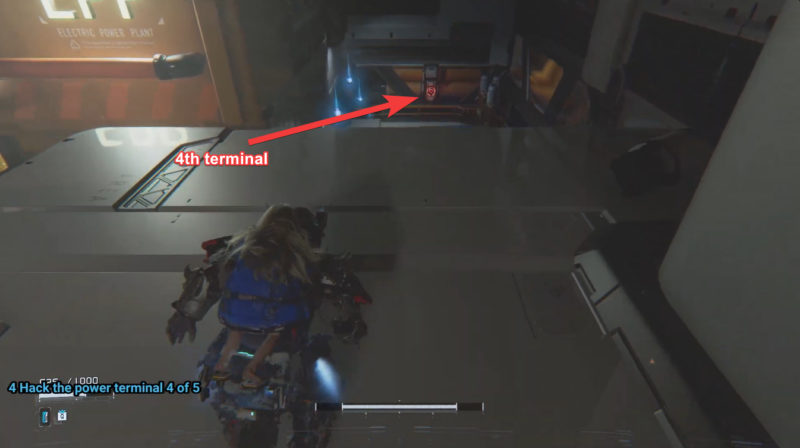
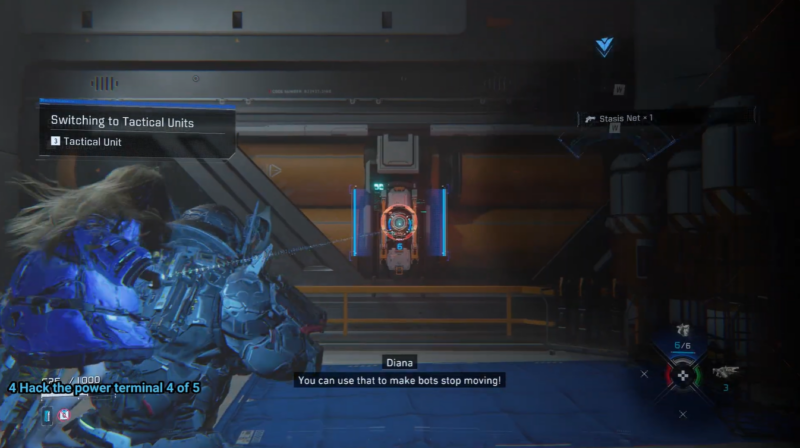
This path eventually leads to a lower-level section marked by distinct yellow piping, where the fourth terminal is mounted. In this area, you also acquire the Stasis Net, a tool that significantly enhances your ability to control enemy encounters.
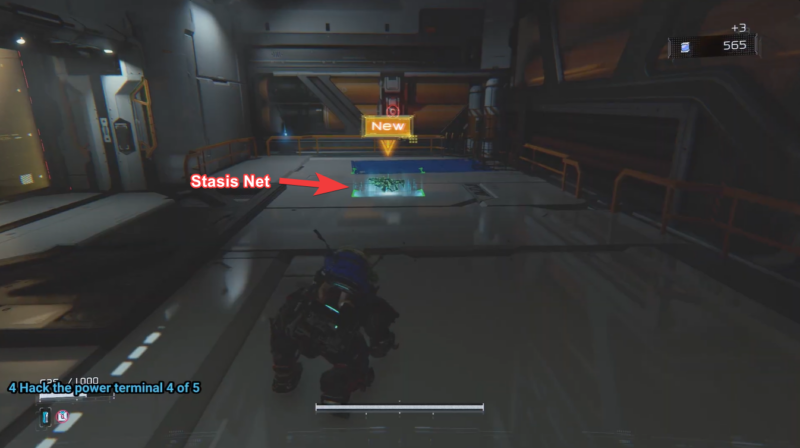
The fourth terminal is straightforward to access once you reach this section, but the real importance lies in gaining the Stasis Net, which prepares you for the final segment.
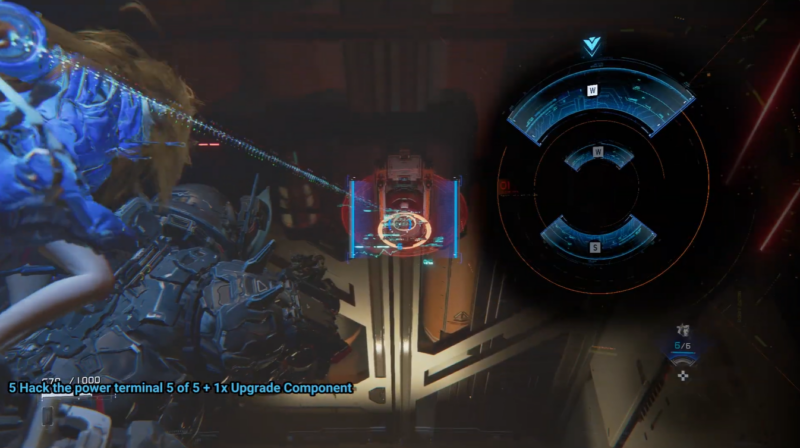
Terminal 5 – Upgrade component
The fifth and final terminal is located in a sealed room positioned to the left after completing the fourth terminal. This area introduces a choice: engage in combat or bypass it.
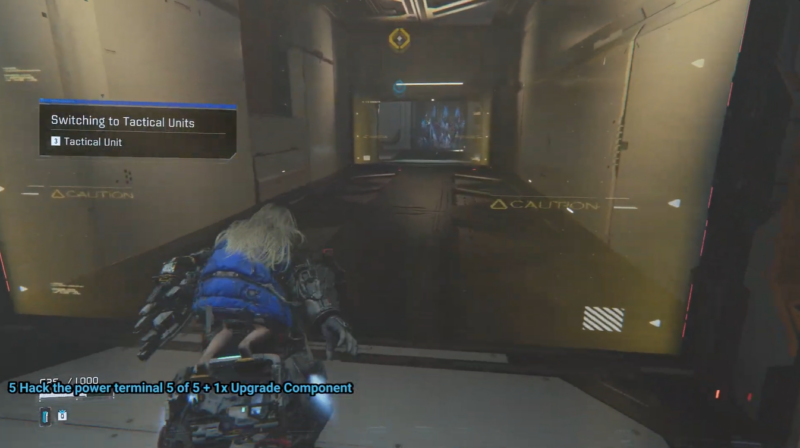
Inside the room, enemies spawn as soon as you enter, and the game encourages you to use the newly acquired Stasis Net to neutralize them.
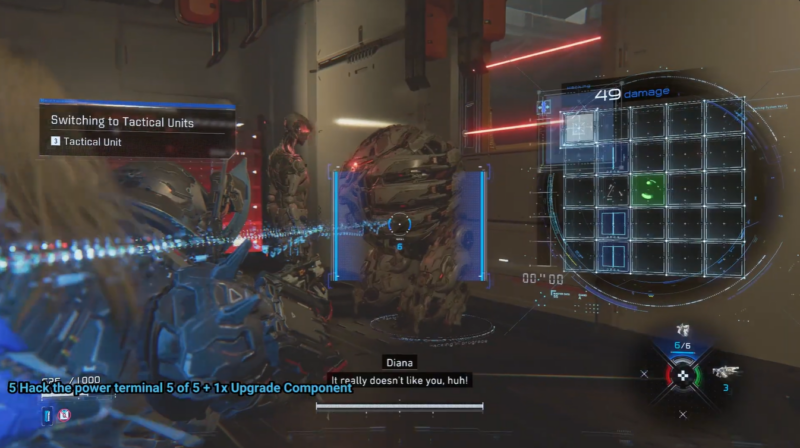
However, you can completely skip the fight by focusing on the objective, as the terminal is mounted on the ceiling.
This design choice reinforces player freedom. If you prioritize efficiency, you can hack the terminal immediately and exit without engaging enemies.
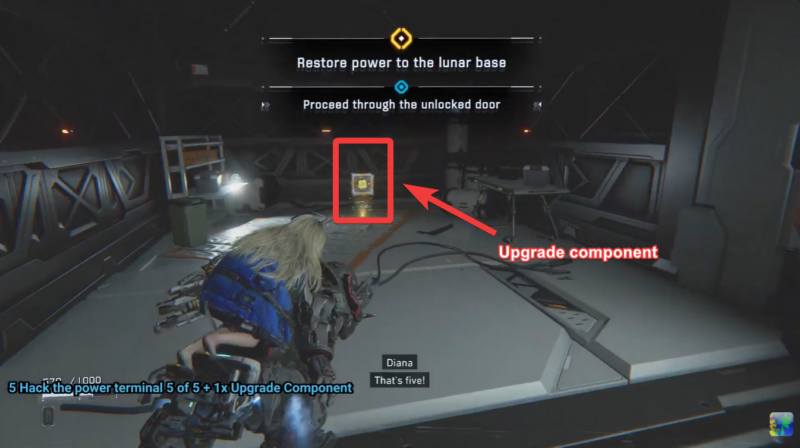
Upon leaving the room, an Upgrade Component awaits on the right side in the form of a hovering cube, rewarding both aggressive and stealth-focused approaches.
Completing the power restoration sequence
Once all five terminals are successfully hacked, the system does not immediately restore power. Instead, you are prompted to perform a manual reboot of the power plant controller, marking the final step of the objective.
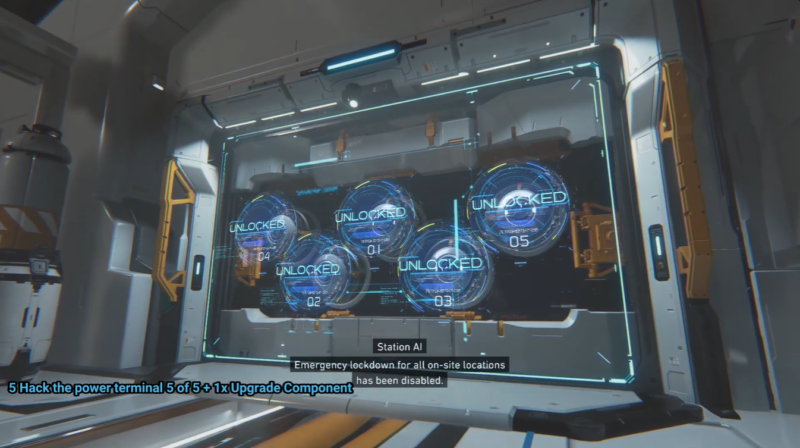
This final interaction ties together the entire sequence, emphasizing that restoring power is not just about hacking terminals but fully reactivating the system infrastructure.
Rewards gained from the power terminal sequence
| Reward Type | Description |
|---|---|
| Upgrade Components | Found near Terminal 1 and after Terminal 5 |
| Shockwave Gun | Unlocked during Terminal 2 segment |
| Stasis Net | Acquired near Terminal 4 |
| System Access | Enables further progression in lunar base |
Why this quest stands out in Pragmata
Restoring power in Pragmata is more than a checklist task—it is a carefully structured progression system that blends exploration, combat, and puzzle-solving into one cohesive experience. By the time you complete the fifth terminal and initiate the reboot, you have effectively mastered several core mechanics of the game.
What makes this quest particularly engaging is how each terminal introduces a new layer of gameplay rather than repeating the same mechanic. You are constantly adapting—first navigating hazards, then learning combat, then revisiting areas with new tools, and finally making strategic choices about whether to fight or bypass encounters.
The pacing ensures that you never feel like you are simply ticking off objectives, but instead actively learning and evolving with each terminal.


Leave a Reply