

What to know
- Choosing the right prompts — with detailed descriptions — is crucial for creating photorealistic images.
- Negative prompts can be employed to avoid undesired elements or styles in the images.
- The use of prompt weights, aspect ratios, permutations and chaos values adjustment is also very important.
Making AI art on Midjourney can be a fun experience at first but it could get frustrating if the AI tool isn’t able to recreate what you had in mind. When it comes to making images that look real, you will have to learn how to script your prompts the right way to create the perfect picture.
In this post, we’ll help you understand everything you need to know about making photorealistic images on Midjourney – from entering the right sets of keywords for camera settings, descriptions, and negative prompts to using prompt weights, aspect ratios, permutation prompts, and chaos parameters.
How to make photorealistic images on Midjourney
The following tips can help you create images on Midjourney that are photorealistic.
1. It’s all about prompts!

The first thing to consider when you’re about to create photorealistic images on Midjourney is learning what prompts you can use to get the kind of results you’re looking for. While anything you create on Midjourney qualifies to be art, if you’re looking to create realistic images, you need to be more specific when entering your input.
To get photorealistic images, you need to have a fundamental idea about photography as this might help you define your concept in a better way. Since your aim is to create images that are natural and closer to real life, you must know what photography style you want to pick for your creation.
Here are a few things you should consider when generating prompts for a photorealistic image:
- Photo type: To create a real-like image of what you’re thinking, you first need to specify the kind of picture you want to generate using any of these keywords – portrait, realistic image, photorealistic image, personal portrait, macro shot, candid shot, close-up portrait, etc.
- Camera model: To force Midjourney into giving the kind of picture you imagined, you can experiment with different camera brands and models to generate images. You can use keywords like – Sony a7R IV camera, Nikon D850 DSLR, Canon EOS R5, Hasselblad X2D 100C, Kodak Portra 800, Fujicolor Superia X-TRA 400, etc.
- Focal length and lens type: In addition to specifying a camera model, you can add lens information to attain your desired perspective and look for the images you create on Midjourney. You can go with these settings – 18mm, 28mm, 35mm, 50mm, 85mm, 100mm, 200mm, etc. Lens with lower values are good for creating landscape images and anything above 85mm is good for portrait and macro shots. You can also specify different lens brands if they provide unique results.
- Depth of field: Depth of field refers to the distance between the closest and furthest elements in an image when they’re in acceptable focus. Describing your depth of field for an image is important to make Midjourney show your subject more or less prominently. You can use keywords like these in your prompt – narrow/shallow depth of field, wide/deep depth of field, bokeh, etc.
- ISO value: Specifying the ISO value for a photo determines the brightness at which the camera renders the scene. You can specify ISO values when creating AI art with Midjourney so that it knows how bright an image is. For that, you can specify the word “ISO” alongside any of these values in your input prompt – 50, 100, 200, 400, 800, 1600, 3200, 6400, 12,800, 25,600, etc; ISO values follow a geometric progression, so you’ll have to enter these values as they are.
- Aperture: Aperture refers to how much of your photo remains in focus and you can experiment with these values – f/1.4, f/2.8, f/4, f/5.6, f/8, f/11, f/16, etc. You will have to research more on how the aperture works with different lenses and you can also specify an aperture range between two values by adding it to your prompt.
- Lighting type: Use keywords like – natural light, dreamlike lighting, dramatic lighting, soft sunlight, golden light, film light, sunlight, back lighting, bottom lighting, top lighting, hard lighting, contrasty lighting, neon lighting, etc.
- Shutter speed: Just like aperture and ISO, you can define a shutter speed for images you create on Midjourney to determine how shots of moving elements look in your image. Low shutter speeds can result in motion blue while high values can obtain eliminate motion from a moving object. You can experiment with your Midjourney prompts with the words “shutter speed” followed by any time value in seconds like – 5s, 2s, 1s, 1/4s, 1/60s, 1/120s, etc.
Related: Midjourney Cheat Sheet: Become a Pro at Using Midjourney!
2. Detailed descriptions create better renders
You can create images with realism on Midjourney as long as your descriptions are well-detailed on their own. Descriptions don’t just mean adding a bunch of elements but to obtain images with a specific setting, you need to script them in a way that you’d describe it to an actual person. You can follow this syntax to create better renders:
/imagine <subject> <environment> <color> <mood> <composition>
Subject: Here, you can describe the person, animal, object, or location with adjectives to be clear about the main context of your image.
Environment: With relevant keywords, describe the setting in which your subject is present. You can enter something like indoors, outdoors, on the moon, in Narnia, underwater, etc.
Color: Since real images can be manipulated with colors, you can specify how vibrant your image should be when created inside Midjourney. For this, use keywords like colorful, black and white, monochromatic, vibrant, muted, bright, etc.
Mood: This refers to how dramatic your image looks which you can specify using keywords like – calm, raucous, energetic, etc.
Composition: This is the type of shot you want Midjourney to create and is part of what we explained in the previous section.
You can learn more about how you can compose prompt descriptions from this Midjourney documentation.
Related: Midjourney Transparent Background: Step-by-step Guide and Tips
3. Use negative prompts to avoid certain elements/styles
Midjourney allows you to use negative prompts to force the AI tool from showing images with certain elements, styles, or backgrounds. The syntax for this prompt goes like this:
/imagine <original prompt with descriptions> --no <unwanted element>
Adding --no towards the end of your input alongside the unwanted elements forces Midjourney to ignore the elements you specify so that they don’t appear in your creations.
For example, entering vibrant tulip fields would show tulips of all colors in a random setting but specify something like --no red at the end will prevent the color “red” from appearing inside the images or at least show them with the least prominence.
It’s not just colors you can remove, you can add the --no parameter to avoid seeing certain objects, people, or animals in the images. You can use the --no parameter multiple times within the input to make sure Midjourney doesn’t show the set of undesired elements in the resulting images.
Here’s an example of how negative prompts may look like:
Prompt: a photorealistic image of vibrant tulip fields in the countryside, taken on a Canon EOS R5 camera with 85mm lens, natural sunlight –no redYou can learn more about using negative prompts from this Midjourney documentation.
Related: Can I Sell Midjourney Art? Everything You Need to Know
4. Split your input with prompt weights
Midjourney can understand the significance of each of your elements if you script them in a certain way. If you want to rank the keywords in your prompt with different levels of preference, you can force Midjourney to focus heavily on the most important part of the prompt and use keywords with subsequently lower importance to create your image.
To separate a prompt into different parts, you can use the double color :: followed by the number to assign the relative importance to that part of the prompt. Let’s say you want to split a prompt into two parts where the first part is to have three times more significant than the second part; the syntax for such an input should look like this:
/imagine <prompt 1>::3 <prompt>::1 or /imagine <prompt 1>::3 <prompt>:: , if the significance of a prompt part is “1”, you can avoid entering the number after the double colon.
Similarly, if your prompts consist of 5 different parts, the syntax for the input should be:
/imagine <prompt 1>::4 <prompt 2>::3 <prompt 3>::2 <prompt 4>:: <prompt 5>::
Here, “prompt 1” will be 4 times more significant than “prompt 4” and “prompt 5”; “prompt 2” is 3 times more important than “prompt 4” and “prompt 5”; and so on.
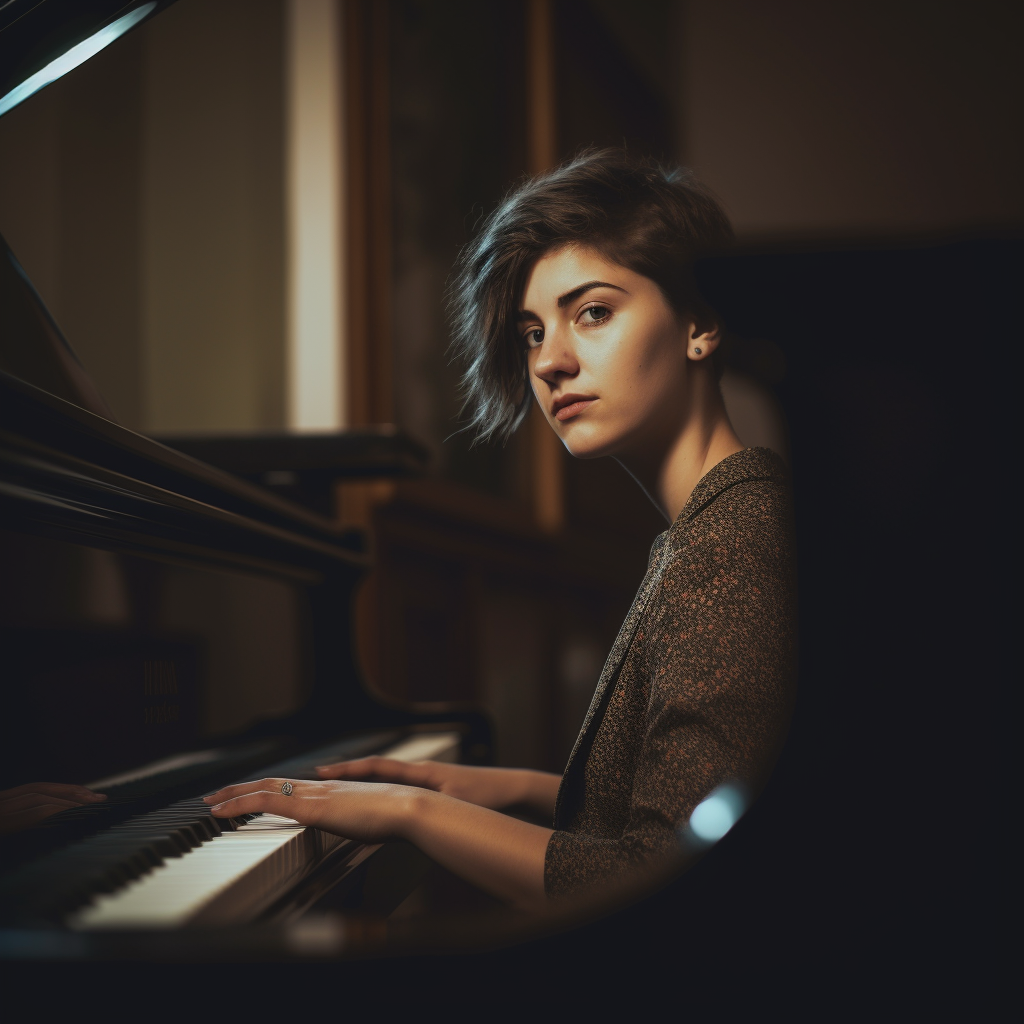
Here’s an example of what an actual prompt would look like when using prompt weights:
You can learn more about using prompt weights from this Midjourney documentation.
5. Specify an aspect ratio for certain photo types
By default, when you enter your prompt on Midjourney, the resulting images will be of a 1:1 aspect ratio. To create a refined photo with more room to add details and styling, you can specify the aspect ratio.
For instance, you may want your portrait shots to be taller than wider; so you can set a desired aspect ratio like 9:16, 4:5, 3:4, 10:16, or so on. For landscape photos, you may want the picture to be wider than taller; so you may prefer any of these values to set the desired aspect ratio – 16:9, 5:4, 4:3, 3:2, etc.
Aspect ratio is a parameter you specify at the end of your prompt and the syntax for applying one looks like this:
/imagine <prompt description> --ar <value> where you replace “value” with your preferred aspect ratio.
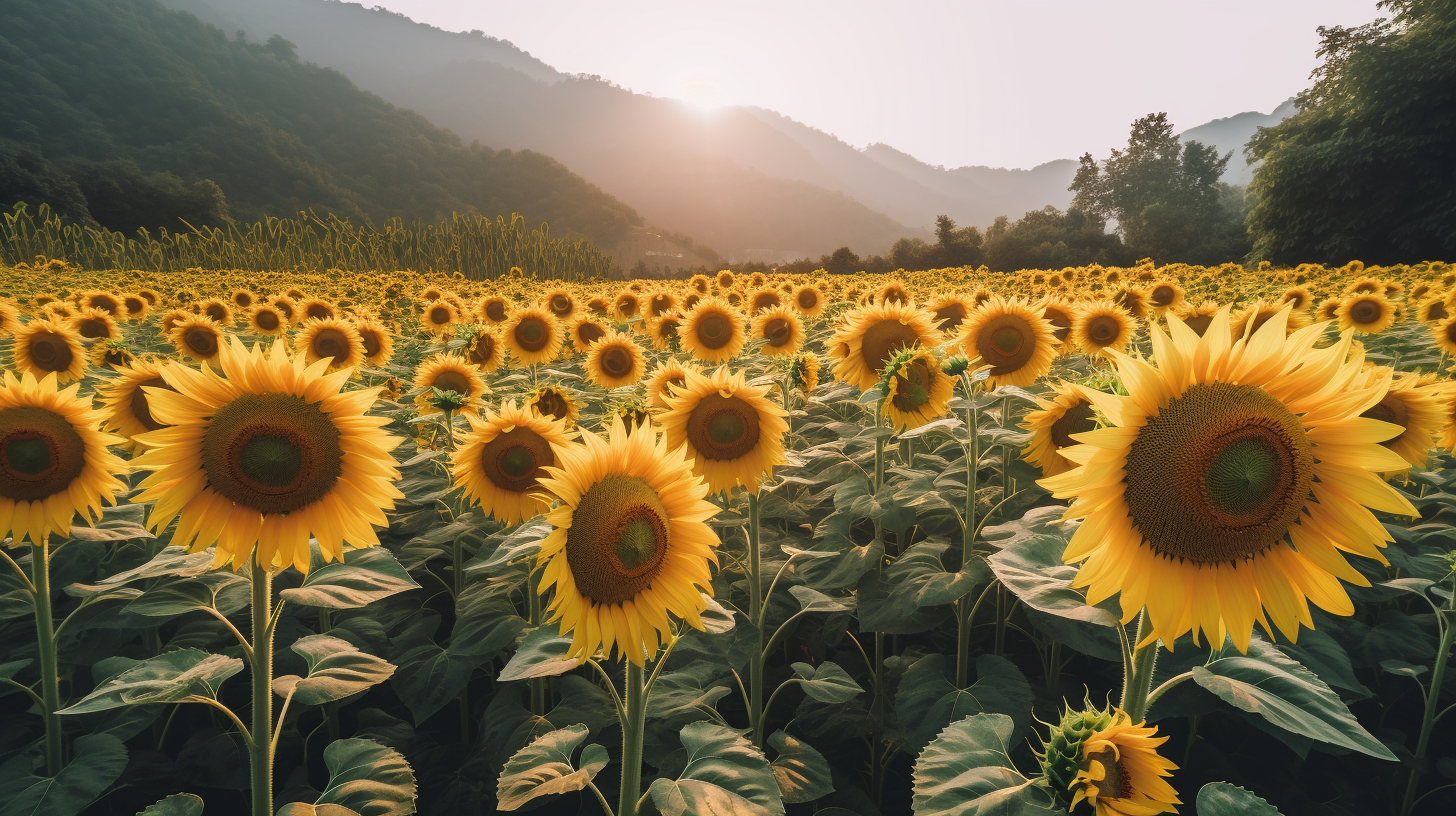
Here’s an example of a landscape in an aspect ratio of 16:9:
You can learn more about using different aspect ratios from this Midjourney documentation.
6. Use Permutation prompts to generate multiple variations of input
Midjourney offers a way to generate variations of a single prompt with different combinations of parameters which you can mention inside curly brackets {}. This way, you can avoid entering similar prompts multiple times to obtain images of similar styles but different parameters. Let’s say, we want to create multiple variations of “a fruit bowl” with different sets of fruits. For that, our input prompt will be something like this:
/imagine a photorealistic image of a bowl of {oranges, apples, mangoes}
This prompt will create 3 jobs, each of these jobs will have sets of images with a bowl of oranges, apples, or mangoes individually, not together.
You can also use these permutation prompts with more than one set of bracketed parameters in one prompt. This will create more variations of your prompt, combining different sets of parameters per job. You can use permutation prompts to create image sets at different aspect ratios without needing to specify an aspect ratio one by one.
The only limitation when using permutation prompts is that it can only be run on Midjourney accounts that are subscribed to the Pro membership. You won’t be able to create permutation variations with a Basic or Standard Midjourney subscription.
You can learn more about using permutation prompts from this Midjourney documentation.
7. Change chaos values to slightly alter generated images
Midjourney can create images using your descriptions, styles, and relative importance. If you’re not satisfied with the results that come out of your prompt and want Midjourney to change them to a more unique and unusual style, you can use the Chaos parameter inside your input.
To define chaos inside your input, you can follow this syntax:
/imagine <description> --chaos <value> or /imagine <description> --c <value> where the value can be anywhere between 0 and 100. You can set lower chaos values to your prompt to get more reliable results based on your input or higher chaos values to get an unexpected combination of results.
You can learn more about using chaos values from this Midjourney documentation.
That’s all for now. Keep an eye on this page for more tips, as we will keep it updated with interesting content about making photorealistic images on Midjourney.
RELATED


Discussion