
Captured human NPCs in Palworld are worth using for three things — high-value side-quest rewards, permanent base access to captured merchants, and novelty human Pal builds for base work or combat.
Almost everything in Palworld orbits the Pals themselves, but the humans wandering the map are far more useful than most players realize. A handful of side quests hand out omni-condensing fruits and stacks of gold, captured merchants turn your base into a one-stop shop, and you can raise a human like a Pal for base work or straight combat. Here is what to prioritize, who to catch, and how to build one.
- How captured humans behave in Palworld
- Human NPC priorities at a glance
- Side missions with rewards worth the detour
- Merchants worth capturing for permanent base access
- Catching merchants without triggering a wanted level
- Dr. Braun and his once-a-day surgery
- Building a human-run base with five NPCs
- The best combat human and how to build it
- Where human combat builds fall short of Pals
- Frequently Asked Questions
How captured humans behave in Palworld
Since version 1.0, a captured human is mechanically almost identical to a Pal. Ones carrying weapons will actually fight with them — every human Pal has a Use Weapon skill, so they fire whatever they are holding when their active skills are on cooldown. They also work at your base, and you can condense and upgrade them just like anything else on the type chart.
The differences are what hold them back. Humans get no element typing, no partner skill, and — oddly — you cannot breed them. Because they have no type, there is nothing to awaken either. Every other power-boosting method still applies, so a human never beats a purpose-built Pal at a given job, but it can land roughly on par with a fair number of them, which is more than you would expect.
Human NPC priorities at a glance
| NPC or activity | Best use |
|---|---|
| Side missions (Zoe, Harold, Kitsun Noct, Fia) | Kinship peaches, stat fruits, gold, cosmetics |
| Captured merchants | Permanent base shopping for ammo, food, meds |
| Dr. Braun | Once-a-day passive and IV re-roll surgery |
| Base-worker humans | Cover nearly every work suitability |
| Syndicate Veteran | Best tested human combat build |
Everything below expands on these five lanes. If you only came for one, jump to it — but the side missions in particular give out fruits you would otherwise grind for.
Side missions with rewards worth the detour
| Side mission | Key reward |
|---|---|
| Zoe’s quest chain | Zoey & Grizzbolt Pal, Halloween outfit skin (repeatable for more copies) |
| Harold’s quest chain | Up to 110,000 gold, high-tier might elixir, kinship peach, 3 might fruits, ripe star fruit |
| Kitsun Noct’s quest chain | Kinship peach, 3 stout fruits, ripe star fruit |
| Fia’s quest chain | Kinship peach, 3 life fruits, ripe star fruit |
| Depresso Man | Depresso costume and mask |
| Operation Splatterina Spree | 10 extravagant vegetable cakes, 5 special cakes |
| Stolen Pal (Sand Dunes Entrance) | Rank-two star fruit, 10 high-quality recovery meds |
| Give a Flack | Gathering handbook, 3 Dazzi Thunderclouds, 3,500 gold |
| Progress checker NPCs | Escalating rewards for logging Pals, bosses, and captures |
Most Palworld side quests pay out trivial rewards, so this is a curated set — the ones that give something genuinely worth the time, not every marker on your map. The quest chains from named NPCs are the standouts because they escalate into omni-condensing fruits and IV boosters.
Zoe appears outside the first tower after you beat its boss; talk to her and she relocates to the desolate church in the starting area. Her chain has you show off a captured Grizzbolt, thin out Free Pal Alliance members near Lily and Lyleen’s tower, and fetch an item from nearby ruins — the payoff is the Zoey & Grizzbolt Pal, functionally a Grizzbolt with Zoe riding on top. Return to the church for her Halloween quest to unlock an outfit skin, and note you can also catch pure Zoey by throwing a spear at her. A later repeatable quest to clear more Free Pal Alliance members hands out an extra Zoey & Grizzbolt each time.
Harold is the richest chain. Free him from a cage just north of the starting watchtower for a rank-one star fruit and medical supplies. He then moves beside Clint’s bounty marker in the Astral Mountains, where his quest spawns a one-time capturable bounty NPC — throw a sphere if you fancy collecting humans, because this is the only chance to grab him — and pays out 80,000 gold. Next he sits in a hillside gazebo in Sun Reach; clear a rampaging Flopie up the road for 30,000 gold and a high-tier might elixir. His finale on the northern Sakurajima beach ends in a fight (join it or watch) for a kinship peach, three might fruits, and a ripe star fruit — the omni star fruit that condenses at any rank.
Kitsun Noct starts with the wounded Pal on Sakurajima Island — feed it, follow the marker into Feybreak, and clear a rampaging Pal. A PIDF officer then gives “The Unpatched Katana,” which forces you to hunt down and kill the Kitsun Noct yourself; you cannot capture it at any point. Reporting back nets a kinship peach, three stout fruits for defense IVs, and a ripe star fruit. Fia’s chain runs from an early roadside group through the volcano’s south shore, the Dune Shelter (hand her a might remedy), and a final fight on Sakurajima’s southern coast for a kinship peach, three life fruits for max-HP IVs, and a ripe star fruit.
The smaller ones still earn their spot. Depresso Man trades venom glands and high-quality cloth for the excellent Depresso costume and mask. Operation Splatterina Spree, from a breeder by a Feybreak fast-travel point, swaps 10 Splatterina for 10 extravagant vegetable cakes and five special cakes — huge because you can pull it off long before you unlock special cakes in the tech tree. The Sand Dunes Entrance NPC pays a rank-two star fruit and 10 high-quality recovery meds for a two-minute stolen-Pal fetch. Give a Flack, by the alpha near the starting area, is worth it mainly for the three Dazzi Thunderclouds nobody bothers to craft. Finally, check in regularly with the progress checker NPCs — the Pal Ecological Researcher (log species in the Paldeck), the Veteran Hunter (kill bosses), and the Wise Hunter at Fisherman’s Point (capture Pals) — since their rewards climb each time you hand in progress.
Merchants worth capturing for permanent base access
| Merchant | Stock or use |
|---|---|
| Medal merchant | Items bought with dog coins |
| Bounty token vendor | Bounty-token goods, works fine from base |
| Pal merchant | Buys and sells Pals (blue jacket) |
| Legendary pharmacist | Basic meds up to high-grade medical supplies |
| Legendary gourmet | Mammorest Curry, Niku Jaga, and more |
| Legendary grocer | Plants, seeds, and mushrooms |
| Legendary materials merchant | Resources and Pal-specific materials |
| Legendary game hunter | Meats, milk, and eggs |
| Legendary ammo merchant | All ammo, up to beam launcher ammo |
Catch a merchant, release them at your base, and you can buy and sell from them any time — no trip to town. Different merchants stock different goods, so there is a genuine shopping list here. The plain ones you can grab from settlements, but the legendary merchants only appear as random base events once you hit base level 20 or above, so catch them the moment they show up.
Medal merchant and bounty token vendor
The medal merchant sells goods for dog coins and works perfectly from your base once caught, and the bounty token vendor does the same for its currency. Both are easy early grabs that save repeat town runs.
Pal merchant
Found at any settlement in a blue jacket, the Pal merchant is the one that turns a base into a business — drop it in a breeding base and you can offload Pals for gold without ever leaving.
Legendary pharmacist, gourmet, grocer
The legendary pharmacist carries everything from basic meds to high-grade medical supplies. The legendary gourmet is a gold engine, stocking Mammorest Curry and Niku Jaga you can buy in bulk and resell, plus other dishes. The legendary grocer rounds out the pantry with plants, seeds, and mushrooms.
Legendary materials merchant and game hunter
The legendary materials merchant sells stacks of resources and hard-to-farm Pal-specific materials. The legendary game hunter handles meats, milk, and eggs — between him and the grocer, you can source almost every food ingredient in the game from your base.
Legendary ammo merchant
The most valuable of the set. The legendary ammo merchant sells every kind of ammo for gold — right up to beam launcher ammo. Get a gold farm running and you never craft or scavenge ammunition again.
Catching merchants without triggering a wanted level
Approach the merchant

Get close enough to reliably land a Pal Sphere on the merchant you want to keep.
Throw a single sphere
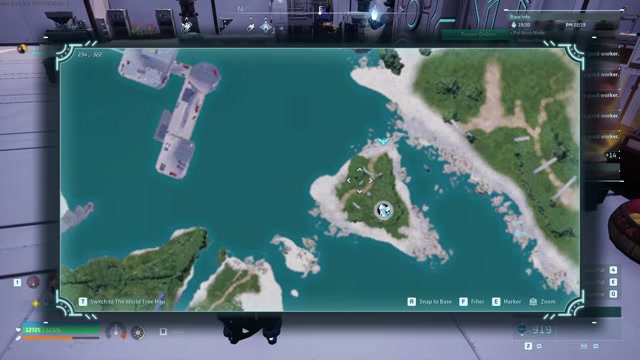
Toss one Pal Sphere and stop — the criminal-activity pop-up appears, but that on its own is harmless.
Wait out the window
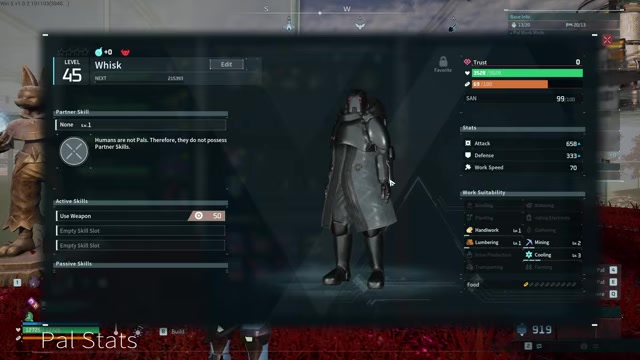
Let a full 10 seconds pass before any further criminal act, since a wanted level only triggers on two criminal acts inside 10 seconds.
Repeat until caught
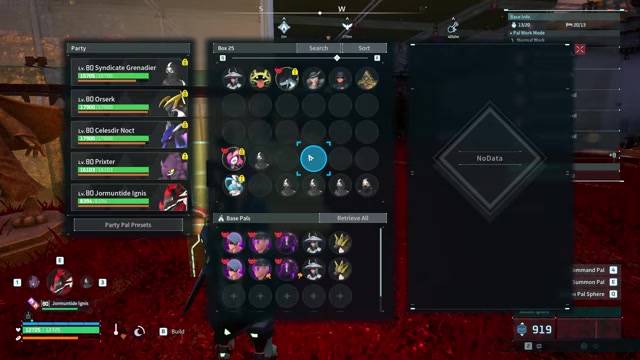
Throw again after each 10-second gap until the merchant is yours, then release them at base.
Throw only one Pal Sphere every 10 seconds when capturing a merchant — a wanted level needs two criminal acts inside a single 10-second window, so spacing your throws keeps the guards calm.
Dr. Braun and his once-a-day surgery
Dr. Braun has no fixed home. Instead he has a spawn chance during world events (incidents), which occur at set locations — the higher-level incident spots around Feybreak are a good place to farm for him. Spawn locations vary, though, so treat any marked spot as a chance rather than a guaranteed route.
He is essentially a Pal slot machine. Show him a Pal, agree to surgery, and one of a few outcomes rolls: a positive result replaces a red down-arrow passive with a good passive and raises IVs, while a negative result does the opposite — swapping a passive for a red down-arrow one and lowering IVs. It is roughly a coin flip whether both effects come up good or both come up bad. He can operate once per day, and because the outcome is random on interaction, it is fully save-scummable if you want to force a good roll. He is better earlier than later, before endgame implants and easy statue farming make him redundant.
He also has medicine production work suitability, so if you would rather keep him around, feed him books to reach level 10 medicine and station him at your clinic permanently. He is a doctor, after all.
Building a human-run base with five NPCs
| Human NPC | Work role |
|---|---|
| Azour Covenant Enforcer | Watering, planting, handiwork, lumbering, mining, transporting |
| Whisk | Cooling |
| Pinch (or any Free Pal Alliance believer) | Gathering |
| Dazzle | Kindling and medicine production |
| PIDF rider on Rayhound | Electricity (by technicality) |
Human work speed is identical to a Pal’s, so the only real drawback is that no human is nocturnal by default — give them the Insomnia passive if you want them working overnight. Humans can technically cover every base suitability except ranching, and a compact roster of five can handle the rest between them.
The Azour Covenant Enforcer, the standard enemy in the Sunbridge bases, is the workhorse with six work types, missing only kindling, electricity, gathering, medicine, and cooling. Whisk, a bounty target in the Astral Mountains, fills cooling and nothing else. Any Free Pal Alliance believer near the second tower covers gathering, though Pinch — a bounty target west of the middle of Feybreak Island — does the same job with more personality. Dazzle, a bounty target on eastern Feybreak, slots in both kindling and medicine production.
Electricity is the technicality. Raise your wanted level to two stars and PIDF riders start showing up; some ride Rayhounds, and if you catch one, the partner skill designates the human as the Pal even though the Rayhound is doing the generating. For a serious human base, grab multiple copies of each and specialize them — a worker that only does one or two suitabilities outperforms a jack-of-all-trades — then stack the best base passives on them with implants.
The best combat human and how to build it
| Human NPC | Combat value |
|---|---|
| Harold | Top tier on paper — roughly triple the HP and defense of any other NPC, but uncatchable |
| Syndicate Veteran | Best catchable damage pick — grenades, tied-highest attack stat |
| Syndicate Cleaner | Fast, consistent burn buildup via flamethrower |
| Syndicate Elite | Was the top pick pre-1.0, now weak after an attack-stat nerf |
Once humans started using their real weapons in 1.0 instead of all punching, they stopped being equal, and you can actually rank them for combat. There are only a few stat variations, but a clear quality ladder.
The answer would be Harold if you could catch him — his files show about three times the total stats of any other high-stat NPC, with HP and defense that dwarf even the best Pals — but he is immune to spheres. Among what you can actually keep, the Syndicate Veteran is the strongest in early testing so far: he uses grenades and has the tied-highest attack stat. The likely reason grenades outperform headshot-balanced weapons is that the AI never aims for heads, so it loses nothing from a weapon that ignores headshots — though that is a guess. Syndicate Cleaner is a fine alternative for its quick, reliable burn buildup, while the once-dominant Syndicate Elite got its attack gutted in the rebalance. All three turn up on the oil rigs, especially the westernmost one off Feybreak.
Since you cannot breed a human, everything happens after the catch. Condense spare humans into your chosen one — every human condenses into every other human — then teach it high-power attacks with skill fruits, stack top-tier passives with implants, and raise trust to boost its stats. Feed stat fruits to push IVs toward 100 and Pal Souls to lift stats further. The only step off the table is awakening, because there is no element to awaken. Built this way, a human lands somewhere around 80% of a perfect Pal’s power — an approximate ceiling, not a measured figure, and one that ignores partner skills.
Where human combat builds fall short of Pals
The lower ceiling comes from what humans structurally lack: no element, no awakening, no breeding, and no partner skill of their own. The subtler catch is that many Pal partner skills that would normally buff your active fighter do not apply to a human, because the game does not treat a human as a Pal for those effects — skills that specifically reference “the Pal fighting alongside you” simply skip over them.
What still works are general damage multipliers, including status-damage boosts against burning or poisoned enemies, since those trigger on any active character’s hit rather than on a Pal specifically. So a human build can still clear hard-mode towers and get reasonably tanky — it just tops out below a fully optimized Pal. Choosing to become a human tamer instead of a Pal tamer is entirely viable. It is only concerning for your state of mind.
Related Palworld guides
Frequently Asked Questions
Can you breed human Pals in Palworld?
No. Breeding is the one power-up path humans are locked out of, which is why condensing spare humans into your main and topping them up with implants and stat fruits is the only way to strengthen one.
Can human Pals be awakened?
No. Humans have no type at all — not even Neutral — so the awakening system has nothing to boost. They also deal no elemental damage as a result.
Do captured merchants still sell items at your base?
Yes. Release a caught merchant at your base and you can buy and sell exactly as you would in town. A Pal merchant is the standout, since it lets you sell bred Pals for gold without ever leaving the base.
Which human should you build first if you only want one combat human?
The Syndicate Veteran, taken from the Feybreak oil rigs. It has the tied-highest attack stat and its grenades give it the best tested damage output of any catchable human.
Video help






Leave a Reply