

For Palworld 1.0 fishing, use a party built around Whalaska, Whalaska Ignis, Gloopie, Jelliette, and Solmora Lux, bring the best rod and bait you can craft, and farm visible fish-shadow spots such as Sealed Realm of Terraria early and World Tree water clusters later.
Fishing in the 1.0 update is a real progression system, not just a side activity. It can give you useful Pals, passive rolls, Alpha-style catches, loot, gold routes, salvage value, and low-effort base output once your bait economy is ready.
- Best fishing setup for Palworld
- Fishing rewards worth chasing
- Rods, bait, and movement gear
- Pal party roles for manual fishing
- How to fish manually in Palworld
- Fish shadows, sparkles, and tier labels
- Fishing spots by progression
- Base fishing pond setup
- Salvaging and loot farming with fishing
- Fishing mistakes to avoid
- Frequently Asked Questions
Best fishing setup for Palworld
| Need | Best pick |
|---|---|
| Manual-fishing party core | Whalaska, Whalaska Ignis, Gloopie, Jelliette, Solmora Lux |
| Item farming | Jelliette for fishing loot; Gelroy only for salvage routes |
| Passive hunting | Solmora Lux, with Yakumo if you are copying passives |
| Rod and bait priority | Use the highest-tier Fishing Rod and bait your route supports |
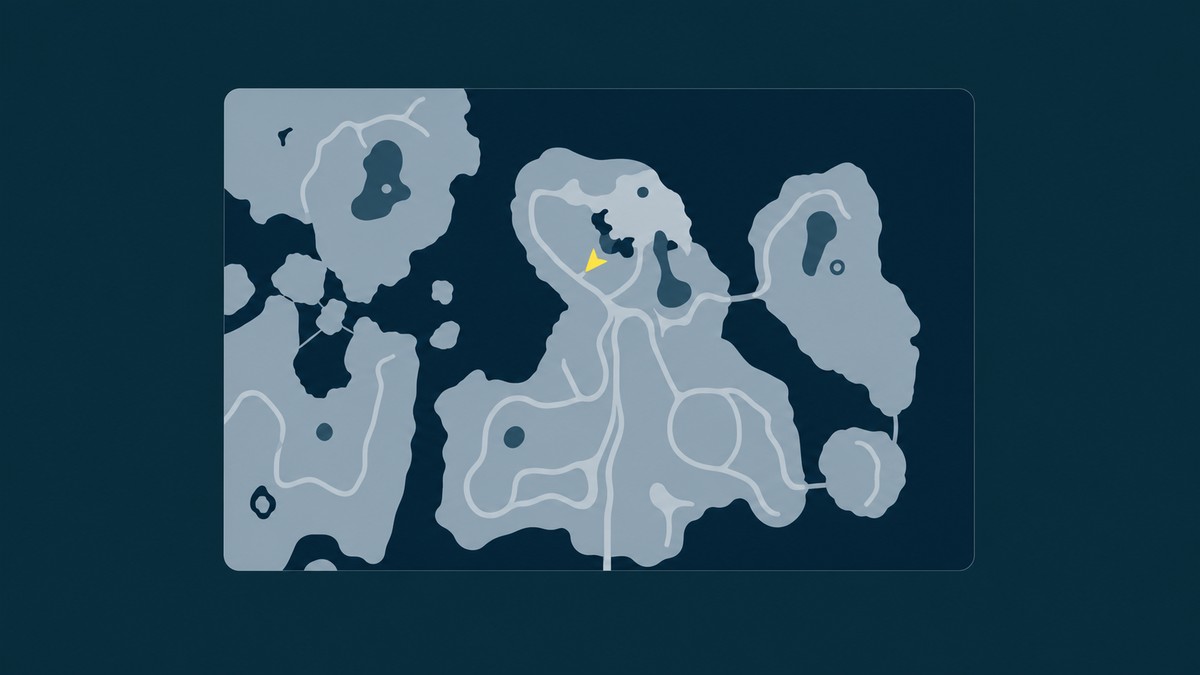
| Early fishing route | Sealed Realm of Terraria for Dumud Gild and gold farming |
| Late fishing route | World Tree Grand Master clusters, then Sunlit Isle island water |
| Passive-base option | Fishing Pond or Large Fishing Pond when you want hands-off output |
The cleanest manual setup is a gauge-control core with one slot aimed at either loot or caught-Pal quality. Whalaska and Whalaska Ignis push the catch forward, Gloopie cushions mistakes, Jelliette pays off item runs, and Solmora Lux helps when the Pal itself is the prize.
Fishing rewards worth chasing
Fishing is worth the bait because it can pull in usable Pals, including some that are harder or later to reach through normal fights. That makes early water routes valuable even before your combat team is ready for tougher areas.
The system also matters for passive hunting. Green sparkle-marked catches point to rainbow rarity passives, and a party built around Solmora Lux turns fishing into a repeatable way to roll better team candidates.
Even when the Pal is not the target, the catch can be an item run. Large catches and higher-tier spots can bring a lot of loot, while Dumud Gild routes are especially useful when you want gold.
Rods, bait, and movement gear
| Gear | Use |
|---|---|
| Fishing Rod | Equips in a weapon slot and starts manual fishing at valid spots. |
| Advanced Fishing Rod | Better manual option before pushing into Expert and Grand Master loops. |
| Simple Bait | Cheap early bait for smaller or lower-tier catches. |
| Deluxe Bait | Higher-tier bait for stronger catches and pond production. |
| Alluring Bait | Strong bait choice for harder manual fishing targets. |
| Wing pack | Lets you scout spread-out ponds quickly without using a flyer slot. |
| Water-capable mount | Helps position on water and supports fishing or salvage routes. |
Fishing starts around Level 15 through the Basic Fishing Set, which gives you early access to the Basic Fishing Rod and Simple Bait. Equip a rod in a weapon slot, keep compatible bait in your inventory, and treat stronger rods and bait as part of the route rather than an optional upgrade.
Bait should match what you are trying to pull up. Common bait names you will handle include Simple Bait, High Quality Bait, Deluxe Bait, and Alluring Bait; the practical rule is to save better bait for tougher spot tiers and better catches.
For movement, bring a wing pack once you have it or ride a water-capable Pal. Fast flyers are excellent for scouting, but swimming-capable mounts are better when the spot needs you positioned directly on the water.
Pal party roles for manual fishing
| Pal | Use |
|---|---|
| Whalaska | Core catch helper; at five stars, helps start the gauge with 14% captured and boosts overlap progress. |
| Whalaska Ignis | Same fishing-gauge role as Whalaska and also counts as fire for Ghangler Ignis speed scaling. |
| Gloopie | Slows capture-gauge loss when the bars are not overlapping. |
| Jelliette | Fishing loot slot; fully built, can raise items gained from fishing by up to 95%. |
| Solmora Lux | Quality slot that makes it easier to fish talented Pals with more passives. |
| Gelroy | Salvage swap that raises items gained from salvaging by up to 95% with Heavy Magnet routes. |
| Yakumo | Passive-hunt mount with a 30% chance to pass one of its passives to the caught Pal. |
| Ghangler Ignis | Movement swap that gains 25% movement speed for each fire or water Pal in party, excluding itself. |
| Suzaku Aqua | Water-flyer route swap that gains 25% movement speed for each other water Pal and counts as swimming for salvage access. |
| Hydrolon, Xenogard, or Jetragon | Fast scouting choices when you only need to move between water pockets. |
| Surfent Terra Lux | Quality-max swap when passives and IVs matter more than Jelliette’s item gain. |
Manual fishing feels much better when the party is built around the gauge instead of raw travel speed. Whalaska and Whalaska Ignis are the foundation because their fishing effects start the catch with progress already banked and improve progress gain while the bars overlap.
Gloopie covers the other half of the minigame by slowing gauge loss when your alignment slips. From there, choose your purpose: Jelliette for items, Solmora Lux for talented Pals with more passives, and Yakumo when you are riding for passive copying.
How to fish manually in Palworld
Manual fishing is a short alignment minigame: find a real shadow, hook it, then keep your bar matched until the gauge fills.
STEP 1/9
Find a real fish shadow
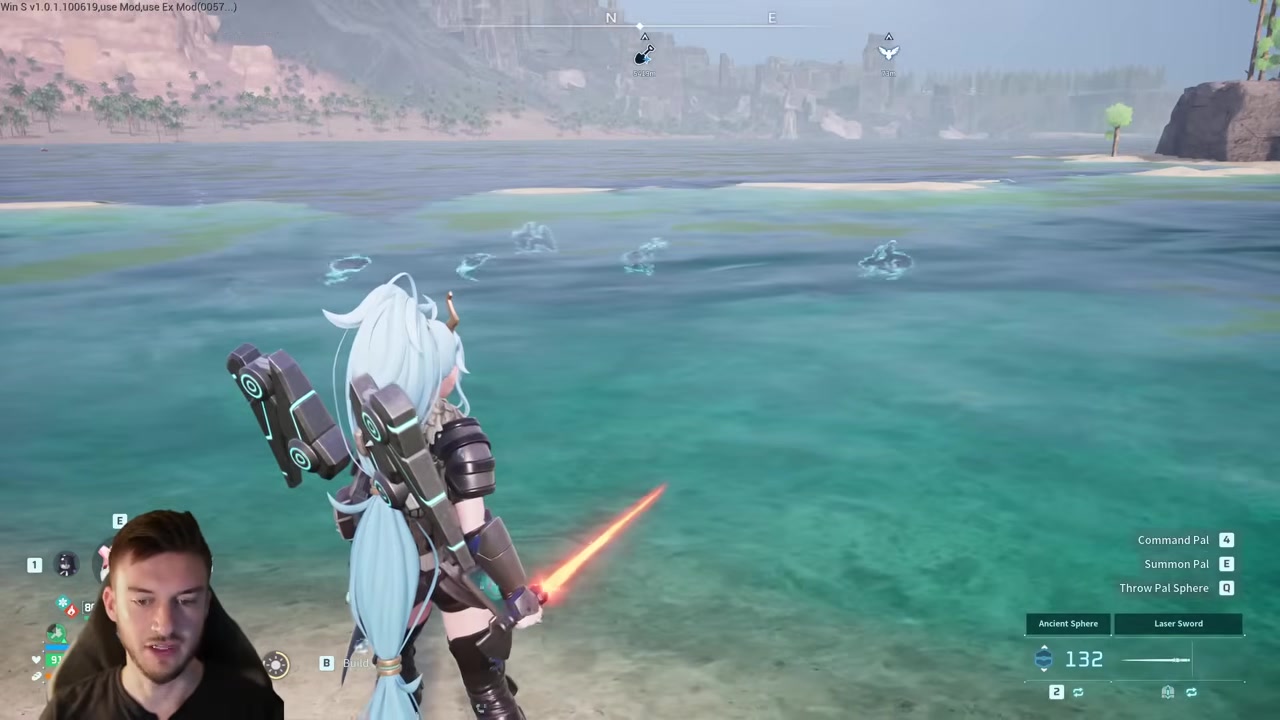
Scan underwater for moving fish silhouettes or sparkle-marked targets because empty water will not start a catch.
STEP 2/9
Cast slightly beyond it
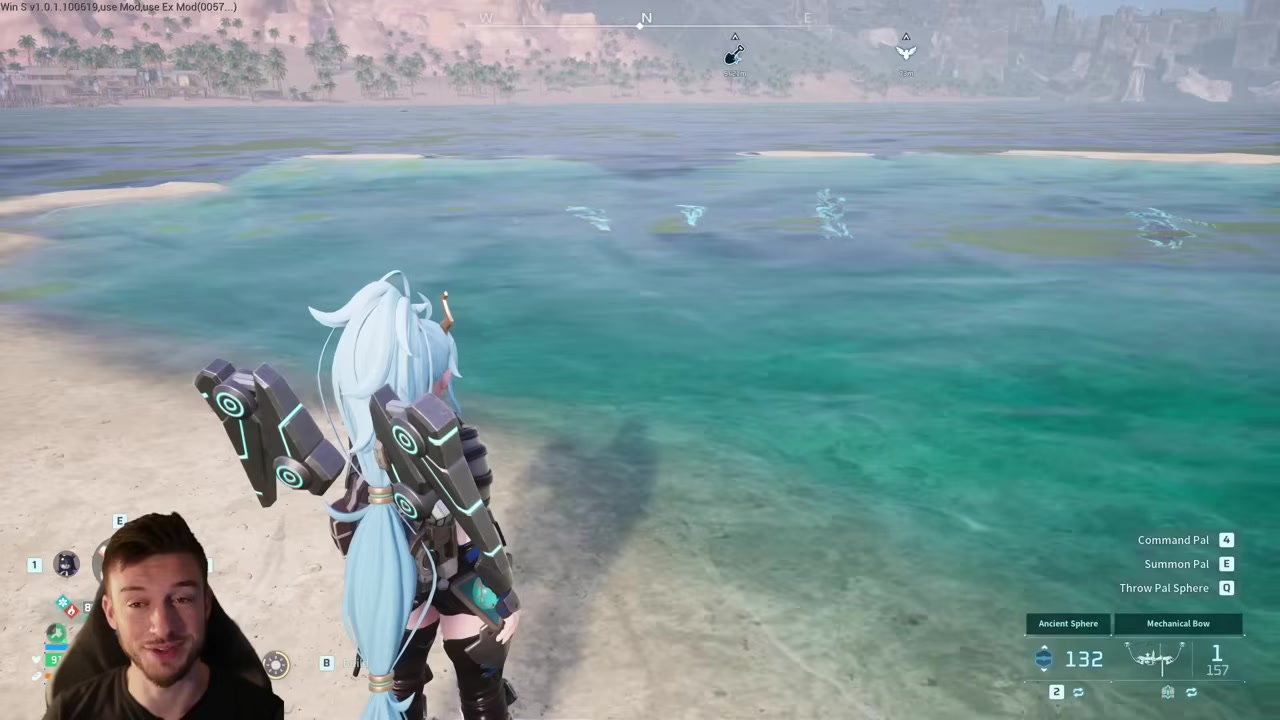
Aim past the shadow so the lure lands in the active fishing spot instead of short of the target.
STEP 3/9
Check the spot label
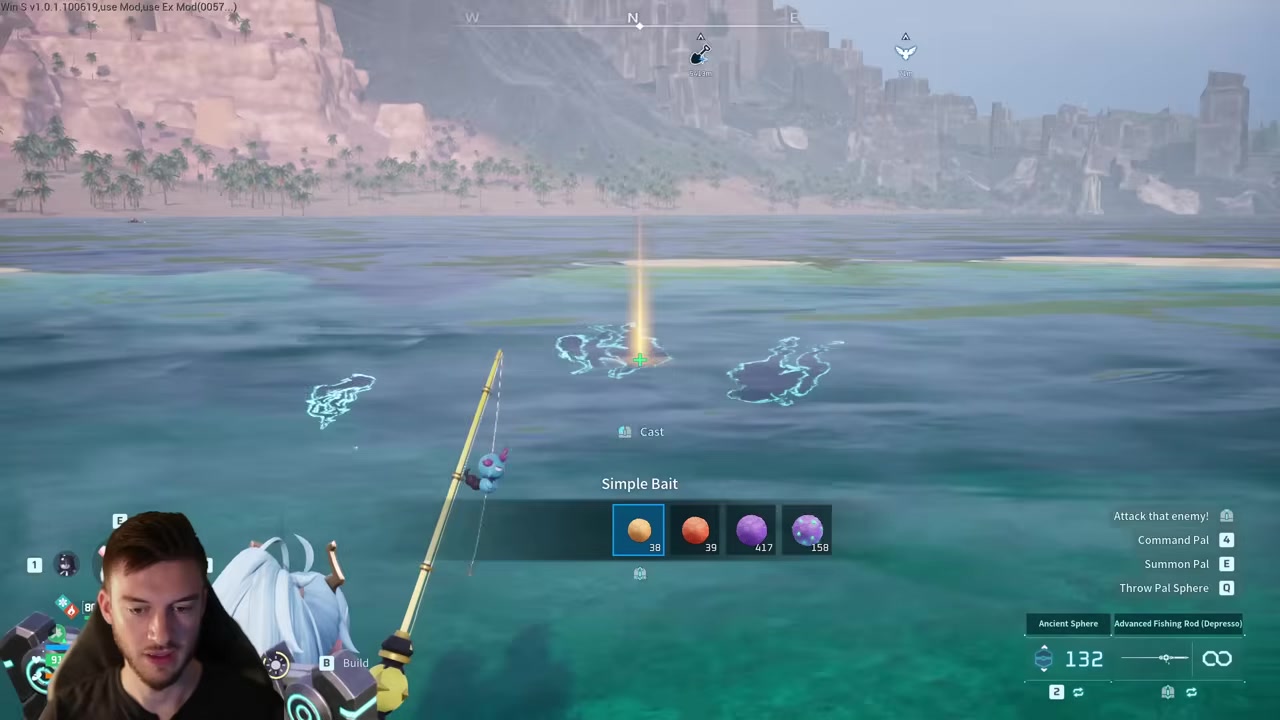
Read the tier prompt, such as Intermediate, before you commit stronger bait to the attempt.
STEP 4/9
Wait for the bite prompt
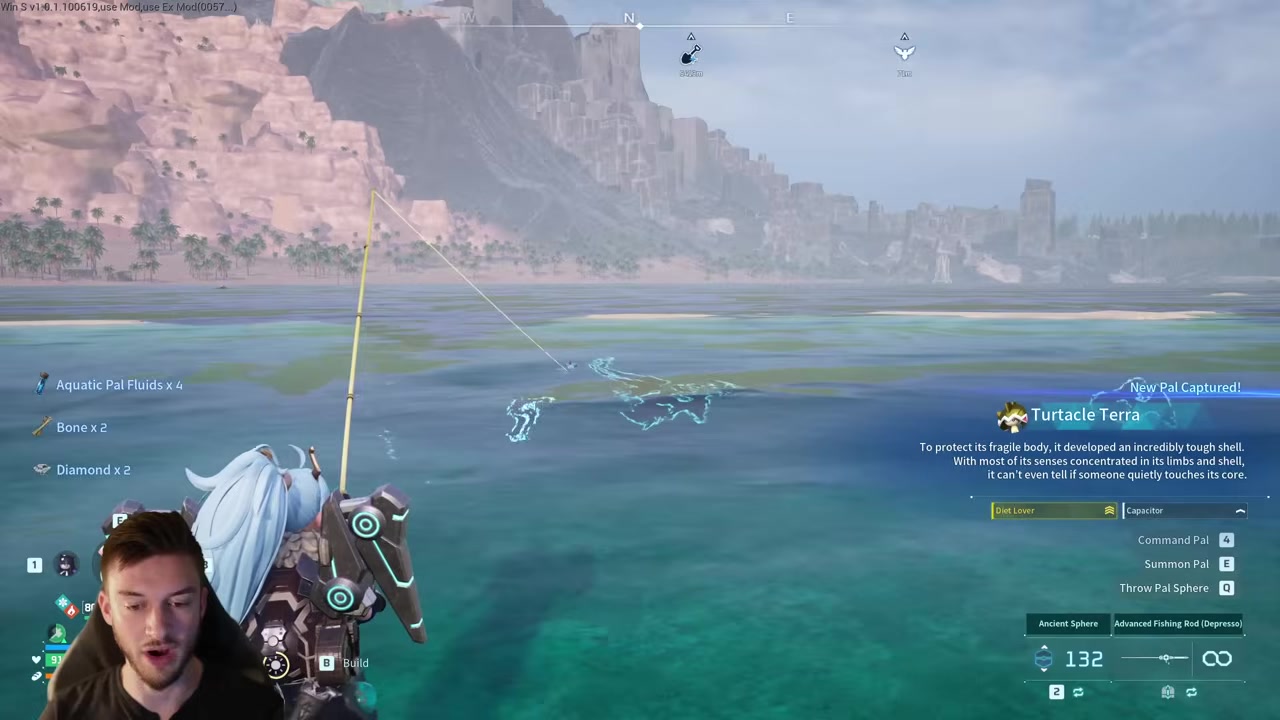
Let the lure sit until the exclamation mark appears, then start reeling.
STEP 5/9
Hold and release to align
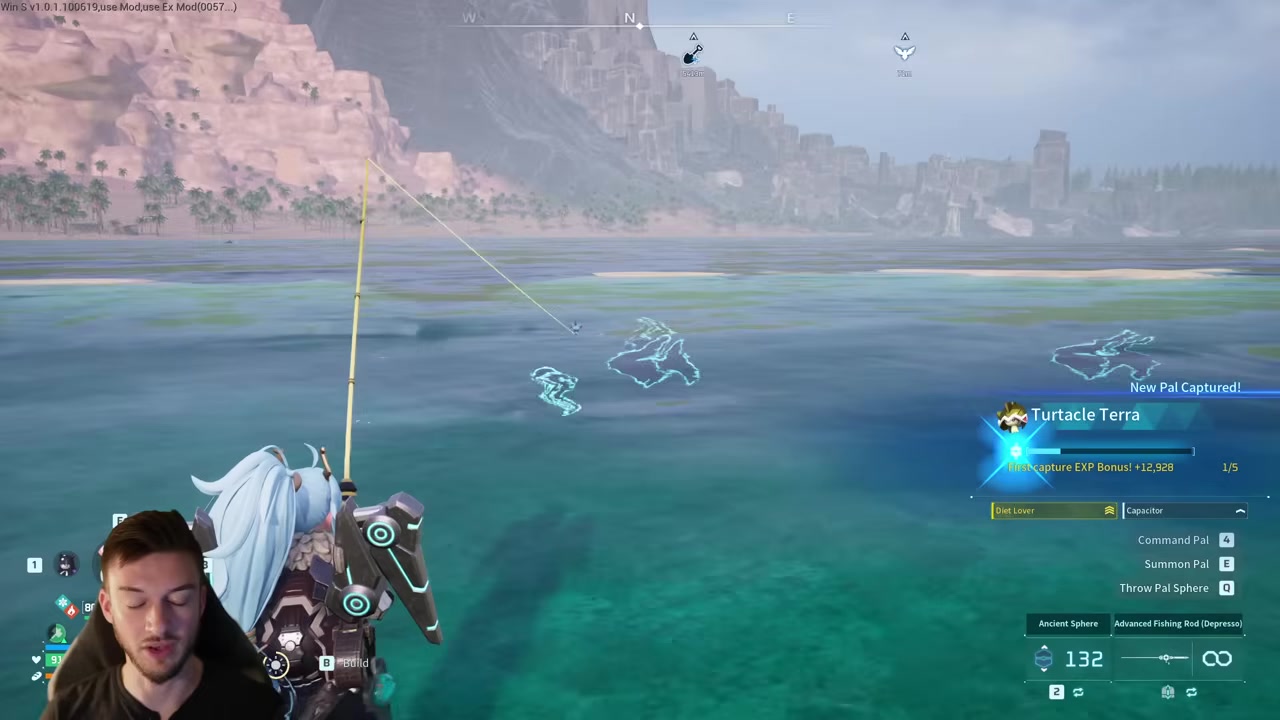
Use the reel input to move your bar over the fish marker and keep the capture gauge climbing.
STEP 6/9
Tap for small corrections
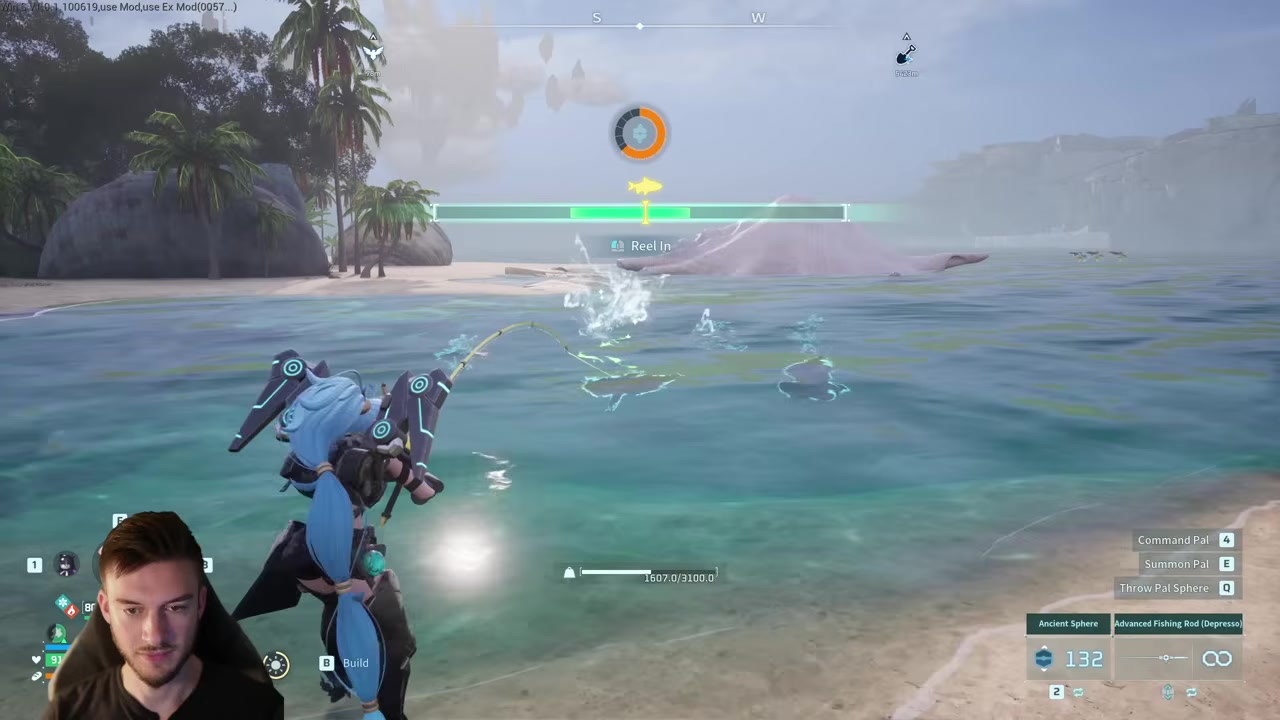
Feather the input when the marker slides so you do not overshoot the center.
STEP 7/9
Switch bait for harder shadows
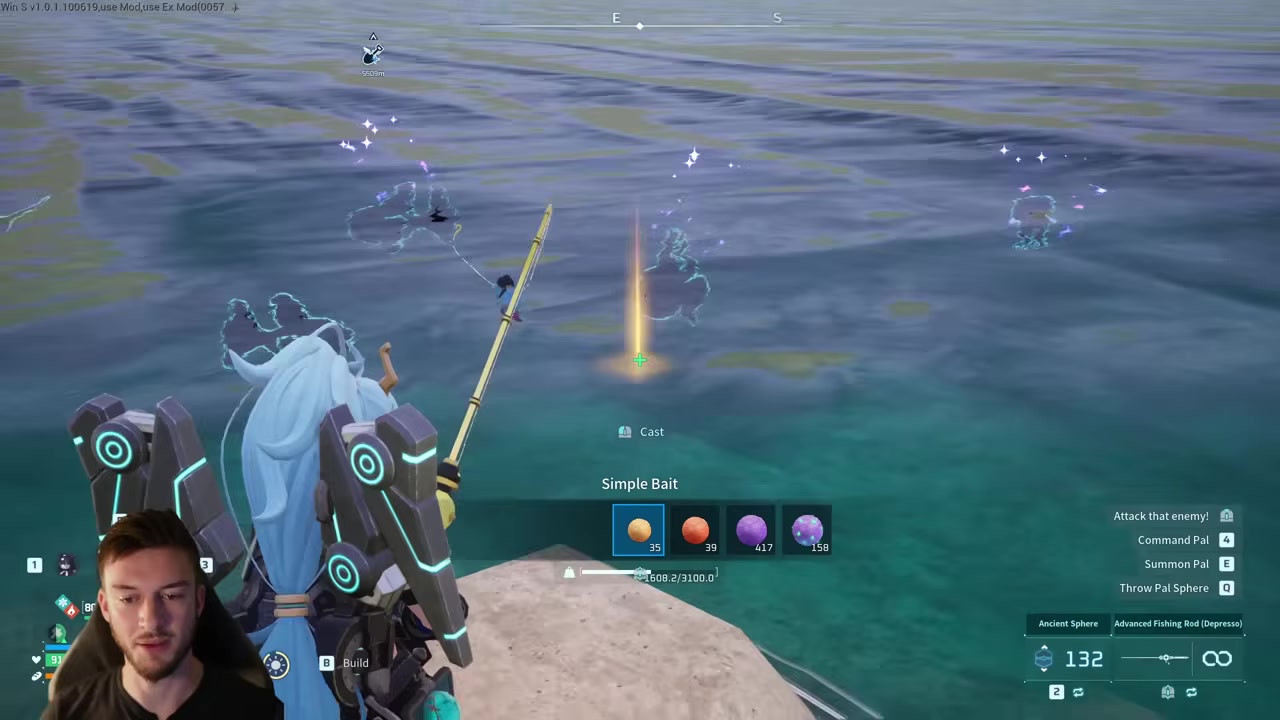
While aiming with the rod, scroll through bait options when a stronger target needs better bait.
STEP 8/9
Slow down on purple targets
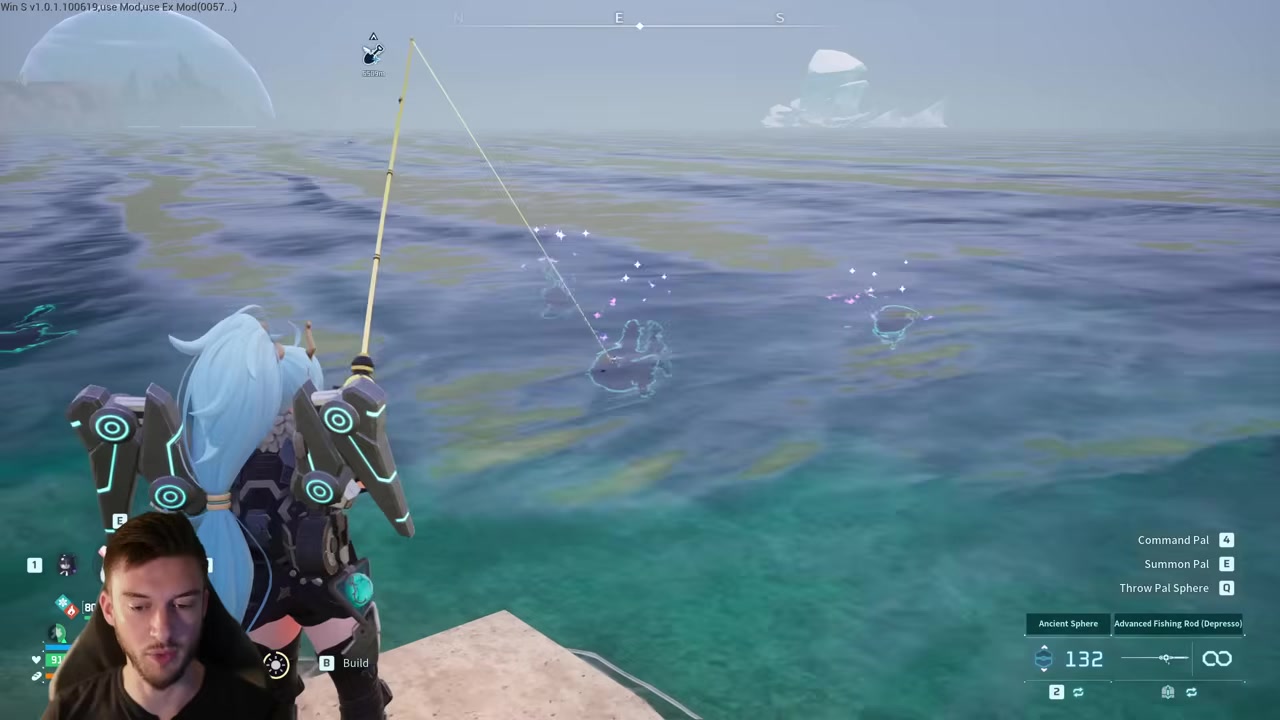
Purple-sparkle catches put up a harder fight, so correct earlier and keep away from the bar edges.
STEP 9/9
React faster at Expert and Grand Master spots
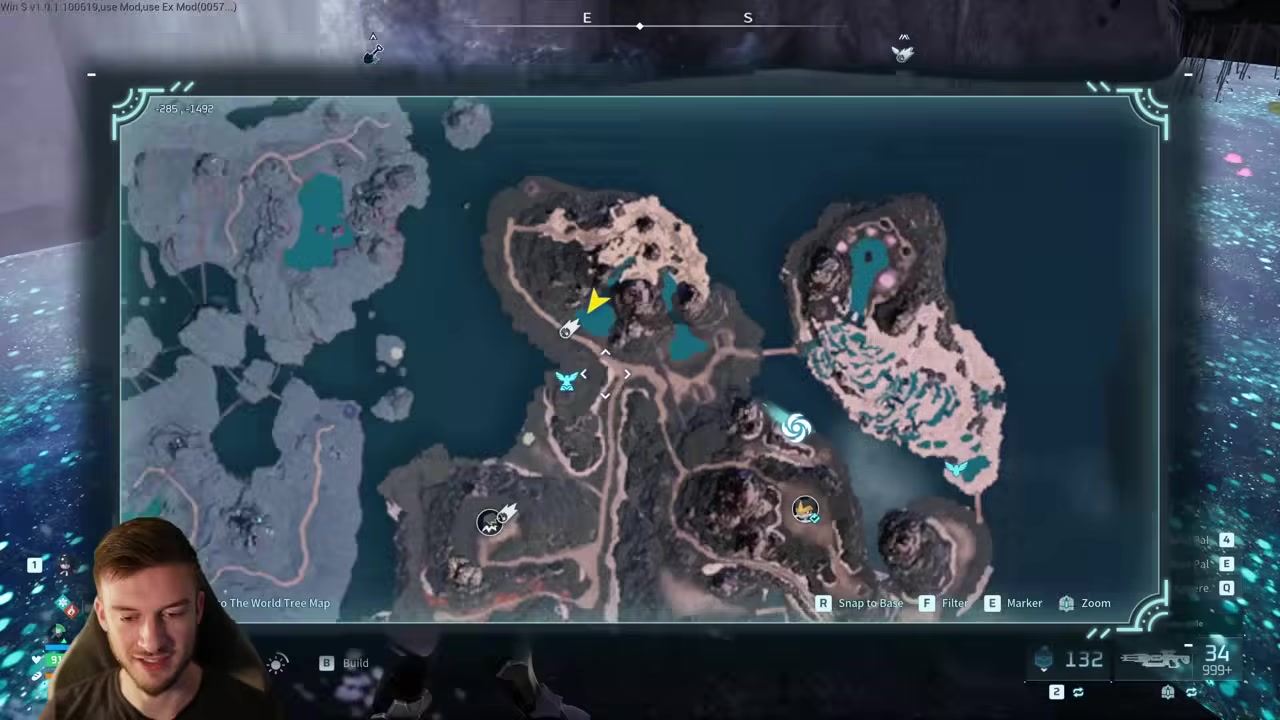
Higher-tier fish bounce more aggressively, making better rods and bait much more important.
Video help
Fish shadows, sparkles, and tier labels
| Cue | Meaning |
|---|---|
| Moving fish shadow | A valid fishing spot; no shadow means no manual minigame. |
| Green sparkles | The caught Pal has a rainbow rarity passive. |
| Purple sparkles | The caught Pal is a larger Alpha Pal with improved stats. |
| Purple frothing water | The caught Pal has Lunker, improving Ice Damage, Water Damage, and Defense. |
| Intermediate | Mid-tier spot with a manageable minigame and better catches than basic shadows. |
| Expert | Harder catch behavior with stronger rewards. |
| Grand Master | Endgame spot tier with the hardest fight and best possible fish. |
KEY!The water tells you what is worth spending bait on before you cast. Your scan priority is sparkle first, then tier label, then plain shadows if you are only farming volume.
Expert and Grand Master labels matter because the fish marker moves more sharply. If your reel rhythm is tuned for early Intermediate spots, expect to tap more often and commit better bait before chasing these.
Spend bait on sparkle targets first: green is the passive chase, purple is the Alpha-style quality chase, and plain shadows can wait when your bait stack is thin.
Fishing spots by progression
| Spot | Use |
|---|---|
| Sealed Realm of Terraria | Earliest route to check for Dumud Gild and gold farming. |
| Back side of the Sealed Realm of Terraria island | Stronger Intermediate shadows and better-quality targets after the first shoreline. |
| Fisherman’s Point and the waterfall pond south of it | Early-to-midgame training route with dense Simple and Intermediate catches. |
| Drilling rig water | Extra shadows around offshore rig routes; check while traveling for salvage or loot. |
| Skyreach ponds | Expert fishing pockets for higher-level catches in small water bodies. |
| Far Cry Marsh | Clustered Expert spots near the top of the marsh. |
| Desert Intermediate pools | Two major Intermediate pools and another Dumud Gild route. |
| Feybreak | Late-game coastal and dungeon-side water route to check for high-tier shadows. |
| Rayne Syndicate Platform Oil Rig | Level 56-60 Grand Master arena route for endgame fishing and loot. |
| Sunreach southern islands | Shoreline circuit for chaining multiple shadows before respawns. |
| World Tree water clusters | Endgame Grand Master farming for top fish, loot, and multi-passive catches. |
| Sunlit Isle | Dense manual-fishing water plus one of the better base-placement choices. |
Run these as circuits instead of expecting one spot to carry the session. Start near Sealed Realm of Terraria if you want early gold, branch to the island’s back side when Intermediate catches are comfortable, then use Skyreach, Far Cry Marsh, and desert pools as your midgame water checks.
For endgame, the World Tree is the main Grand Master chase because the area has many watery sections close enough to scout with a wing pack. Sunlit Isle is different: it is valuable because the same dense fishing water also supports a base, so you can mix manual casts with Fishing Pond production.
Base fishing pond setup
For passive fishing, unlock the Fishing Pond in the technology tree around level 31, then upgrade to the Large Fishing Pond around level 69 when your bait economy can support it. At the pond, choose the silhouette you want to produce, supply the required bait, assign Pals with the listed work suitability, and let them fish while you handle other jobs.
The important cost check is the large version: Large Fishing Pond can consume 10 Deluxe Bait per fish. That makes it excellent for low-attention farming, but only after you are producing enough bait to keep the pond running.
The pond work prompt can call for Handiwork, so use Pals that match the pond’s current work requirement instead of only thinking in Water types. Once production starts, the pond turns fishing into base work instead of a manual minigame.
Salvaging and loot farming with fishing

Bring Gelroy when the route includes salvage spots and you are carrying a Heavy Magnet. That swap is for salvage yield, not the fishing gauge, so it makes the most sense on offshore routes where you can move between shadows and salvage targets without rebuilding the party.
For straight manual fishing loot, Jelliette is the better anchor because its bonus applies to fishing items. If the session is about caught-Pal quality instead, favor Solmora Lux for talented Pals with more passives.
Fishing mistakes to avoid
Do not cast into empty water; spend the cast on a visible shadow. Do not throw low-tier rods and weak bait at Grand Master spots, and do not ignore green or purple sparkle targets just because a plain shadow is closer.
During the minigame, feather the reel input instead of holding constantly, especially once the marker starts bouncing. For route speed, use the wing pack or a water-capable mount to scout multiple pockets, and keep fishing bases fed so assigned Pals stay on the pond instead of stopping work.
Frequently Asked Questions
What is the best fishing team in Palworld?
The best all-purpose manual team is Whalaska, Whalaska Ignis, Gloopie, Jelliette, and Solmora Lux. Swap in Gelroy for salvage routes or Yakumo when the goal is passive copying.
What do green and purple sparkles mean when fishing?
Green sparkles point to a rainbow rarity passive. Purple sparkles point to a larger Alpha Pal with improved stats, while purple frothing water is the tell for Lunker.
Where should beginners fish first in Palworld?
Start at Sealed Realm of Terraria if you want an early practical farm, especially for Dumud Gild and gold. Fisherman’s Point is another easy early-to-midgame practice route.
Where are the best endgame fishing spots?
Prioritize World Tree water clusters for Grand Master catches, then check Sunlit Isle, Feybreak, Rayne Syndicate Platform Oil Rig, and Sunreach for additional late routes.
Can you automate fishing at a base?
Yes. Build a Fishing Pond or Large Fishing Pond, choose the silhouette, load the required bait, and assign Pals with the pond’s requested work suitability.
More questions⤵
Which Pal helps you get more fishing loot?
Jelliette is the fishing-loot Pal. Gelroy is the separate pick for salvage item yield when you are using a Heavy Magnet.
Is fishing good for farming passives?
Yes. Use Solmora Lux when you want talented Pals with more passives, chase green sparkle targets, and add Yakumo when you want a chance to copy one of its passives.






Leave a Reply