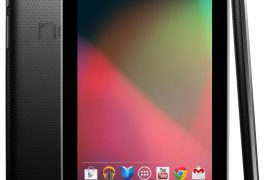
Here’s another helping of a custom ROM for the Jelly Bean Android 4.1 flagship tablet, aka the Nexus 7. Slim Bean is a Jelly Bean ROM that is extremely small in size and very lightweight, coming up at a total size of just around 80 MB, for a fast and no-bloatware experience. It’s completely pure stock Android with nothing extra added to it so it’s very light on resources as well.
Try out other custom ROMs for the Nexus 7 → here.
The guide below will take you through the steps required to install the ROM on your Nexus 7, so continue reading.
Compatibility
This ROM and the guide below are compatible only and only with the ASUS Nexus 7 tablet.
Warning!
The methods and procedures discussed here are considered risky and you should not attempt anything if you don’t know completely what it is. If any damage occurs to your device, we won’t be held liable.
How to Install Slim Bean ROM on Nexus 7
- This procedure will wipe all your apps, data and settings. Backup your Apps and important data — bookmarks, contacts, SMS, APNs (internet settings), etc. This Android backup guide would help you.
NOTE: Don’t forget to at least make a backup of your APN settings, which you can restore later if your data connection does not work after installing the ROM. Use the backup guide to find out how. - Unlock the bootloader on your Nexus 7 by using the Nexus Root Toolkit → here. This will wipe all the data on the tablet including the files on the SD card, so make sure to take a backup.
- Install ClockworkMod (CWM) recovery on the tablet by following the guide → here. Install the touch version of recovery as it is more convenient to use. You can also flash TWRP recovery using the guide → here which has a much better interface compared to CWM recovery.
- Download Slim Bean ROM. You will need to download the following files:
- Copy the zip files downloaded in step 4 to the SD card on the tablet (do not extract the files).
- Turn off the tablet. Then, boot into recovery. To do so, press and hold the Volume Up + Volume Down + Power buttons together till the device boots into CWM/TWRP recovery.
- Perform a Nandroid Backup of your existing ROM, so that you can always restore it from recovery if something does not work out with this ROM. To perform a backup, select Backup and Restore –> On the next screen, select Backup again. Go back to main recovery menu after backup is complete. (If using TWRP recovery, select Backup, then slide the blue button to the right to confirm backup)
- Select wipe data/factory reset, then select Yes on next screen to confirm (or select Wipe » Factory reset if using TWRP recovery then go back to main recovery menu). Wait a while till the data wipe is complete.
- Select install zip from sdcard, then select choose zip from sdcard. Scroll to the grouper.zip file on the SD card and select it. Confirm installation by selecting Yes on the next screen (for TWRP recovery, select Install, then select the ROM file) . The ROM will start installing.
- If the grouper.zip file installation finishes too quickly, like in 5 seconds, repeat step 9 before going to the next step.
- After ROM installation completes, select choose zip from sdcard again, then select the Common_2.*.zip file (for TWRP recovery, go to main recovery menu, then select Install again). Confirm installation on next screen.
- After the installation is complete, go back to the main recovery menu and select reboot system now to reboot the tablet and boot up into Slim Bean ROM (or press the Reboot system button in TWRP recovery). The first boot will take some time, up to 5 minutes.
NOTE: If you want to go back to your previous ROM, boot into recovery (as given in step 6), select backup and restore then restore your previous ROM by selecting it from the list (or if using TWRP recovery, select Restore, then select the backup from the list).
Installing ROM Addons
To install features such as Google Now (the voice recognition based Google Search app which also provides automatic info like weather, traffic info etc.) or the Face Unlock feature, perform the following steps after Slim Bean ROM has been installed and booted up.
- Download the Google Now and/or Face Unlock package from this link.
- Copy the downloaded file(s) to the internal SD card.
- Turn off the phone, then boot into ClockworkMod recovery (the same way you did in step 5 of main guide).
- Select install zip from sdcard, then select choose zip from sdcard. Scroll to the Google Now file on the SD card and select it. Confirm installation by selecting Yes on the next screen.
- Then repeat step 4 to install the Face Unlock file if you have downloaded that as well to install the face unlock feature.
- Then, go back to main recovery menu and reboot the phone. After it boots up, you’ll be able to use Google Now and Face Unlock.
Slim Bean ROM, based on Jelly Bean Android 4.1 is now installed on your Nexus 7. Visit the development page for more info and to get the latest updates on the ROM. Share your thoughts on the ROM in the comments.
Be sure to take a look at CM10 for the Nexus 7 → here, and AOKP ROM → here.


