Another day, more jelly beans. We’ve already seen the release of a couple of custom Jelly Bean Android 4.1 ROMs for the HTC myTouch 4G, and now owners of the device can try out another ROM – Codename Android.
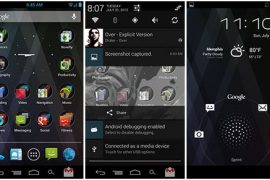
Codename Android is based on pure stock Android 4.1 and features blazing fast performance, and also includes a myriad of customization options that allow you to change different parts of the interface, including a theme engine with lots of different themes available. Jelly Bean itself brings many new features such as a butter smooth interface, actionable and expandable notifications, Google Now and advanced Search functionality, and more.
This ROM is not an official HTC ROM, and is a custom ROM that has a few issues present. As of 27-8-2012, the following things do not work in the ROM (the most updated issues list can be found on the source page):
Front Camera
LED (Only Charging)
Wifi Hotspot – use WiFi tether app (on play store). in settings, make device ‘NexusOne’ and enable the ‘Routing Fix’
Read on for the instructions on how to flash Codename Android ROM on your myTouch 4G.
Compatibility
This ROM and the guide below are compatible only and only with the T-Mobile myTouch 4G/HTC Glacier. It’s not compatible with any other device. Check your device model in Settings » About.
Warning!
The methods and procedures discussed here are considered risky and you should not attempt anything if you don’t know completely what it is. If any damage occurs to your device, we won’t be held liable.
How to Install Codename Android ROM on myTouch 4G
- This procedure will wipe all your apps, data and settings (but it will NOT touch your SD cards, so don’t worry about those). Backup your Apps and important data — bookmarks, contacts, SMS, APNs (internet settings), etc. This Android backup guide would help you.
NOTE: Don’t forget to at least note down your network’s APN settings, which are required to make mobile data work. Go into Settings » More » Mobile Networks, click on the APN that is in use, then note down the setting for each field. While APN settings should be automatically restored from network, you can enter them manually if needed to make mobile data work. You can also find your APN details → here. - Make sure you have ClockworkMod recovery installed on your phone and that its bootloader is unlocked.
- Download the following files:
- ROM: Download Link | Filename: Codename_Android_v3.3.2_port.zip
- Camera and Backlights Fix file: Download Link | Filename: Codename-Android-3.3.2-1-SAGA-BLINDNDUMB.zip
- Download the Google Apps package. This will install apps like Play Store, Gmail, etc. which are not present in the ROM by default.
Download Gapps | Alternate Link | Filename: gapps-jb-20120726-signed.zip - Copy the zip files downloaded in step 3 and 4 to the SD card on the phone (do not extract the files).
- Boot into ClockworkMod recovery. To do so, turn off the phone. Then, press and hold the Volume Down and the Power buttons together to boot into the bootloader/HBOOT mode. Here, highlight the RECOVERY option by navigating to it using the volume buttons, then select it using the Power button to boot into recovery.
In recovery, use the volume buttons to scroll up/down and the power button to select an option. - Perform a Nandroid Backup of your existing ROM, so that you can always restore it from recovery if something does not work out with this ROM. To perform a backup, select Backup and Restore –> On the next screen, select Backup again. Go back to main recovery menu after backup is complete.
- Select wipe data/factory reset, then select Yes on next screen to confirm. Wait a while till the data wipe is complete.
- Select mounts and storage, then select format system, and confirm format on next screen. Then, go back to the main recovery menu.
- Select install zip from sdcard, then select choose zip from sdcard. Scroll to the Codename_Android_v3.3.2_port.zip file on the SD card and select it. Confirm installation by selecting Yes on the next screen. The ROM will start installing.
- After ROM installation completes, select choose zip from sdcard again, then select the Codename-Android-3.3.2-1-SAGA-BLINDNDUMB.zip file to install the camera and backlights fix.
- After installation of camera and backlights fix file completes, select choose zip from sdcard again, then select the gapps-jb-20120726-signed.zip file to install the Google apps package.
- After the installation is complete, go back to the main recovery menu and select reboot system now to reboot the phone and boot up into Codename Android ROM. The first boot will take some time, up to 5 minutes.
NOTE: If you want to go back to your previous ROM, boot into recovery (as explained in step 6), select backup and restore then restore your previous ROM by selecting it from the list.
Codename Android ROM, based on Jelly Bean Android 4.1 is now installed and running on your myTouch 4G. Visit the development page for updates and more info. Share your thoughts on the ROM in the comments below.
Try out other Jelly Bean ROMs for the myTouch 4G → here.


3 responses to “Install Codename Android ROM on myTouch 4G for Android 4.1 Jelly Bean”
Hi there – I installed the above, including the fix but I still have problems with my camera. Some apps that don’t rely on the standard camera app can use the rear facing camera – but attempting to use the front facing camera causes Gallery to close and I lose access to that rear camera and am forced to reboot to try it again. Any suggestions?
Hi there – I installed the above, including the fix but I still have problems with my camera. Some apps that don’t rely on the standard camera app can use the rear facing camera – but attempting to use the front facing camera causes Gallery to close and I lose access to that rear camera and am forced to reboot to try it again. Any suggestions?
Hi there – I installed the above, including the fix but I still have problems with my camera. Some apps that don’t rely on the standard camera app can use the rear facing camera – but attempting to use the front facing camera causes Gallery to close and I lose access to that rear camera and am forced to reboot to try it again. Any suggestions?