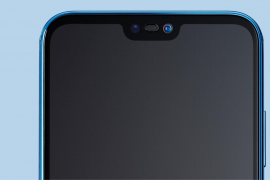
Huawei made a giant leap into the flagship Android device business with the release of the P20 and the P20 Pro. Packing premium hardware, a carefully crafted software with heavy betting on AI and machine-learning based EMUI 8.0, The Huawei P20 is set to be a strong contender for the likes of the Galaxy S9 and S9+.
In the meantime, the tweakers in the Android community have already figured out a way to do more with the Huawei P20 Pro than it is already capable of doing. You can now root your P20 Pro and unlock the full potential of your bezel-less iPhone X clone with the help of Magisk systemless root tool.
How to root the Huawei P20, Huawei P20 Pro, and Huawei P20 Lite
This is a lengthy process if you are doing for the first time. To be able to root the either of Huawei P20, or its Lite or Pro variant, you need to unlock its bootloader first, which involves requesting Huawei to give you unlock code first. This also deletes everything from your device, so make sure you have created appropriate backups.
Pre-requisites and downloads:
- Install ADB and Fastboot driver on your PC.
- Enable developer options, USB debugging and OEM Unlock on your Huawei device.
- Download TWRP recovery:
- Huawei P20 (model no. EML): twrp_p20_0.1.img
- Huawei P20 Pro (model no. CLT): twrp_p20_0.1.img
- Huawei P20 Lite (model no. ANE): p20-lite-twrp.img
Note: The TWRP recovery works only for the stock Huawei EMUI ROMs, not with the Android 8.1 custom ROMs, including the Treble ROM.
Step 1: Unlock the bootloader
To gain root access to your Huawei P20, Huawei P20 Pro, and Huawei P20 Lite, you will need to unlock the bootloader of the device first. Remember, that unlocking the bootloader of your device will automatically void the warranty of your mobile device. See the link below to do that.
→ How to unlock the bootloader of Huawei P20/Pro/Lite
Step 2: Install TWRP recovery
- Connect your Huawei phone to the computer using the USB cable it came with.
- Open a command window or PowerShell window in the folder where you have the IMG file for your device. (That is, TWRP file for the P20 and P20 Pro, while Magisk file for the P20 Lite.)
- In the CMD/PowerShell window, run the following command to reboot into fastboot/bootloader mode:
adb reboot bootloader
- Once your device screen appears to be in Bootloader mode, run the command below to install the IMG file:
fastboot flash recovery_ramdisk <name of the IMG file>
The command would be this: first, for the P20 and P20 Pro (fastboot flash recovery_ramdisk TWRP_P20_0.1.IMG), or second, for the P20 Lite (fastboot flash recovery_ramdisk p20-lite-twrp.img).
- When you restart the device, the system may remove TWRP automatically and replace it with default stock recovery. So, to prevent that, reboot to recovery mode now.
- Disconnect the device from PC by removing the USB cable from the device.
- Press and hold the power button for about 10 seconds (or more) until the screen goes black (force shutdown) but quickly do the next step.
- Quickly press and hold Volume Up button until you see the TWRP screen (continue holding even after blue screen shows up).
- If it asks for, then provide the password, PIN, etc. that you have set to allow TWRP to decrypt the device.
- In TWRP, do not allow for modifications. Hence, tap on ‘Keep Read Only‘ button. So, what next now?
- Now, if you want to root your device, then do not restart the device from TWRP and just continue the root guide below.
- If you do not want to root for the time being, restart the device by tapping on Reboot, then on System.
Getting error in TWRP?
Are you getting any of the error mentioned below?
- recovery_ramdisk not available for backup
- vendor not available for backup
Then simply use /vendor_image for backups.
Step 3: Get root access
Using the TWRP recovery, we will now root our device.
- First, download the Magisk zip file.
- Now, connect the device to PC and transfer the Magisk file to your device.
- Reboot into recovery mode. (Skip this step if your device is already in TWRP from the above guide.) For that, open a command/PowerShell window, and run the following command. Once the device boots into recovery mode, you would see TWRP recovery. Skip the system modifications by tapping on ‘Keep Read Only’.
adb reboot recovery
- Now, hit the Install button, and then select the Magisk zip file you transferred in step 2 above.
- Swipe at the bottom to allow installation.
- Tap on Reboot System. That’s it. let the device reboot, and you would have the root access. You can use a root checker app to verify root access.
That’s it.
Need any help regarding the root access and TWRP recovery installation on Huawei P20, Huawei P20 Pro, and Huawei P20 Lite? Let us know in the comments box below.

3 responses to “How to root the Huawei P20 Pro, Huawei P20 lite, and Huawei P20”
i a problem with fastboot -pls help -thx!
>> target reported max download size of 471859200 bytes
>> sending ‘recovery_ramdisk’ (9100 KB)…
>> OKAY [ 0.297s]
>> writing ‘recovery_ramdisk’…
>> FAILED (remote: Command not allowed)
>> finished. total time: 0.312s
the system always remove TWRP automatically and replace it with default stock recovery how to fix please ?
thank you for the info,
I did everything written but I can not find the magisk zip file in the recovery mode all i can see is bunch of symbols…