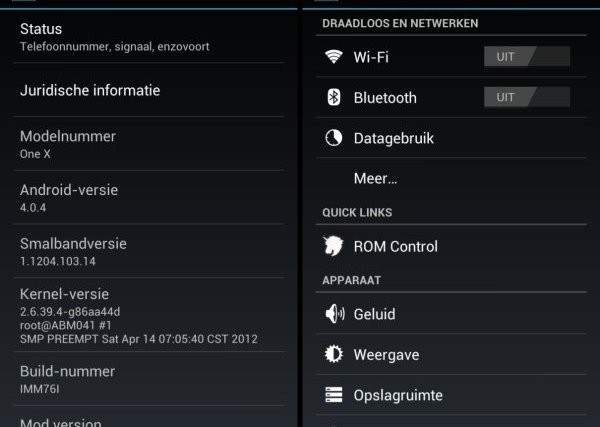
AOKP ROM for the HTC One X is finally out, and if you’ve used AOKP on another device, you’re probably excited to try it on your One X as well. AOKP is an Ice Cream Sandwich Android 4.0 based ROM that gives you a completely stock Android experience without any custom manufacturer UI or bloatware on top, along with a huge amount of customization options. And if you think your One X was fast, wait till you try out AOKP ROM as you’ll be pleasantly surprised by how fast AOKP is.
However, the ROM is in its early stages, so there can be many bugs and issues in it. The most important issues are given below under the Known Issues section, so make sure you go through them before you try the ROM.
Read on to find out how you can install AOKP ROM on your HTC One X.
Compatibility
This guide is applicable only for HTC One X. DO NOT try this on any other device.
Warning!
The methods and procedures discussed here are considered risky and you should not attempt anything if you don’t know completely what it is. If any damage occurs to your device, we won’t be held liable.
Developer Team → TripNRaVeR
Known Issues:
- Camera doesn’t work.
- WiFi hotspot doesn’t work.
- Mobile data will take a lot of time to correctly connect, there’s not much you can do about it just wait untill it correctly connects. When it is connected is stable, it will not disconnect this happens only after a reboot or after initial setup.
How to Install AOKP ROM on HTC One X
- This procedure will wipe all your apps, data and settings (but it will NOT touch your SD cards, so don’t worry about those). Backup your Apps and important data — bookmarks, contacts, SMS,APNs (internet settings), etc. This Android backup guide would help you.
Important! Don’t forget to at least make a backup of your APN settings, which you can restore later if your data connection does not work after installing the ROM. Use the backup guide to find out how. - Unlock the bootloader on your HTC One X by following the guide → here.
- Install ClockWorkMod (CWM) recovery by following the guide → here.
- Install the HTC Sync software to install the proper drivers for the phone. Download it here and install it on your computer.
Skip this step if you have HTC Sync/drivers installed on your computer already. - Download the latest version of the ROM from the official development page.
- Download the Google Apps package. This will install apps like Market, Gmail, etc. which are not present in the ROM by default.
Download Link | Filename: gapps-ics-20120429-signed.zip - Copy the two zip files downloaded in step 5 and 6 to the SD card on the phone, without extracting it
- Extract the file boot.img from inside the ROM’s zip file that you downloaded in step 5, using Winzip or a similar software.
- Download fastboot.
Download Link | Filename: Fastboot.zip - Extract the Fastboot.zip file to the C: drive on your computer to get a folder named Fastboot with four files inside it.
- Copy the boot.img file extracted in step 8 to the Fastboot folder on C drive. You should have 5 files in the Fastboot folder now.
- Switch off the phone. Enter fastboot mode. For that, boot into the bootloader mode first by holding the Volume Down button and then pressing power key. Then, select fastboot mode from there using the volume buttons to navigate and power button to select. Then connect your phone to the computer once you are in fastboot mode.
- Open Command Prompt on your computer from Start » All Programs » Accessories.
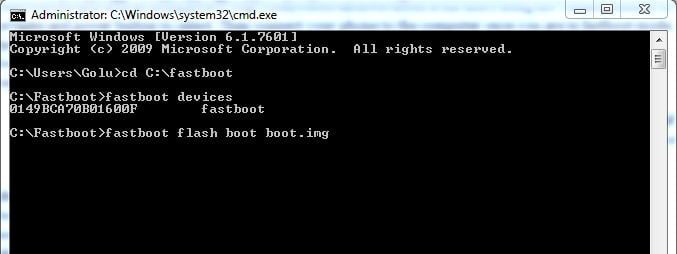
- Now, type the following commands in command prompt to flash the boot.img file, pressing Enter after each command (Check the screenshot after step 14.3 for reference).
- After the kernel is flashed, you’ll get a finished/OKAY message in command prompt.
- Disconnect your phone from the PC.
- Now, on your phone select HBOOT using the Power button. And then select RECOVERY to boot into recovery mode.
Use volume buttons to scroll up and down and the power button to select options in bootloader menu and recovery. - From the main recovery menu, select install zip from sdcard, then select choose zip from sdcard. Scroll to the ROM file on the SD card and select it. Confirm installation by selecting Yes – Install _____.zip on the next screen.
- After installation is complete, again select choose zip from sdcard, then select the gapps-ics-20120429-signed.zip file. Select Yes on next screen to confirm installation of the Google apps package.
- After the installation is complete, select go back then select reboot system now to reboot the phone and boot up into AOKP ROM.
AOKP ROM is now installed on your HTC One X. Visit the official development page for more information and the latest updates on the ROM. Share your thoughts on the ROM in the comments below.
Check out CM9 ROM for the HTC One X → here, and MIUI ROM → here.


