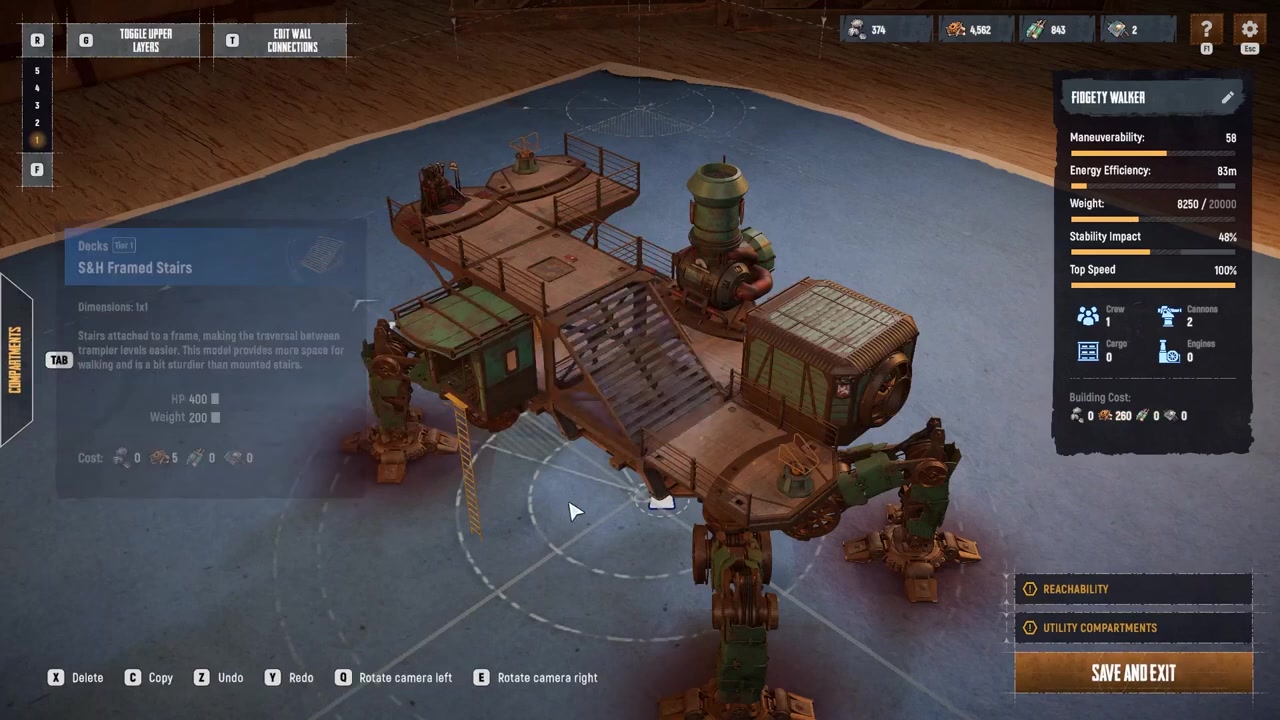
To add stairs to your Trampler, unlock either Balcony Stairs or Frame Stairs from Godlewski’s Tech Tree branch, then place them in the Trampler blueprint editor with the right deck or balcony connections.
Stairs in Sand Raiders of Sophie are added through Trampler blueprint customization, not by improvising during a raid. Once the right stair type is unlocked in the Tech Tree, you can place it in the Blueprints menu as long as the surrounding decks, balconies, or framed compartments support it.
The main choice is whether you want an interior stair route or an outside balcony route. That choice matters, because each stair type uses space differently and rejects placement when its required connections are missing.
When stairs are worth the space
Stairs are a convenience upgrade for moving between Trampler floors. If you are tired of climbing ladders every time you move through a larger build, or you have had awkward moments getting stuck on ladders, stairs make the route feel smoother.
On bigger builds, stairs start making more sense. They can make repeated trips between floors less annoying, especially when your layout has storage, crew spaces, steering access, or other rooms spread across multiple levels.
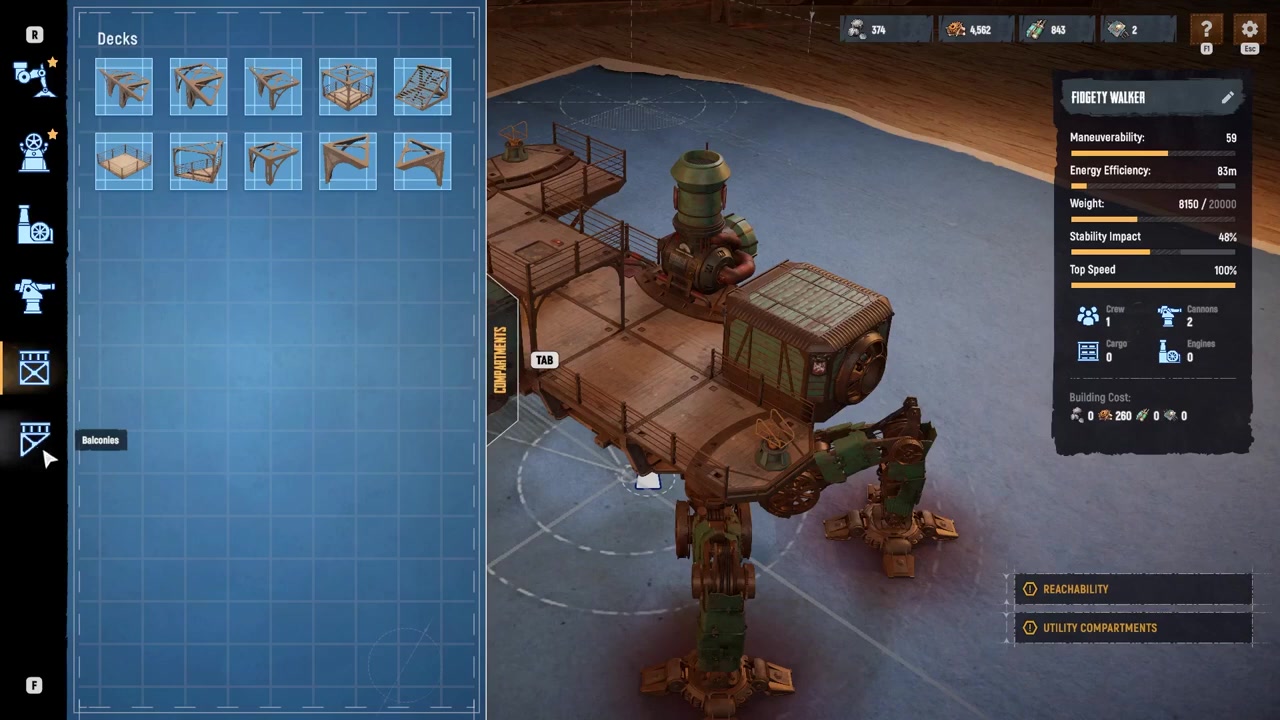
Balcony Stairs vs Frame Stairs
| Stair type | Where it goes | Best use | Main limitation |
|---|---|---|---|
| Balcony Stairs | Outside the Trampler through balcony connections | Saving interior compartment space | Needs balconies and valid framed support |
| Frame Stairs | Inside the Trampler layout | Smoother movement between interior floors | Occupies compartment space |
Balcony Stairs are the better pick when your interior is already tight. Frame Stairs are better when you want the stair route protected inside the main build and you can afford the lost compartment space.
What you need first
How to unlock and place stairs on your Trampler
STEP 1/9
Open the Tech Tree
From the main lobby, open the Tech Tree, where Trampler part unlocks live.
STEP 2/9
Go to Godlewski’s branch
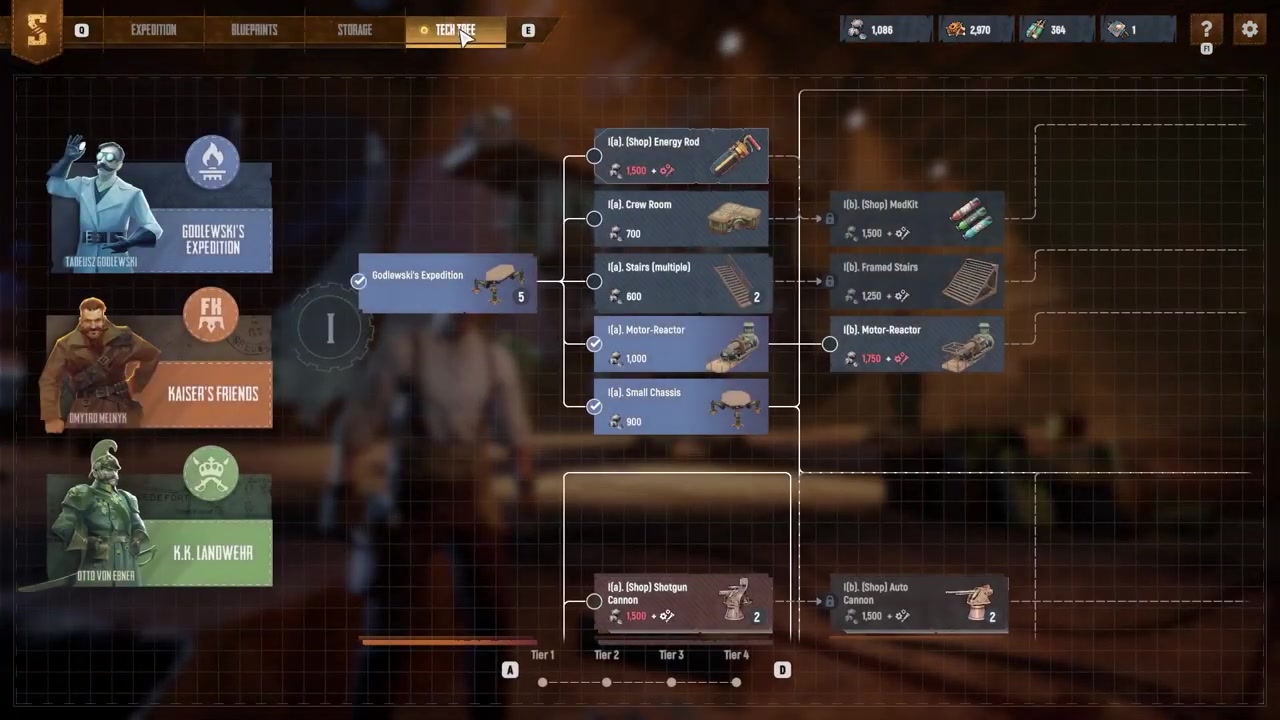
Choose Godlewski’s branch, since this is the branch that contains the stair unlock path.
STEP 3/9
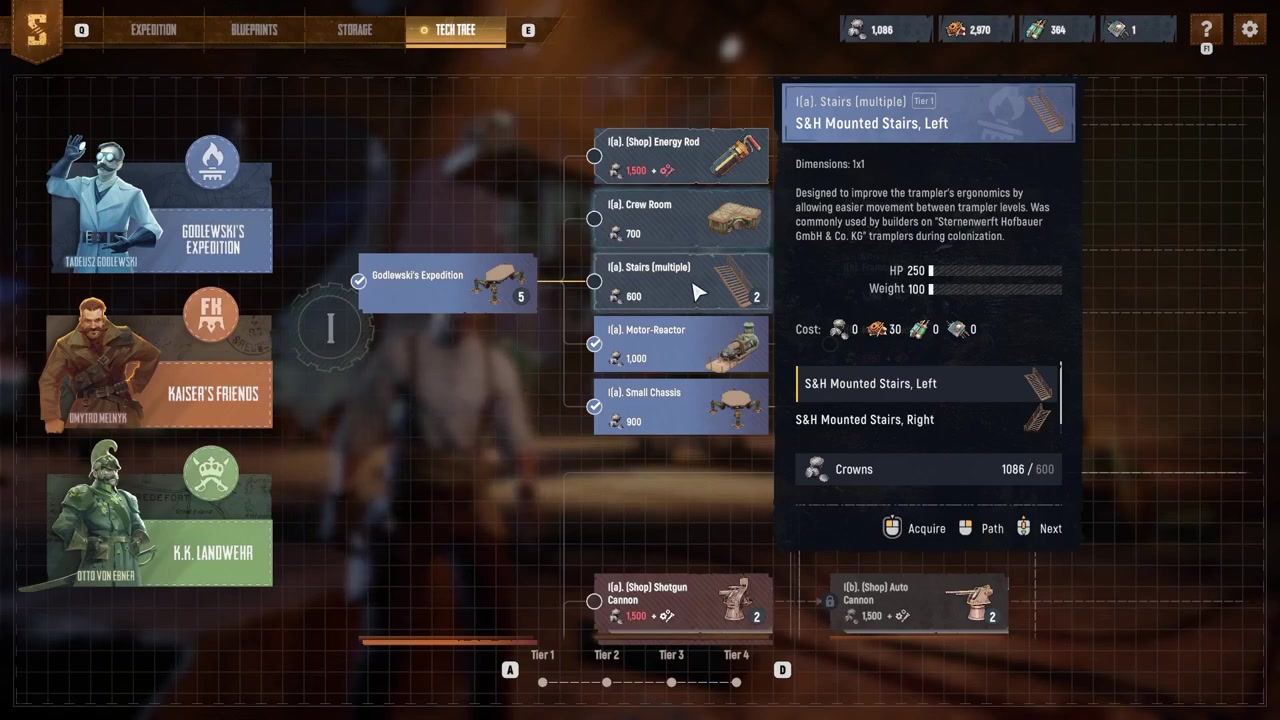
Unlock Balcony Stairs
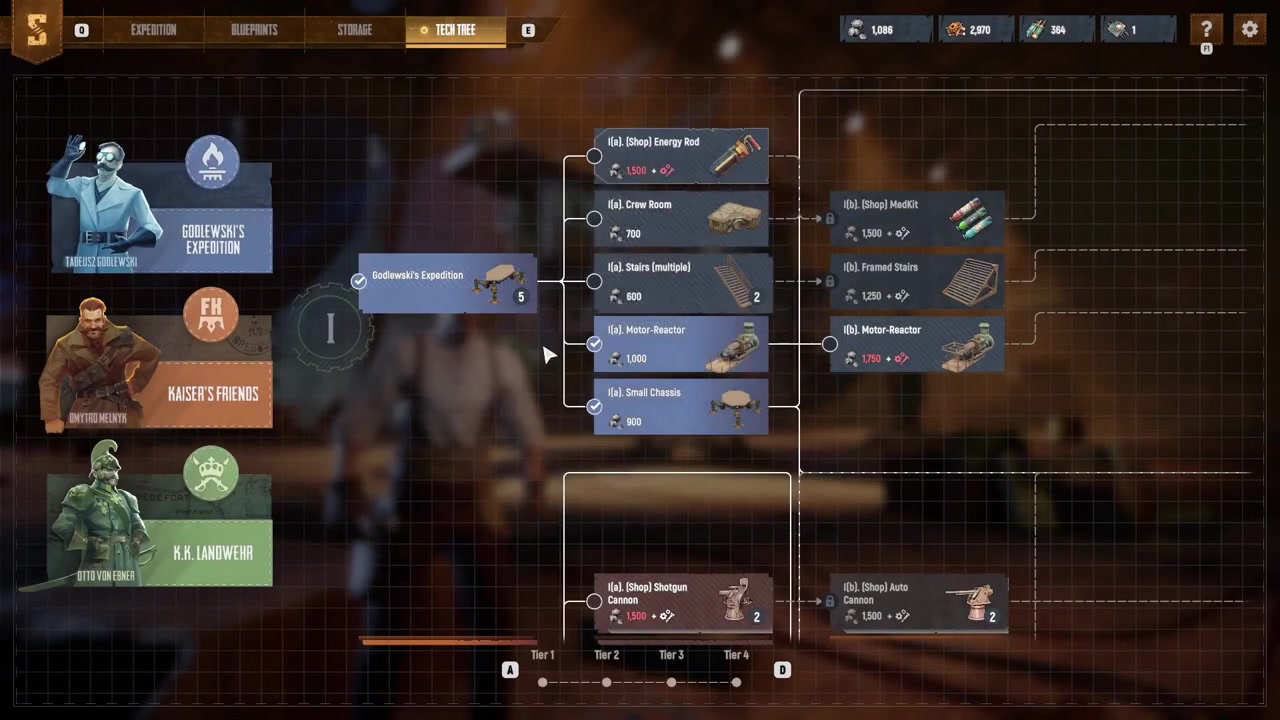
Unlock Balcony Stairs if you want exterior stairs that attach to balconies on the outside of the Trampler.
STEP 4/9
Unlock Frame Stairs
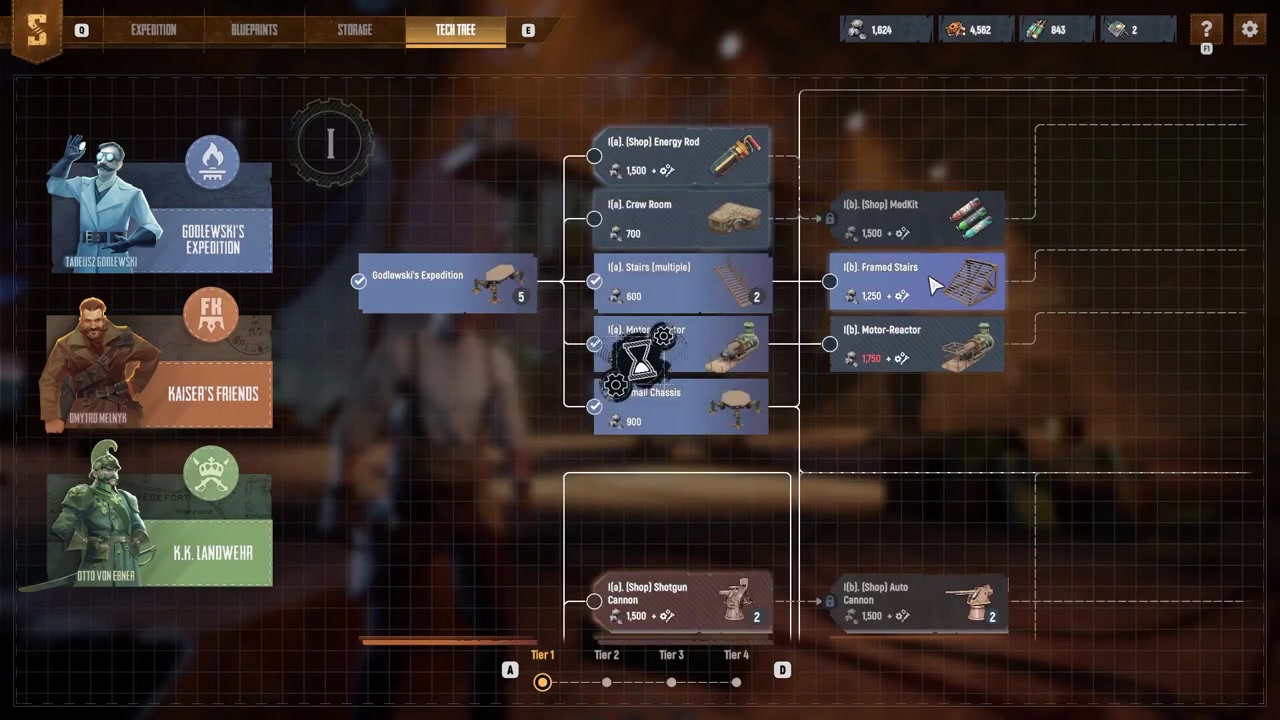
Continue farther along Godlewski’s branch for Frame Stairs, the version meant for interior Trampler layouts.
STEP 5/9
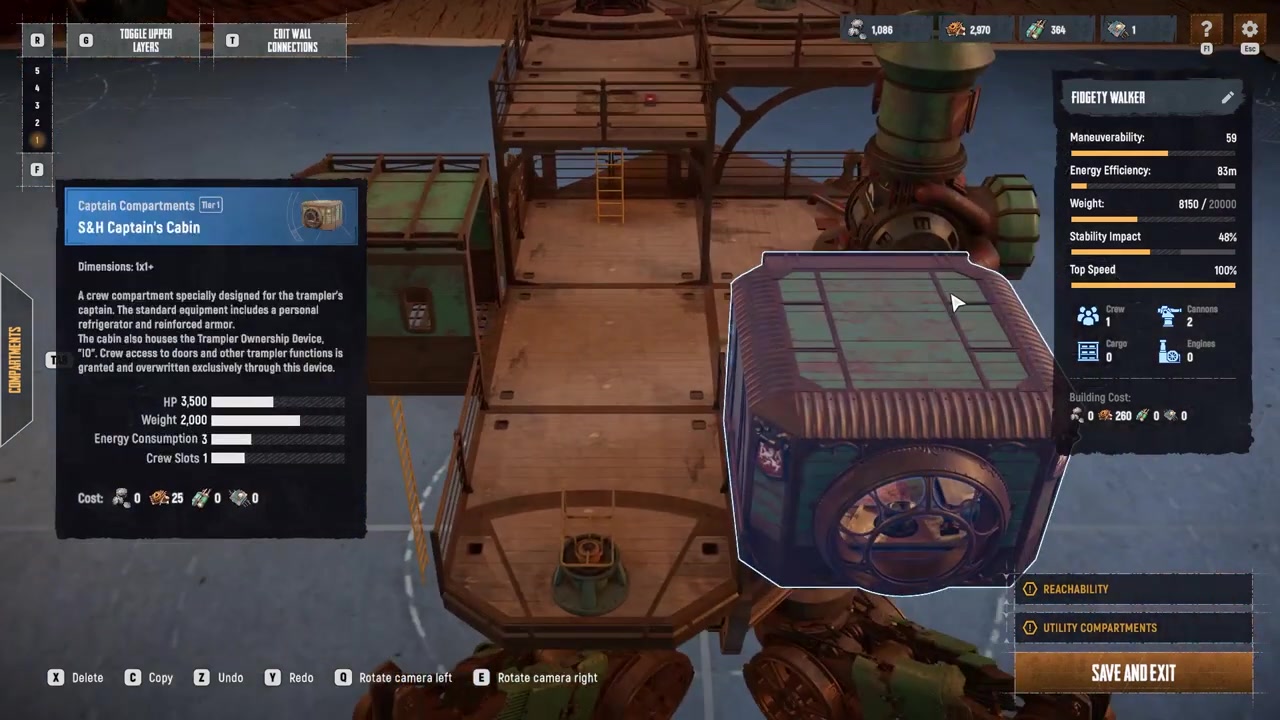
Edit your Trampler blueprint
Open the Blueprints menu and edit your Trampler; exact creation or editing hotkeys are not confirmed.
STEP 6/9
Place Frame Stairs from Decks
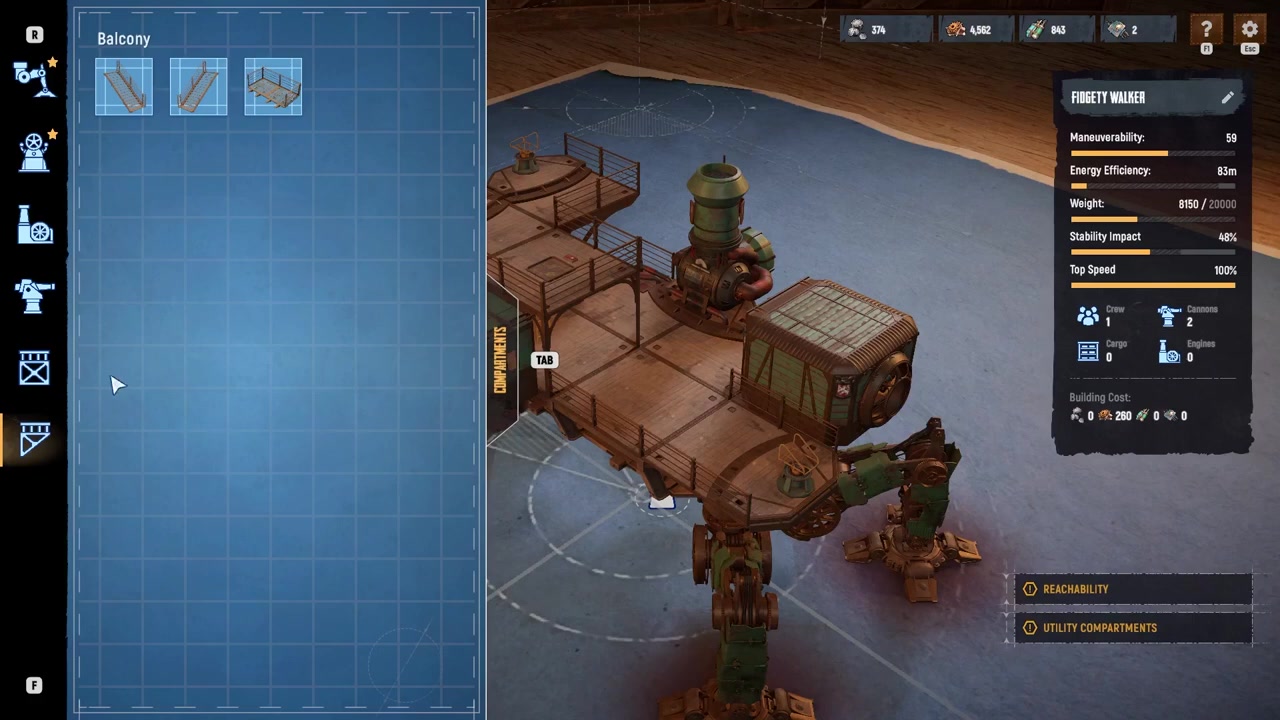
For Frame Stairs, open the Decks tab and place them inside the Trampler, knowing they occupy compartment space.
STEP 7/9
Choose Balcony Stairs for exterior access
Use Balcony Stairs when you want to save interior space instead of giving up a compartment slot.
STEP 8/9
Build balconies on both ends
Before placing Balcony Stairs, build balconies on both ends so the stair piece has the exterior connections it needs.
STEP 9/9
Check the finished connection
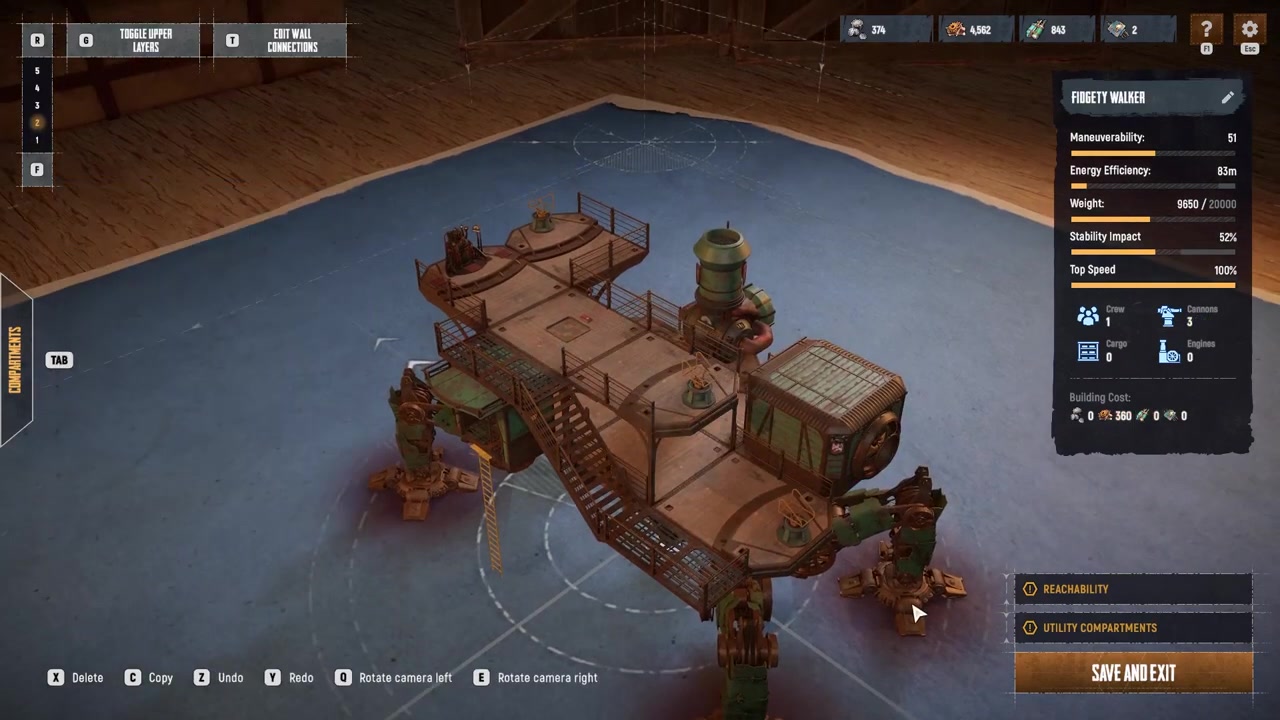
When the stair connections are valid, your Trampler gains smoother floor-to-floor movement without relying entirely on ladders.
Video help
How to fix red stair placement
When the stair preview turns red, treat it as an invalid connection warning. For this specific problem, the usual cause is that the stairs are not connected to a compatible framed compartment.
- Check the stair’s connection points. Make sure the ends are meeting the correct deck, balcony, or framed piece.
- Add a frame deck beside the balcony. If Balcony Stairs refuse to sit, place a frame deck or another compatible framed compartment next to the balcony.
- Re-place the stairs after the support exists. Once the framed connection is present, the stair piece has a valid attachment point to accept.
Place the supporting frame deck before the stair piece when Balcony Stairs turn red, because the stairs need a valid framed attachment beside the balcony.
Stair layouts that keep routes usable
Plan stairs around the rooms you need to reach quickly. Routes to areas like the Entrance Area, Fly Bridge, Captain’s Compartment, and Motor Reactor should stay clear, because a nice-looking stair run is not useful if it blocks the rooms you actually move through during a raid.
Frame Stairs are convenient, but they consume interior compartment space. If your build is already crowded, Balcony Stairs can keep the inside cleaner, provided you have the balcony connections and framed support needed to make them valid.
Do not treat stairs as confirmed armor or reliable combat cover. Early player builds have experimented with stair pieces around vulnerable parts, but behavior around stair slits, broken stair pieces, and reactor protection is not solid enough to design around. Use stairs for movement first.
After the layout works, save the blueprint with a name you will recognize. Multiple saved Trampler designs can get confusing fast, especially if you are editing one of the three basic starter blueprints into a more specialized build.
Frequently Asked Questions
Where do you unlock stairs in SAND: Raiders of Sophie?
You unlock Trampler stairs in the Tech Tree from the main lobby. Go to Godlewski’s branch, where Balcony Stairs appear first and Frame Stairs are found farther along the branch.
What is the difference between Balcony Stairs and Frame Stairs?
Balcony Stairs attach outside the Trampler through balconies, making them useful when you want to save interior space. Frame Stairs are built for interior layouts and are placed through the Decks tab, but they take up compartment space.
Why are my stairs highlighted red?
A red stair preview usually means the stairs do not have a valid connection. For Balcony Stairs, build balconies on both ends and place a frame deck or another compatible framed compartment next to the balcony so the stair piece has a proper attachment point.
Do stairs replace ladders completely?
No. Stairs reduce your reliance on ladders and feel better on larger Trampler builds, but ladders still make sense in tight layouts because they use less space and fewer materials.
Do stairs have a confirmed material cost?
No confirmed material amount is available for Balcony Stairs or Frame Stairs. Stairs are known to require additional materials, and Tech Tree upgrades may use resources such as Coral Chunks and Weird Coral, but the exact stair cost should be checked in-game before planning a farming route.