
Windows 10 has introduced numerous security features for end-users since its launch. One main addition has been the ability to stop unverified/unsigned apps. Microsoft verifies each certificate as well as the driver used by any app on your system to ensure that it does not contain any malicious code.
But in doing so, it prevents developers from testing apps and services on their system. The same feature will also prevent you from running test or beta apps that have not yet been publically released with a verified certificate or developer signature. This is where test mode in Windows 10 comes in. Let’s take a quick look at it.
What is a test mode on Windows?
Test mode is a temporary environment that can be trigger manually for Windows 10. Once triggered, your OS will run in test mode and allow you to run unsigned/unverified apps.
This is a great feature for app and program developers that wish to test the unsigned version of their apps or programs on a daily basis. However, if you are an everyday user that does not use the test environment then the test mode can end up putting your private data at risk.
Not only will you be able to install unsigned apps on your system, but other apps and administrative users will also be able to do the same. In case you have an infected file/program on your system, this could give it the ability to install any additional code or programs without verifying them with Microsoft first.
Hence, you might want to disable test mode to ensure utmost security on your system. Let’s take a look at how you can disable test mode in Windows 10.
Guide
Press ‘Windows + X’ on your keyboard. This will bring up a list of management tools in your start menu. Click and launch ‘Windows Powershell (admin)’ from this menu.

Now type in the following command in the Powershell window and press enter.

bcdedit -set TESTSIGNING OFF
If you get an error message then instead use the command given below.

bcdedit /set nointegritychecks off
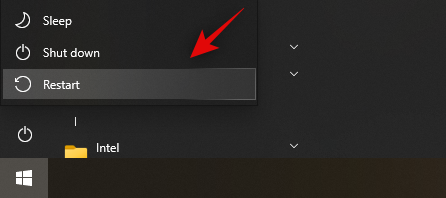
Once the command has been executed, simply restart your system and test mode should be disabled for you.
And that’s it! Test mode will now be disabled which in turn will provide you with added security when using your system.
I get an error message when disabling test mode
If you get an error message using test mode then it is likely due to Windows needing additional permissions and commands to disable Integrity checks. Follow the procedure below if the above command does not work for you.
Press ‘Windows + X’ on your keyboard and launch ‘Windows Powershell (admin)’.
Now type in the following command and press enter.

Bcdedit.exe -set loadoptions ENABLE_INTEGRITY_CHECKS
Once the command has been executed, type in the command given below and press enter again.

Bcdedit.exe -set TESTSIGNING OFF
Now it’s time to restart your system.
Once Windows boots up again, test mode should now be disabled for your system.
I hope you were able to disable test mode easily using the guide above. Feel free to ask any more questions in the comments section below.


4 responses to “How to Turn off Test Mode on Windows 10”
After I follow the instruction to disable test mode I am getting a message “The value is protected by Secure Boot policy and cannot be modified or deleted.
I only started getting the Test Mode watermark after I was on a session with Microsoft tech on another device.
I tried everything that I was shown and is still showing protected by secure boot
Don’t know what to do
Thanks
Fredg
You need to turn off Secure Boot in your computer’s BIOS/UEFI settings. I just had to walk a customer through this exact thing.
Have tried all the process but still I can see test mode in water mark…