At its annual developers’ conference Google I/O in May this year, Google announced Smart Canvas – a set of features to be available inside Google’s Workspace that should change your experience when working and collaborating with others. At the time, Smart Canvas was exclusively available only for customers of Business Starter, Business Standard, Business Plus, and Enterprise plans and not free regular Gmail accounts.
Now, Google is making a couple of those collaborative features available to all of its users including those on its free tier. With the recent most changes, you can now use most of Google Apps from the same screen without opening a bunch of tabs for each one of them and also collaborate at the same time. In this post, we’ll explain what are these new changes available for your Google account, where can you use it, how do you set it up, and start using it from within your Gmail account.
Related: How to use labels as folders in Gmail
- A little background…
- What is the new “integrated workspace” on Gmail?
- Integrated Workspace or Google Rooms or Spaces: What do you call it?
- How to Enable Google Spaces for Collaboration
- Where can you access all Google Apps for Collaboration?
- How to Set Up a Space on Google Chat
-
How to Use Google Space to Collaborate with others
- Start a Conversation inside Spaces
- Send a personal message to someone in Spaces
- Upload a file from your computer
- Add files from Google Drive
- Create Documents to Collaborate on Docs, Sheets, and Slides
- Create a meeting session on Google Meet
- Schedule an event on Google Calendar
- Create and assign tasks for everyone in a Space
- More features should arrive soon!
A little background…
In July last year, Google announced a whole new redesign of Gmail for users of its premium G Suite plans to make “a better home for work”. By integrating its core services like video, chat, email, files, and tasks, Google said Gmail is not just a mail app anymore but also a platform that lets you access all of Google’s apps from the same screen through what they called an “integrated workspace”.
The move came as a means to create this unified experience where you can send emails, chat with others, collaborate on documents, and make video calls within a single browser tab. Within months, the company started rolling out the “integrated workspace” to all G Suite (now Workspace) customers with the following features:
- Using Google Chat inside Gmail
- Creating Spaces to send messages to a group of people, share files, and assign tasks
- Collaborate with others via Google Meet
- Open and co-edit documents with others without leaving Gmail
- Set your availability
- Get search results that have been integrated with Gmail and Google Chat
Fast forward to now, Google is now bringing two of its Workspace features to the free (read as “all”) Google accounts – Google Chat and its “integrated workspace” that was previously only available for paid Google Workspace users. What this means is that you and the other 3 billion users will now have access to the full Google Workspace experience for free.
What is the new “integrated workspace” on Gmail?
The new “integrated workspace” will bring most of its collaboration features inside the Gmail sidebar with access to Google Chat, Spaces, and Meet. You can collaborate with others on Google apps on Gmail but it’s not actually present on this sidebar. Instead, it’s available when you share a Docs, Sheets, or Slides document with someone on Chat or Spaces (previously Spaces).

When such a document is opened, you should see the new interface inside Gmail that now loads up the document on the right and shows your active Google Chat thread on the left. Another significant change comes in the form of your Google Chat status, which is now easily accessible on the top right corner of the Gmail window. By default, it will label you as “Active” with a green icon but you can quickly switch to “Do not disturb” or “Away” to minimize distractions.
Read further down this post to learn how you may enable the new “integrated workspace” on your Google account and use all the new features inside it.
Integrated Workspace or Google Rooms or Spaces: What do you call it?
At the time of its announcement last year, Google called the new collaboration features in Chat Spaces “integrated workspace” although it was Chat rooms that constituted a significant part of the features. When the new features were rolled out in September, the company continually kept calling it “integrated workspace” but also unveiled “Rooms” as one of the distinct components of the new Gmail interface.
With its latest blog post, Google has clarified that Rooms will be rebranded to “Spaces” offering a dedicated section for managing people, topics, and conversations. The company says that the move from Rooms to Spaces will take place over the summer but for now, the new collaborative features are still available as Rooms inside the Gmail app.
Update [September 14, 2021]: “Spaces” is now finally live inside Google Chat and Gmail with both apps on Android getting the new rebranding. On Gmail, Spaces is present for phones running on Android 12 beta; which could mean that the feature may have been brought alongside the Material You redesign for the Gmail app on the upcoming Android OS. On Google Chat, however, the new Spaces tab is visible on Android 11 as well, provided you’re running the latest version of Google Chat from the Play Store.
On the web clients of Gmail and Google Chat, however, it still shows “Rooms” instead of “Spaces” but based on recent developments, we should start seeing Spaces appear inside both the services anytime soon.
If this wasn’t confusing enough, this isn’t the first time Google has branded something “Spaces” as the company once experimented with a messaging app back in 2016 before shutting it down completely within eight months.
Since the new feature has started popping up on users’ smartphones as Spaces, we’ll stick to using “Spaces” for the rest of this post.
How to Enable Google Spaces for Collaboration
The new “integrated workspace” can be accessed inside Gmail only after you flick the switch on Google Chat inside Google’s email interface which doesn’t make much sense but the presence of such an option does mean that you can go back to old Gmail if you find all of its new features overwhelming to deal with. This particular step of setting up can only be done on a desktop and not on the Gmail app on your phone.
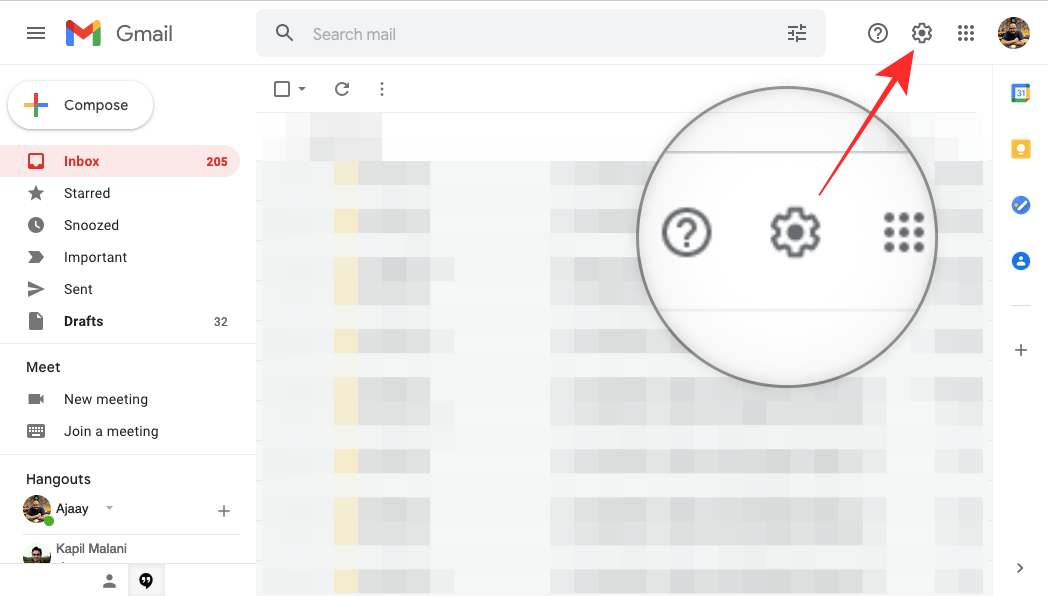
To get started, open mail.google.com on the web and sign in with your Google account if you haven’t so. Inside Gmail, click on the cogwheel icon at the top right corner.
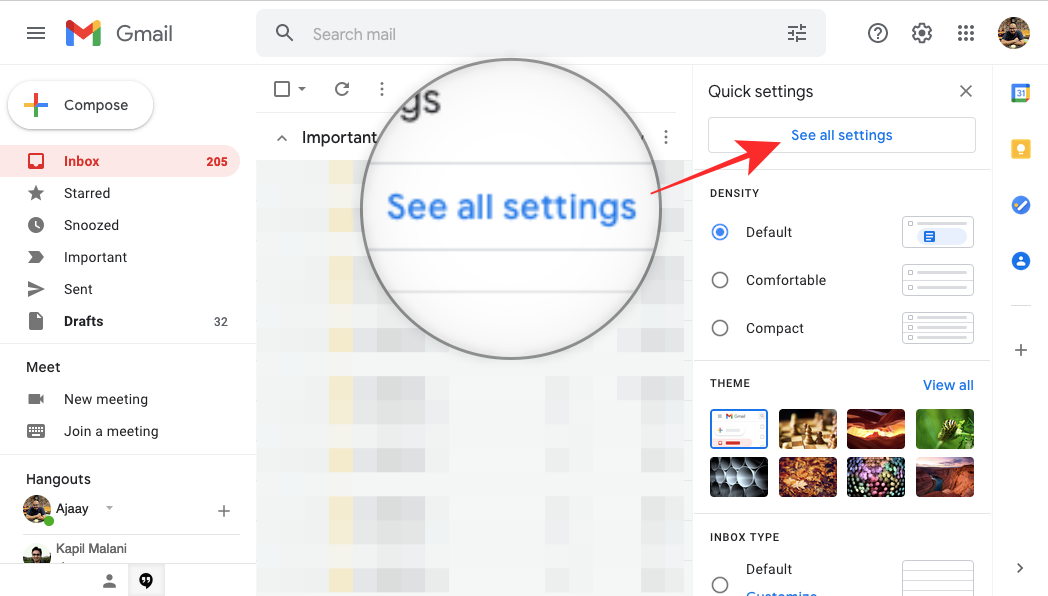
When the Quick Settings panel opens on the right-hand side, click on the ‘See all settings’ option at the top.
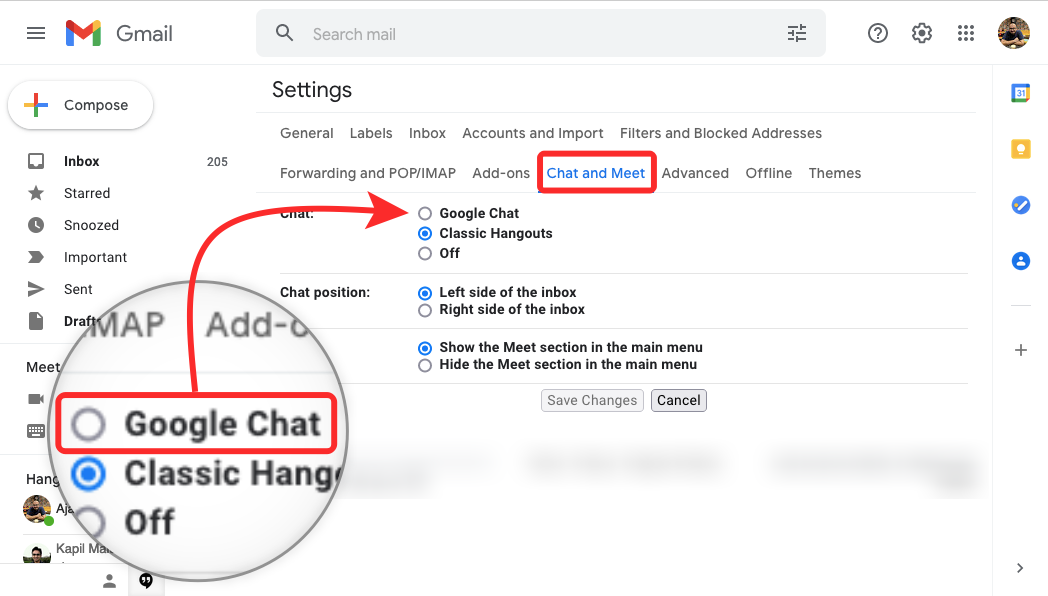
This will bring up the Settings screen inside Gmail. Here, select the ‘Chat and Meet’ tab at the top.
Under ‘Chat and Meet’, select the ‘Google Chat’ option inside ‘Chat’. Before your selection, ‘Classic Hangouts’ will be selected by default.
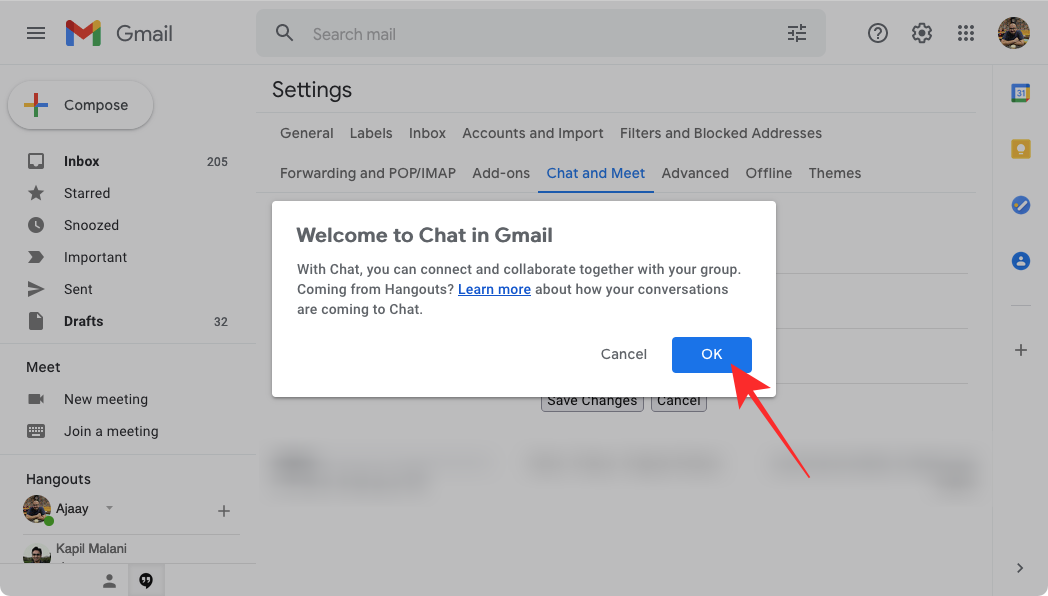
You will be prompted with a dialog that reads “Welcome to Chat in Gmail”. To confirm your switch to the new “integrated workspace”, click on ‘OK’.
Additionally, you can choose which side of the inbox you want Google Chat to appear at by selecting your preferred choice inside ‘Chat position’.
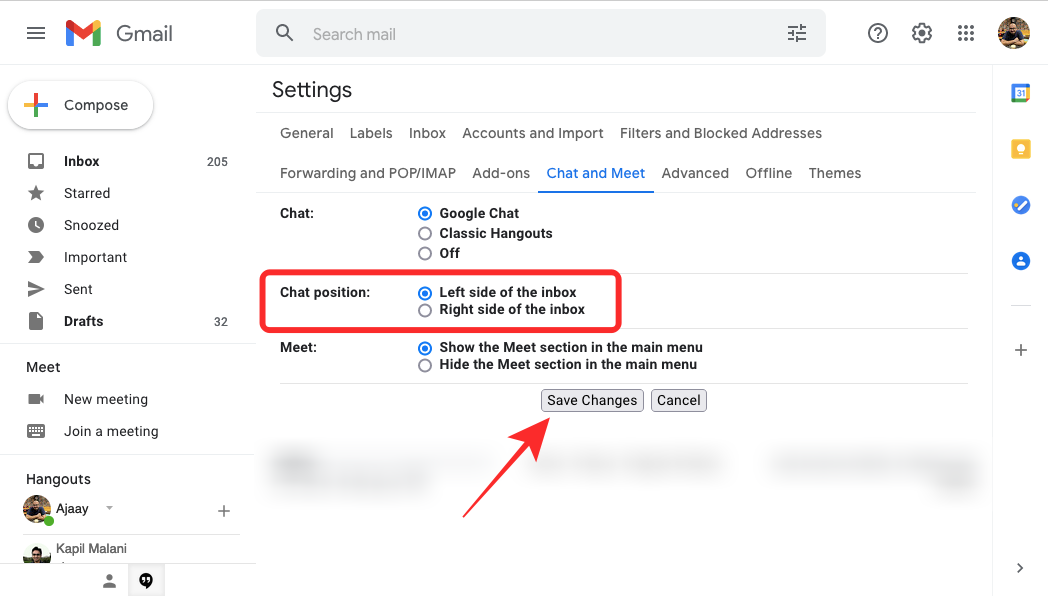
You need to save changes for your setting to take effect. Click on the ‘Save Changes’ button on the screen and wait for Gmail to reload.
Once Gmail is reloaded, you should be able to see the new “integrated workspace” which shows Mail, Chat, Rooms, and Meet as tabs on the left/right sidebar.

Where can you access all Google Apps for Collaboration?
Since the new “integrated workspace” revolves around Google Spaces (soon-to-be Spaces), you can use it wherever Google Spaces is accessible. Although the unified experience is primarily designed for Gmail on the web, there’s one more space where you can access it from. Once the Google Chat switch has been enabled inside Gmail as we explained above, you can use Google’s “integrated workspace” directly within Google Chat on the web.
So, to answer your question, you can access the all-new “integrated workspace” for collaboration by going to:
- Gmail on the web | Gmail app on Android
- Google Chat on the web | Google Chat app on Android
How to Set Up a Space on Google Chat
An integral part of the new “integrated workspace” inside Gmail is Google Space, which is accessible from a sidebar on Gmail and Google Chat. Follow the steps below to set up a Space to start collaborating with others.
Create a Space
On PC
Open either Gmail or Google Chat on a web browser on your computer and sign in with your Google account, if you haven’t already. Depending on how you’ve set it up, you should see the Spaces or Rooms tab on either the left sidebar or the one on the right.
If you haven’t accessed Google Spaces before, it will be minimized on the left sidebar. To expand it, click on the arrow adjacent to the Spaces or Rooms tab.

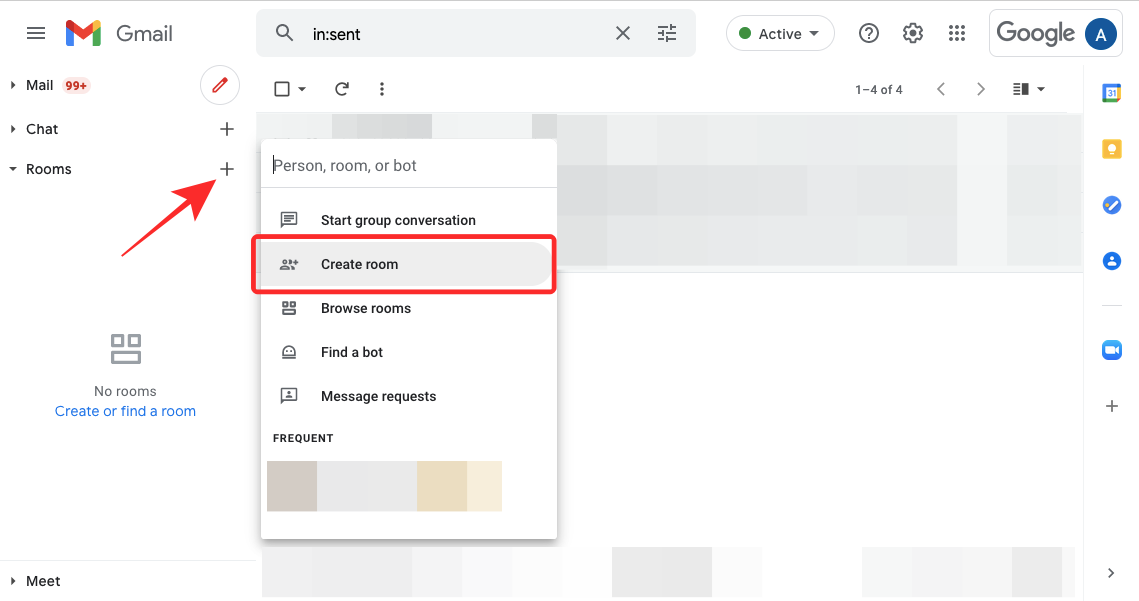
To create a Space or Room on Google Chat or Gmail, click on the ‘+’ icon. When an overflow menu appears, select the ‘Create room’ option.

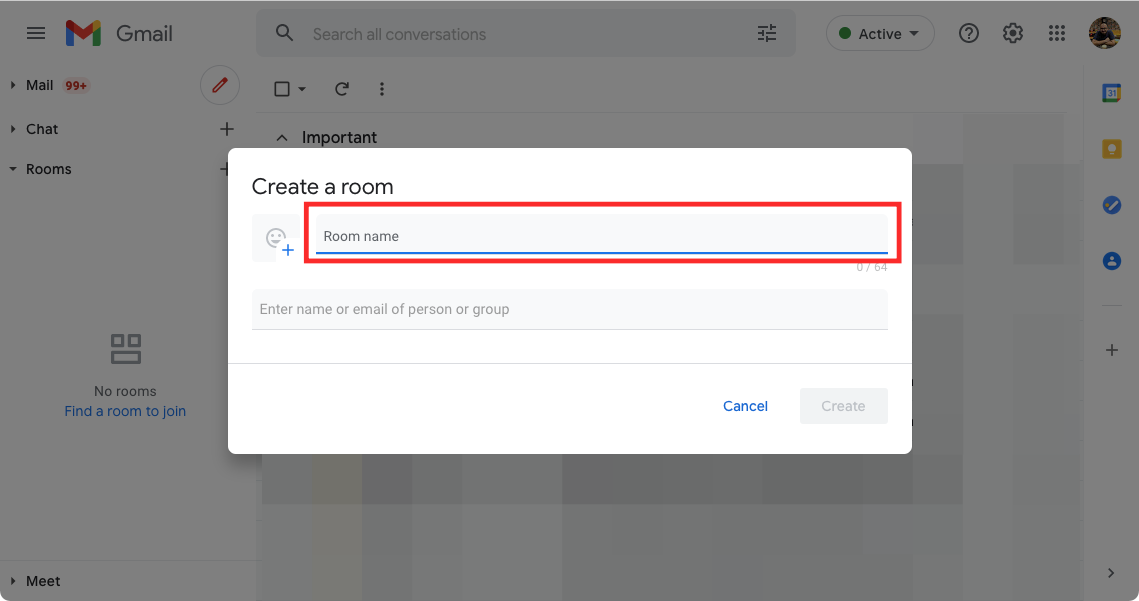
A new ‘Create a Space’ dialog will appear, asking you to enter the name of the space you’re about to create in the first text field.
Next, you will need to enter the name or email address of the people you want to add on Chat.
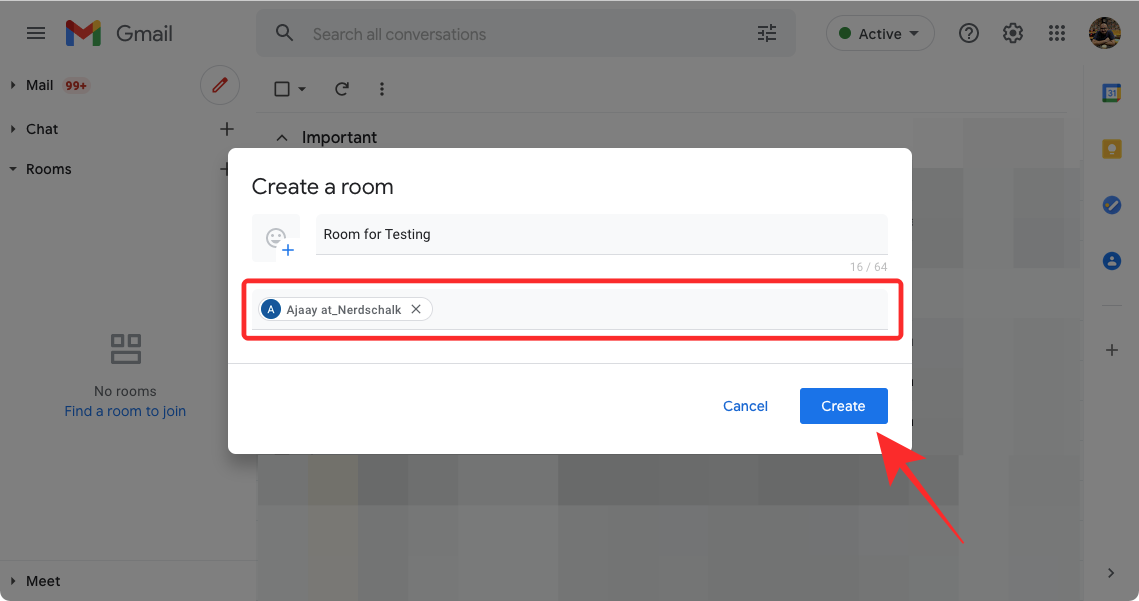
Once you’ve added everyone to the Space, click on ‘Create’.
Your Space should be created and will be visible under the ‘Spaces’ tab on the Gmail or Google Chat sidebar.
On Phone
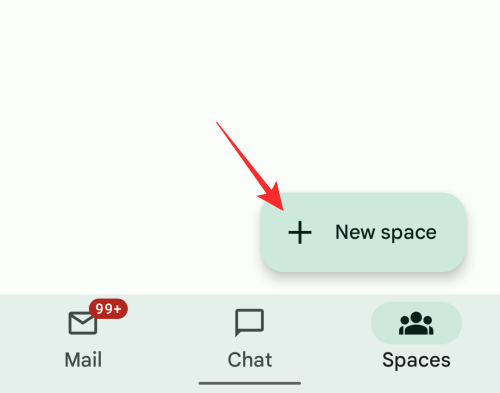
As has been explained above, you can access Spaces on both the Gmail or Google Chat apps on your phone. To get to the Spaces section and create a Space, open either of those apps and select the ‘Spaces’ tab from the bottom. Inside Spaces, tap on the ‘New space’ bubble at the bottom right corner of your screen.
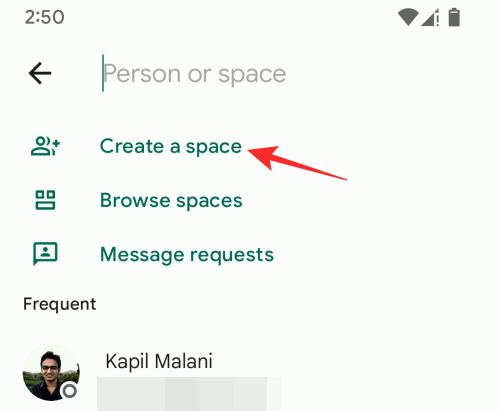
Next, select the ‘Create a space’ option on the screen.
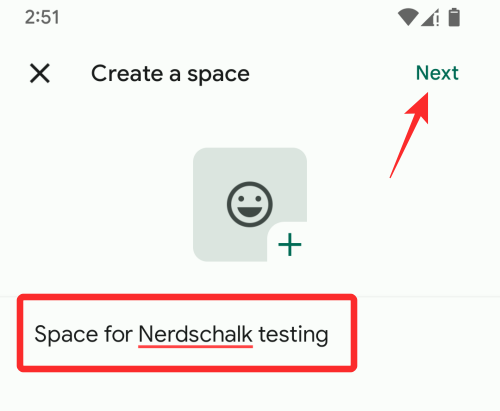
Now, add a name for your Space inside the ‘Create a space’ screen and then tap on ‘Next’.
On the next screen, you’ll be able to add people to your space directly. You can add people from suggestions based on whom you frequently contact or search for their name or email address in the text field above. Simply tap on the person’s name to add them to your space and once everyone has been added, tap on ‘Done’ at the top right corner of your screen to complete the process.
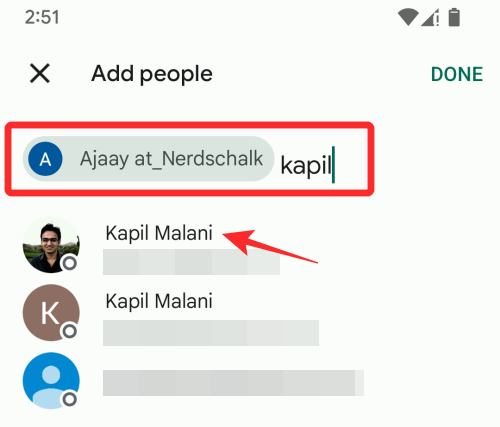
Add people to a Space
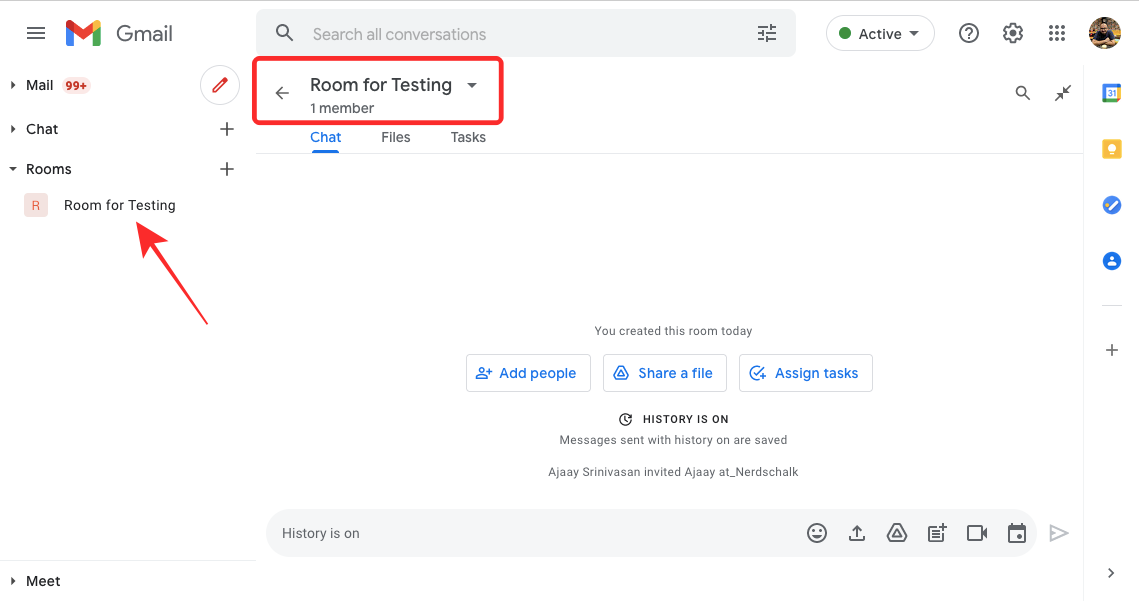
While you will be asked to add people to a Space at the time of creating one, you can add more people to a Space by selecting the Space from the Gmail or Chat sidebar to enter one.
Once you’re inside a space, click on the Space’s name at the top just below the search bar.
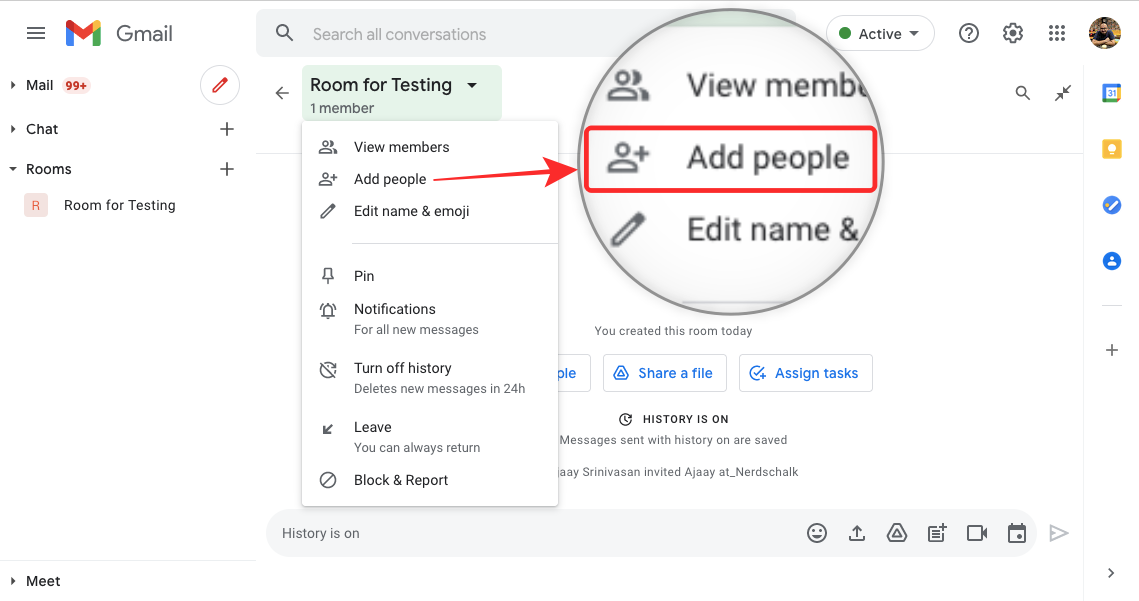
When a menu appears, select the ‘Add people’ option.
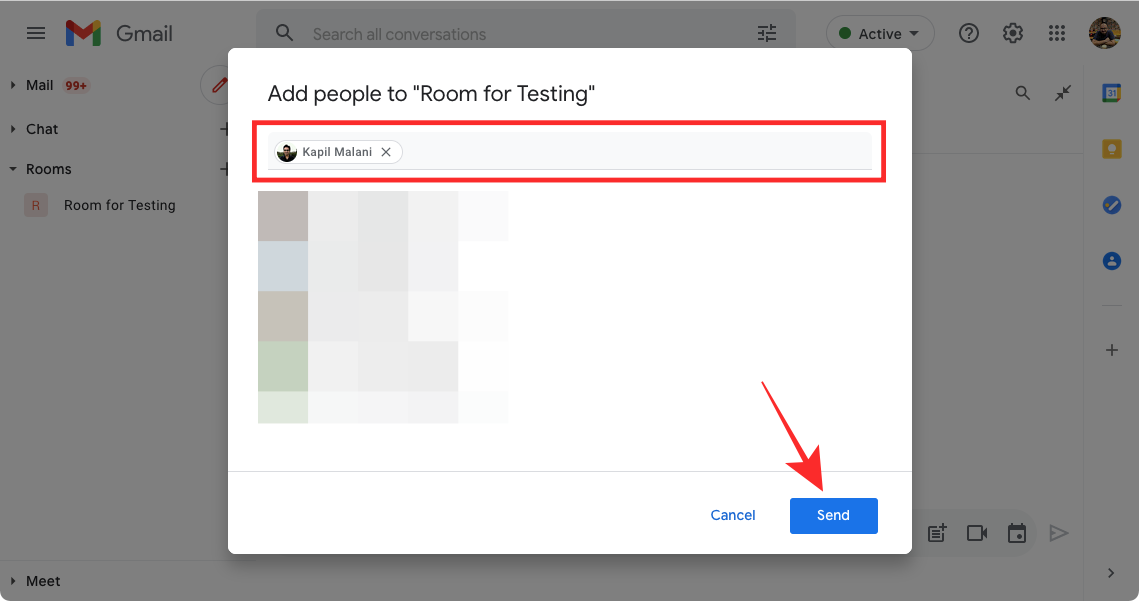
Inside the ‘Add people to Space’ dialog, enter the name or email address of the people you want to invite to the Space, and then click on ‘Send’.
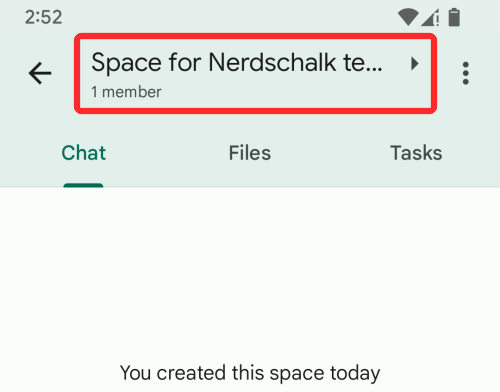
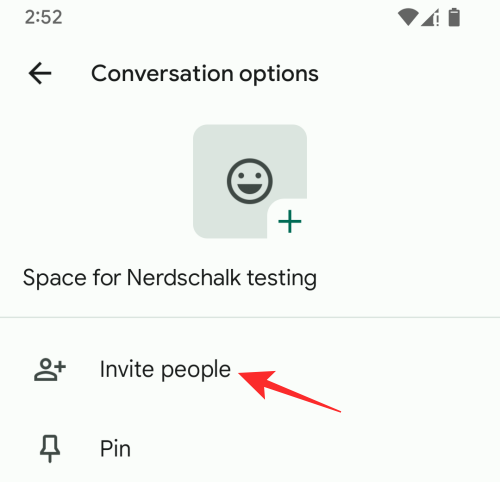
On the phone, you can add anyone even after your Spaces have been created. For this, open the Spaces you created earlier and tap on the name of the Space at the top of your screen.
Inside the ‘Conversation options’ screen that appears next, tap on ‘Invite people’ and start adding more people to your space.
Join a Space you’re invited to
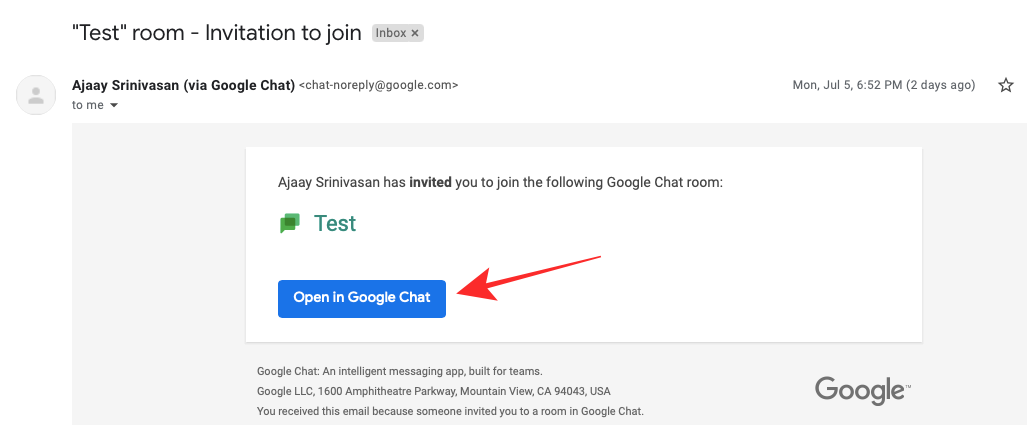
If someone created a Space for you to join, you will receive an invitation on Gmail. To access the invitation, open mail.google.com on a web browser and sign in to your Google account. Inside Gmail, look for the email that reads “[Name of] Space – Invitation to join” and open it.
When the mail opens, you should be able to see your invite and who sent it to you. To join the Space you’ve been invited to, click on the Open in Google Chat option inside the invite.
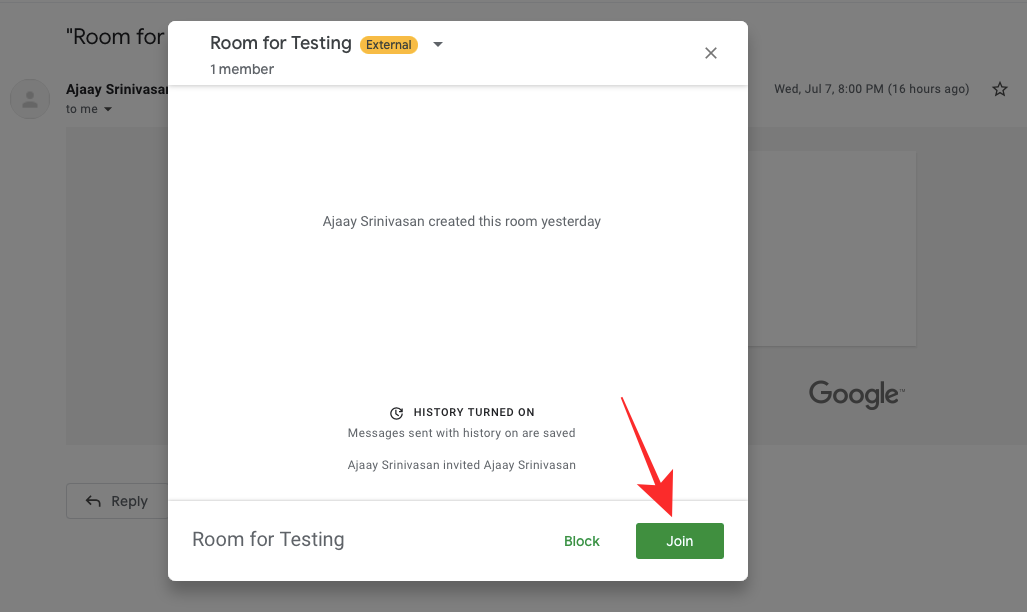
A new popup window screen will appear showing you a preview of the Space till now. Click on the ‘Join’ button on this popup to enter the Space.
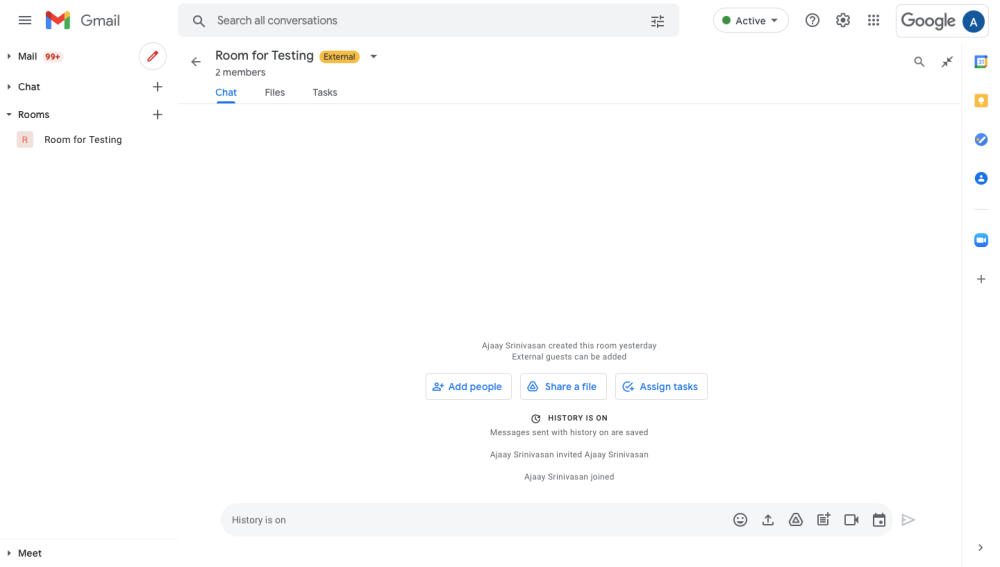
The Gmail screen will now switch to the Space you just entered showing you all the tabs on the left and messages history for the Space on the right panel.
Toggle Message History
You and others in a Space can choose to keep Message History enabled or disabled at any time and this option is available even for members of the Space who didn’t create it. When Message History is turned off, all of the conversations happening inside a thread are removed after 24 hours. If Message history is enabled, all of the messages in the conversation will be kept indefinitely.
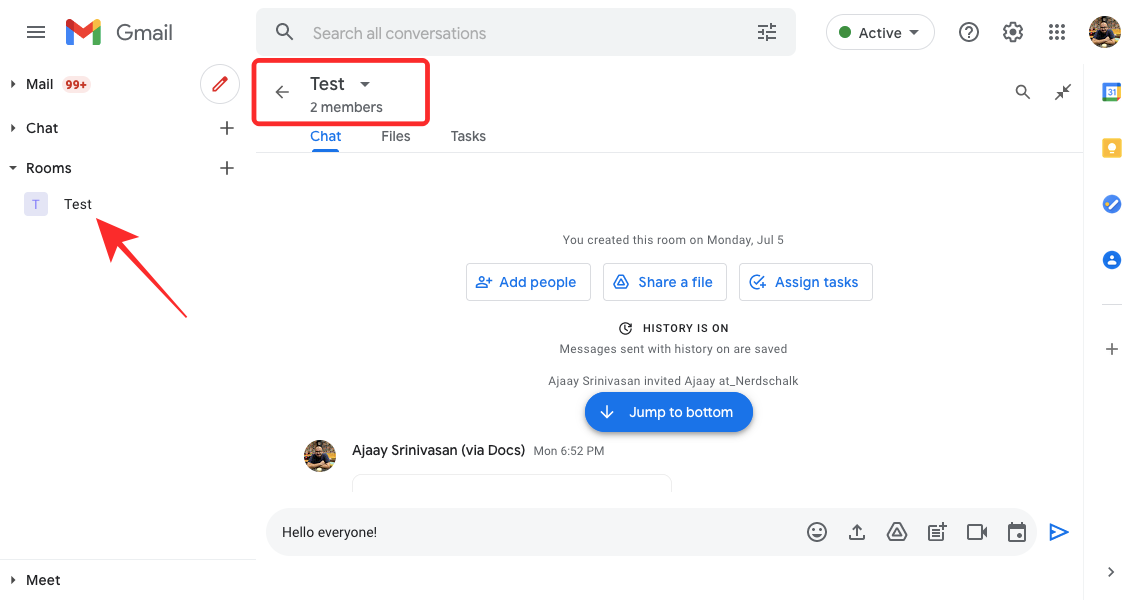
To toggle Message history on Spaces, enter a Space on Gmail or Google Chat. Inside a Space, click on the Space name at the top.
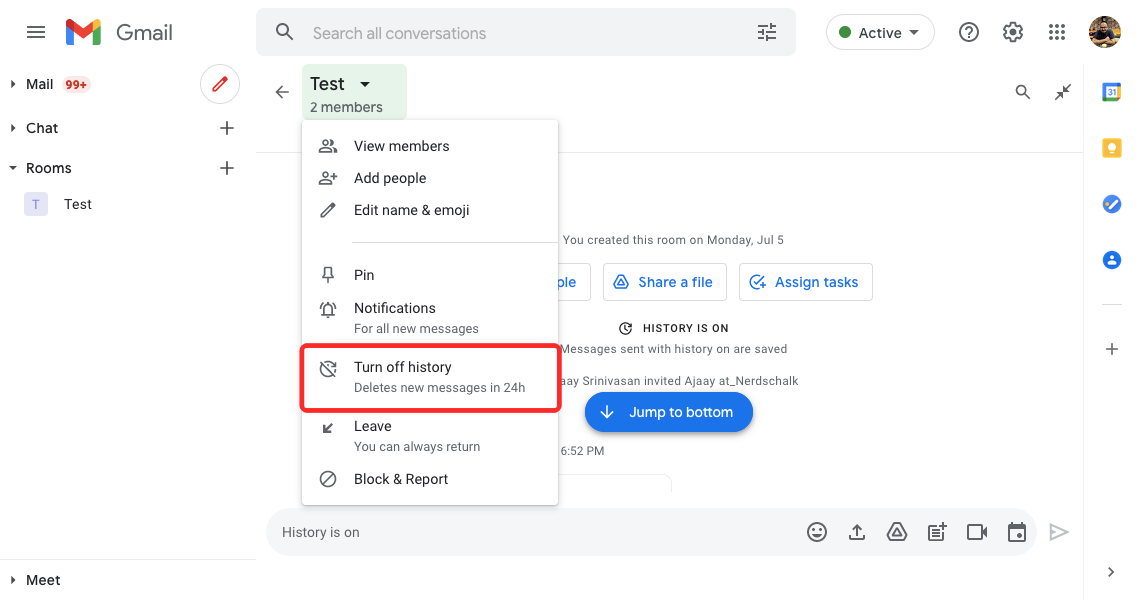
In the menu that appears, you can click on ‘Turn on/off history’ to enable or disable Message History for the conversations taking place inside the space.
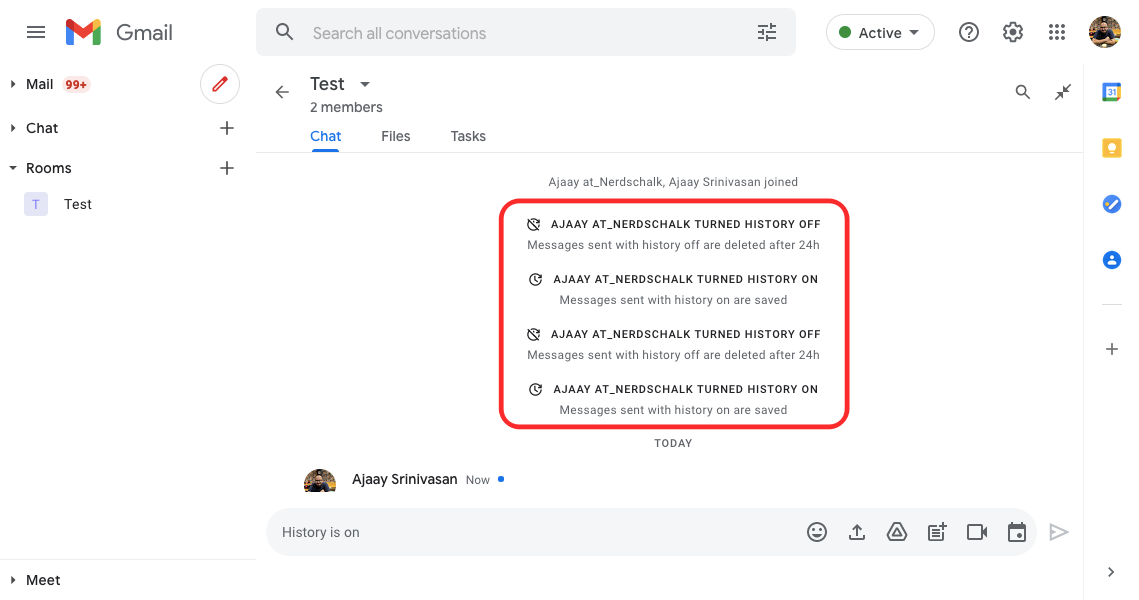
Anyone in a Space can toggle the message history and any changes made to it will be visible for everyone in the Space.
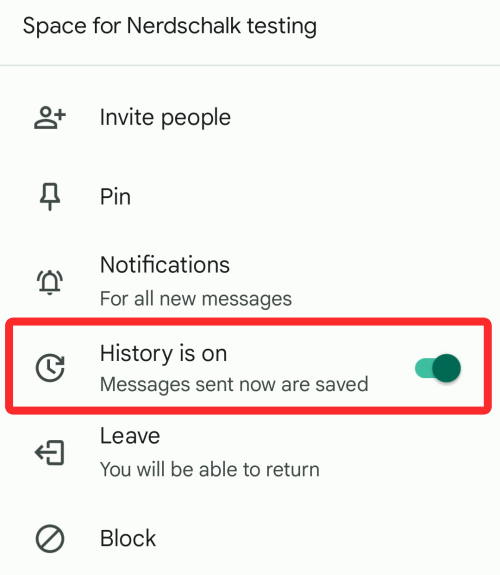
On the phone, you toggle message history by first opening the Space and then tapping on the name of the Space at the top of your screen.

Inside the ‘Conversation options’ screen that appears next, tap on toggle next to the ‘History is on/off’ to enable/disable message history.
Pin a Space
To make sure a particular Space is highlighted and easily accessible inside your Gmail or Google Chat, you can pin a selected Space. For this, enter a Space on Gmail or Google Chat and click on the Space name at the top.

When the menu shows up, select ‘Pin’ to keep the selected Space visible all the time.
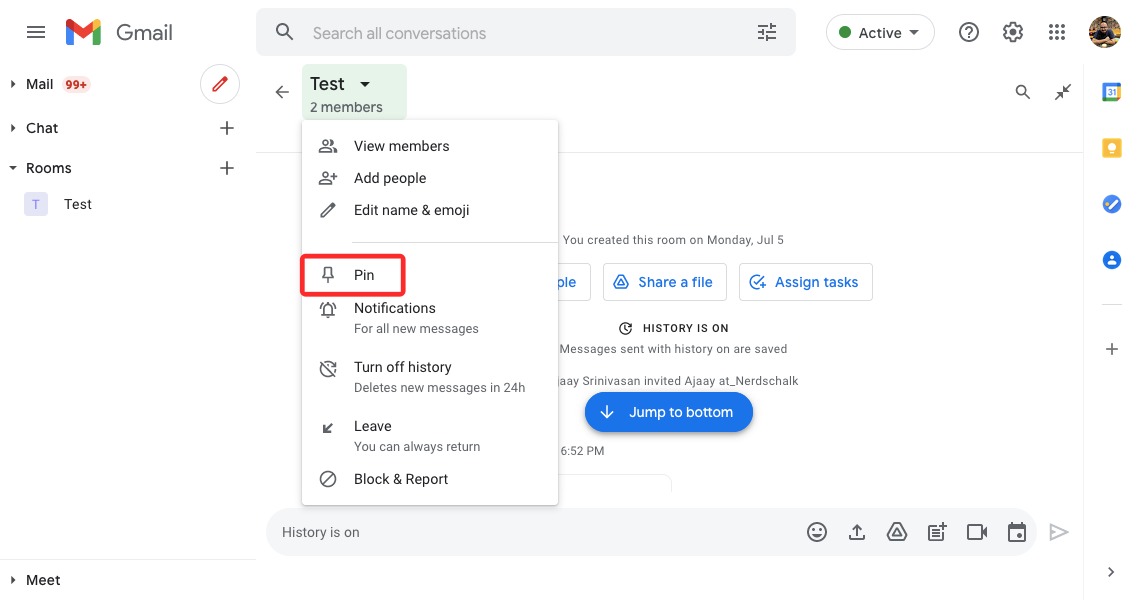
On the phone, you pin a space by first opening the Space and then tapping on the name of the Space at the top of your screen.

Inside the ‘Conversation options’ screen, tap on the ‘Pin’ option to make sure this space is pinned at the top of your Spaces screen.
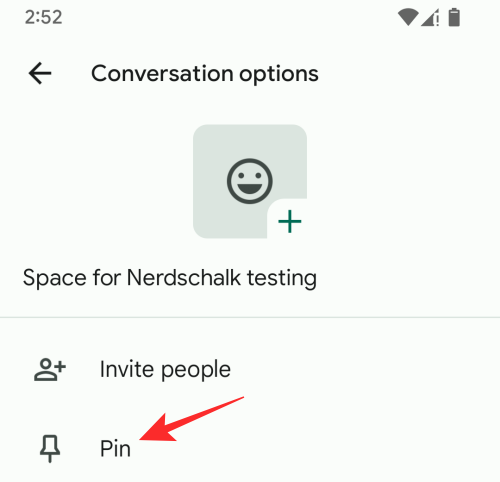
Similarly, you can tap on the ‘Unpin’ option if you wish to remove the space from the top of your list.
Manage Notifications
By default, everyone in a Space will get notified about messages that are happening in threads they’re a part of as well as when they’re @mentioned. You can configure it the way you want so you’re notified about Spaces less frequently or not at all.
To manage the notifications of a Space, enter one on Gmail or Google Chat and click on the Space name at the top.

In the menu that appears, click on ‘Notifications’.
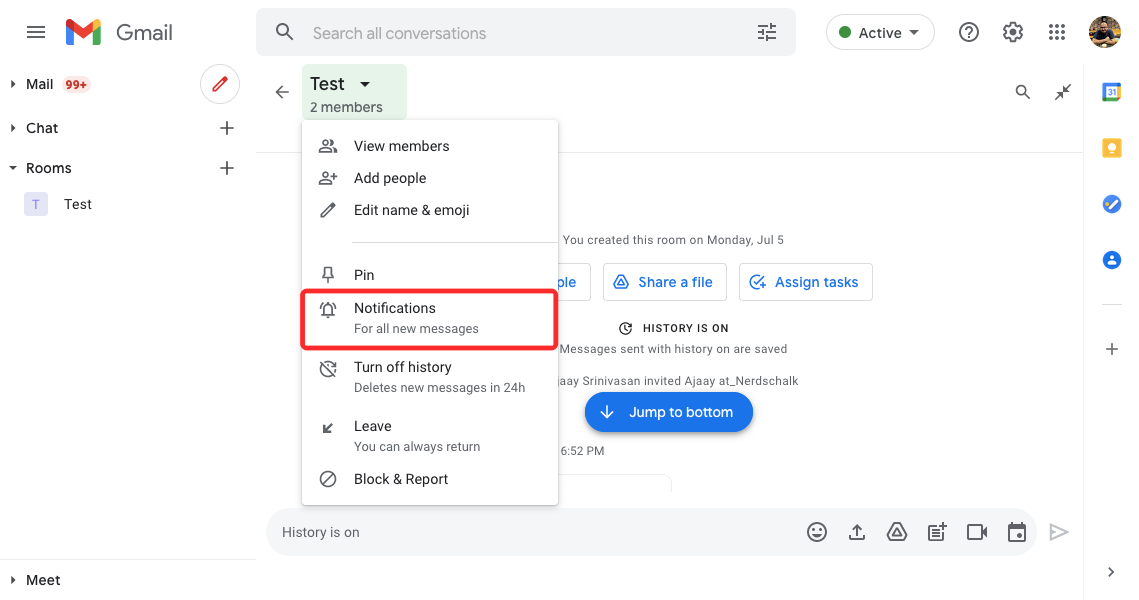
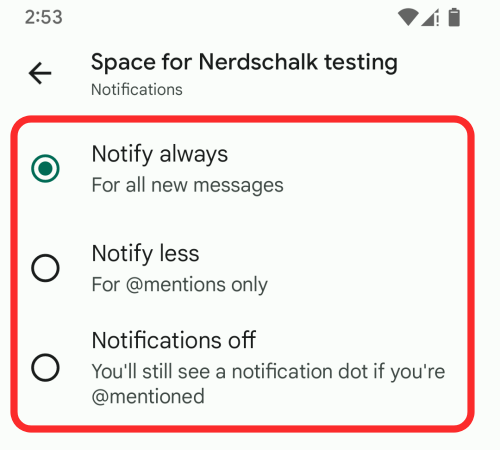
This will bring up a dialog on the screen, asking you to select from any of these options:
- Notify always: You will get notifications for every message you receive in the Space.
- Notify less: You won’t get notifications for all messages, just the ones that @mention you.
- Notifications off: You won’t get any notifications for messages in the group. Only a notification dot will appear in the Space’s name if you have been @mentioned.
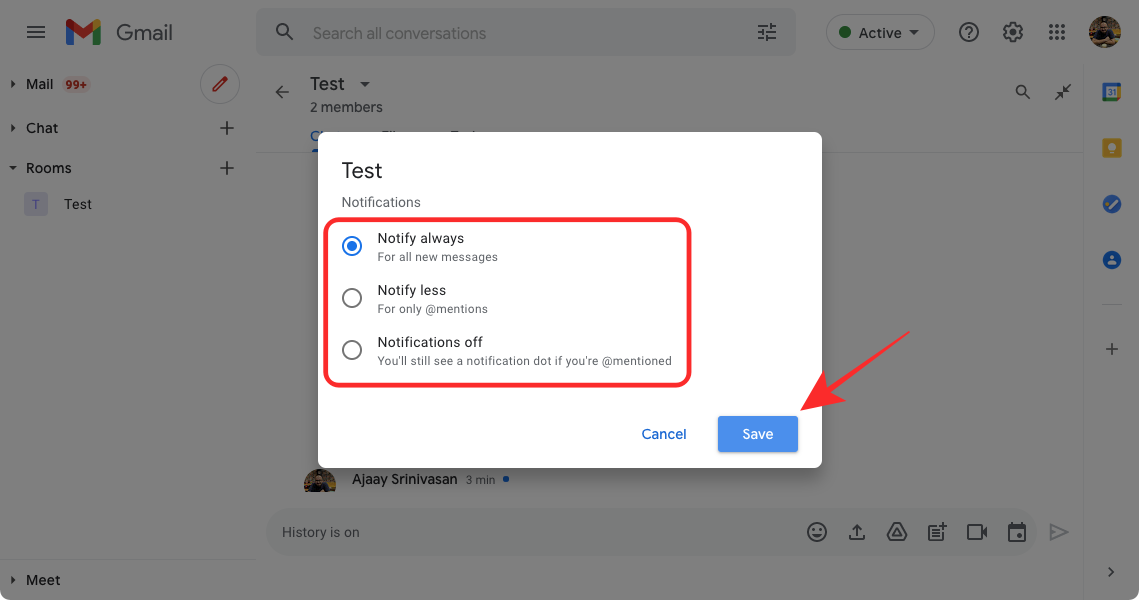
Once you’ve selected your preferred option, click on the ‘Save’ button to confirm changes.
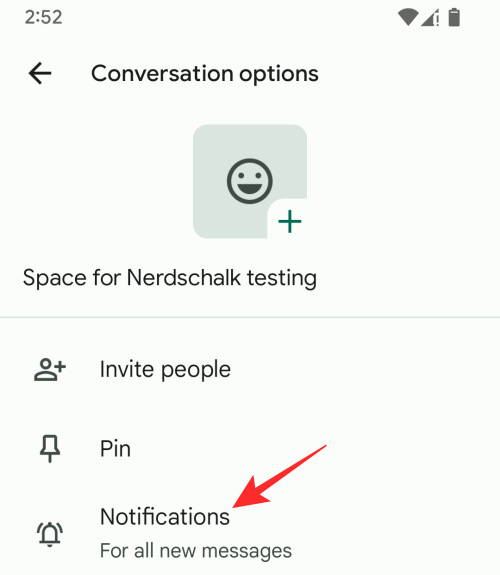
On the phone, you can change your notifications type by first opening the Space and then tapping on the name of the Space at the top of your screen.

Inside the ‘Conversation options’ screen, tap on ‘Notifications’.
On the next screen, select the type of notifications you want to be alerted for on Spaces.
How to Use Google Space to Collaborate with others
Now that you’ve learned how to set up Google Spaces inside Gmail or Google Chat, you can now start collaborating with others on it. Before you get started, you will first need to head over to either Gmail or Google Chat using a web browser and sign in to your Google account.
Inside Gmail or Google Chat, look for the Spaces tab either on the left sidebar or the one on the right and expand it by clicking on the arrow adjacent to it.

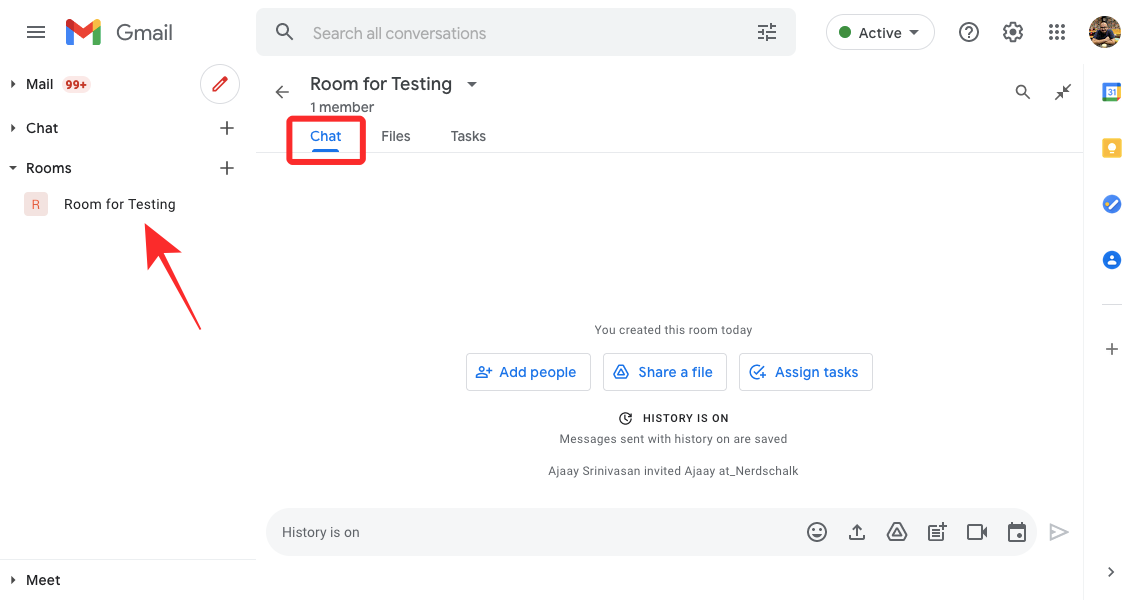
When the Spaces tab expands, select the Space you want to start collaborating on, click on the ‘Chat’ tab at the top and then follow the steps below.
Start a Conversation inside Spaces
Once you’ve entered a Space you created or were invited to, you can immediately start a conversation by clicking on the text field at the bottom and typing the text you want to enter.
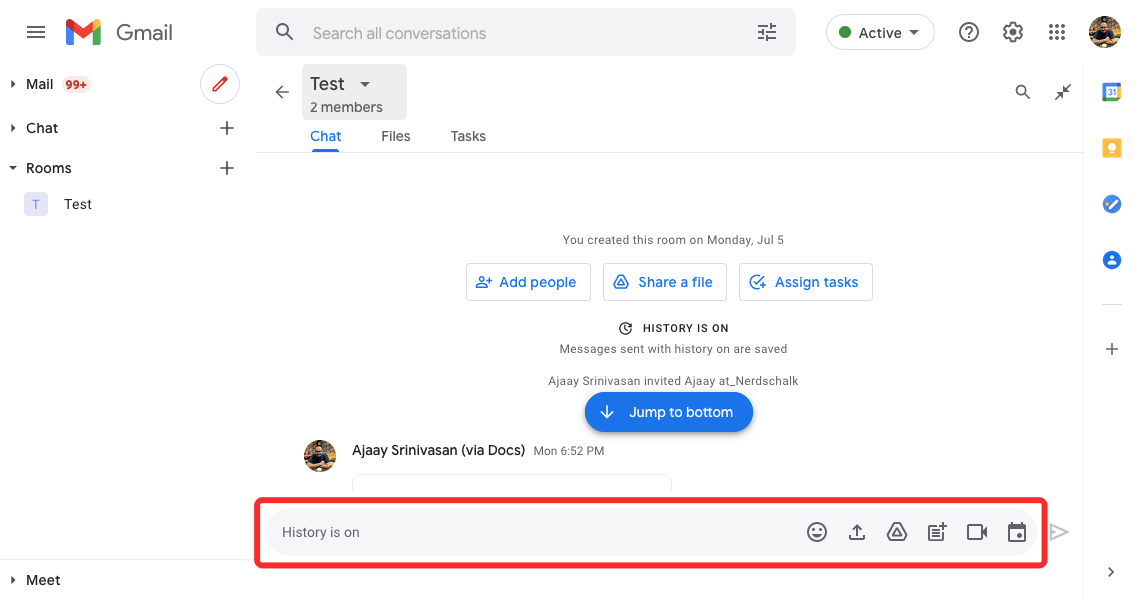
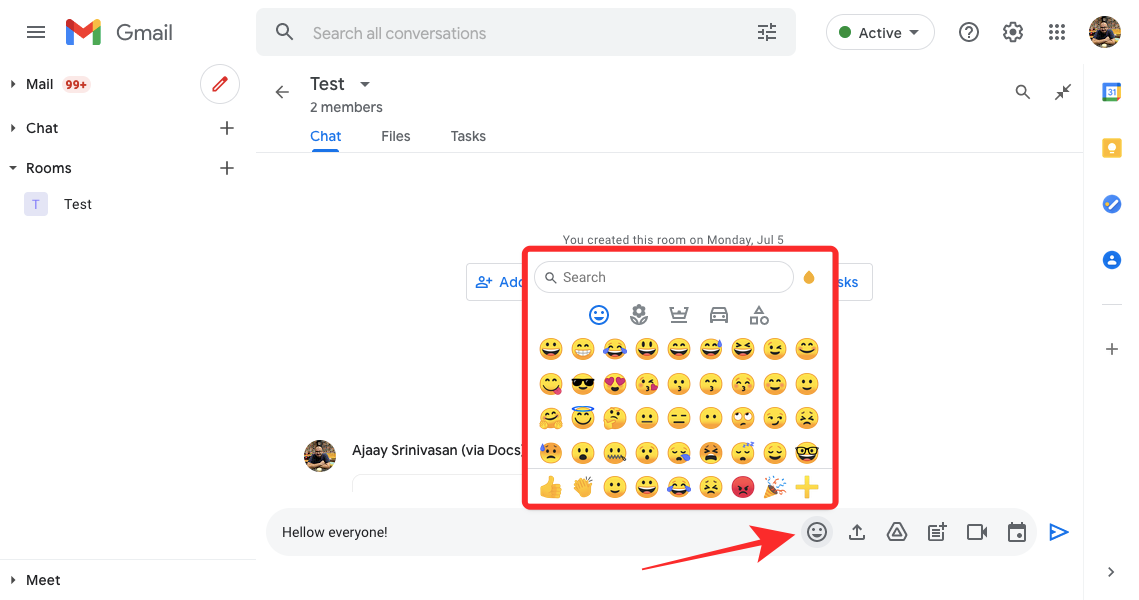
You can also add emojis to your message by clicking on the Emoji icon on the right side of the text bar and select the emoji you want to add to your message.
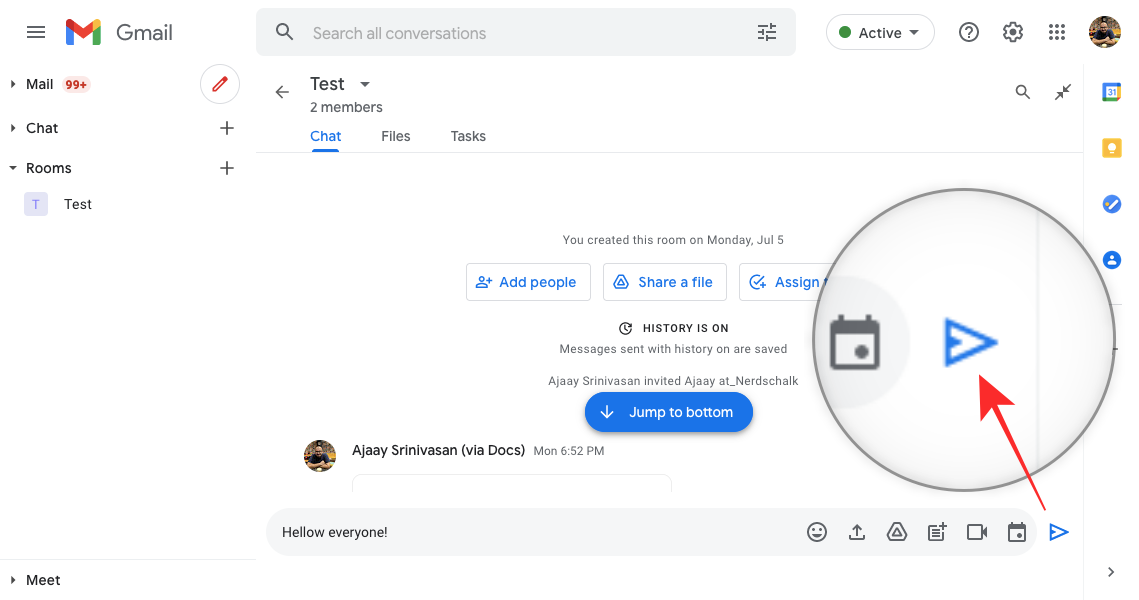
When your message is ready, you click on the Send button at the extreme right side of the text box or just press the ‘Enter’ key on your keyboard.
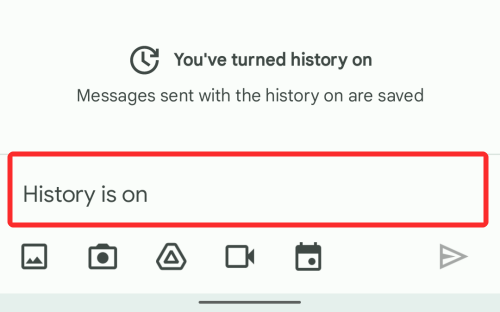
On the phone, you can start having a conversation by opening the Space you created or joined and then tapping on the text field at the bottom of your screen.
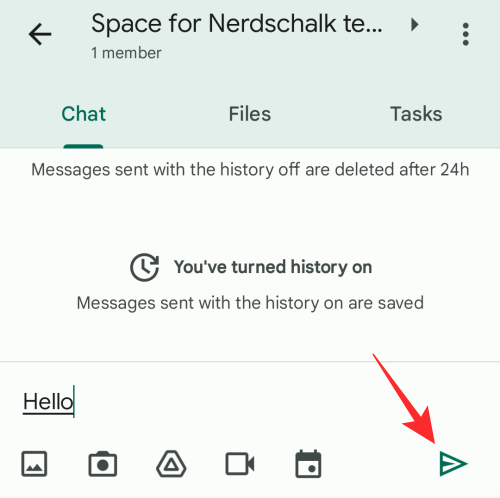
Once you’ve crafted your message, tap on the Send button at the bottom right corner.
Send a personal message to someone in Spaces
The above method is to send messages to everyone in a Space. If you wish to send a direct message to someone who’s part of a Space you’re in, you can do that by first entering the Space.
Inside the Space, click on the Space name at the top.

In the menu that appears, select ‘View members’.
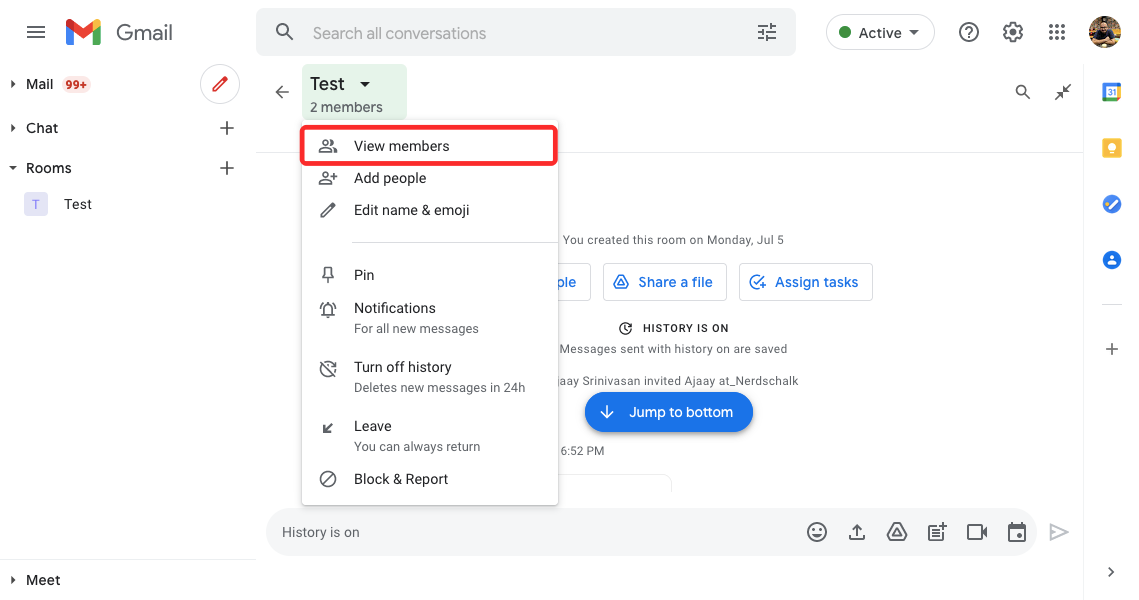
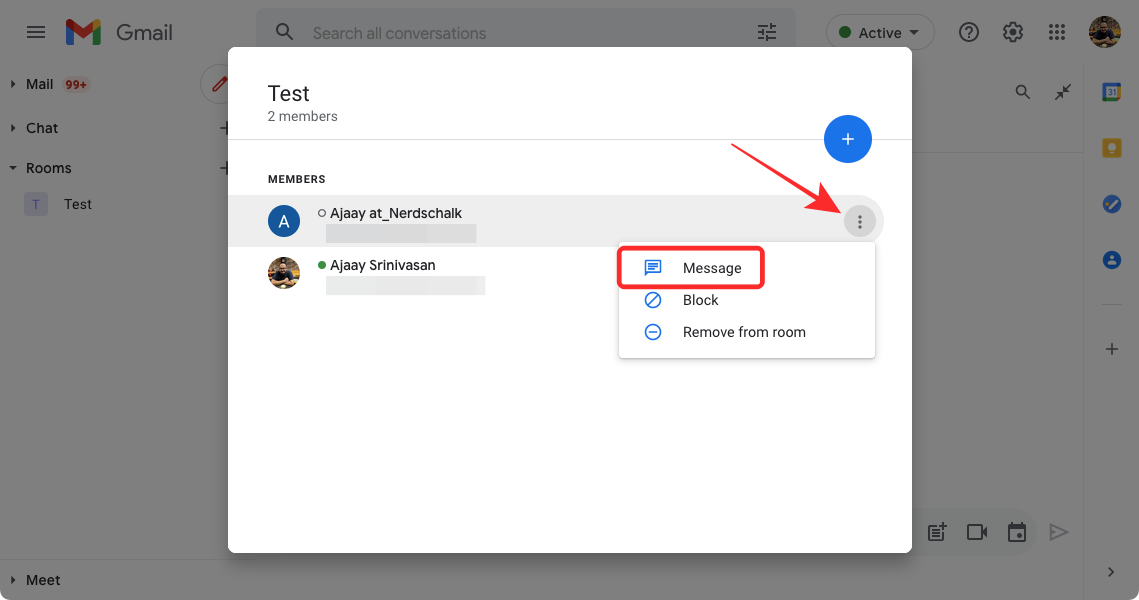
You should now see a list of all members in the Space appear inside a dialog. Here, hover over the person’s name you want to send a text to and click on the 3-dots icon on the right. In the next menu, select the ‘Message’ option to start a private conversation with the selected person.
You should now see a conversation popup appear on the bottom right portion of the Gmail/Chat screen. You can script a message in the text box and send it by clicking the Send icon.
On the phone, you can send a personal message to someone inside a Space by first opening the Space and then tapping on the name of the Space at the top of your screen.

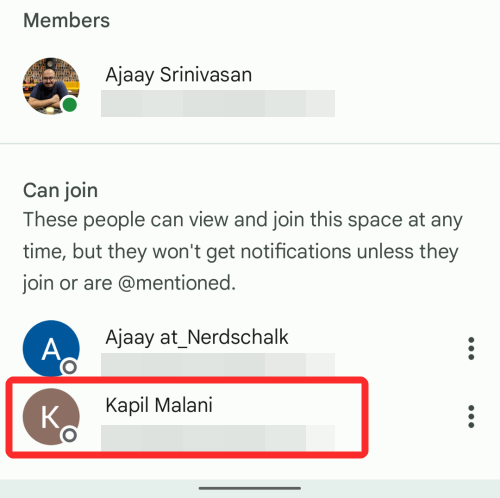
Inside the ‘Conversation options’ screen, tap on the person with whom you want to start a conversation with.
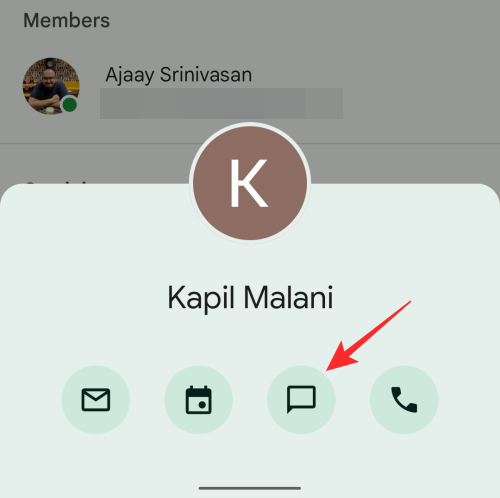
You’ll now see a popup appear on the screen with the person’s name at the top. From here, you get different ways to contact this person. To send a personal message via Google Chat, tap on the Chat icon inside this popup and start typing your message.
Upload a file from your computer
You can also upload files from your computer to share them with others in a Space. For this, click on the Upload icon from the text field at the bottom.
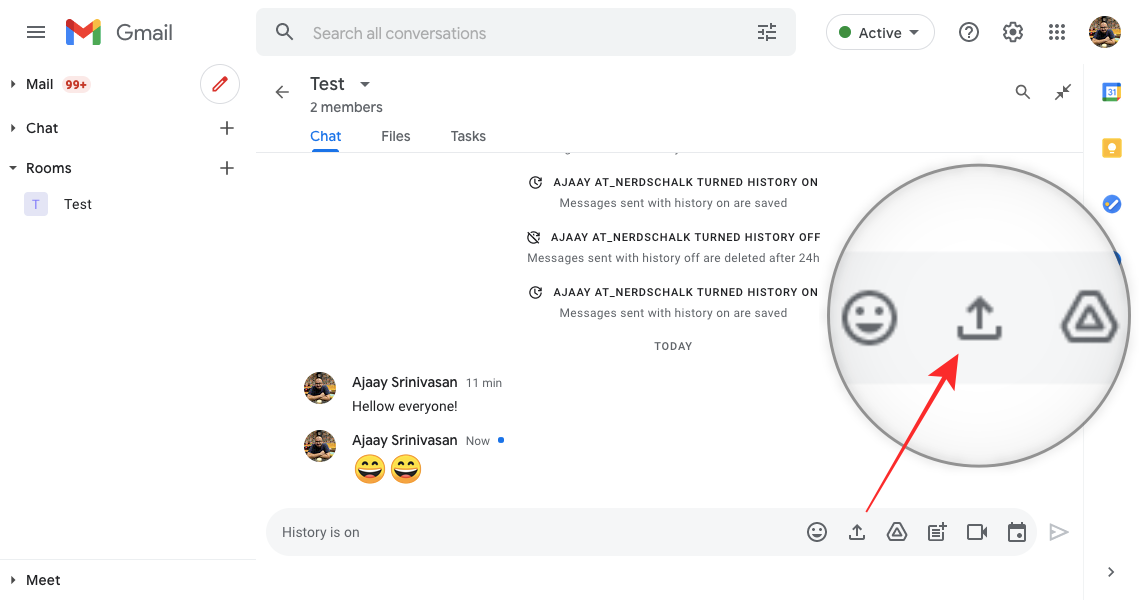
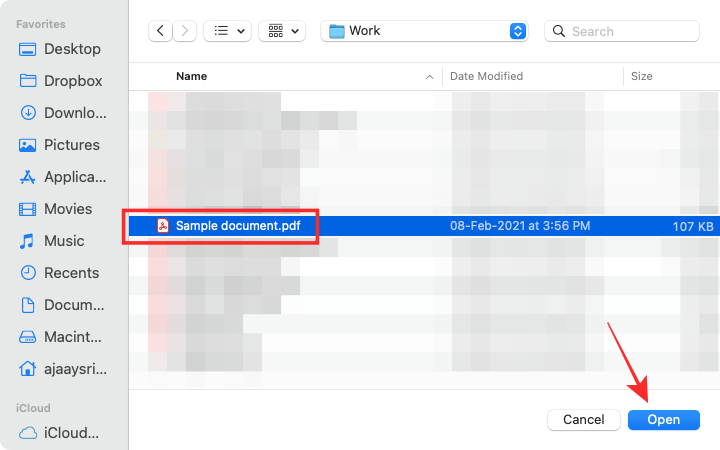
You will now be asked to locate and select the files/folders you want to upload to the Space and once selected, click on ‘Open’.
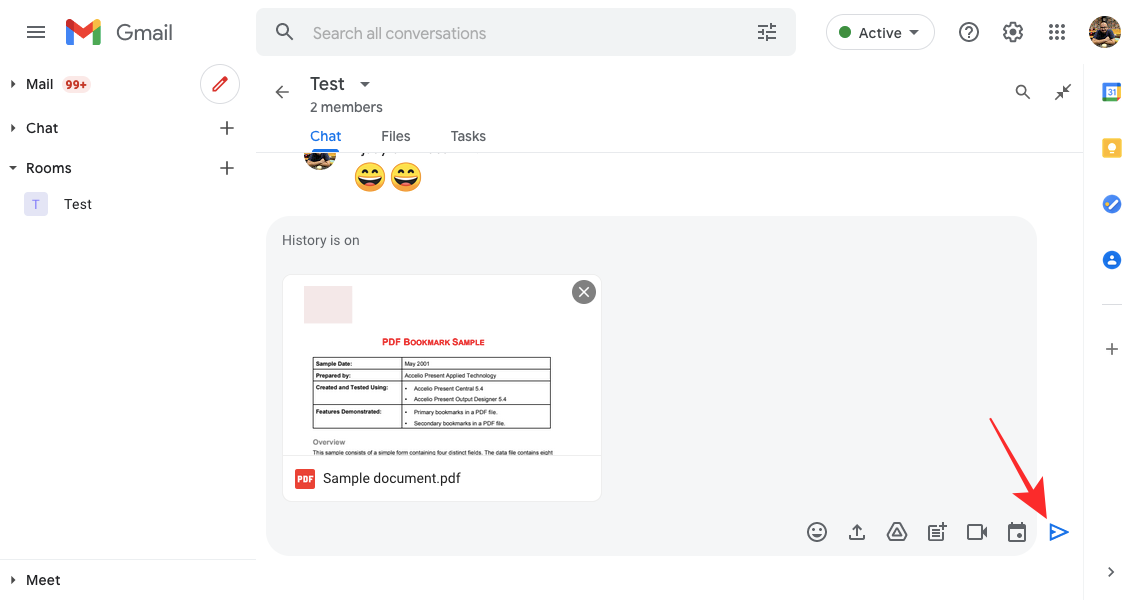
Your files will now start uploading and once it has been uploaded, you should be able to see a preview of it on the screen. From here, you can send it directly by clicking the Send icon next to the text box at the bottom right corner. You can also write a message to show up next to your file.
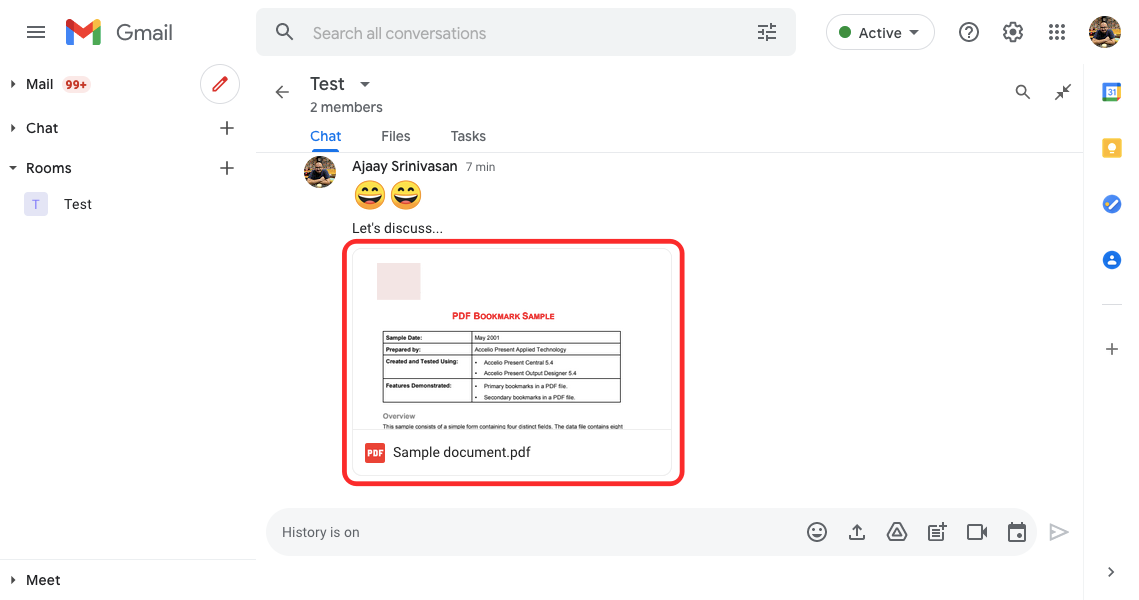
Once sent, the file will appear inside the conversation as a preview. You and the others can access the file by simply clicking on the preview.
When you open a shared file, it will open up in full-screen and from there, you will get more actions depending on the type of file you sent.
Like on desktop, users can also use the Gmail or Google Chat apps to send files from their phones. To share files from their device library, you can tap on the Gallery icon from the bottom and select the photo, video, or file you have on your device to share it with others inside your space.
Add files from Google Drive
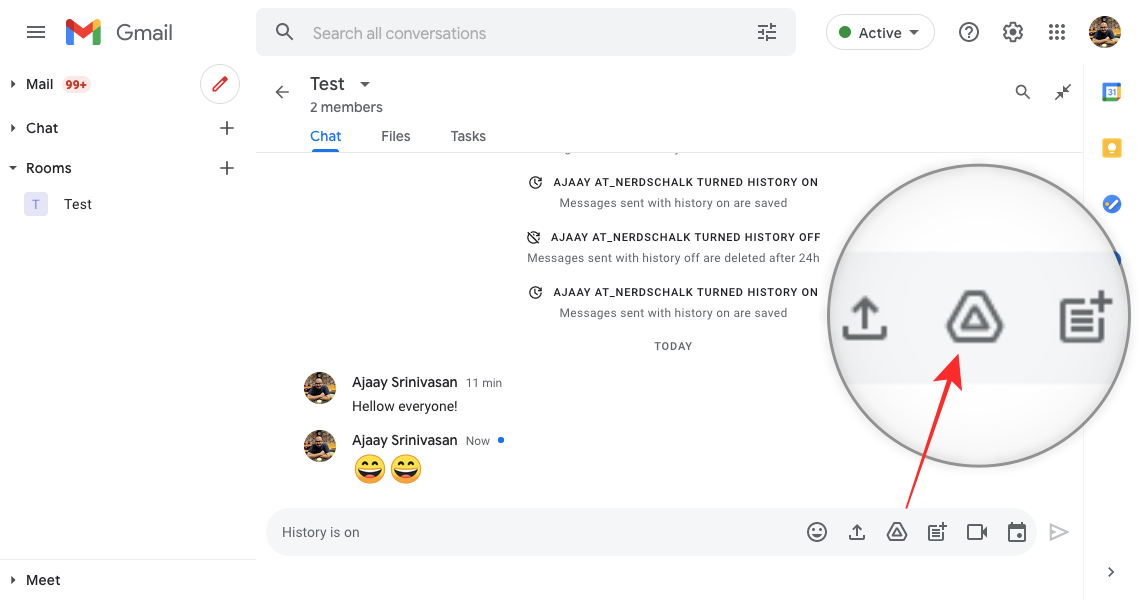
Besides uploading files from your computer, you can also send documents and files from your Google Drive directly to a Space you’re a part of. To do this, first, enter a Space and click on the Google Drive icon inside the text field at the bottom.
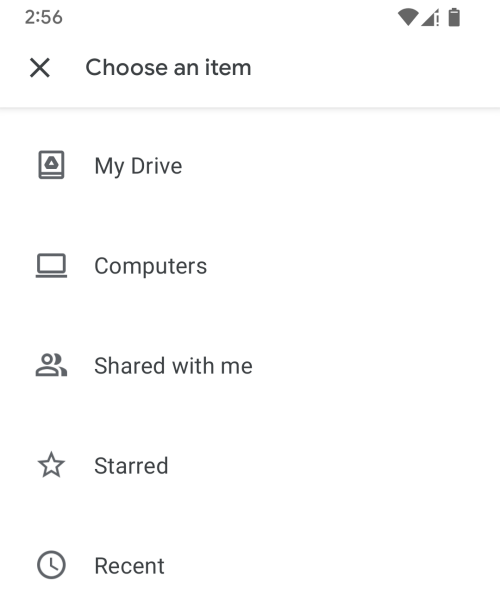
You should now see a popup screen appear showing you all the files that are available on your Google Drive account. You can select the files you wish to add to the Space from under various tabs (My Drive, Share with Me, Recent, and Upload).
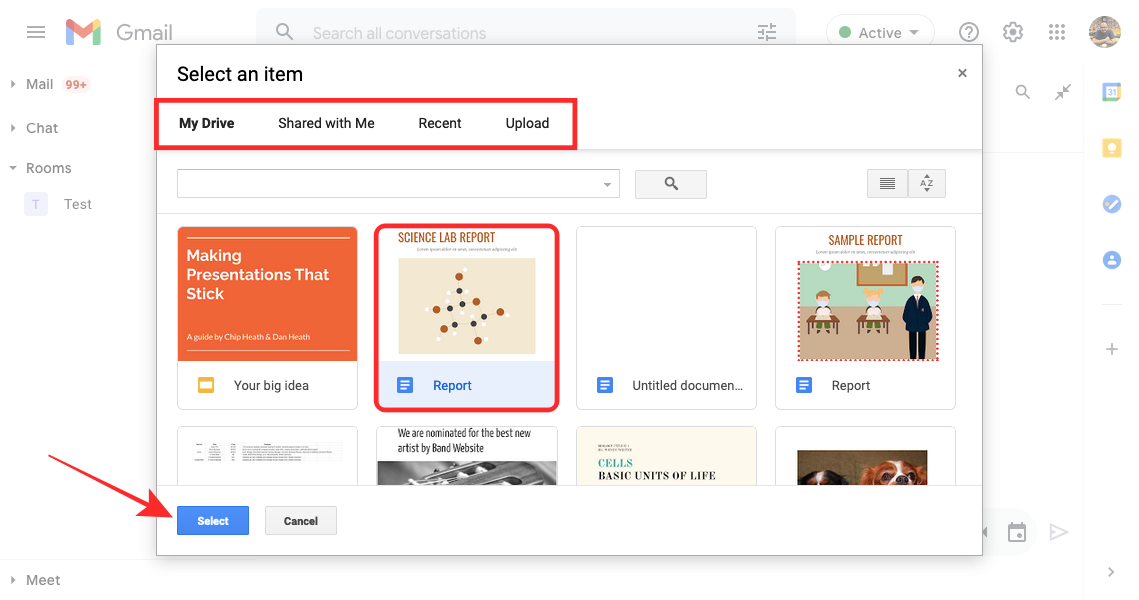
Once you’ve made your selection, click on the ‘Select’ button on the bottom left corner of the Drive popup.
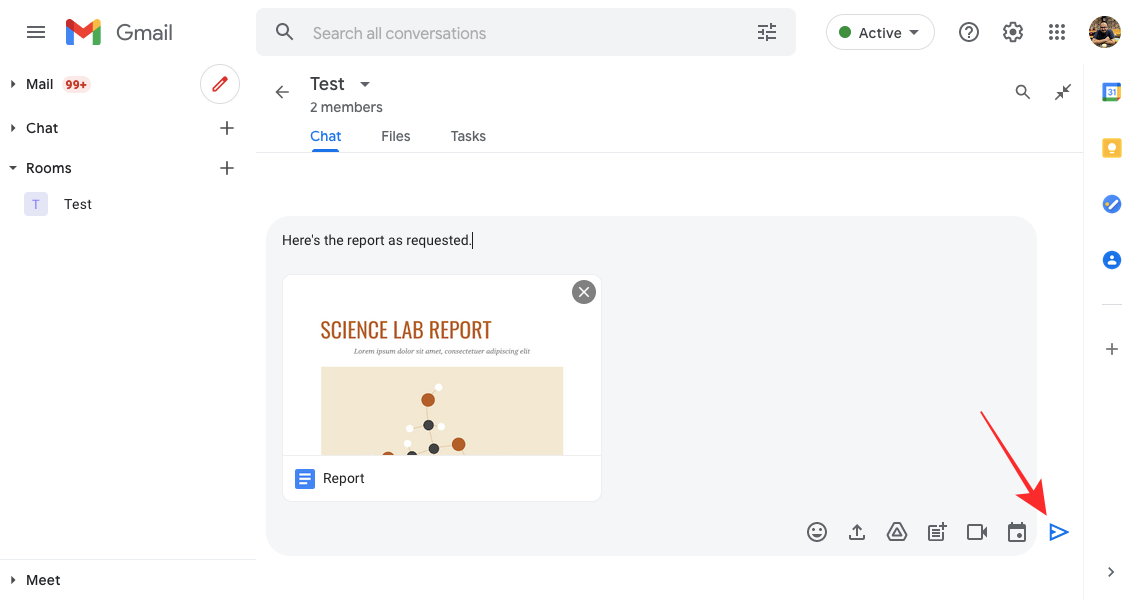
When the file(s) has been selected, you should see a preview of it before you send it to everyone. At the top of the preview, you can write a note about the file you’re sharing. To send to all members of the Space, click on the Send icon at the bottom right corner of the screen.
In a dialog box that appears next, you will now be asked to manage the permissions you want to assign for the file that you’re sharing. Select how other members can interact with your file by selecting one (between View, Comment, and Edit) under ‘Share with Space members’ if you wish that the file remain available only to people present in the Space.
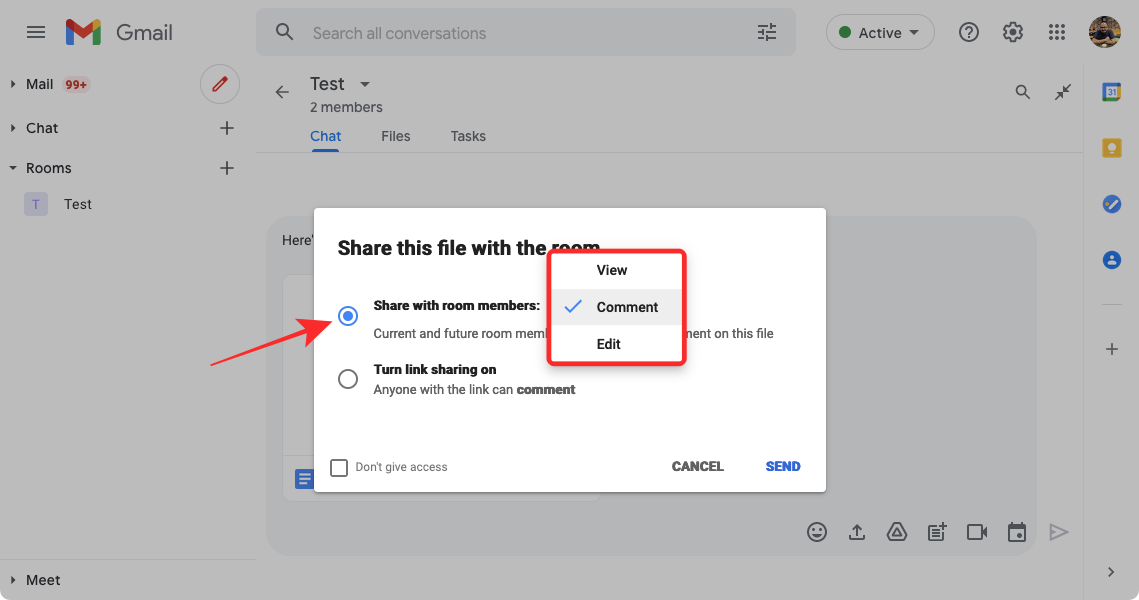
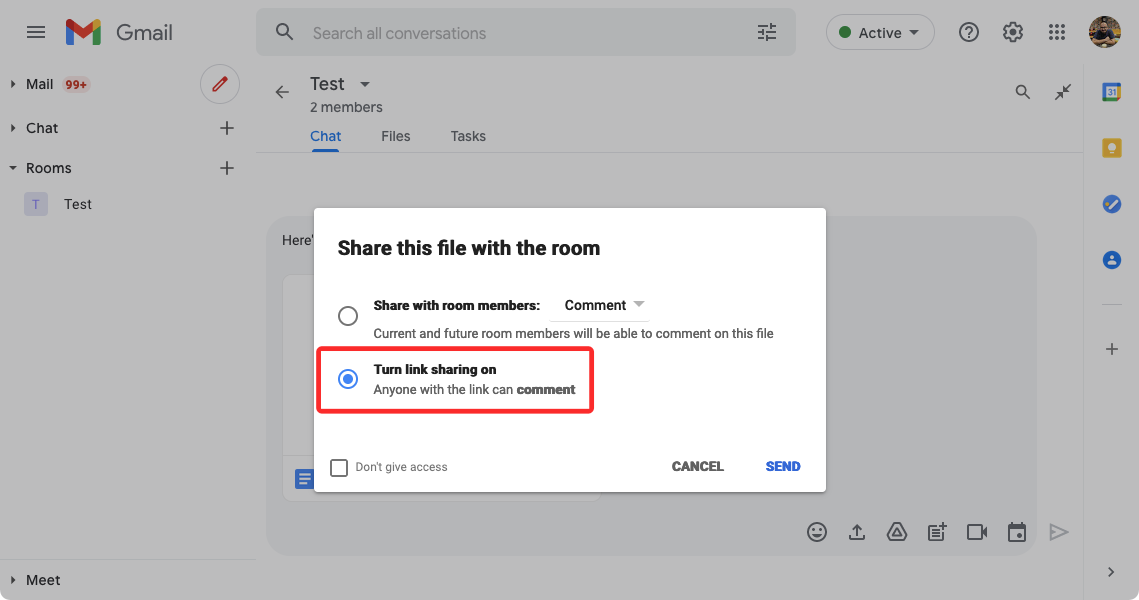
If you want the file to be accessible to anyone with a link to it, you can select the ‘Turn link sharing on’ option in the dialog. You need to keep in mind that if you select this option, anyone with a link to the file can only comment on it and do not have editing permissions.
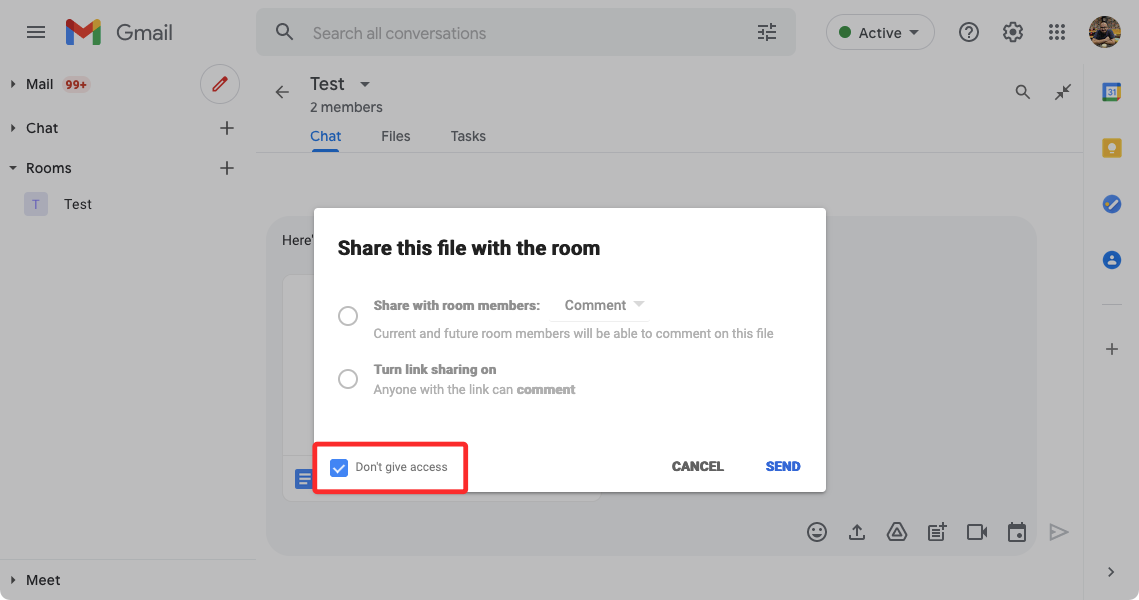
If you do not wish to permit members to access the file, you can check the ‘Don’t give access’ box in the dialog but that essentially means that others will only see that you shared something and won’t be able to open it.
Once you’ve figured out the permission you want to give to others, you can click on the ‘Send’ option to send it to everyone in the Space.
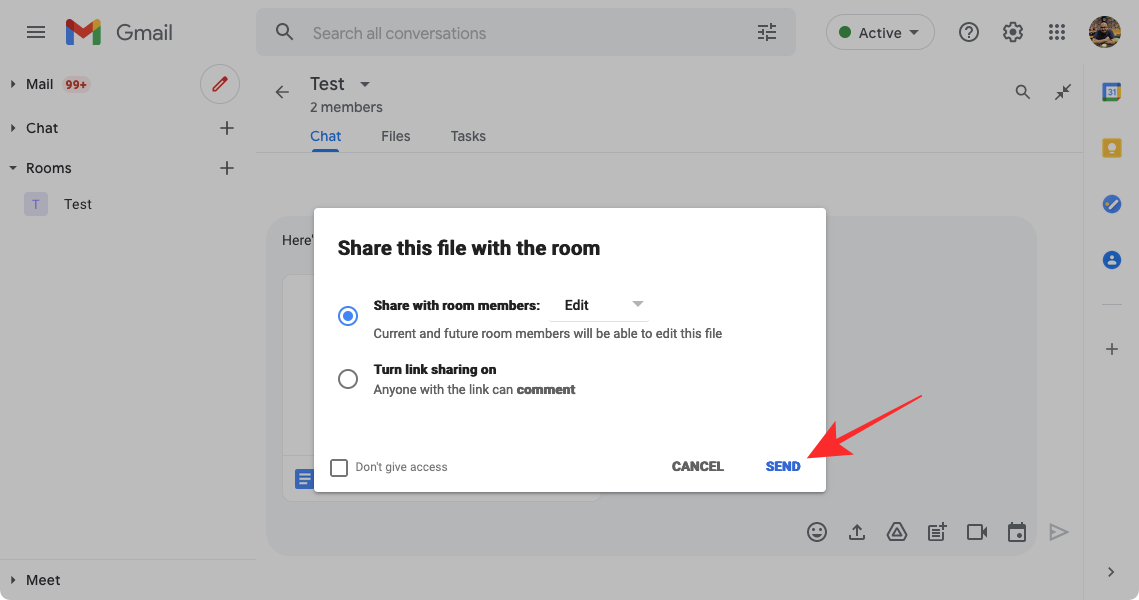
The shared file will now be visible for everyone in the Space and they can access it, however you have assigned the file’s permissions.
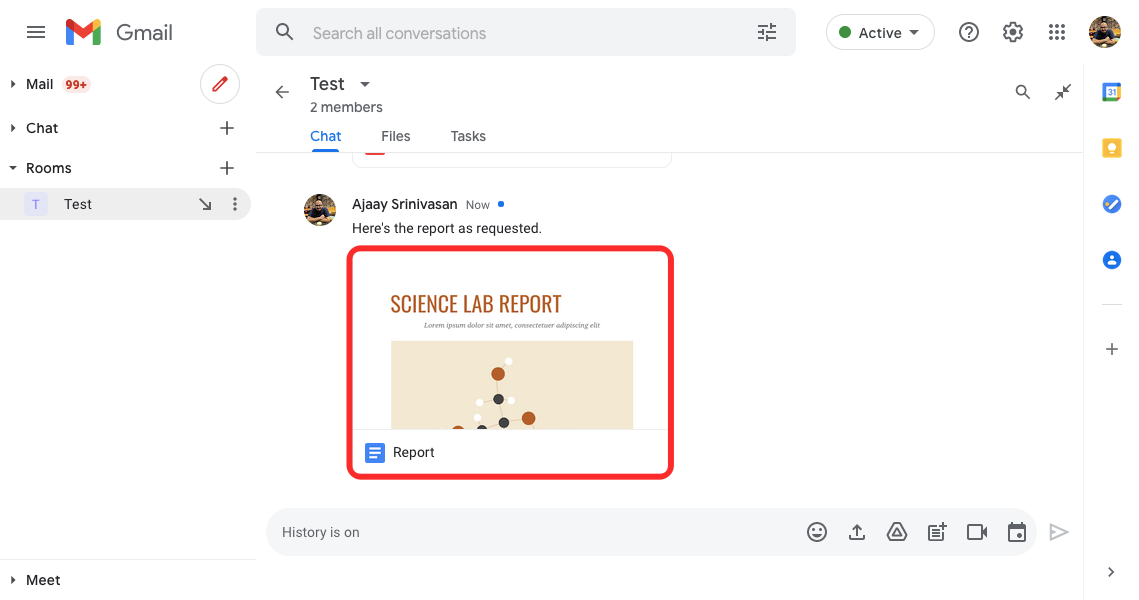
Shared files that were created on Google Docs, Sheets, and Slides can also be collaborated upon inside Spaces but we’ll discuss how you can collaborate with others in the sections below.
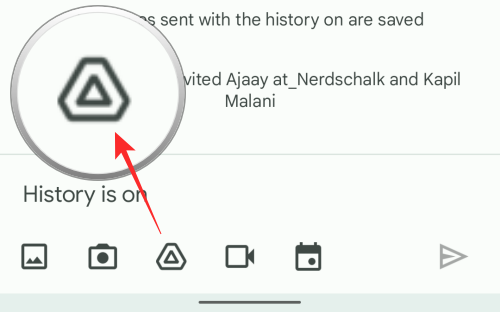
On the phone, there are two ways to share files from Google Drive. To share files directly from a conversation inside a space, tap on the Drive icon from the bottom.
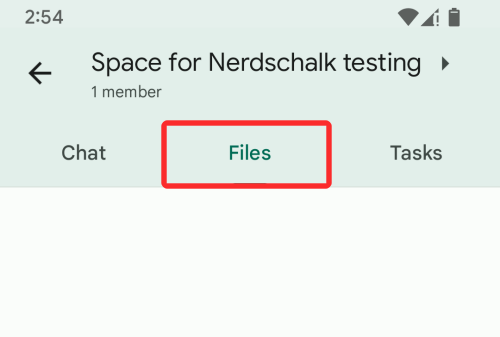
Another way you can share files is by going to the Files tab inside a space you created or joined.
Inside the Files section, tap on the ‘+’ bubble at the bottom right corner of your screen.
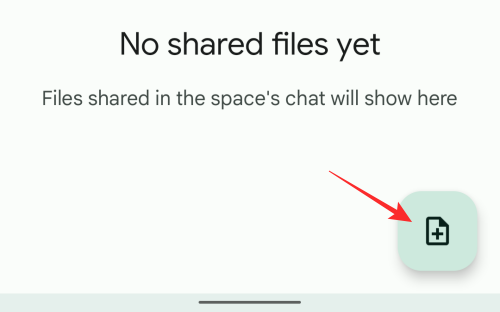
Next, you can select a folder or section from your Google Drive and then upload it to your space.
Create Documents to Collaborate on Docs, Sheets, and Slides
This is perhaps the biggest new feature that’s available in the new Gmail as users can now create documents that can be accessed and edited by anyone in the Space without switching to a new tab. Docs, Sheets, and Slides are already widely known for their collaborative features, but together with the new “integrated workspace”, you can now access it within Gmail or Google Chat without needing to open a new tab on your web browser.
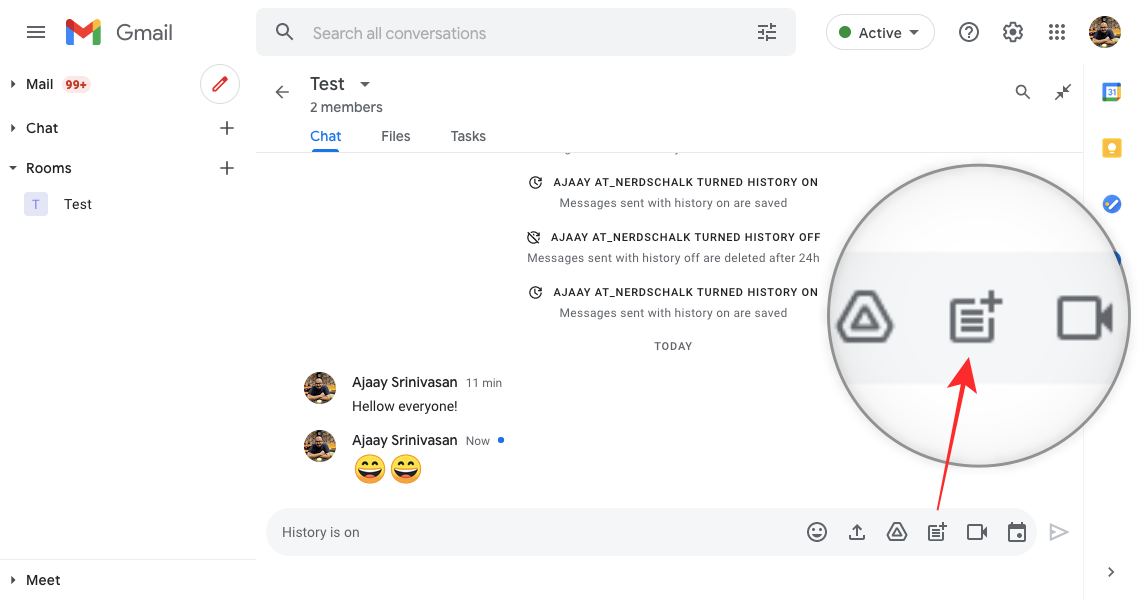
You can now create documents on Google Doc directly within a Space by entering one and then clicking on the Document icon (the one marked by a page with horizontal lines and a ‘+’ symbol).
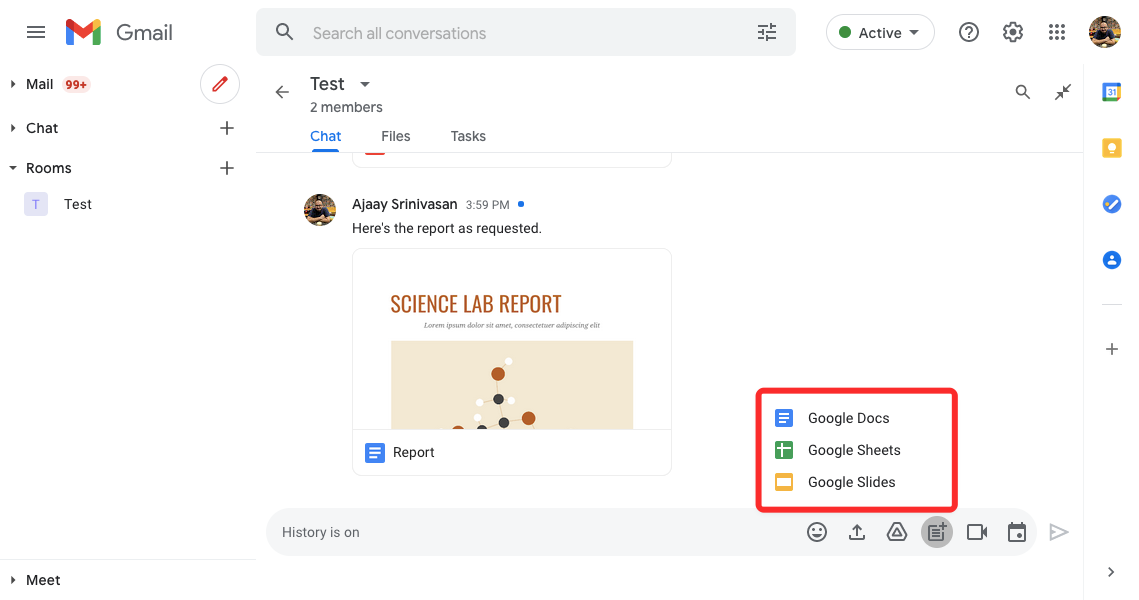
Select the type of document you want to create – Google Docs, Google Sheets, or Google Slides.
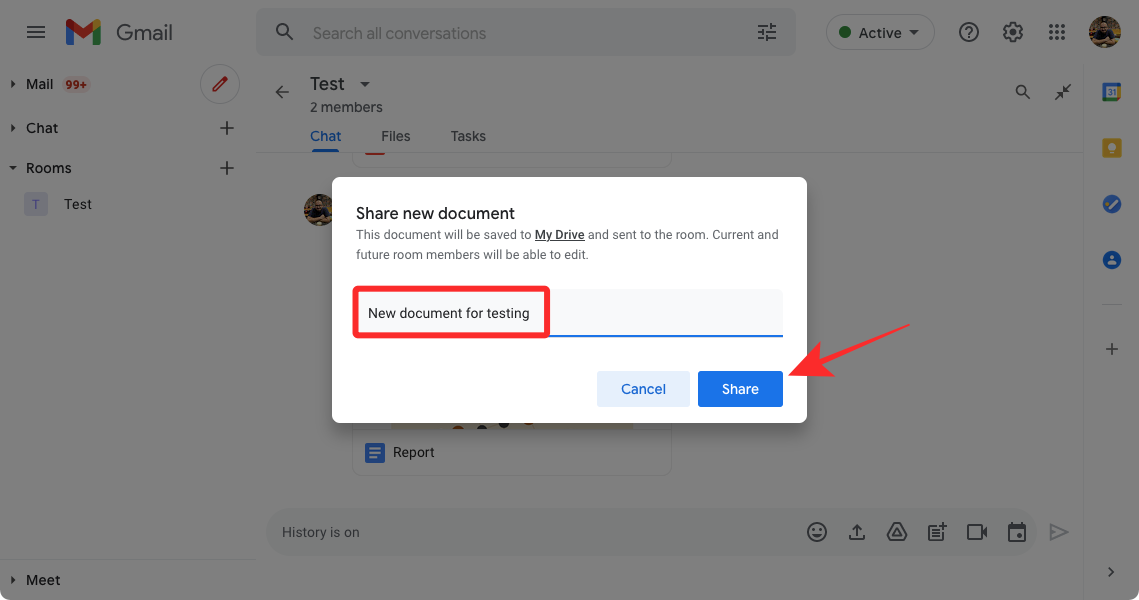
Next, enter a name for the document you’re creating in the dialog that appears, and then click on ‘Share’. Since it’s you who’s creating the document, it will be stored and saved to your ‘My Drive’ section inside Google Drive.
Your new document will now be created and shared inside the selected Space and will appear inside the main conversation thread.
You can start using the document directly from this screen by simply clicking on its preview.
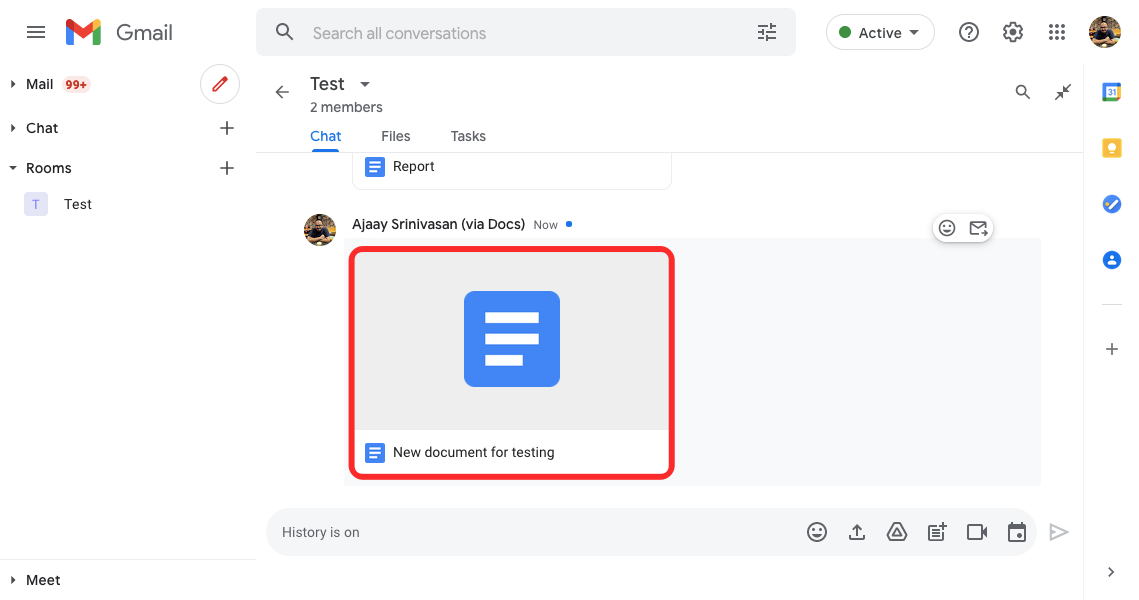
When you do that, the document will load up in full view on the right-side panel and will look a lot like you’re accessing it inside Google Docs.
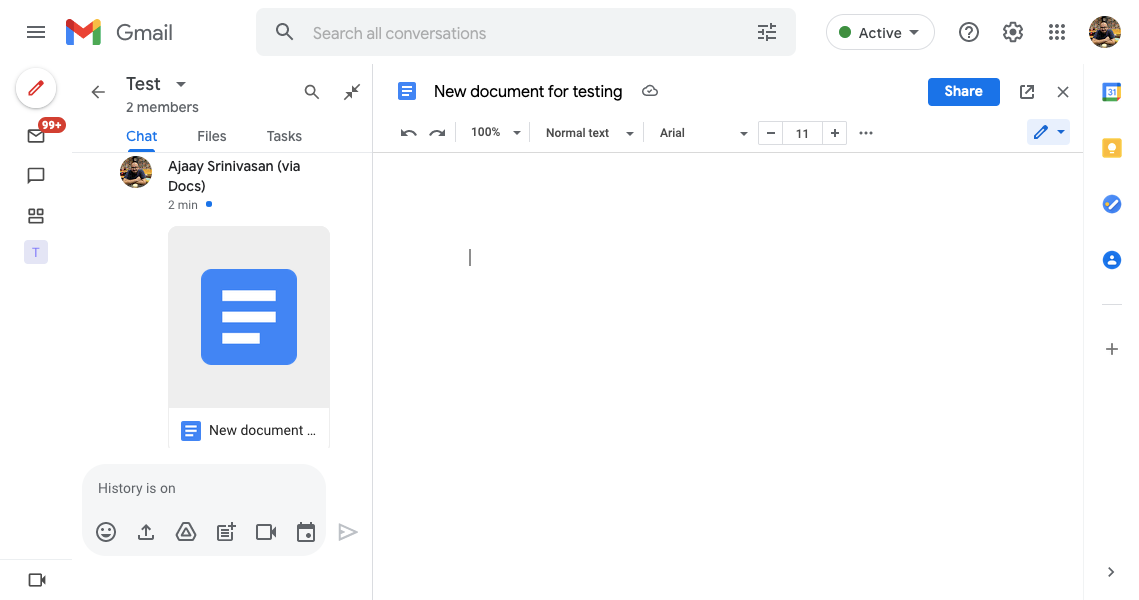
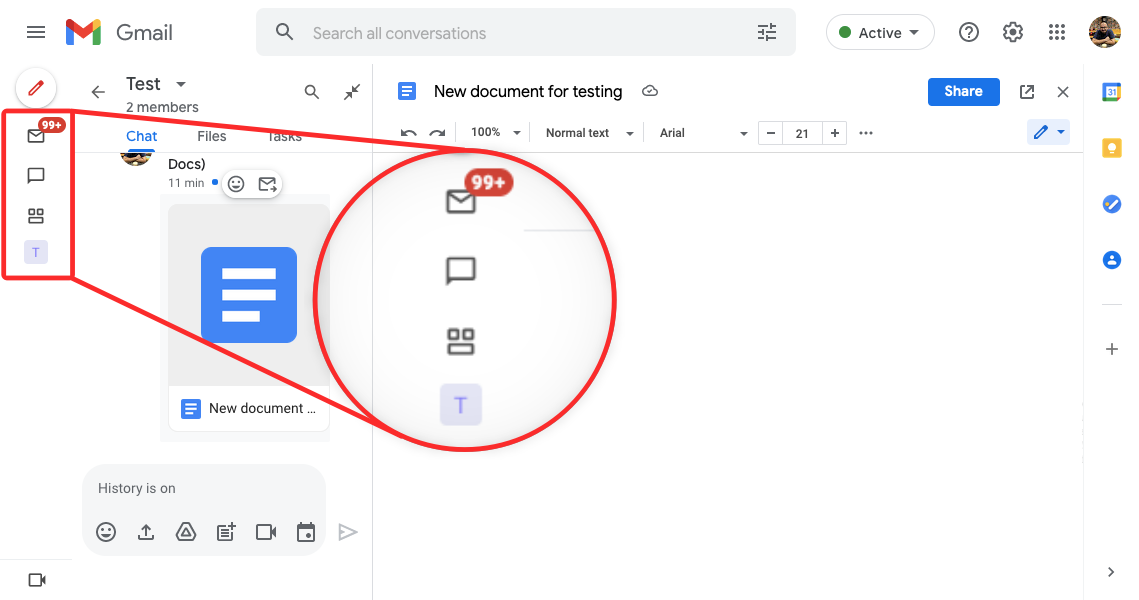
If you have Gmail open in a smaller window, you should also note that the left-most sidebar (the one that hosted the Mail, Chat, Spaces, and Meet) has been minimized to just show the relevant icons instead.
Others can access the shared document inside their Gmail or Google Chat screen by entering the Space and clicking on the document you created. When someone in your Space is taking a look at a document at the same time as you are, you will be able to see their account picture at the top right corner of the screen next to the ‘Share’ button. When you hover over their name, you should see their name and email address in an overflow bubble below it.
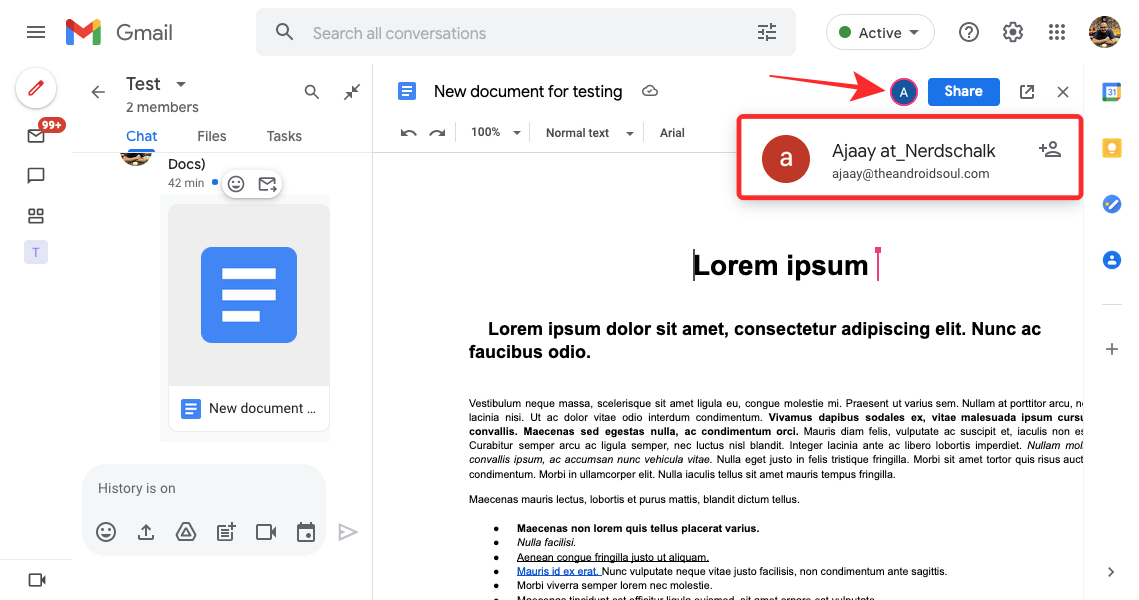
You should also be able to look at all the changes someone is making to a shared document in real-time as their cursor, selection, and editing will be highlighted in the document in the same color as the ring around their account picture.
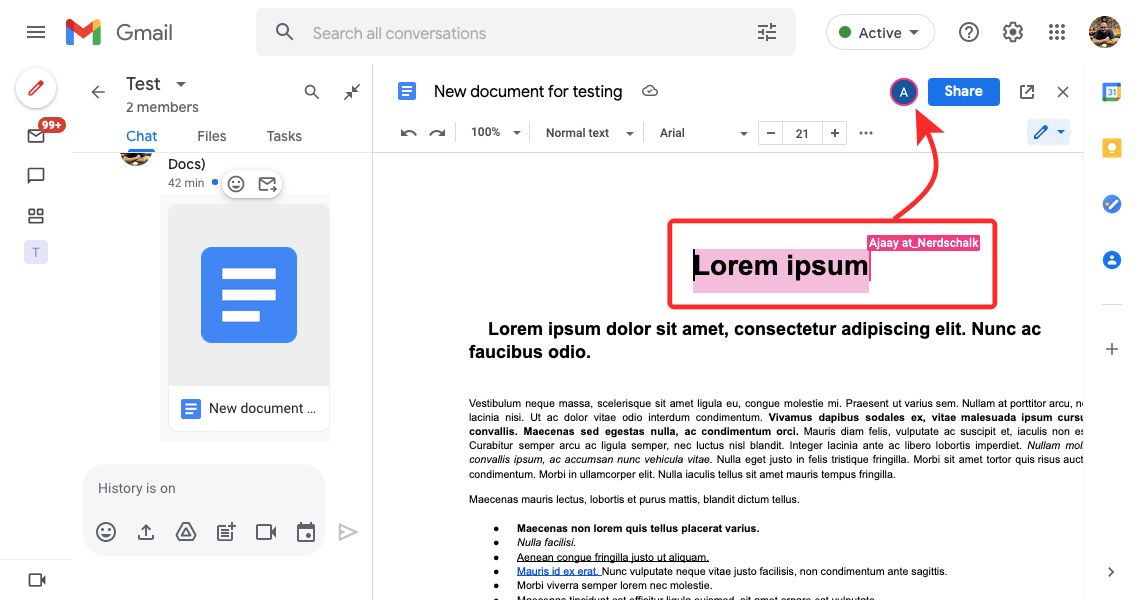
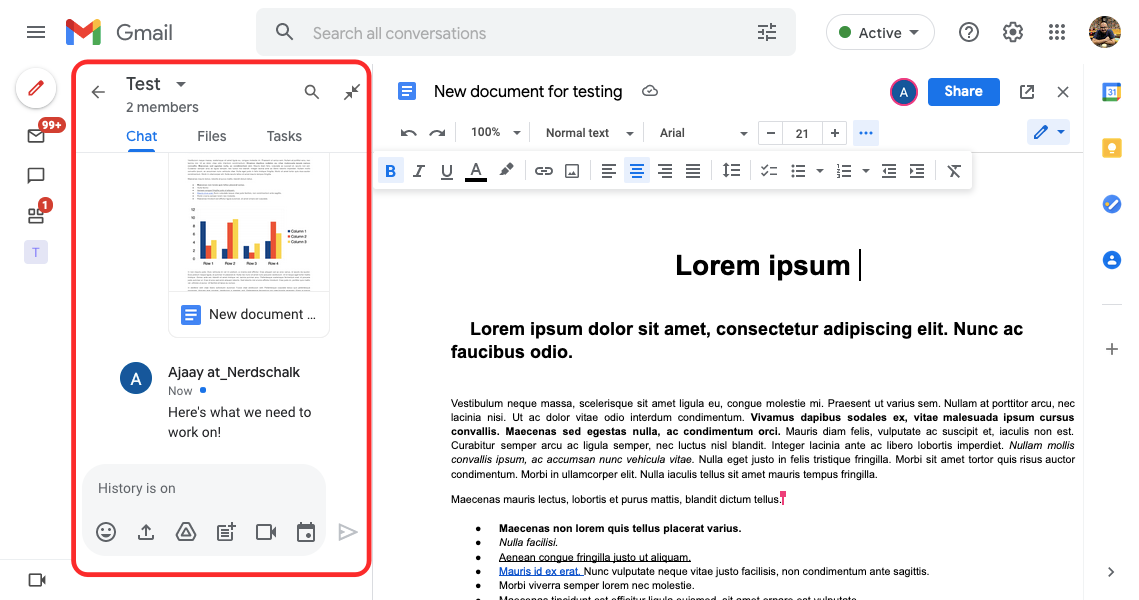
Using Docs, Sheets, and Slides within Gmail or Google Chat should be a relatively simple affair as all of the options presented here should be sufficient enough to get work done. You can view and collaborate on a shared document on the right-side panel while chatting and sharing other things on the main conversation thread that shifts to the left side.
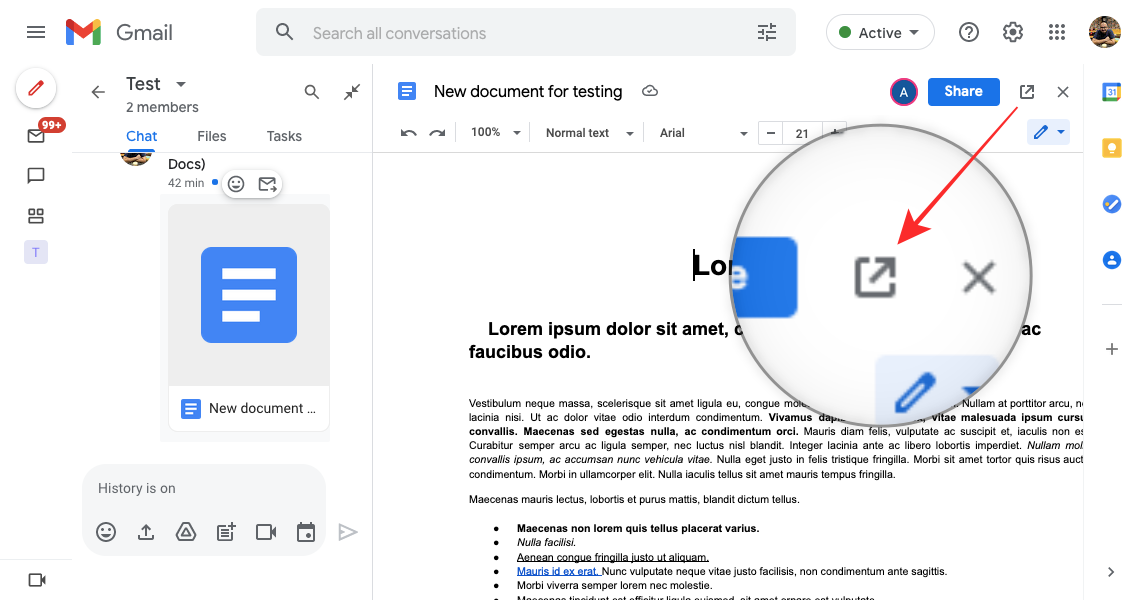
At any time, you can switch to regular Google Docs by clicking the Expand icon (the one marked with an arrow facing outward from a square) which should open the document in a new tab for easier access.
On your phone, you cannot create documents directly and unlike on the desktop clients of Gmail and Google Chat, both of the app don’t let you collaborate on Docs, Sheets, or Slides directly. Instead, when someone shares a document inside a space, tapping on it will open the document in the Google Drive app on their device.
Create a meeting session on Google Meet
Google Spaces all lets you start a Google Meet call directly from a Space so that you can work together with others while being in a video call with them at the same time. To start a Google Meet call, enter a Space and click on the Camera icon from inside the text field at the bottom.
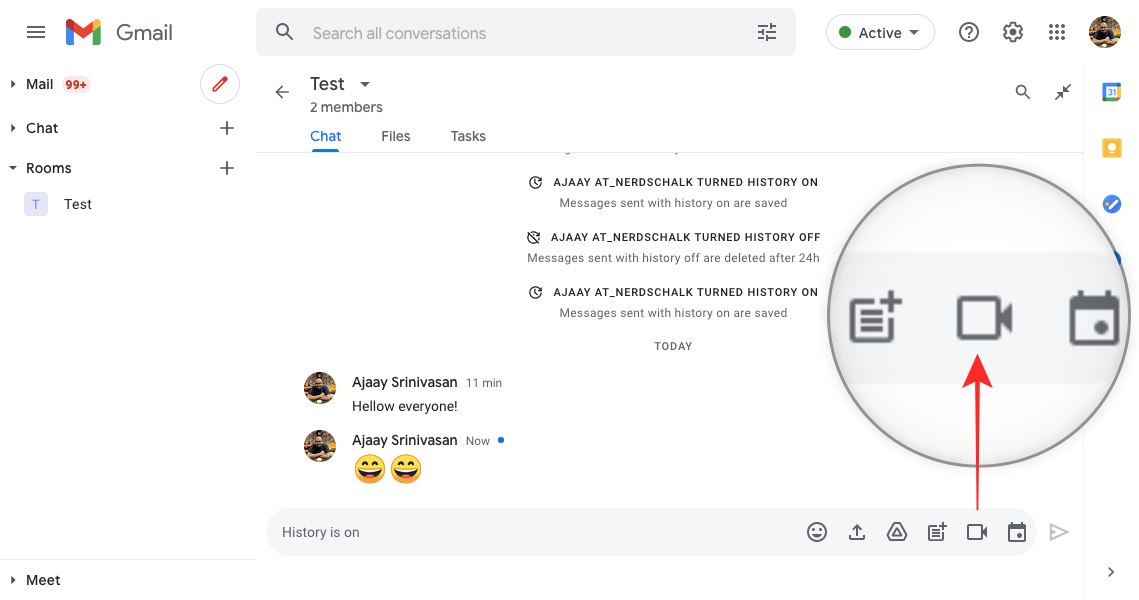
A Google Meet preview will now appear on the screen. You can share the meeting link with others in the Space by clicking the Send icon at the bottom right corner.
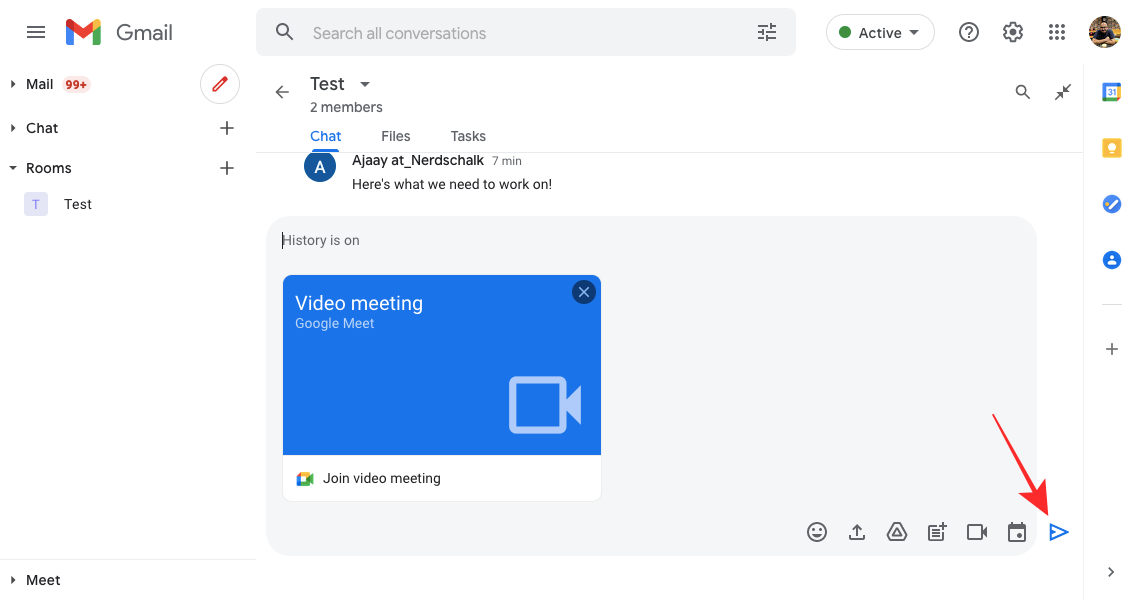
When you create and send the Meet video call link to others in the Space, they can go to the video call by clicking on the ‘Join video meeting’ option.
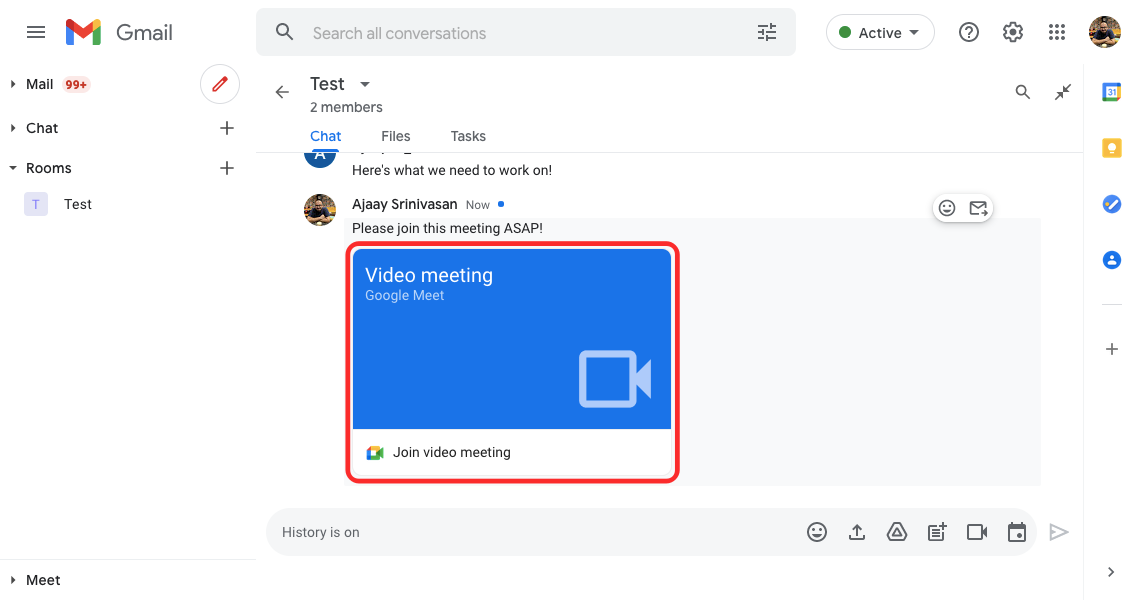
Unlike other collaborative features, the Meet call will load up in a separate tab on your web browser, at least for now.
This might change in the future as Google plans to combine Meet with Workspace later this year. When that happens, you should be able to make video calls directly from a document’s screen without needing to open Meet in a separate window or browser tab. We can expect this feature to come during the fall of 2021, as the feature was first announced as part of the “Smart Canvas” update earlier this year.
On the phone, you start a meeting on Google Meet inside Gmail or Google Chat by first opening the Space and then tapping on the video icon at the bottom of your screen.
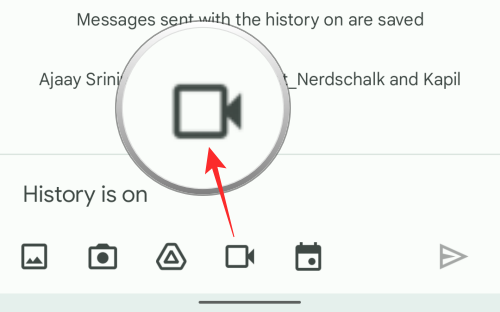
When you do that, you should see the Video meeting box appear at the bottom.
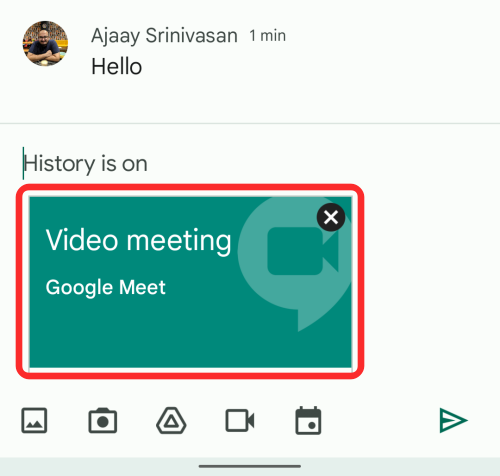
Schedule an event on Google Calendar
You can also create and schedule events on Google Calendar for everyone in a Space to see by clicking the Calendar icon from inside the text field at the bottom.
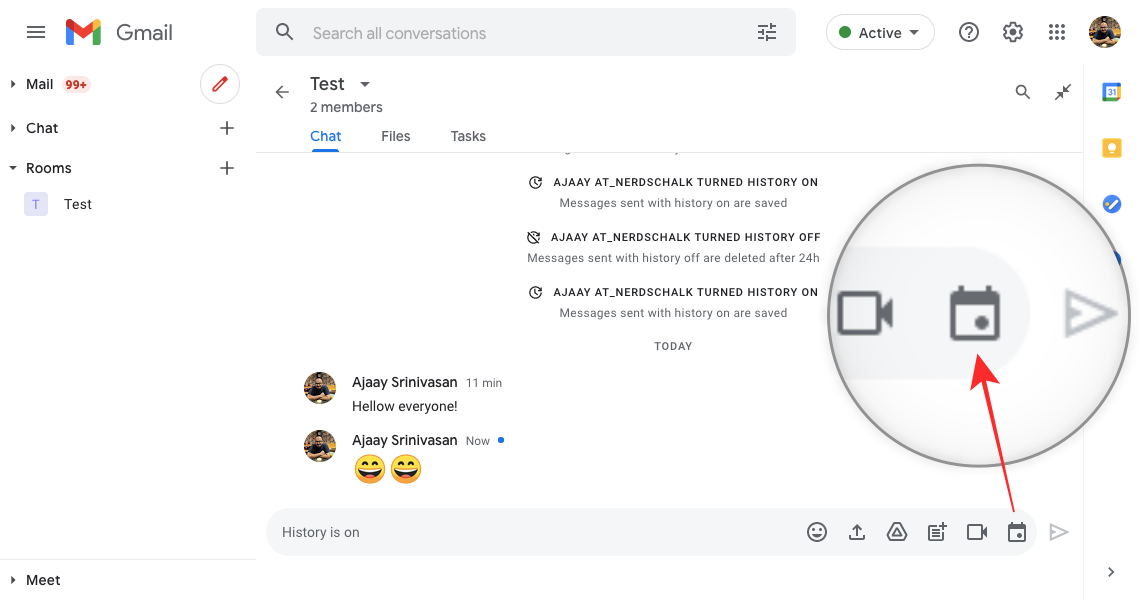
Google Calendar will now load up in a panel on the right. Here, you can add all the necessary details like setting the date, time, guests to add, guest permissions, location, description, Google Meet link, and more.

Once you’ve added all details, click on the ‘Save & share’ button at the bottom right corner to create the event.
On the phone, you can schedule an event inside Calendar by first opening the Space and then tapping on Calendar icon at the bottom of your screen.
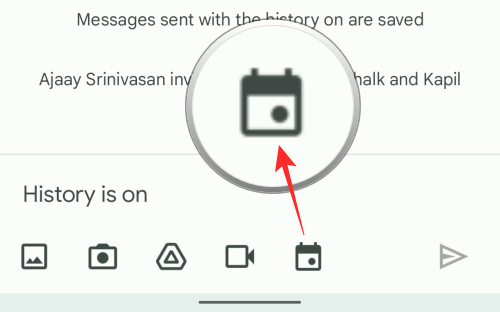
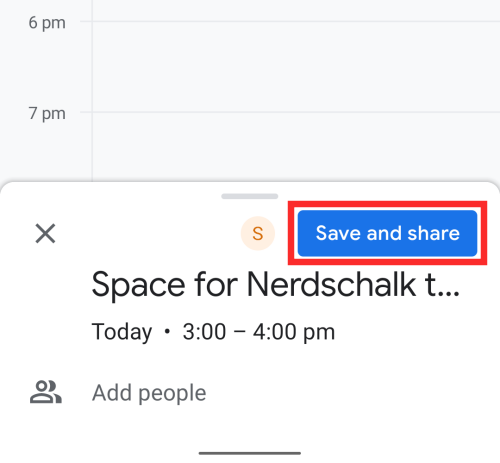
On the next screen, you can schedule the event with all the necessary details and then confirm the setup by tapping on the ‘Save and share’ button at the bottom.
Create and assign tasks for everyone in a Space
Until now, you might have accessed all of the features inside Google Spaces under the ‘Chat’ tab. But there’s another ‘Tasks’ tab at the top of the Space screen that lets you create group tasks and assign them to every member of the Space.
To create a task for someone in the Space, enter the Space and click on the ‘Tasks’ tab at the top.
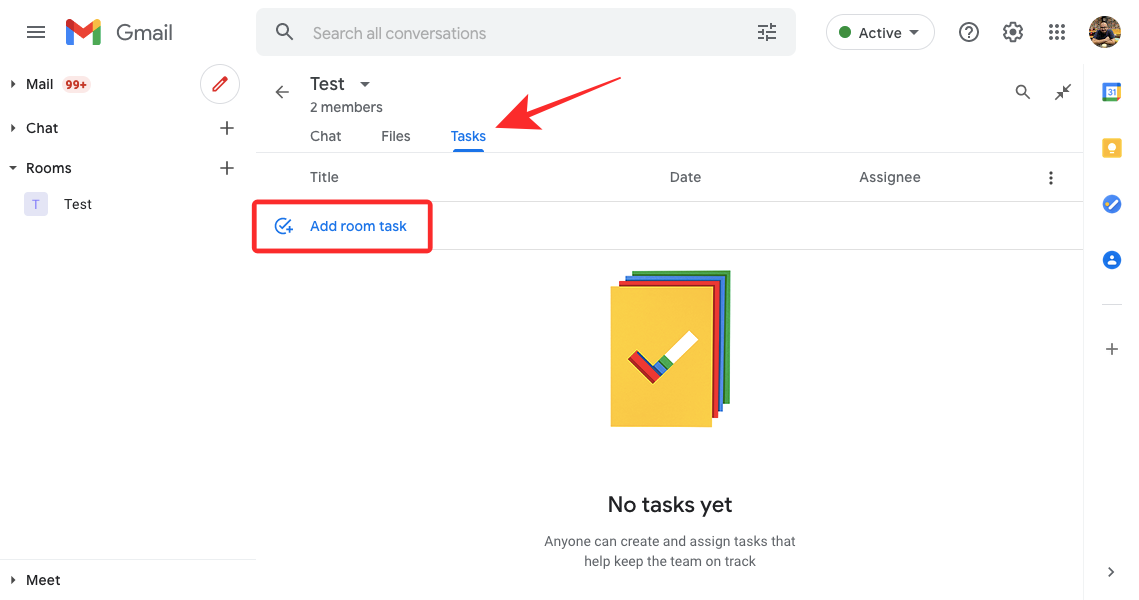
When the Tasks screen loads up, you can start creating a tasking by clicking on the ‘Add Space task’ option.
A task will be created below where you’d be required to fill up the Task title, description, date, and time, choose members, and add other details for it.

Once all the details have been added, click on the ‘Add’ button under the task you created.
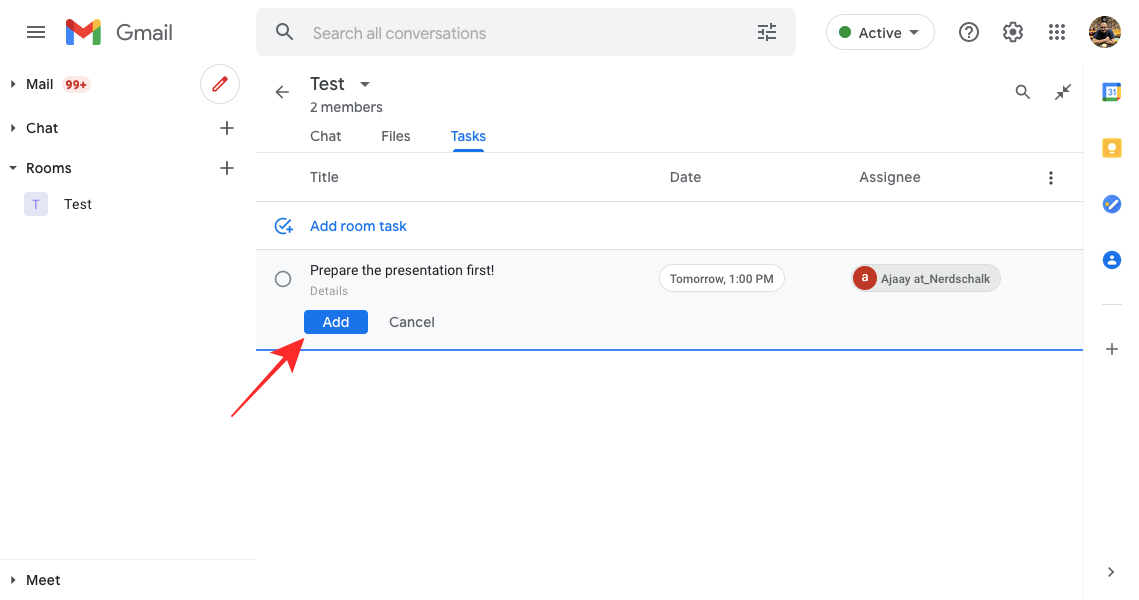
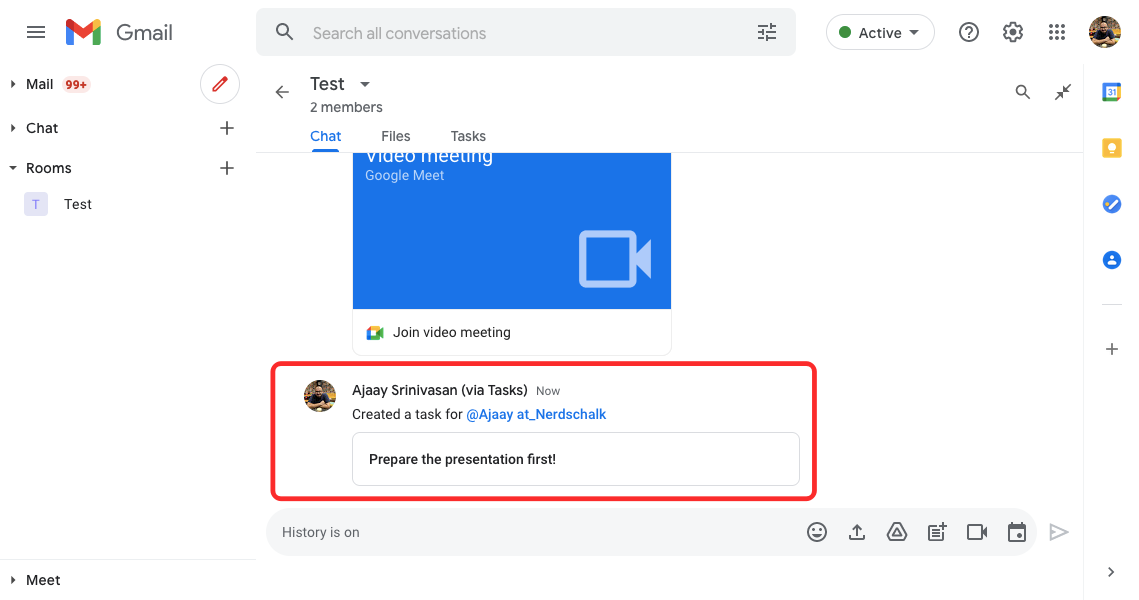
When you create a task for the Space or one member, it should be visible inside the main conversation thread.
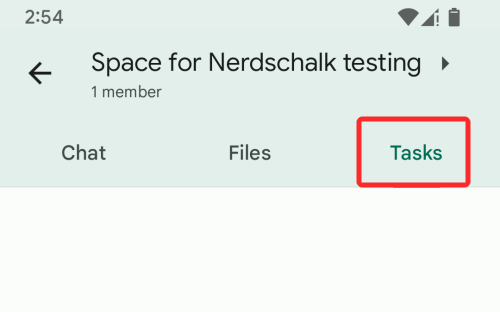
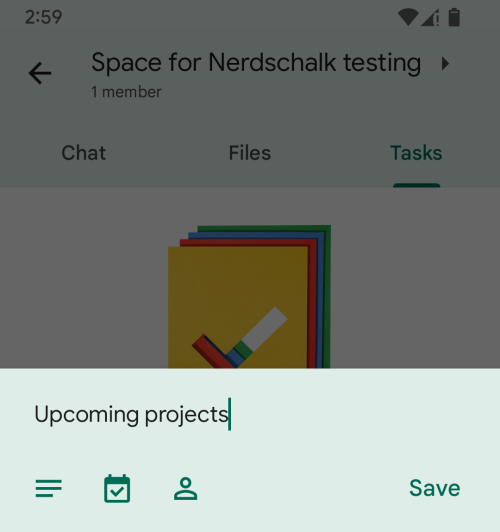
On the phone, you create a task by first opening the Space and then tapping on the ‘Tasks’ tab at the top of your screen.
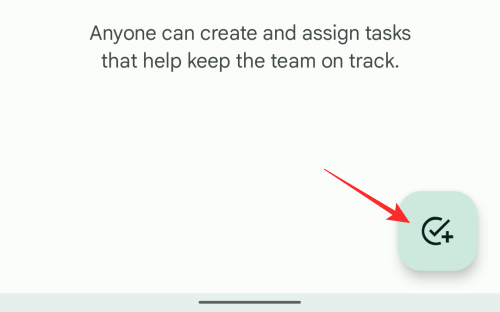
Inside the Tasks screen, tap on the New Tasks button at the bottom right corner.
Next, you can start adding details to your task and then save it.
More features should arrive soon!
Since a lot of what’s to be seen on Google Chat and Gmail’s “integrated workspace” is set to arrive with “Spaces” later this year, there are still a bunch of features we can expect when Google switches to Spaces completely. Here are all the features that should be available for all Google users soon:
- A new Gmail UI with greyed-out sidebars, search bar, and settings section.
- Companion Mode for Google Meet to make video calls more interactive; set to arrive in September 2021.
- Google Meet call integration within Docs, Sheets, or Slide without opening a new tab.
That’s all you need to know about Google Spaces.
RELATED


Hi, good info but pity about the lack of integration…
It’s astonishingly lame that you cannot connect/link/share a gmail message with a Space… so if you get an email message you want to share in your space, you’re out of luck. Even if you export the email as an eml file, then go to spaces and import it (tedious) guess what, you cannot open it in spaces! SO BAD!!!