Whether you’re an amateur or a pro at taking photos on your iPhone, one thing that can help you take better shots is the Timer option. Like the self-timer function on digital cameras, the built-in timer tool on the iPhone Camera lets you activate the shutter button after a specific interval so that you can plan a moment to capture it and pose for it yourself.
In this post, we’ll explain everything you need to know to set a timer and capture timed photos on your iPhone’s camera.
How to set a timer on iPhone Camera
Although setting a timer on the iPhone camera is a fairly straightforward process, how you do it differs on the iPhone model you’re using.
Method 1: On iPhone XS/XR and newer models
If you own an iPhone XS/XR or a newer model, the Timer option is available inside a hidden menu inside the Camera app.
- To set a timer, open the Camera app on your iPhone.

- When the Camera opens, make sure you’re in Photo or Portrait modes by tapping on these modes at the bottom. By default, the Camera app opens in Photo mode but it may differ if you preserve your settings for the Camera app.

- When you’re inside Photo or Portrait mode, tap on the upward-facing arrow at the top of the screen to open additional options.

- These options can also be accessed by swiping up on the viewfinder inside either of these modes.

- In the options that appear at the bottom, tap on the Timer icon (the one marked with a clock-like sign).

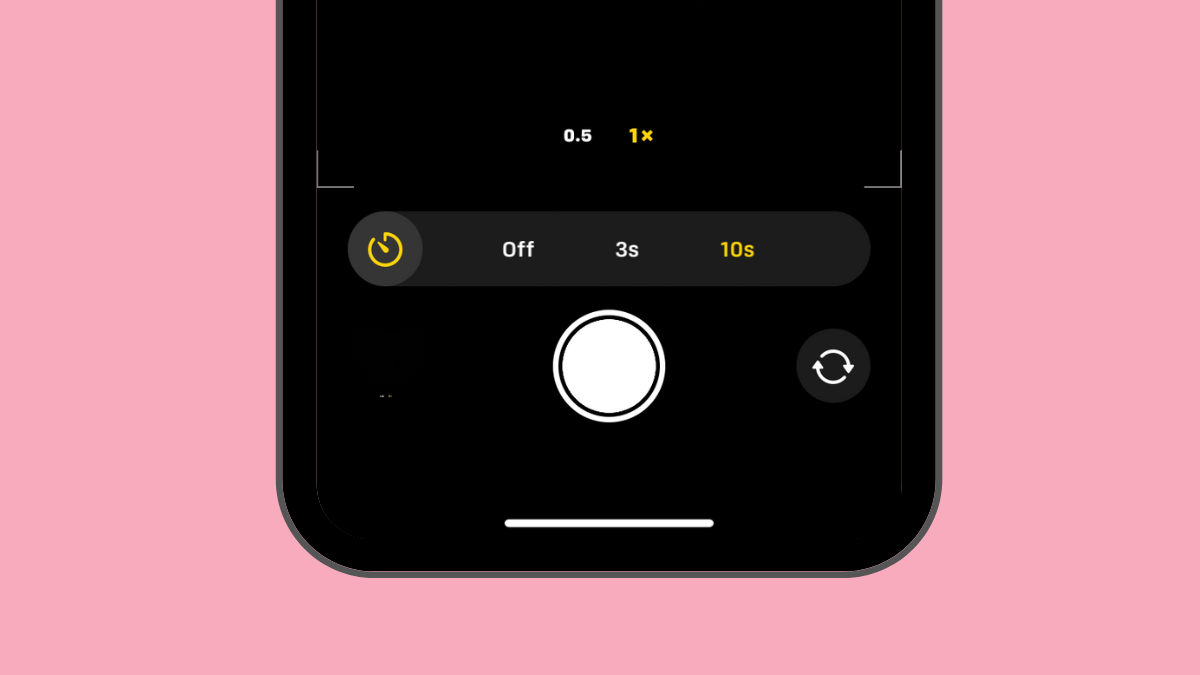
- When you tap on the Time icon, you will see new options appear at the bottom. From here, choose 3s or 10s to set a timer depending on how fast you want the shot to be taken.

- The chosen timer option will show up at the top right corner to help you make sure you chose it correctly.

- Once the timer is set, you can align yourself to face the camera. If this is a group selfie, you may want to rest the iPhone beside a wall or mount it on top of a tripod.
Note: You can disable Live Photo mode on your iPhone by tapping on the Live Photo icon (the one marked with concentric circles) if it’s highlighted in yellow to capture multiple shots in timed mode. This icon will be located at the top right corner or at the bottom inside the hidden menu where you accessed the Timer option.

- If Live Photo shows as enabled inside the hidden camera menu, select Live Off after you tap on the Live Photo icon.

- Once you’re ready with the shot, tap on the Shutter button at the bottom.

- You will now see the countdown appear at the bottom right corner of your screen. If you’re capturing the photo from your main (back) camera, your iPhone’s flash will also blink to let you know the count so you can be ready to pose at the right time.

- At the end of the countdown, your iPhone will capture the picture or multiple pictures depending on whether or not you’ve enabled Live Photo for the picture.
- When a timed shot is captured, you will see its thumbnail appear at the bottom left corner. To check out the picture that was taken, you can tap on this thumbnail to see how well the picture was captured.

You can repeat these steps to capture more timed shots on your iPhone.
Case 2: On iPhone X and older models
The above method works when you have a modern iPhone. In case the iPhone you use is an iPhone X, iPhone 8, or older, the timer option will be readily accessible on the iOS camera.
- To capture a timed shot on an iPhone X or older, open the Camera app on iOS.

- When the Camera opens, tap on the Photo tab at the bottom to be able to capture timed shots. The Timer option won’t be accessible on other camera modes.

- Inside the Photo or Portrait mode, tap on the Timer icon (the one marked with a clock-like sign) at the top of your screen.

- When you do that, you’ll see additional options at the top to set a timer. From here, choose either 3s or 10s depending on how long you want to wait for your iPhone to capture the picture.

- The Timer you set will be visible at the top right corner to let you know the chosen time.

- Once the timer is set, you can align yourself to face the camera. If this is a group selfie, you may want to rest the iPhone beside a wall or mount it on top of a tripod.
Note: You can disable Live Photo mode on your iPhone by tapping on the Live Photo icon at the top (the one marked with concentric circles) if it’s highlighted in yellow to capture multiple shots in timed mode.

- Once you’re ready with the shot, tap on the Shutter button at the bottom.

- You will now see the countdown appear at the center of your screen. If you’re capturing the photo from your main (back) camera, your iPhone’s flash will also blink to let you know the count so you can be ready to pose at the right time.

- At the end of the countdown, your iPhone will capture the picture or multiple pictures depending on whether or not you’ve enabled Live Photo for the picture.
- When a timed shot is captured, you will see its thumbnail appear at the bottom left corner. To check out the picture that was taken, you can tap on this thumbnail to see how well the picture was captured.

- You can repeat these steps to capture more timed shots on your iPhone.
How long can you set a timer on the iPhone camera?
When you access the Timer option inside the Camera app on your iPhone, you will get options to choose between two modes: 3 seconds (3s) and 10 seconds (10s). You can use the first option for taking quick selfies from the front or back camera when your iPhone is handheld. The second option will be useful in scenarios to click group pictures or selfies where you’ve mounted your iPhone onto a tripod from far out.
How to stop a timer midway inside the camera
When you tap the Shutter button for a timed photo, the Camera app shows the countdown timer at the bottom right corner of the screen (or at the center on older iPhones) or it flashes the LED at the back to notify you about the remaining time. You can stop the timed shot at any time during this countdown period to prevent the Camera app from taking your picture.
To stop the counter midway during a timed shot, tap on the Stop button at the bottom. This button will appear in place of the Shutter button inside the Camera app.

When you stop the timed shot midway, the screen will go back to the way it was before you pressed the Shutter button. You can re-adjust your frame, make changes to the scene, and then tap on the Shutter button again to restart the countdown timer.
How to turn off the timer on iPhone Camera
When you set a timer for capturing photos inside the Camera app, the Camera app preserves this setting for the next time you want to capture something on your iPhone. What this means is that if you have enabled the timer previously, whenever you open the Camera app again to click another photo, the chosen timer is re-activated by default. To avoid waiting for the timed countdown, you will need to manually disable the timer on your iPhone so that subsequent clicks are regular shots captured when you tap on the Shutter button.
Method 1: On iPhone XS/XR and newer models
- To turn off the timer on these iPhones, open the Camera app and tap on the timer option (indicated by a clock sign with 3s or 10s) that shows the previously set time.
- This will open a new menu at the bottom. From here, select Off.

The previously configured timer will now be disabled and any pictures you click now will be captured when you tap on the Shutter button.
Method 2: On iPhone X and older models
- To turn off the timer on these iPhones, open the Camera app and tap on the timer option (indicated by a clock sign with 3s or 10s) that shows the previously set time.
- In the options that appear at the top, select Off.

The previously configured timer will now be disabled and any pictures you click now will be captured when you tap on the Shutter button.
FAQs
How many pictures are saved on a timed shot?
Ideally, when you capture a picture on your iPhone, the Camera app captures a bunch of shots in burst mode at the moment when the shutter button is tapped. When using timed shots, the number of pictures that are taken from your iPhone’s camera will depend on whether or not Live Photo is enabled.
Live Photo is a feature inside the Camera app that allows your iPhone to capture moments before and after the shutter button is tapped, so you can choose the best moment from the series of pictures or the video that gets captured. While Live Photo captures a video with audio during regular shots, timed shots in Live Photo mode work differently.
- When Live Photo is turned on during a timed shot, your iPhone will only capture a single shot.
- When Live Photo is turned off during a timed shot, your iPhone will capture 10 shots in burst mode.
Regardless of whether or not Live Photo is enabled, all timed shots are saved on your Photos library and you can access them by tapping on the thumbnail at the bottom left corner of the Camera app or by opening the Photos app on your iPhone.

Which modes can you use with a timer on the Camera app?
You can capture timed shots on your iPhone only when taking still pictures of moments inside the iOS Camera app. The Timer icon will only be accessible when you’re in Photo mode or Portrait mode inside the app. You can choose these modes by tapping on the respective mode tabs at the bottom or by swiping left or right on the camera viewfinder.
You cannot use the Timer option when you’re capturing a panoramic shot which would require you to manually move your iPhone from side to side to take an extended shot.
This also applies when capturing videos as the Timer option is unavailable when you’re in Video, Time-Lapse, or Slo-Mo modes inside the Camera app. Since you can trim unnecessary portions from a video after it has been shot, it doesn’t make sense to add a timer to capture videos as you can always edit them to remove the beginning portion.
The Timer option works when taking pictures from any camera on your iPhone regardless of its position. This means you can capture timed shots from the front (selfie) camera, main (wide) lens, Ultra-wide angle lens, and Telephoto lens.
Why and when should you use a timer on camera?
Timed shots can come in handy when you’re planning to capture a moment, not when the moment is right in front of you. The best occasion to use the Timer option is when you’re taking group selfies. Since you’re not required to time the shot at the right moment, setting a timer will allow others in the frame to be ready for the shot to be taken when the countdown reaches zero. You can even use your iPhone’s main camera (the one at the back) to capture a higher-quality shot than an ordinary selfie.
Using timed shots for group selfies allows you (the photographer) to be ready and in the frame for group selfies. You can also prevent camera shake or blur that may otherwise occur when manually clicking these pictures since you no longer need to press the volume down or Shutter button at the moment. Since timed shots without Live Photo capture burst shots, you will have up to 10 pictures to choose the best moment from.
You can also use the Timer option to capture better-looking selfies from your front and back cameras. Since you no longer need to manually press the Shutter button to click pictures, you can position the camera towards you or place it on a steady surface to click selfies and pose for them at the right time.
Other scenarios where you may benefit from timed shots are when you’re about to capture a long-exposure photo or a macro photo. In both of these cases, your iPhone needs to be perfectly steady and focused on the subject at hand. Using the Timer option in such scenarios helps eliminate blur that may otherwise happen when you take pictures with the Volume Down or Shutter buttons.
I cannot find the Timer option on the iOS Camera. Why?
The Timer option appears when you’re taking a picture inside the Photo or Portrait modes on your iPhone’s camera. The feature is available on the iPhone 5 or newer models as long as it runs on iOS 8 or later. If you’re unable to find this option, it’s because:
- The Timer option is hidden on the Camera app. On iPhone XR/XS or newer models, you need to tap on the upward-facing arrow or swipe up on the viewfinder to make the Timer option visible.
- You cannot use timed shots when capturing a panoramic photo in Pano mode.
- You cannot use the Timer option when taking a video on any of these modes – Video, Time-Lapse, or Slo-Mo.
- You cannot capture timed shots on iPhone 4 or older models.
- Your iPhone hasn’t been or cannot be updated to iOS 8 or newer.
To capture a time shot on a supported iPhone, make sure you’re on Photo or Portrait mode, swipe up on the viewfinder to access the Timer option, and set it to your preferred duration.
That’s all you need to know about setting a timer on the Camera app on an iPhone.


