Fans of Pokémon Go, there is a new and exciting feature that’s coming to your favorite game. Pokémon GO now comes with AR Mapping tasks that let players scan objects at PokéStops near them in order to complete your daily Field Research tasks.
Today, we will be explaining to you what the PokéStop Scan feature in Pokémon Go is all about and how you will be able to use it inside the game.
What actually is PokéStop Scanning?
PokéStop Scanning is a feature available inside Pokémon GO that lets users record a video or capture a set of frames of PokéStops or Gyms around their area. When you scan an object at a PokéStop, the game will be able to generate a 3D version of the real-world object and thus update its dynamic 3-D maps in real-time for others to see.
What do you need to try this?
In order to use the PokéStop Scanning feature in Pokémon Go, you will need to make sure you have the following things.
- You’re a Pokémon GO Trainer
- You have reached at least level 20 of the game
- You’re running Pokémon GO on an iPhone 6s and newer or an Android 7.0+ device with Google Play Services for AR support
- You cannot perform PokéStop Scanning if you’re using PokéStop with child accounts
How to enable PokéStop Scan in Pokémon Go
Once you have ensured that you have all the things necessary to scan PokéStop, you can now proceed to do so by opening the Pokemon Go on your phone. Once the game loads, tap on the PokéBall icon at the bottom center of the game’s home screen.

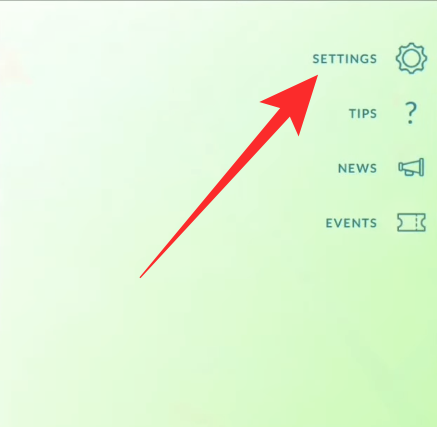
On the next screen, tap on the ‘Settings’ option in the top right corner.
Inside the ‘Settings’ screen, turn On the ‘Enable PokéStop Scan’ toggle under ‘PokéStop Scan’ section.
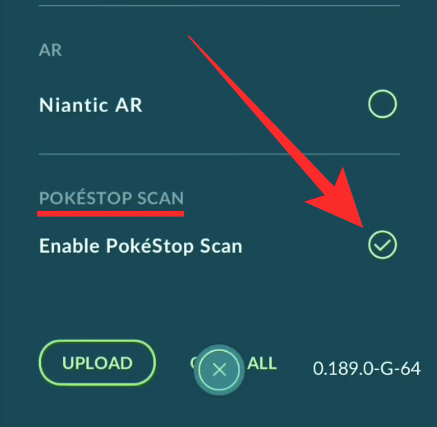
There you go! You have successfully enabled PokéStop Scan in the game and you can scan objects and sculptures in and around your location to complete daily tasks.
How to Scan PokéStops in Pokémon Go
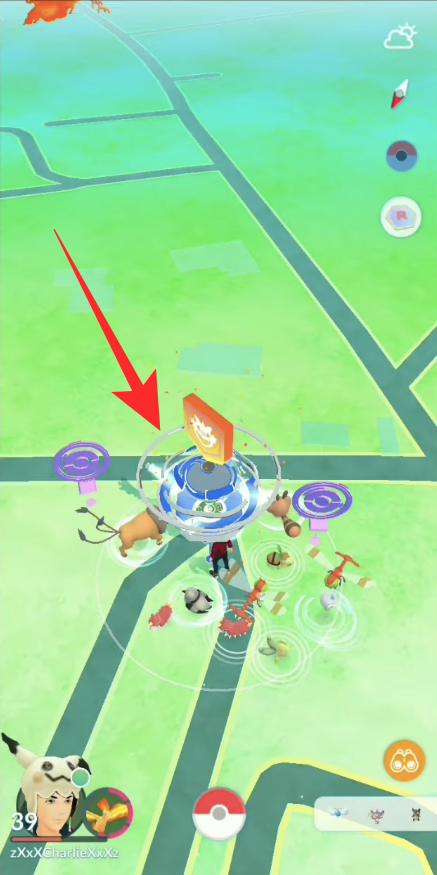
After you have enabled PokéStop Scan in Pokémon Go, you can now proceed to scan some stuff in AR using the new feature. Before you get started with the scanning, you should first reach the Pokéstop or Gym and tap on the Pokéstop available inside the Pokémon Go map.
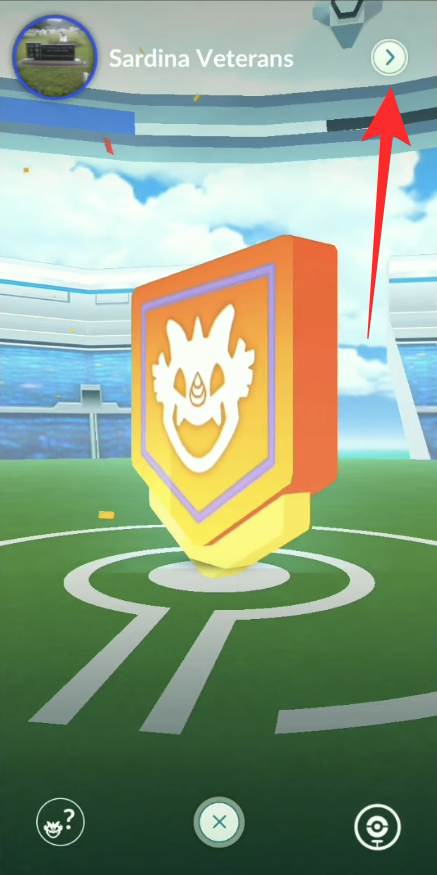
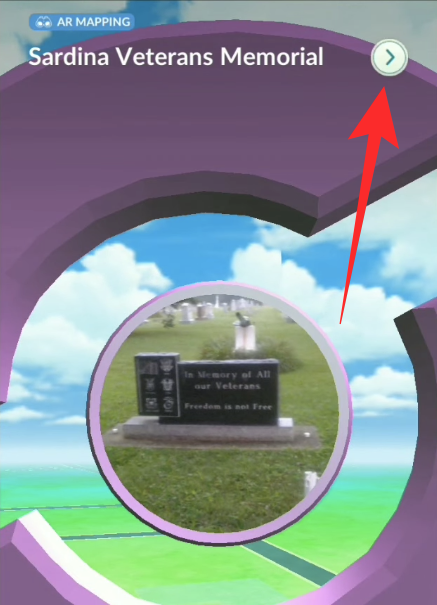
This will open the Pokéstop and you will be able to view the location’s Photo Disc. On this screen, tap on the right-arrow icon at the top right corner.
The picture that was visible in the Photo Disc can now be screen enlarged on your screen. Inside this screen, tap on the 3-dots icon at the top right corner.
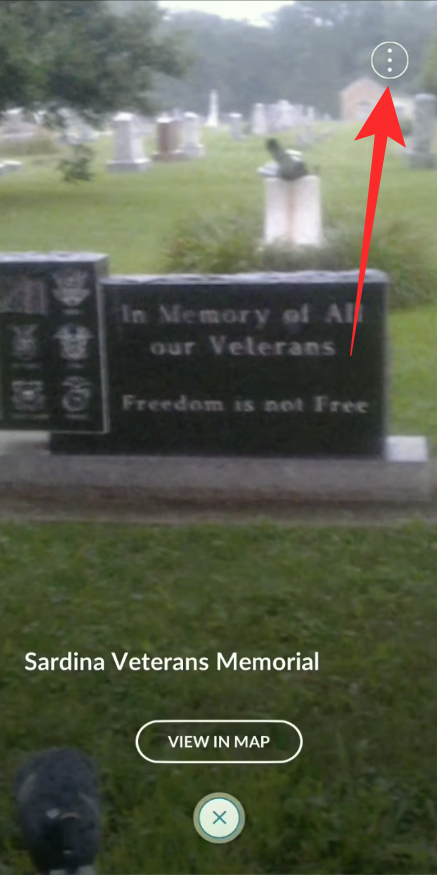
On the next screen, tap on the ‘Scan Pokéstop’ option.

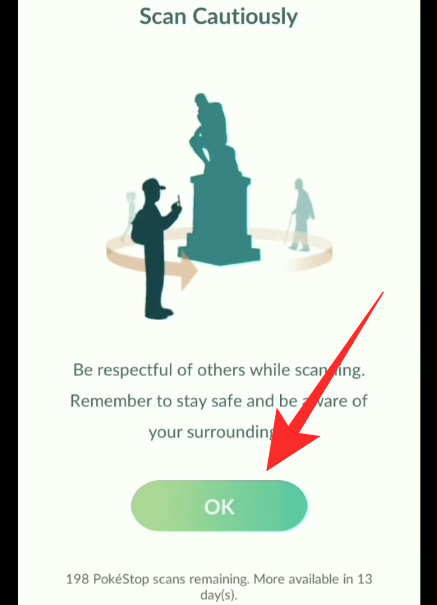
You will now be warned to scan cautiously and be respectful of others around you. Tap on the ‘Ok’ button to go to the camera screen.
You will now be able to see the camera feed directly within Pokémon Go. When you’re ready to start scanning, tap on the shutter button to start recording. Walk around the object to cover it from as many angles as possible. You can refer to the things you can consider and the tips to scan PokéStops better from the sections below.
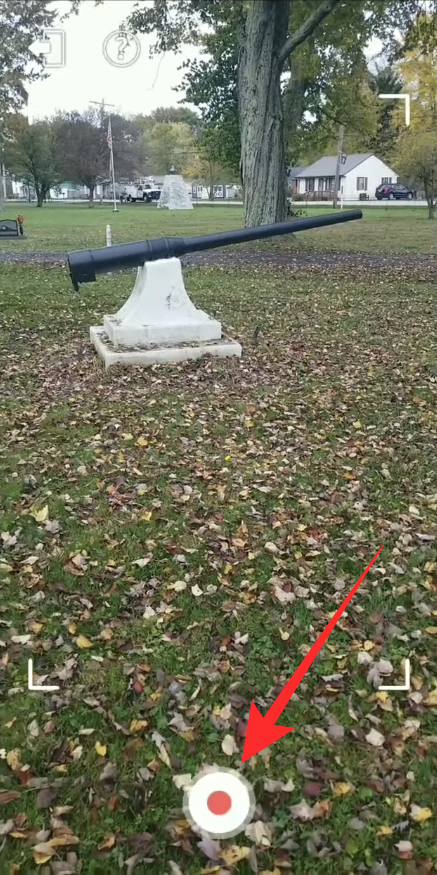
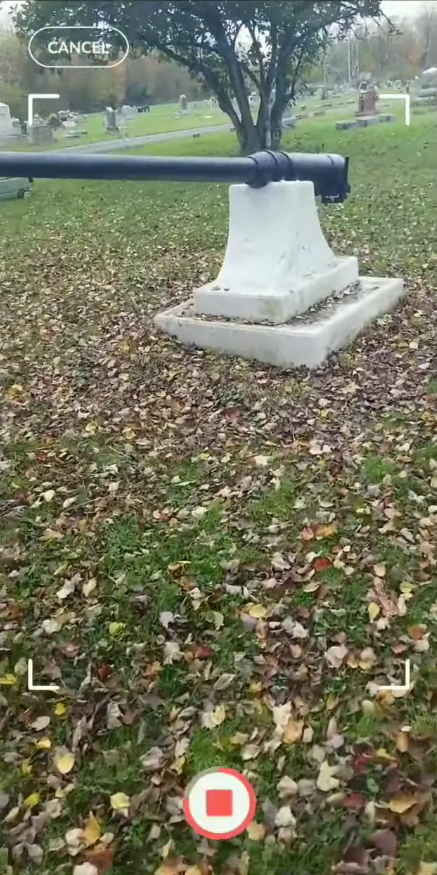
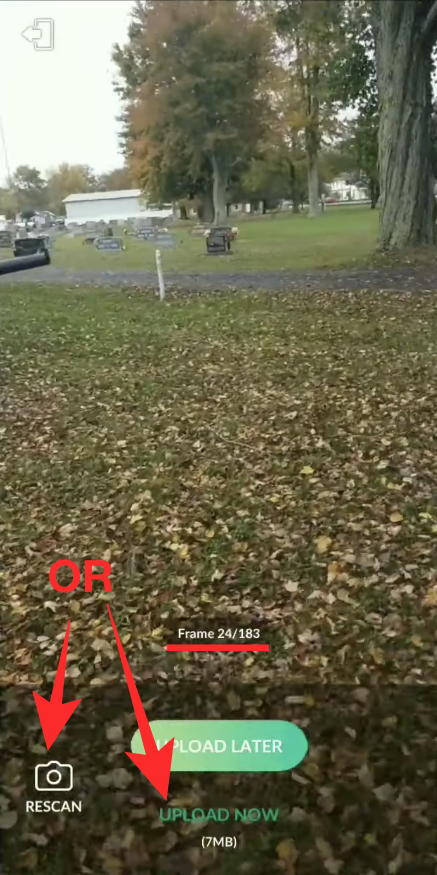
As you move around and record the object, a red progress bar will start filling up around the shutter button. When the red bar comes full circle, Pokémon Go will now prepare your scan and after which it will now load on your screen for review. You will be shown the number of frames that have been captured while the scan automatically starts playing in the background.
To upload the scan, tap on the ‘Upload Now’ button at the bottom and then select ‘Upload Now’ in the next screen to confirm. If you are not satisfied with the result, you can simply start scanning by tapping on the ‘Rescan’ button at the bottom left corner.

Your PokéStop Scan will now be upload to Niantic servers which analyzes the content you uploaded and then will host it in Pokémon Go later.
Things to consider before scanning a PokéStop
Niantic has clearly mentioned a few things that you may need to know before you go ahead and scan PokéStops.
- Scan those objects around which you can walk around without any obstruction. These include sculptures and states that you can access from any angle.
- While keeping the object at the center of the frame, move around it and scan it for at least 20-30 seconds
- When scanning the object, keep your camera steady and move at one consistent speed
- Scan objects at PokéStops for at least 180 degrees but if possible, cover the entire 360 degrees
- Scans can be performed at various weather conditions or at different times of the day
Tips to scan PokéStop the best way possible
Although we have provided the things you should take care of when scanning PokéStops around you, but if you want to make the most out of it, then you might want to jot down the following tips.
- Stay aware of things around. It’s important that you stay safe and not constantly look at the screen while attempting to scan an object.
- Avoid scanning PokéStop in under-lit or dark conditions.
- You need to move 10 or more steps to make your PokéStop Scans useful.
- Distance yourself from the PokéStop in such a way that moving around it in circles won’t be obstructed in any way.
- Here’s how you move and scan PokéStops depending on how big they are:
- Small/Flat PokéStops: Just move laterally from one side to the other to scan it.
- Medium-sized PokéStops: Capture the object/sculpture in 360 degrees, if possible.
- Large-size PokéStops: Capture images at different angles with the same range and then move back and forth to complete the scan.
- Avoid blurry scans, obstructions, and people as much as you can while scanning.
Did this guide help you scan PokéStops on Pokémon Go? If you are facing difficulties while scanning them, let us know in the comments below.
RELATED
- How Many People Can Play Among Us?
- Are Diluc and Kaeya Brothers in Genshin Impact?
- What are the Imposters in Among Us? How Do They win?
- Genshin Impact Update 1.1 New Characters, Weapons, Bosses, and More!
- What Is Among Us Based On?
Screenshots Source: C _fold