Sure Samsung has got you plenty many stuff to play with with its latest phone of the Galaxy S series — the Galaxy S4. You’ve air gestures, IR sensor, smart scroll and lots more. But for the power users among us customization has no limits.
And that’s where the urge to root your phone pops in. You could bring a world of awesomeness and easiness to your phone by gaining root access to it and there’s a great community of developers from everywhere around the world to help you do it.
This page will guide you on how to gain root access on your Galaxy S4 i9500. Enjoy!
[featurearea title=”Compatibility” icon=”danger”] The guide below is only applicable to international Galaxy S4 variant with 8-core processor (model number GT-I9500). Do NOT use it for any other device or variants of Galaxy S4.To check your phone’s model number go to Settings → More (tab) → About device [/featurearea]
Before you start..
Make sure your laptop/PC has enough power supply to go through the process (say 10-20 mins) and your phone’s battery is at-least 30% charged.
Downloads
- CF-Auto-Root → Download link
- Odin v3.04 → Download link
Preparing your PC
- Create a folder on your PC named “9500 Root” and copy/paste the files you downloaded in the downloads section above to this folder
- Extract the files that are in .zip format. Do NOT extract any other file types
- Now out of the extracted files and folders, open Odin3 v3.04.exe file and leave the odin window on top of your computer screen
Preparing your Galaxy S4
- Take a backup of SMS, call logs and other important data on your phone. You can use the Super Backup app from play store
- Switch off your phone
- Put it into download mode by pressing the following keys together ─ Power + Home + Volume Down. Keep holding the keys until you see a warning message on screen
- Press Volume Up key to continue through warning. This will put your phone in download mode
- Connect your phone to the computer using a USB cable.
As soon as you connect your Galaxy S4 (that’s in download mode) to your PC, the Odin software will show an Added!! message at the bottom left corner of the software.
However if Added!! message doesn’t appear on Odin, then that means there’s some problem with the drivers for your phone on your PC and you’ll need to install the proper drivers to solve this issue.
[featurearea title=”Guide to install proper drivers” icon=”settings”] Link → Samsung Galaxy S4 Drivers Installation Guide [/featurearea]Once you’ve installed the proper drivers for your phone, repeat the steps above (except the backup part).
Onto the rooting process now..
If things have gone all well with preparing your PC and Galaxy S4 for the process, then you’re only 4 steps away from rooting your S4
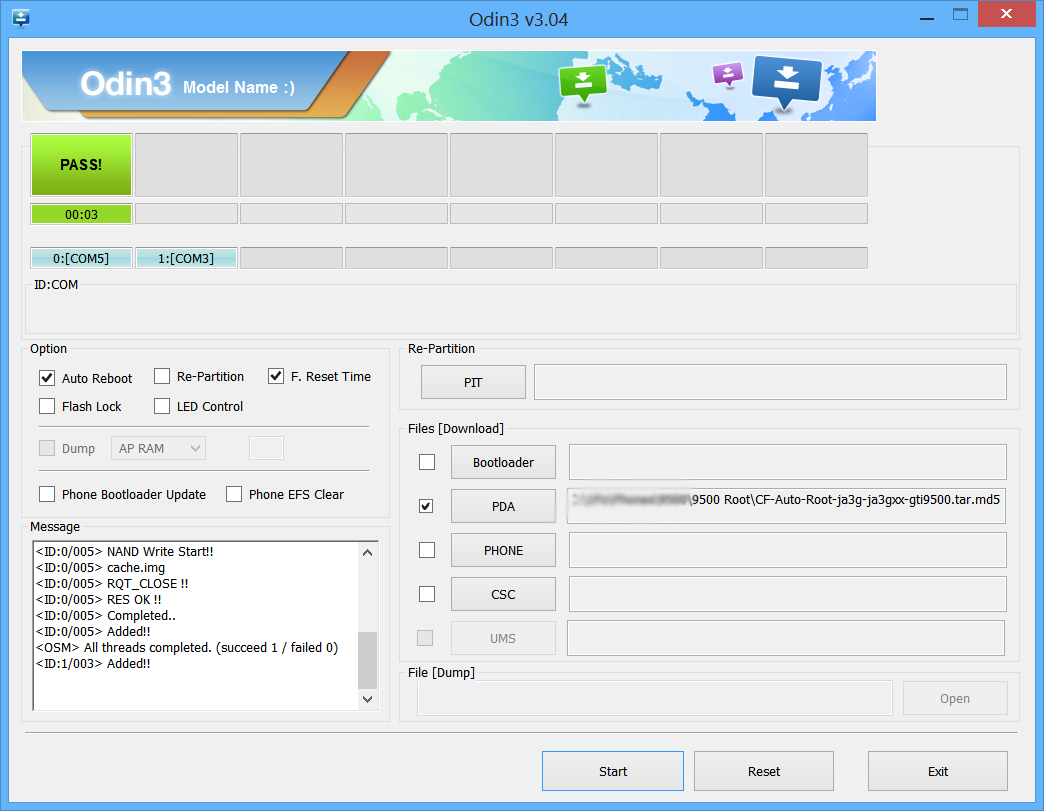
- Click the PDA tab on the Odin screen on your PC and select the CF-Auto-Root-ja3g-ja3gxx-gti9500.tar file that we downloaded and extracted to ‘9500 root’ folder
- Don’t touch anything else on your Odin screen. Keep the Auto Reboot and F. Reset Time checkboxes checked and everything else unchecked. Your Odin Screen should look like this:
- Hit the Start button and wait while it does its work
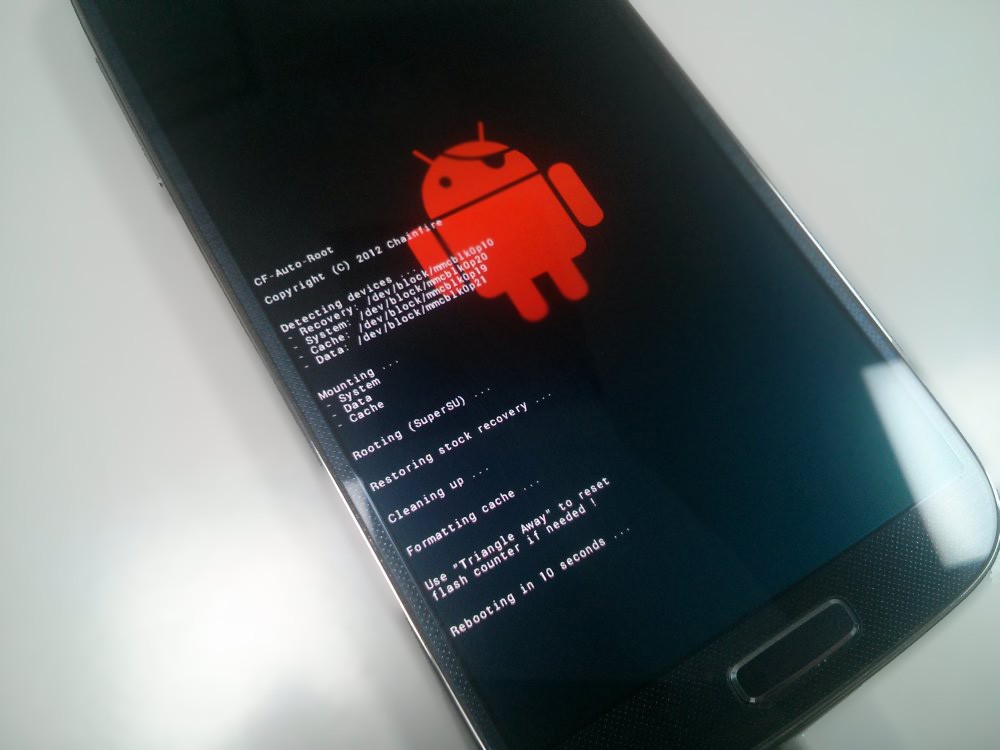
- Once done Odin screen will show pass message and your phone will automatically reboot.
Link → Install Root Checker [/featurearea]
Hope this page proves helpful for all Galaxy S4 I9500 users around the world. Do share your experiences in the comments below.





This is what I got:
Added!!
Enter CS for MD5..
Check MD5.. Do not unplug the cable..
Please wait..
CF-Auto-Root-ja3g-ja3gxx-gti9500.tar.md5 is valid.
Checking MD5 finished Sucessfully..
Leave CS..
Odin v.3 engine (ID:6)..
File analysis..
SetupConnection..
Initialzation..
Get PIT for mapping..
Firmware update start..
recovery.img
NAND Write Start!!
cache.img
Complete(Write) operation failed.
Added!!
All threads completed. (succeed 0 / failed 1)
@d2c0d8696369134192027c0b9bb0ef1c:disqus U need to Run As Administrator, but first install the drivers.
@d2c0d8696369134192027c0b9bb0ef1c:disqus U need to Run As Administrator, but first install the drivers.