Here is everything you need to know about setting up and making a free Microsoft Teams video call with your friend and family. We will talk about various ways to create a personal Teams meeting for friends and family, and also how to invite them to join your meeting easily.
How to set up a free account on Microsoft Teams for personal use
On computer
Go to the Microsoft Teams website and click the Sign up for free button that is visible on the homepage banner.

A new page will open along with a window that contains a textbox for your email address. Type in your email address in the text box. Once you’re done, click the Next button.

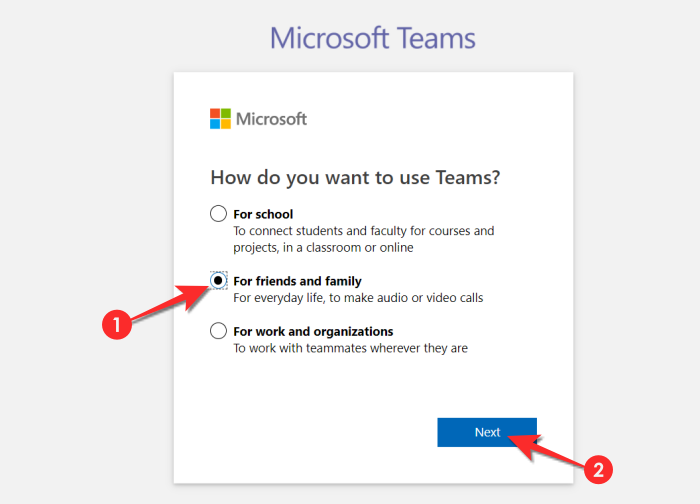
Microsoft will now ask you the purpose of the account, along with three options. Click the checkbox for the one in the middle i.e For family and friends. Then click the Next button.
Type your password in the allocated text box and then click the Sign-Up button.

In the next window, Microsoft will ask for your phone number. Add the phone number in the allocated text box and then click the Next button.

Wait for the code to arrive on your phone, once it does, type the code in the text box and then click the Next button.

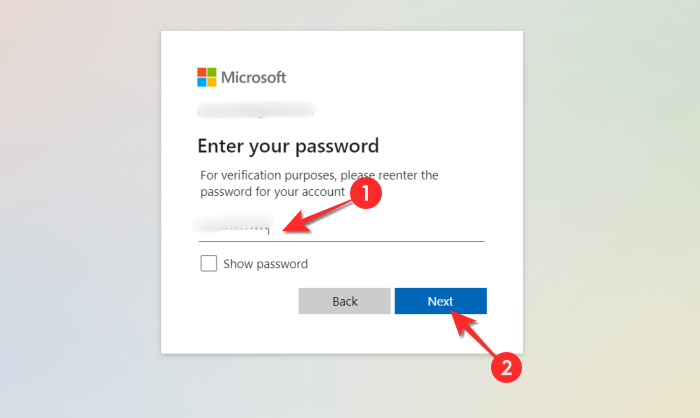
Microsoft will ask you to re-type your password, type the password in the text box and then click the Next button.
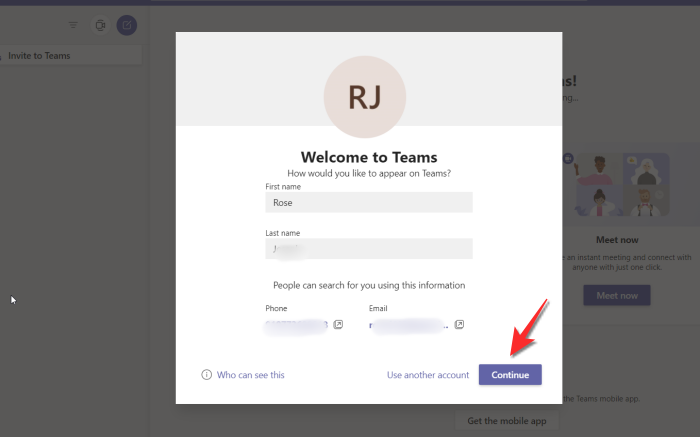
You will now find yourself on the Microsoft Teams website with a welcome window. If you want to change your First Name or Last Name do so by typing the details in the allocated text boxes and then press Continue.
On phone
Download the Microsoft Teams app from the Play Store. Once the app is installed, launch it on your phone.
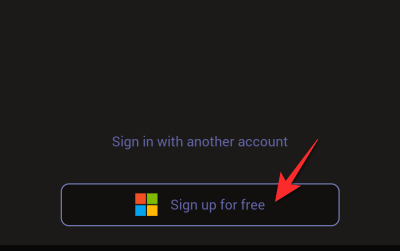
Tap the Sign up for free button that is visible at the bottom of the page.
Select the Personal option for the Account type information.

Add your phone number in the allocated text box and then tap the Next button.

Type your password in the text box and tap the Next button.

Next, type your name in the allocated text boxes and tap the Next button once again.

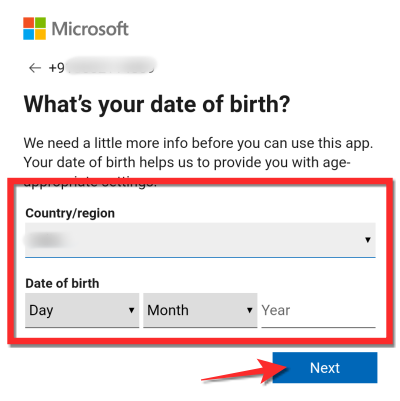
Select your country of birth and date of birth using the allocated dropdown menu options. After selecting the details, tap the Next button.
Finally, a verification code will be sent to your phone number. Type in the code and then tap the Next button.

Wait for the application to sign you in.

Once in, Teams will ask for permission to access your contacts. Choose what you’re comfortable with.

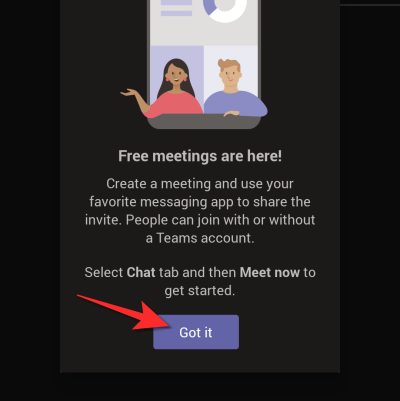
Tap the Got it button for the Teams introductory message. That’s it!
How to add your profile photo on your Teams personal account
On computer
Once you have logged into your Microsoft Teams account, go to the top-right section of the screen and click the circle that looks like a profile icon and open your profile window.
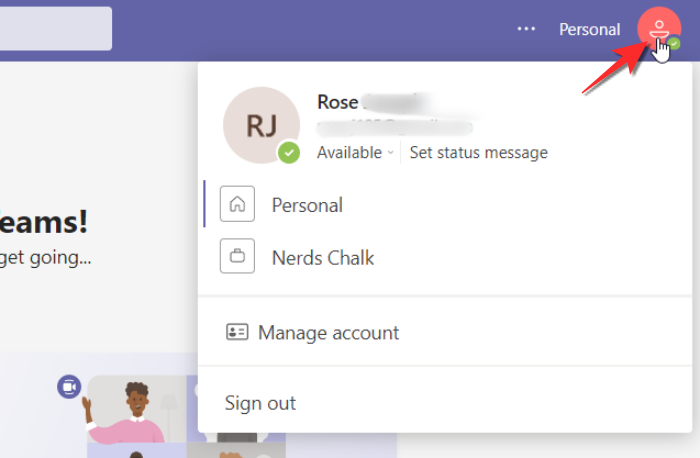
Within the window, click the circle with the initials of your name.
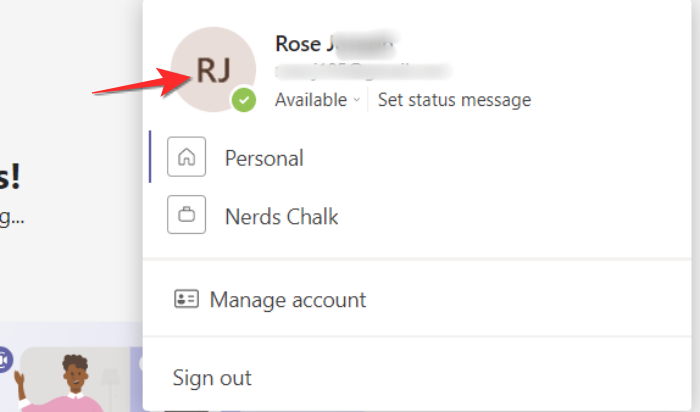
Now a new window will open on the Teams page, here, click on the Upload picture option.
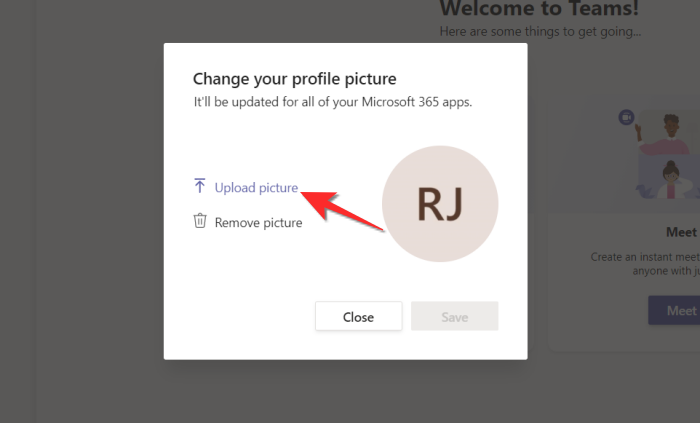
Locate the picture that you want to upload from your computer’s storage. Click the image and then click the Open button.

The image will now be uploaded in the empty circle. Click the Save button once this is done.

On phone
Currently, Microsoft Teams only allows the user to change their profile picture from the browser website. So it is not possible to change your profile picture from your phone.
How to start a Microsoft Teams personal meeting on PC
Before you can invite anyone to the meeting, you need to start the meeting. Here’s how it works:
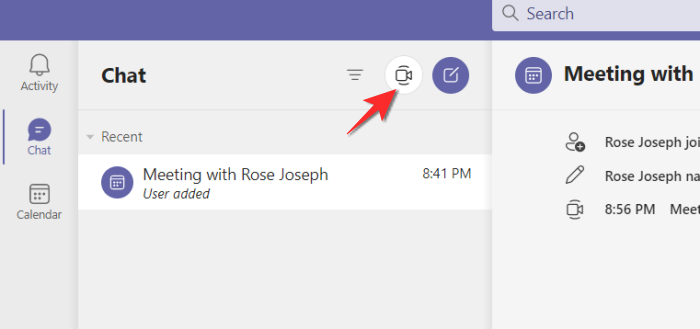
On the top left section where the chats are located, click the video camera icon which represents video calls.
A small window will open under the icon with a text box where you can name the meeting and two buttons. Type the name of the meeting in the text box and then click the Start Meeting button.
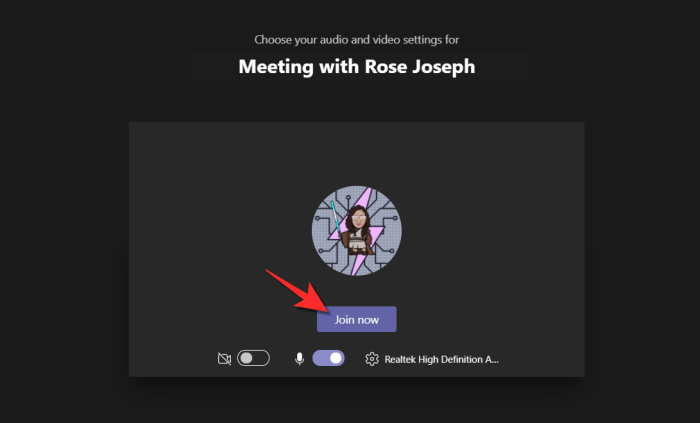
You will now be taken to the meeting page. Click the Join now button that is present on the screen.
4 ways to invite family and friends to your meeting on PC
Method #01: Invite using the meeting link
If you have already joined the meeting, a window will open with methods to allow you to send the invitation to the meeting. Here, click the first options i.e Copy meeting link.
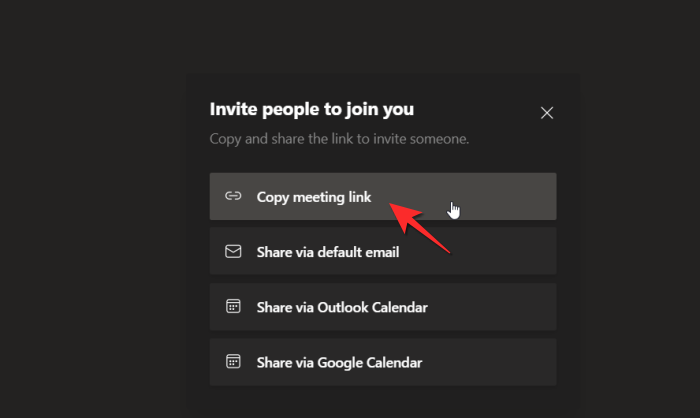
When you do this, the option will change to reflect that the meeting link has now been copied.

Share the link with the email id of the contact that you want to invite to the meeting.
Method #02: Invite using email
Start the meeting as given above, and then click the small video icon on the chat section.
When you do this a small window will appear. Click the Get a link to share button from the window.

Either copy the link or click the Share via email button.

Send the link to the contact’s email id or chat so that they can join the video call.
Method #03: Invite using Google Calendar
Once you’re in the meeting, a window will open with methods to allow you to send the invitation to the meeting. Here, click the last option i.e Share Via Google Calendar option.
If you are already logged in then you will directly be taken to the Calendar, if not, then you must log in to your Google Account first. Select your account and type in your password in the text box. Once you are done, click the Next button.
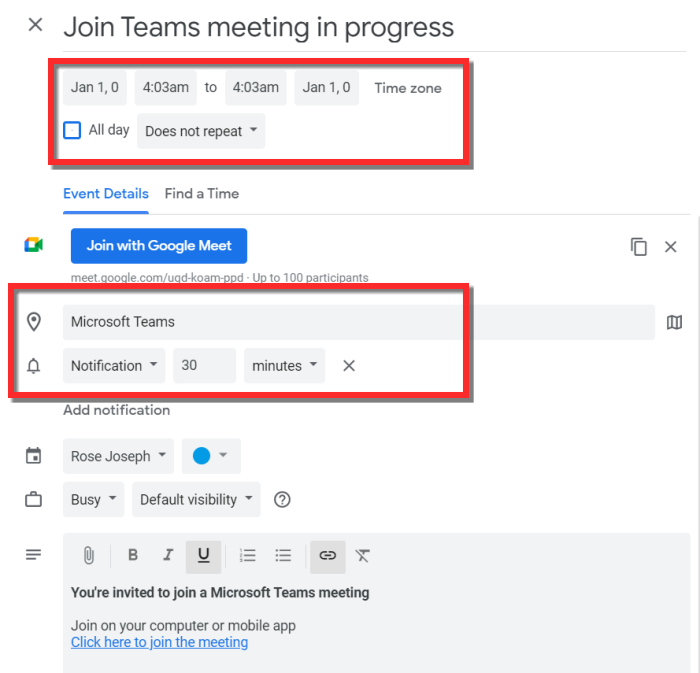
The Google Calendar page with the meeting information will now be open. Set the name, time, date and other information regarding the meeting here.
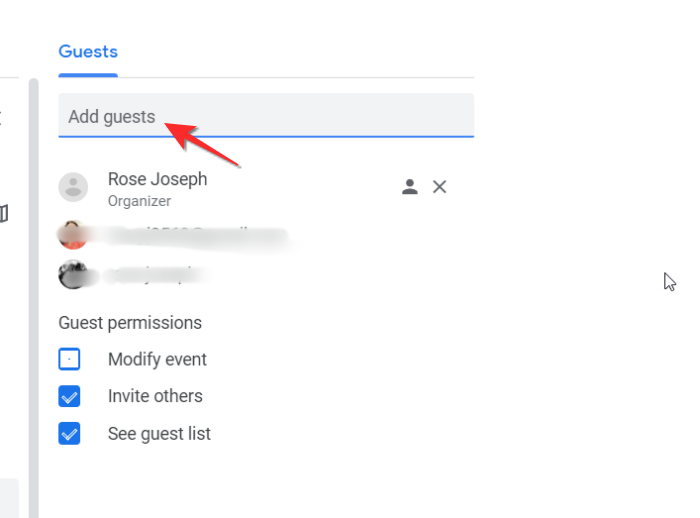
From the Add Guests section, add the email-ids of the friends/family that you want to invite to the meeting.
Once you’re satisfied with the information about the meeting, click the Save button.
Those who have been invited to the meeting can click the link and join the meeting.
Method #04: Invite using Outlook Calendar
Once you’re in the meeting, a window will open with methods to allow you to send the invitation to the meeting. Here, click the third option i.e Share Via Outlook Calendar option.

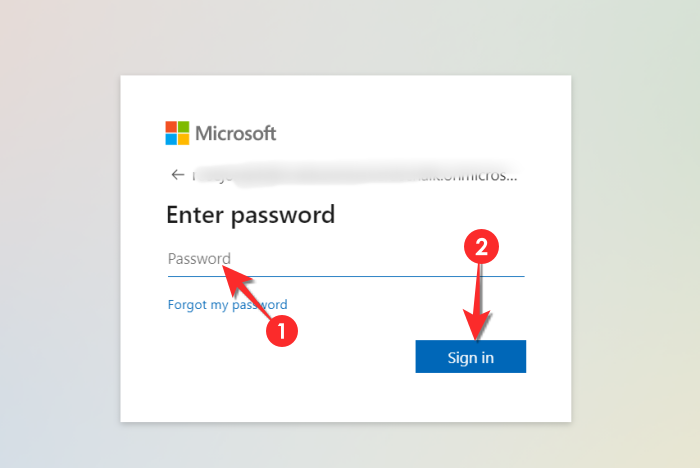
If you are already logged in then you will directly be taken to the Calendar, if not, then you must log in to your Outlook Calendar first. Select your account and type in your password in the text box. Once you are done, click the Sign In button.
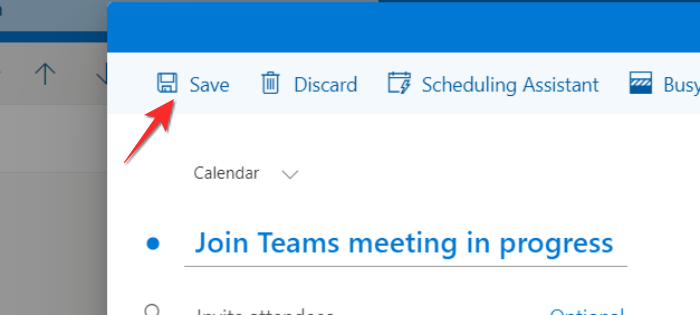
On the Calendar page, a window will automatically be open with the details of the Team Meeting. Make the changes that you want to the details of the meeting.

Make sure that you add the email id of the friends and family that you want to invite to the meeting.
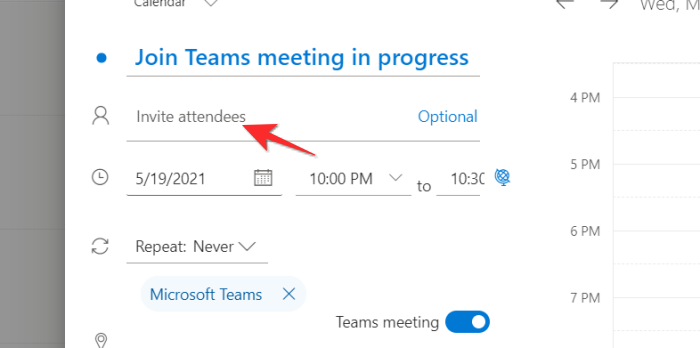
Once you are done with the details, click the Save button.
How to start a Microsoft Teams personal meeting on phone and invite friends and family
There will be four icons on the bottom, tap the video camera icon that indicates the Meet section of the app.
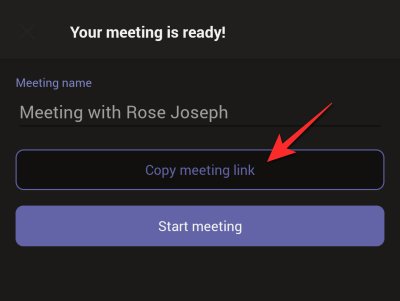
Tap the Meet button once you are in the section.

Now, you can do one of two things.
Tap the Copy meeting link button and paste the link in the family/friends group chat or personal chat/messages. You can also compose a mail and send the link to your contact using their email id. It’s up to you how you share the link. They can simply click the link on their phone to join the meeting.
Alternatively:
Or, you can tap the Start Meeting button instead.

Tap the Join Now button.

Once you are in the meeting, tap the Add participants button.

The meeting will minimize and you will see an Add People option on the top, tap that option only if all your family/friends whom you want to invite to the meeting are already on Microsoft Teams. If they are not, then their names will not appear.
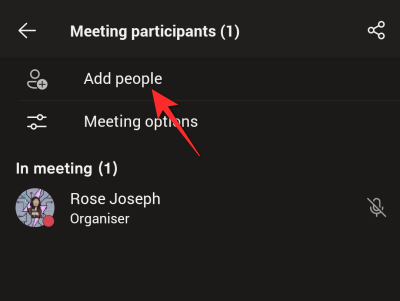
After selecting the contacts, tap the tick icon on the top right.

Alternatively, tap the Share icon on the top right of the screen.

From the Share window that then opens, you can send the link to the contact of your choice personally, the Social Media platform of your choice, via Gmail or any other location available on your phone. Simply tap the contact/icon and then paste the link. The meeting information will be shared.

FAQs: Free video calls on Microsoft Teams for personal use
Do you need a Microsoft account to join a meeting? Can you join without a Teams account?
While the link itself is available to anyone outside the Teams ecosystem. However, if the user does not have a Teams Account, then upon clicking the link, the user will be redirected to the Download page for the Microsoft Teams applications for Windows and phone along with a link to the website. Only after creating an account will the user be able to access the meeting.
Do you need a separate meeting link for the phone and computer?
No, you don’t need a separate link for the phone and computer. The meeting link remains unchanged regardless of where the user chooses to access it. As long as the user has a Teams account and clicks the link, they can enter the meeting.
How many people can you invite to your free video call
Generally, up to 100 people can join a free video call on Microsoft Teams. Considering the special circumstances of COVID-19, this number has been increased to 300. Microsoft will inform its users when the special increase in numbers goes back to the general set i.e 100.
How to admit people to a Teams meeting automatically
Unless you change the settings to reflect otherwise, you will have to Admit users who must wait in the lobby in order to join a meeting. Depending on the setting in Meeting options, you can decide whether the participant can enter the meeting with or without your permission. Here’s how you can customize the meeting options automatically:
On computer
Log in to your Teams account and create a Meeting like we showed you in the previous sections. Once you’re inside the Meeting, click the three-dot menu and then click the show meeting details option.
A new panel will open on the right, click the Meeting Options link that is available here.

The Meeting Options menu will have two questions, the first one asks who can bypass the lobby along with a dropdown menu that will reflect Only me. Click the dropdown menu.

Select the Everyone option from the dropdown menu.

Now, everyone will be able to join the meeting without having to wait in the Lobby.
On phone
These settings can only be changed from the website/Desktop application.
Why am I unable to change the Bypass Settings?
If you are using a Teams account that has been designated by your School or Organization, then these settings remain in the control of the Administrator who has allocated you the account details. You will need to communicate with them so that they can edit the control settings according to your requirements.
We hope you found this article helpful! Take care and stay safe.


