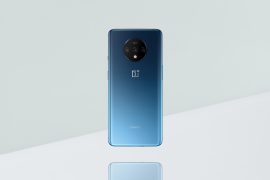
OnePlus 7T brought a slew of changes to the OnePlus 7 lineup, defining the bridge between the OnePlus 7 and the 7 Pro. Not only was the display bumped up to 90Hz, its camera system got upgraded to a triple-lens setup that welcomed a telephoto and ultrawide sensor. If you’re still not impressed with that for your daily photo game, you might want to give it a fresh shade in the form of Google Camera.
With this little tool set up, you will be able to exploit Google’s powerful machine learning algorithms for capturing stunning photos on your OnePlus 7T. To make things simple, you’re giving your OnePlus 7T, the Google Camera treatment.
Follow the procedure mentioned below and once done, your OnePlus 7T will be able to click better pictures than it used to with the stock camera. If you’re using a OnePlus 7 Pro instead, a guide to install and use GCam is given here.
Downloads
Download any one of the following APKs and your preferred set of GCam settings.
GCam APK for OnePlus 7T
- 6.2_GCam_Arnova_2.2.2b2.apk by Arnova8G2
- xtreme_6-1_beta11-for-Q.apk by xtrme
- GCam-6.2.030_Arnova8G2_Urnyx05-v2.3.apk by Urnyx05 »
Pre-configured GCam settings
- Hooolm_v10_Savitar_ZA3.xml
- XDeadshoTX_v2.1Q-2.2.2.xml
- Xcam_beta_11_Fiz_DSLR_AWB_IMX.xml
- XDeadshoTX_v1.8Q_naturalcolor.xml
How to get Google camera on OnePlus 7T
Keep the aforementioned APKs and XML files ready and carefully follow the instructions from down below.
- Install any of the three GCam apps from the links above.
- If you used Chrome to download the files, allow Chrome to install apps from unknown sources by heading over to Settings.
- Under Settings, search for “unknown” and click on Install Unknown apps.
- In the next window, allow Chrome or the browser you generally use, to install apps from unknown sources. A detailed step-by-step procedure is available here.
- After the app is installed, tap Open to use Google Camera directly on your OnePlus 7T.
- To explore further inside Google Camera, you can load preconfigured GCam settings by following these steps:
- Launch your default File manager and locate the GCam settings available in XML format. In most cases, the files will be available inside the Downloads folder.
- Copy the downloaded XML files and paste them in this location – Internal Storage > Gcam > Configs. If these folders are not available, create them.
- After moving the files, open GCam.
- Double-tap on the blank space around the camera shutter.
- A box will pop up asking you to select a config of your choice. Select your preferred config and click Restore. Sometimes, you’ll need to load the XML file twice to make it work.
- You can now click awesome pictures on your OnePlus 7T.
Tips for Pro users
Besides XMLs, you can also install libraries to get the best out of the XML in use. Some XMLs will work better with a specific library. Here’s a guide to install libraries.
- Open the GCam app.
- Head over to More > Settings > HDR + Control.
- Tap on Custom Libs and click “Get Updates“.
- From here, choose the appropriate library for your XML setting.
- Savitar ZA3 lib is known to work well with Hooolm_v10_Savitar_ZA3.xml
- Fi v2 lib with XDeadshoTX_v2.1Q-2.2.2.xml
- Fi v4b for GCam-6.2.030_Arnova8G2_Urnyx05-v2.3.apk
You’re up and running to make the most out of your OnePlus 7T camera. But there’s one thing you should note – GCam only comes in hand to make pictures out of the main camera pop out. To utilize the ultrawide and telephoto lenses, use the default camera on your OnePlus 7T. Rooted OnePlus 7T devices can flash this module through Magisk (via Reddit) to use the other cameras.