What to know
- Permutation prompts allow you to enter variations of a prompt that you can use to create multiple image grids from a single /imagine command on Midjourney.
- When Permutation Prompts are used, Midjourney will process each of your variations as individual jobs but you don’t need to enter prompts for each of them, just a single prompt will do the job.
- You can use Permutation Prompts by adding options to variate inside curly brackets {}. The syntax for such a prompt should be like this:
/imagine prompt <description {option 1, option 2, option 3}> - Permutations can be used to create images with multiple subjects, in multiple environments, using various artistic styles, more than one aspect ratio, and using multiple Midjourney models all within a single prompt.
What are Permutation Prompts on Midjourney?
Ideally, when you enter a prompt on Midjourney, you get a set of 4 different images based on the way you described it in your prompt. On some occasions, you may want Midjourney to create different versions of an image with slightly varied descriptions in the prompt. This is where Permutation Prompts come in handy as they can be used to generate variations of a prompt in such a way that you can create multiple image grids from a single /imagine command.
When you use Permutation Prompts to generate variations, Midjourney will process each of these variations as individual jobs. Since each job on Midjourney consumes a certain number of GPU minutes, when you use Permutation Prompts, you will consume GPU minutes per job, thus using up more GPU minutes than a usual image generation. To help you avoid losing unnecessary GPU minutes, Midjourney will show a confirmation message that you need to approve before processing a Permutation Prompt request.
Permutation Prompts can be used to create variations of any part of a prompt like its text description, parameters, image prompts, and prompt weights. The feature can only be used for prompts you enter on Fast Mode; so you won’t be able to use these prompts on Relax Mode or Turbo Mode.
The number of jobs you can create upon every use of Permutation Prompts is dependent on the type of subscription you’ve enrolled on Midjourney.
- Midjourney Basic: Users here can generate up to 4 imagine jobs with a single Permutation Prompt.
- Midjourney Standard: Users here can generate up to 10 imagine jobs with a single Permutation Prompt.
- Midjourney Pro: Users here can generate up to 40 imagine jobs with a single Permutation Prompt.
How to use Permutation prompts on Midjourney
You can create a prompt using Permutation Prompts by adding the options you want to variate inside curly brackets, i.e., “{}”. Midjourney will acknowledge that you’re using Permutation prompts by looking for the options you enter inside {} and since you’ll be entering more than one option to variate, you’ll need to separate them using commas “,” inside these brackets.
You can follow this syntax for generating images using Permutation Prompts: /imagine prompt <description {option 1, option 2, option 3}>
Since there are a bunch of ways you can use Permutation Prompts, we’ll explain how you can use them to achieve different kinds of results every time. You can follow the instructions we explain inside each of the cases below to see how Permutation Prompts can be used for different image creations on Midjourney.
Case 1: To create multiple subjects
The most basic use-case for Permutation Prompt involves creating multiple subjects within a single /imagine request. You can use this tool to create subjects in different varieties; like, for instance, different species of birds/animals, different types of fruits/vegetables, objects in different colors, etc. The syntax for such a prompt should look like this: /imagine prompt a {type 1, type 2, type 3} subject <rest of the description>
To help you understand how Permutation Prompts can be used to create multiple subjects, we’ll demonstrate the prompt we use to create illustrations of one fruit (apple, in this case) in different colors (red, yellow, and green). To get started, open any of Midjourney’s Discord servers or access the Midjourney Bot from your Discord Server or Discord DM. Regardless of how you access it, tap on the text box at the bottom.

Here, type /imagine and select the /imagine option from the menu.

Now, enter your desired description for the image. While scripting this prompt, we’ll specify the multiple options inside curly brackets like {red, yellow, and green} and leave other parts of the prompt outside the brackets. Take a look at the screenshot below to check out what the final prompt looks like.
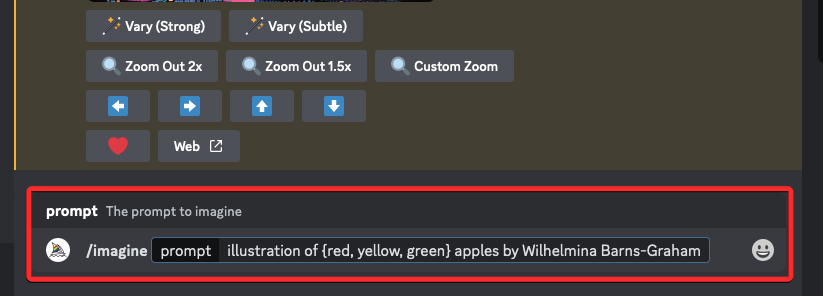
Once you’ve finished entering a prompt, press the Enter key on your keyboard.
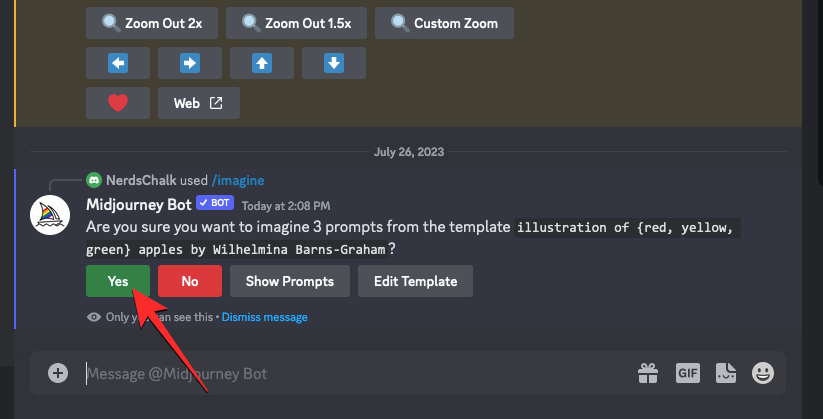
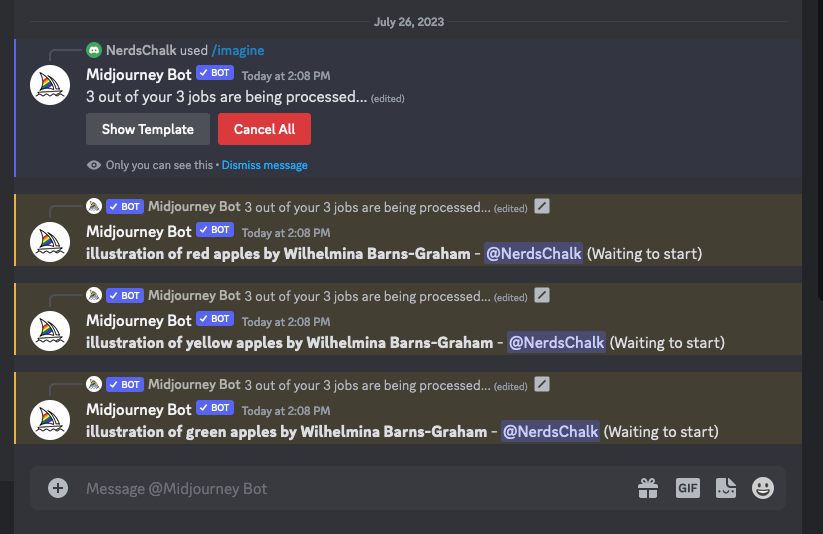
When you do that, the Midjourney Bot will show a confirmation message before processing. To proceed with the processing, click on Yes from this response. You also get options to cancel the request, edit the prompt template, or make Midjourney show all prompts that will be individually processed from the Permutation Prompt you entered.
After you confirm the processing request from the Midjourney Bot, it will start generating images based on the individual prompts simultaneously.
Depending on the GPUs available, all the image grids may begin processing at once or one at a time; so you need to wait a little longer than usual to see all of your generations from the Permutation Prompt.
Once done, you’ll see multiple image grids on the screen for each of the /imagine jobs that were created from the Permutation Prompt.

You can upscale or vary the images that get generated based on your preference or use the Permutation Prompt again to create different sets of subjects.
| Prompt | Image Grid 1 | Image Grid 2 | Image Grid 3 |
| illustration of {red, yellow, green} apples by Wilhelmina Barns-Graham |  |
 |
 |
Case 2: To create images in multiple environments
Besides creating multiple subjects, Permutation Prompts can also be used to generate images in different environments. For instance, you can use the feature to create images with a subject with different lighting, backgrounds, conditions, etc. The syntax for such a prompt should look like this: /imagine prompt <description> captured at {environment 1, environment 2, environment 3} or /imagine prompt <description> with {background 1, background 2, background 3}
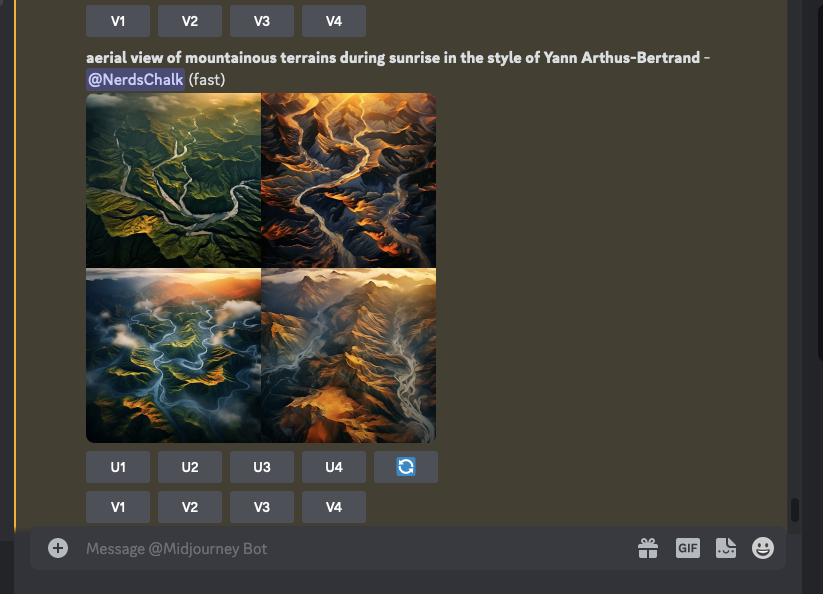
To help you understand how Permutation Prompts can be used for creating multiple environments, we’ll demonstrate the prompt we use to create aerial views of mountainous terrains in different environments like sunrise, sunset, and during night.
To get started, open any of Midjourney’s Discord servers or access the Midjourney Bot from your Discord Server or Discord DM. Regardless of how you access it, tap on the text box at the bottom.
Here, type /imagine and select the /imagine option from the menu.
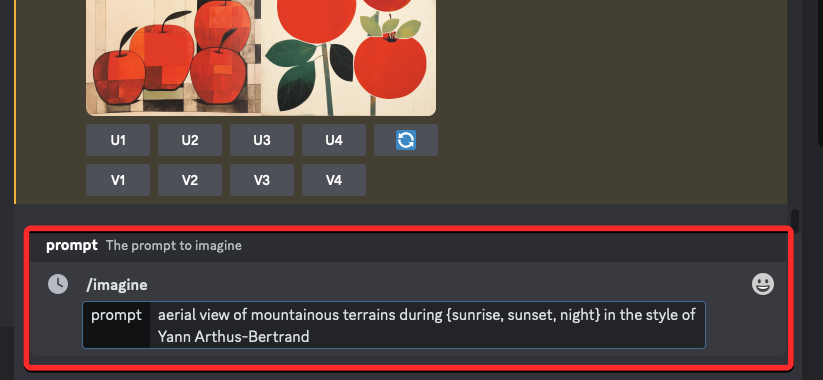
Now, enter your desired description for the image. While scripting this prompt, we’ll specify the multiple options inside curly brackets like {sunrise, sunset, night}. Take a look at the screenshot below to check out what the final prompt looks like.
Once you’ve finished entering a prompt, press the Enter key on your keyboard.
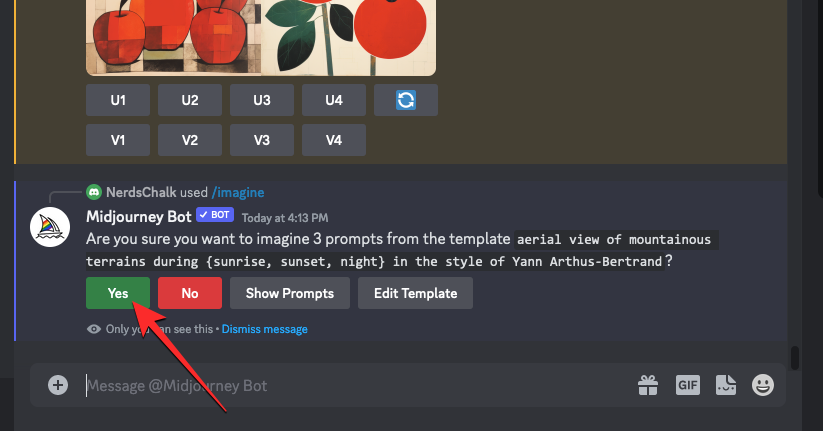
When you do that, the Midjourney Bot will show a confirmation message before processing. To proceed with the processing, click on Yes from this response. You also get options to cancel the request, edit the prompt template, or make Midjourney show all the prompts that will be individually processed from the Permutation Prompt you entered.
After you confirm the processing request from the Midjourney Bot, it will start generating images based on the individual prompts simultaneously. Depending on the GPUs available, all the image grids may begin processing at once or one at a time; so you need to wait a little longer than usual to see all of your generations from the Permutation Prompt.
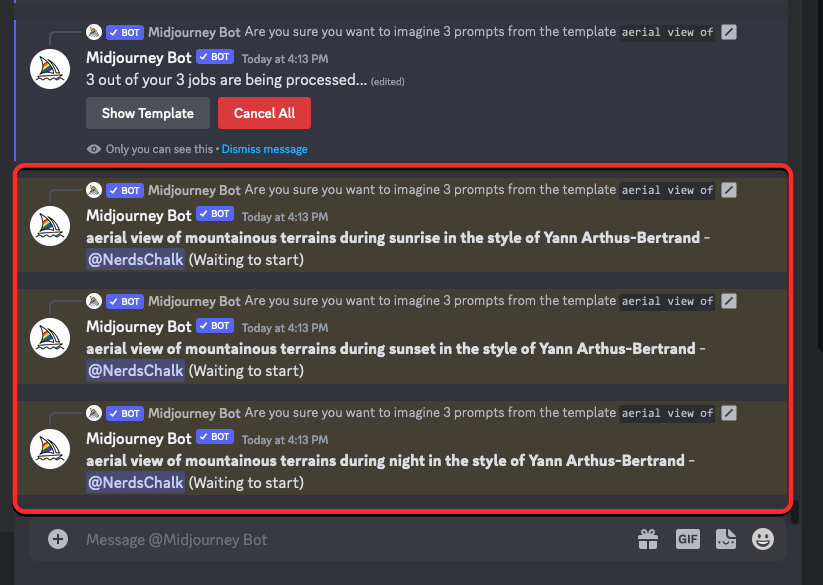
Once done, you’ll see multiple image grids on the screen for each of the /imagine jobs that were created from the Permutation Prompt.
You can upscale or vary the images that get generated based on your preference or use the Permutation Prompt again to create different sets of subjects.
| Prompt | Image Grid 1 | Image Grid 2 | Image Grid 3 |
| aerial view of mountainous terrains during {sunrise, sunset, night} in the style of Yann Arthus-Bertrand |  |
 |
 |
Case 3: To create images in multiple art styles
Permutation prompts can also be used to generate images with the same description in different art styles. These art styles can be anything from different mediums of art, art movements, and artistic techniques to different styles of photographers, designers, and illustrators. The syntax for such a prompt should look like this: /imagine prompt <description> captured by {artist 1, artist 2, artist 3} or /imagine prompt {style 1, style 2, style 3} art of <description>
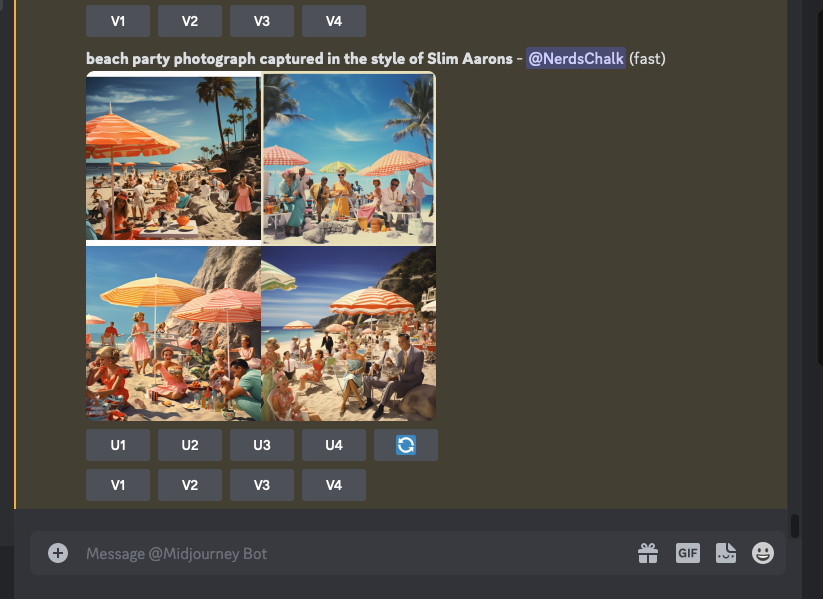
To help you understand how Permutation Prompts can be used for generating images with a specific description with multiple art styles, we’ll demonstrate the prompt we use to conceptualize a “beach party photograph” captured by three different artists (Chris Burkard, LeRoy Grannis, and Slim Aarons, in this instance).
To get started, open any of Midjourney’s Discord servers or access the Midjourney Bot from your Discord Server or Discord DM. Regardless of how you access it, tap on the text box at the bottom.
Here, type /imagine and select the /imagine option from the menu.
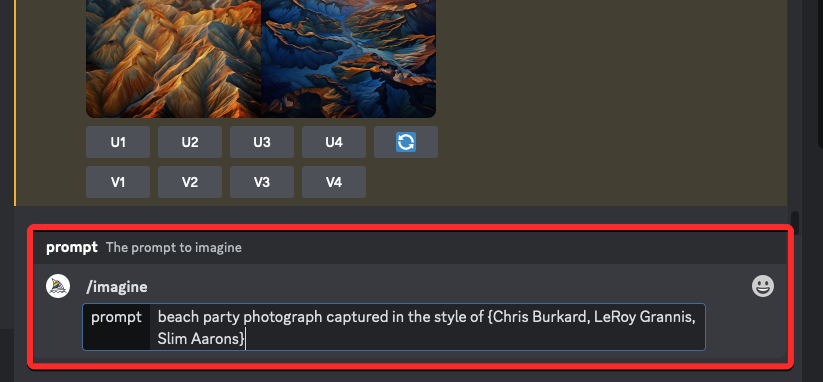
Now, enter your desired description for the image. While scripting this prompt, we’ll specify the multiple options inside curly brackets like {Chris Burkard, LeRoy Grannis, Slim Aarons}. Take a look at the screenshot below to check out what the final prompt looks like.
Once you’ve finished entering a prompt, press the Enter key on your keyboard.
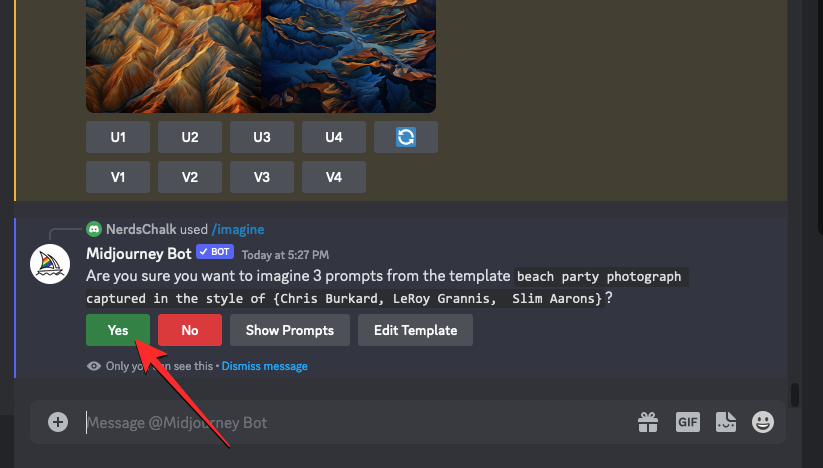
When you do that, the Midjourney Bot will show a confirmation message before processing. To proceed with the processing, click on Yes from this response. You also get options to cancel the request, edit the prompt template, or make Midjourney show all the prompts that will be individually processed from the Permutation Prompt you entered.
After you confirm the processing request from the Midjourney Bot, it will start generating images based on the individual prompts simultaneously. Depending on the GPUs available, all the image grids may begin processing at once or one at a time; so you need to wait a little longer than usual to see all of your generations from the Permutation Prompt.
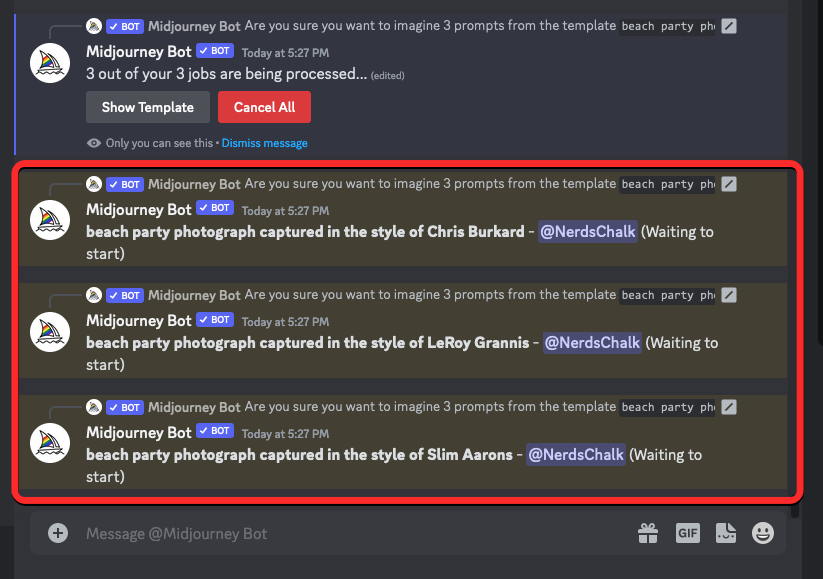
Once done, you’ll see multiple image grids on the screen for each of the /imagine jobs that were created from the Permutation Prompt.
You can upscale or vary the images that get generated based on your preference or use the Permutation Prompt again to create different sets of subjects.
| Prompt | Image Grid 1 | Image Grid 2 | Image Grid 3 |
| beach party photograph captured in the style of {Chris Burkard, LeRoy Grannis, Slim Aarons} |  |
 |
 |
Case 4: To create images in multiple aspect ratios
Suppose you wish to create images of the same description in different dimensions. In that case, Midjourney allows you to generate multiple sets of images using Permutation Prompts by specifying your desired aspect ratios inside curly brackets {}. The syntax for such a prompt should look like this: /imagine prompt <description> --ar {ratio 1, ratio 2, ratio 3}
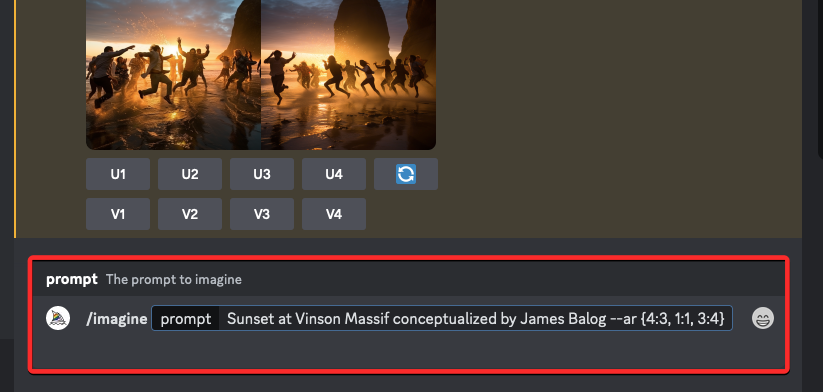
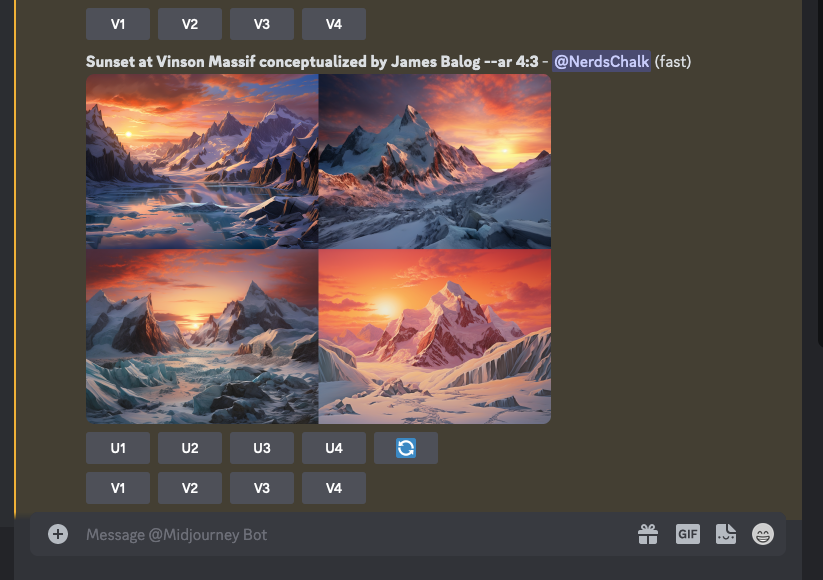
To make it easier for you to understand, we’ll demonstrate the prompt we used to create images of a sunset at a mountain range in Antarctica captured in different dimensions like 4:3, 1:1, and 3:4.
To get started, open any of Midjourney’s Discord servers or access the Midjourney Bot from your Discord Server or Discord DM. Regardless of how you access it, tap on the text box at the bottom.
Here, type /imagine and select the /imagine option from the menu.
Now, enter your desired description for the image. While scripting this prompt, we’ll specify the multiple options inside curly brackets like {4:3, 1:1, 3:4} with the final prompt looking something like this.
Once you’ve finished entering a prompt, press the Enter key on your keyboard.
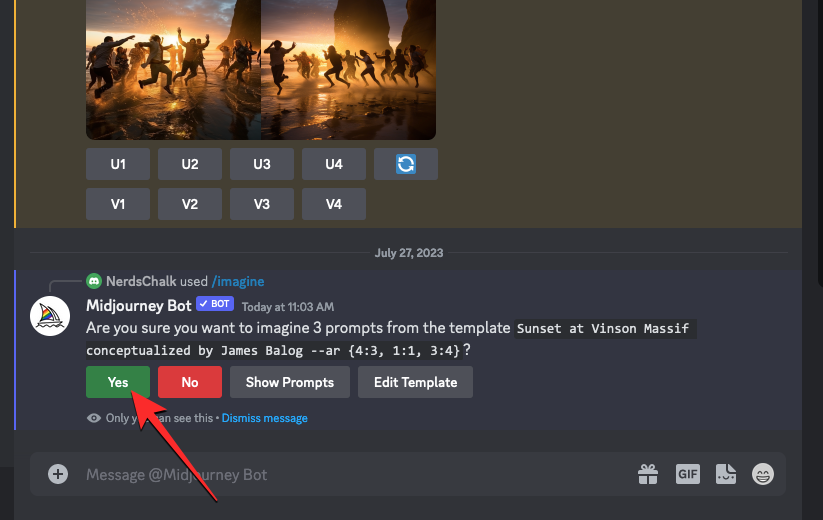
When you do that, the Midjourney Bot will show a confirmation message before processing. To proceed with the processing, click on Yes from this response. You also get options to cancel the request, edit the prompt template, or make Midjourney show all the prompts that will be individually processed from the Permutation Prompt you entered.
After you confirm the processing request from the Midjourney Bot, it will start generating images based on the individual prompts simultaneously. Depending on the GPUs available, all the image grids may begin processing at once or one at a time; so you need to wait a little longer than usual to see all of your generations from the Permutation Prompt.
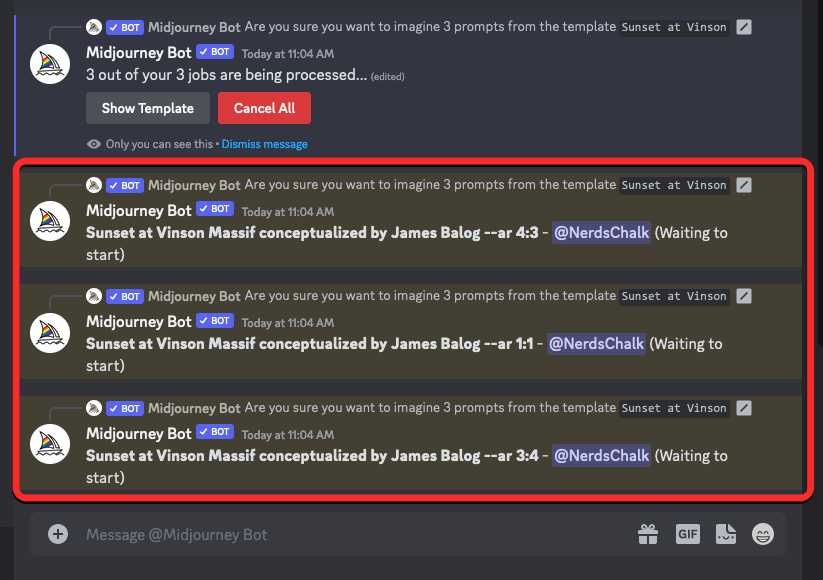
Once done, you’ll see multiple image grids on the screen for each of the /imagine jobs that were created from the Permutation Prompt.
You can upscale or vary the images that get generated based on your preference or use the Permutation Prompt again to create different sets of subjects.
| Prompt | Image Grid 1 | Image Grid 2 | Image Grid 3 |
| Sunset at Vinson Massif conceptualized by James Balog –ar {4:3, 1:1, 3:4} |  |
 |
 |
Case 5: To create images using multiple models
You can also use Permutation Prompts to generate images with the same description across multiple models of Midjourney using just one /imagine command. You can use different versions like 1, 2, 3, 4, 5, 5.1, and 5.2 by giving them a prefix containing --version or --v. Midjourney also allows you to apply its Niji model using the --niji parameter or its test models like --test and --testp as Permutation Prompts when creating images.
If you wish to create images using multiple models, you can follow this syntax: /imagine prompt <description> --{v 5, v4, v3} or /imagine prompt <description> --{v 5, testp, niji} depending on the models you wish to use.
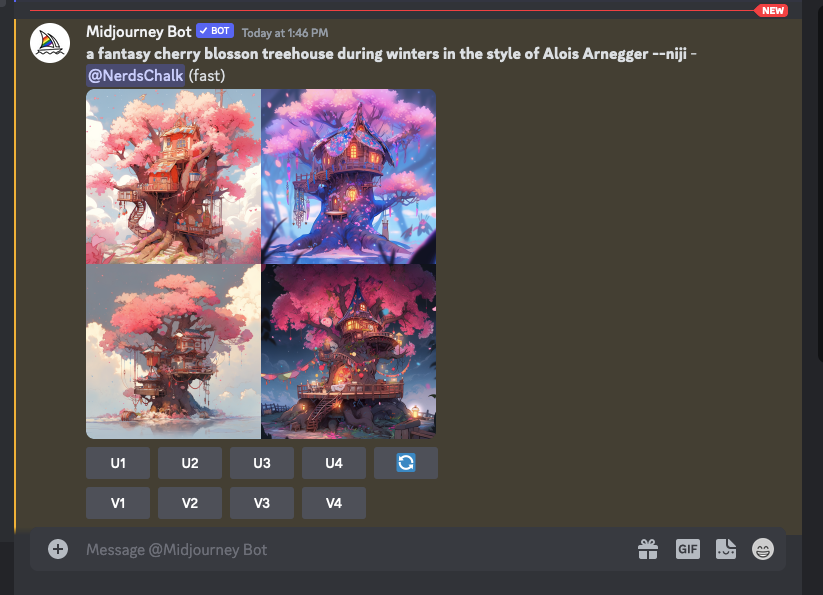
To make it easier for you to understand, we’ll demonstrate the prompt we used to create images of a cherry blossom tree using different Midjourney models like version 5.2, niji, and test.
To get started, open any of Midjourney’s Discord servers or access the Midjourney Bot from your Discord Server or Discord DM. Regardless of how you access it, tap on the text box at the bottom.
Here, type /imagine and select the /imagine option from the menu.
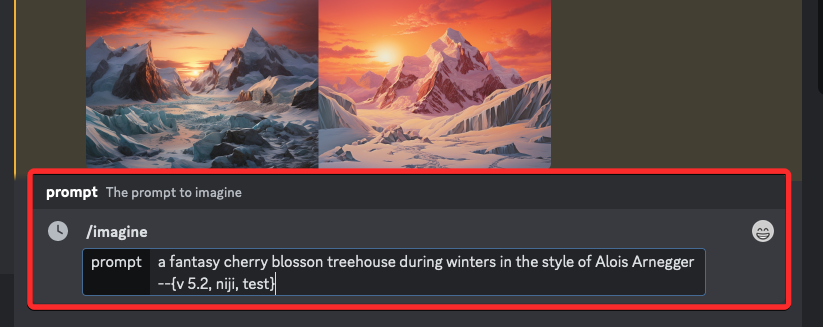
Now, enter your desired description for the image. While scripting this prompt, we’ll specify the multiple options inside curly brackets like –{v 5.2, niji, test}. The final prompt should look something like what you see in the screenshot below.
Once you’ve finished entering a prompt, press the Enter key on your keyboard.
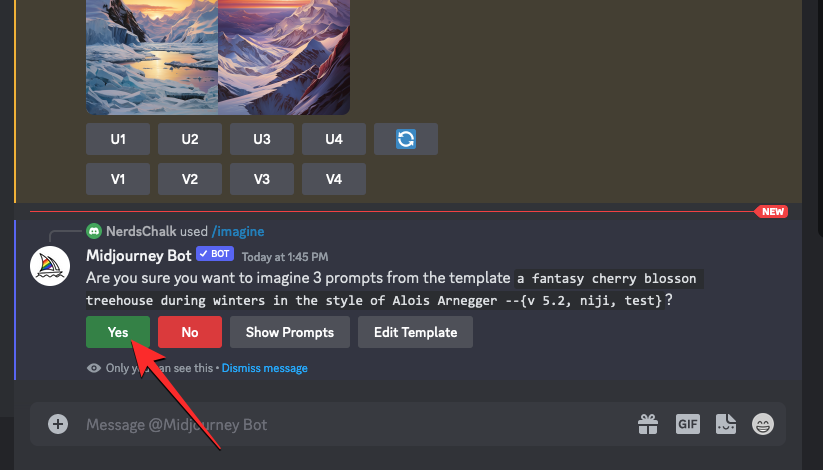
When you do that, the Midjourney Bot will show a confirmation message before processing. To proceed with the processing, click on Yes from this response. You also get options to cancel the request, edit the prompt template, or make Midjourney show all the prompts that will be individually processed from the Permutation Prompt you entered.
After you confirm the processing request from the Midjourney Bot, it will start generating images based on the individual prompts simultaneously. Depending on the GPUs available, all the image grids may begin processing at once or one at a time; so you need to wait a little longer than usual to see all of your generations from the Permutation Prompt.
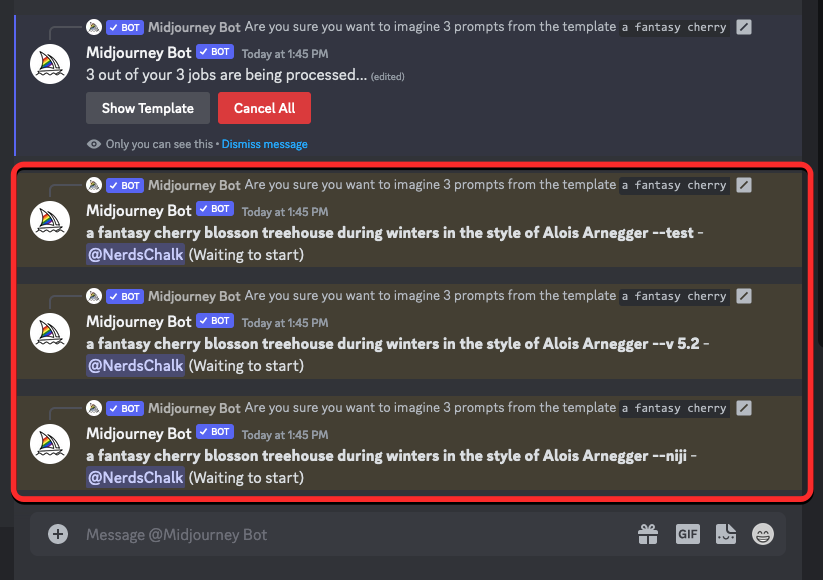
Once done, you’ll see multiple image grids on the screen for each of the /imagine jobs that were created from the Permutation Prompt.
You can upscale or vary the images that get generated based on your preference or use the Permutation Prompt again to create different sets of subjects.
| Prompt | Image Grid 1 | Image Grid 2 | Image Grid 3 |
| a fantasy cherry blossom treehouse during winters in the style of Alois Arnegger –{v 5.2, niji, test} |  |
 |
 |
Can you add multiple bracketed options in the same prompt?
Yes. Midjourney allows users to add multiple sets of Permutation prompts during image creation, meaning you can add more than one bracketed option inside your input prompt. It’s also possible to nest multiple sets of bracketed options inside other sets of brackets in a prompt.
However, there’s one HUGE catch to using multiple Permutation prompts on Midjourney. The number of options you enter inside the curly brackets is dependent on the number of maximum jobs Midjourney allows on your account. This is because the maximum number of jobs that Midjourney can create with Permutation Prompts varies based on your subscription. Here’s the limit we explained earlier:
- Midjourney Basic users can generate up to 4 imagine jobs with a single Permutation Prompt.
- Midjourney Standard users can generate up to 10 imagine jobs with a single Permutation Prompt.
- Midjourney Pro uses can generate up to 40 imagine jobs with a single Permutation Prompt.
So, for instance, if you’re enrolled on the Basic subscription, you can only use two sets of brackets that contain only two options each, all of which combined will generate a total of 4 jobs in a single prompt.
If you enter prompts with multiple bracketed options that exceed the maximum job creation limit for your account, you’ll see the Job action restricted message as a response from the Midjourney Bot.
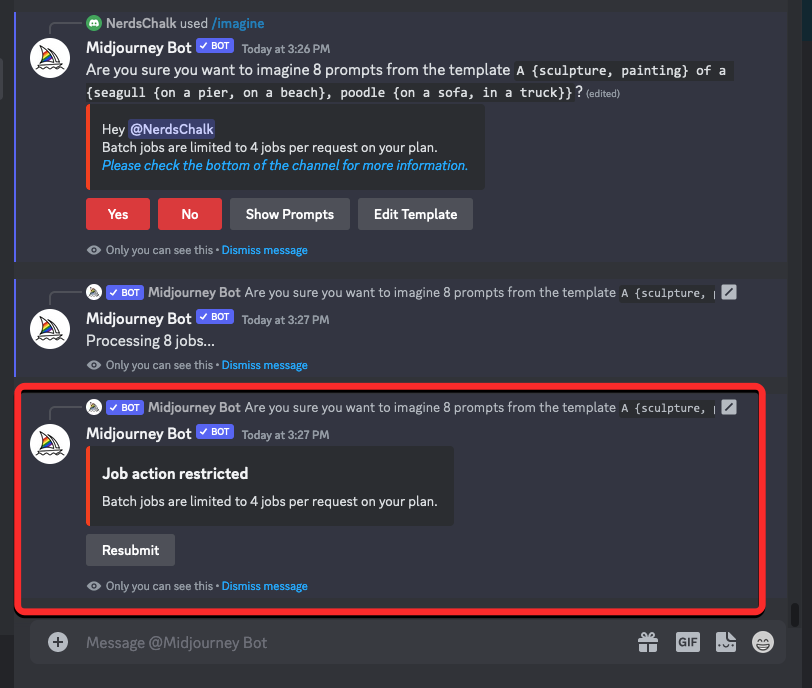
Inside this message, the bot will share the maximum job limit that has been set for your Midjourney account.
How to add multiple permutations in a single prompt
There are two ways you can add multiple permutations in a prompt on Midjourney:
- You can either add different brackets of options with a prompt like this:
/imagine prompt a drawing/photo/painting of a {lion, dog} set {in a jungle, on a sofa} - Or, you can nest sets of bracketed options inside other sets of brackets with a prompt like this:
/imagine prompt a picture of a {lion {in a jungle, at the zoo}, dog {on a sofa, out for a walk}}
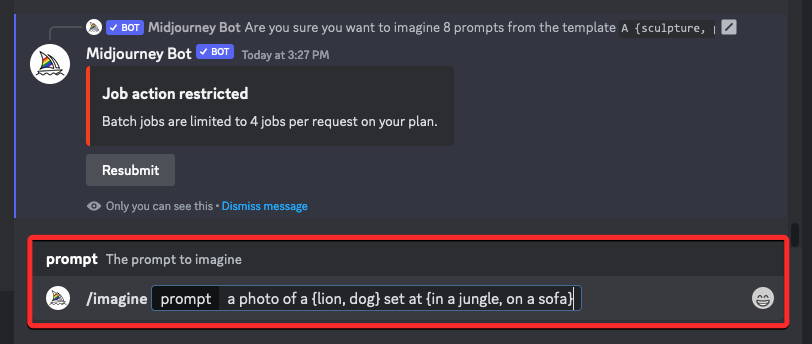
In this instance, we’ll use the first prompt above to create pictures of a dog and a lion in two different environments using Permutation prompts. To get started, open any of Midjourney’s Discord servers or access the Midjourney Bot from your Discord Server or Discord DM. Regardless of how you access it, tap on the text box at the bottom.
Here, type /imagine and select the /imagine option from the menu.
Now, enter your desired description for the image. While scripting this prompt, we’ll specify one set of options (lion, dog) in one bracket and the other set (in a jungle, on a sofa) in a different bracket. The final prompt should look something like what you see in the screenshot below.
Once you’ve finished entering a prompt, press the Enter key on your keyboard.
When you do that, the Midjourney Bot will show a confirmation message before processing. To proceed with the processing, click on Yes from this response. You also get options to cancel the request, edit the prompt template, or make Midjourney show all the prompts that will be individually processed from the Permutation Prompt you entered.

After you confirm the processing request from the Midjourney Bot, it will start generating images based on the individual prompts simultaneously. Depending on the GPUs available, all the image grids may begin processing at once or one at a time; so you need to wait a little longer than usual to see all of your generations from the Permutation Prompt.
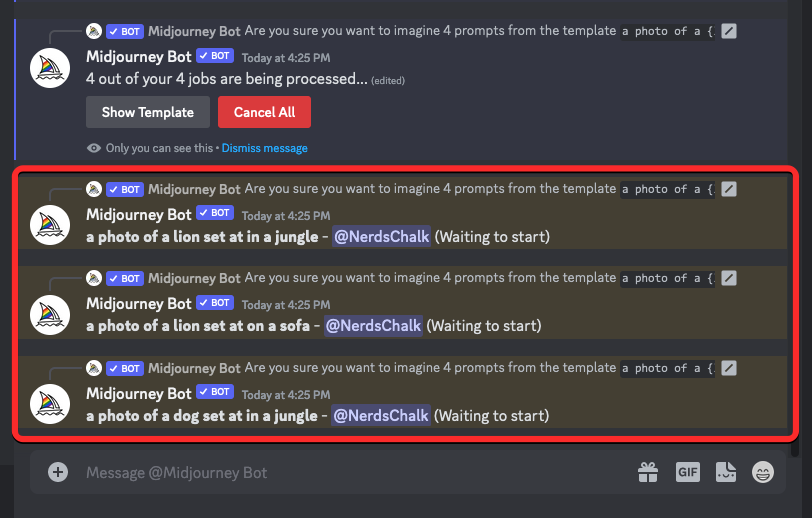
Once done, you’ll see multiple image grids on the screen for each of the /imagine jobs that were created from the Permutation Prompt.
You can upscale or vary the images that get generated based on your preference or use the Permutation Prompt again to create different sets of subjects.
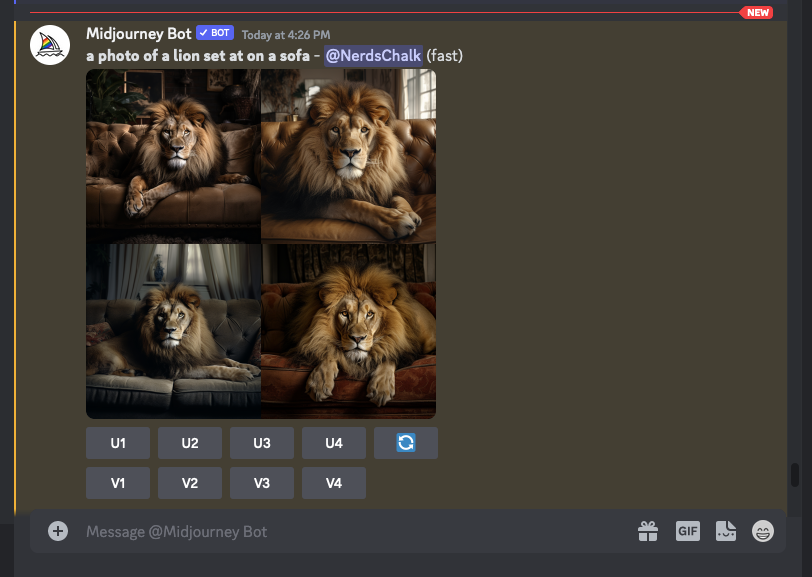
| Prompt | Image Grid 1 | Image Grid 2 | Image Grid 3 | Image Grid 4 |
| a photo of a {lion, dog} set {in a jungle, on a sofa} |  |
 |
 |
 |
That’s all you need to know about using Permutation Prompts to generate multiple image creations on Midjourney.