
With the spread of coronavirus, collaboration tools like Zoom have seen a meteoric rise in user base as organizations from around the world are shifting to remote working. Zoom is not only helping offices and schools to continue offering their services but is also providing casual users with the option to use an add-on like Snapchat Filters that lets you turn yourself into a potato during a meeting.
Of all the video conferencing and collaboration tools in the market, it’s a known fact that Zoom offers the most feature-packed service, and yet, it continues to roll out request updates. Despite its efforts, there’s a likelihood that you might run into problems every now and again when using Zoom.
In this post, we’re going to discuss one major issue that Zoom users are facing at the moment and help you fix them so that you can get back to doing your routine work on Zoom.
- What is the virtual camera not working problem
- Why is Zoom not able to use your virtual camera
- Can you fix the virtual camera problem in Zoom
- How to fix the ‘virtual camera not working’ problem in Zoom
-
What else can you try – Quick Fixes
- Make sure your virtual cam is installed and turned On
- Close and re-open your virtual camera app
- Force shut Zoom and restart it
- Disable Hardware Acceleration on your virtual camera software
- Allow Zoom and virtual camera access to camera on Mac
- Enable Camera access inside Windows Privacy Settings
- Restart your computer
- Is your virtual camera up to date
- Reinstall webcam driver
- Just accept virtual cameras are not compatible with SOME apps
What is the virtual camera not working problem
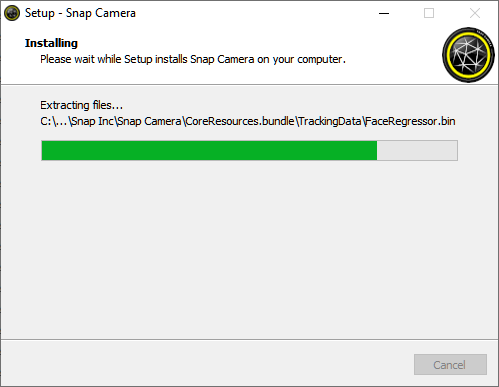
The latest problem with Zoom is the one regarding its functionality with a virtual camera. Virtual cameras are software that modifies the output of your physical camera or webcam to produce images with slight changes like a potato face or a change in background. There are several virtual camera software available online including Snap Camera, ManyCam, Ecamm Live, and more.
Users are reporting that the current version of Zoom does not load virtual camera devices. Zoom seems to have disabled virtual cameras on both Mac and PC and although the issue first started occurring for users on Mac, it has started appearing for Windows users as well.
Why is Zoom not able to use your virtual camera
The inability to use a virtual camera software on Zoom is believed to be due to a recent update (version 4.6.9) to the Zoom app on Mac and Windows since the previous version works without any issue. It’s unclear if Zoom’s latest app update was to break the functionality of virtual cameras or if the update was addressed to solving security issues which instead broke the virtual camera support.
Can you fix the virtual camera problem in Zoom
Zoom officially hasn’t offered any fixes to the breaking functionality of virtual camera software on its video conferencing tool. However, you can manually fix the virtual camera problem inside Zoom. You need to note that the following workaround might not work for you and if it doesn’t, the best solution is to wait for Zoom to fix this issue.
How to fix the ‘virtual camera not working’ problem in Zoom
This guide will help you fix the virtual camera not working problem if you’re someone who installed the latest Zoom app version 4.6.9 on your PC. At the moment, installing an older version of Zoom seems to work for many users as stated by Damon Kiesow.
Method 1 – Remove official signature from Zoom app on Mac
Zoom’s latest update has brought up concerns regarding the compatibility of virtual cameras on Mac because of a feature called ‘Library validation’. Library validation restricts plugins that aren’t signed by Apple or Zoom and the only way you can solve this is by unsigning the latest version of Zoom. You can remove official signature from the Zoom app by following the steps below.
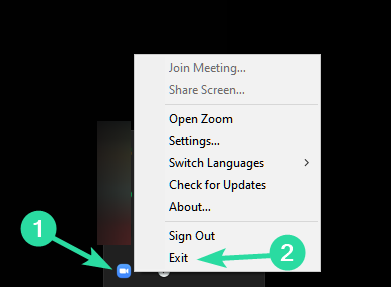
Step 1: Update your Zoom app to the latest version on Mac by opening the app, heading over to the Menu bar > App name > Check for updates, and then updating the app the latest version. After installing the update, force-close the zoom app. 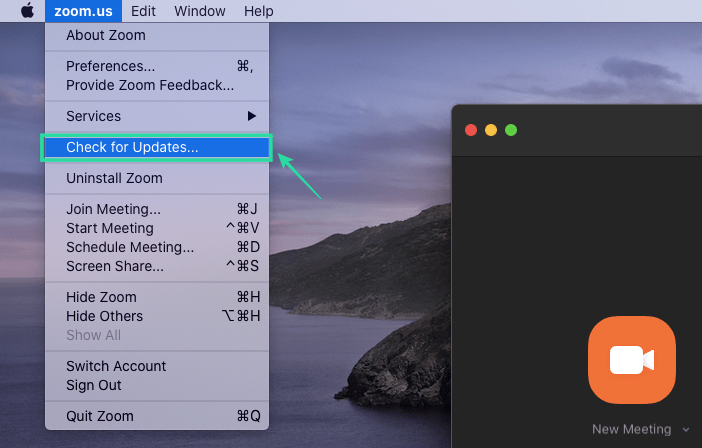
Step 2: Install the Xcode tool on your Mac by opening Terminal and entering the following command and hitting the Enter key: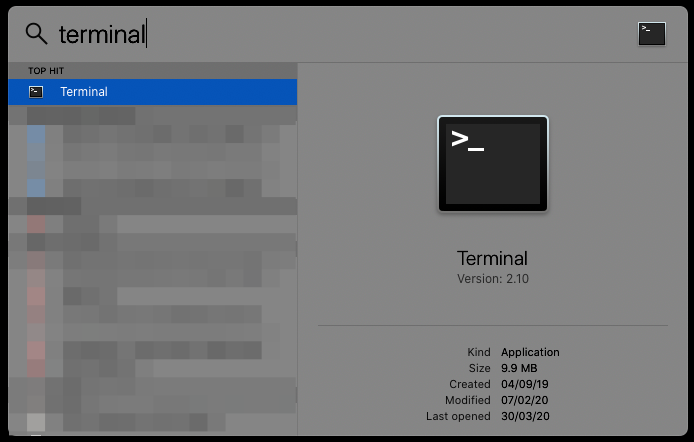
Xcode-select --install
Wait for Xcode to install on your system and then move on to the next step.
Step 3: You can now proceed to unsign the Zoom app by typing the following command and then hitting the Enter key:
sudo codesign --remove-signature /Applications/zoom.us.app/
 Alternatively, you can use the following command, drag the Zoom app from the Applications folder to the Terminal window, and then hit the Enter key.
sudo codesign --remove-signature
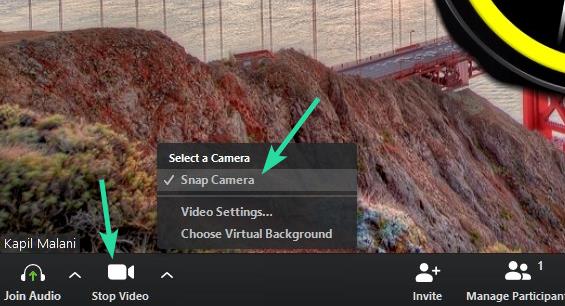
Step 4: You can now open the Zoom app and enable the virtual camera app as your default camera option.
That’s it! The virtual camera app should now start working on Zoom.
Method 2 – Install an older version of Zoom
Step 1: Uninstall the current version of Zoom on your computer.
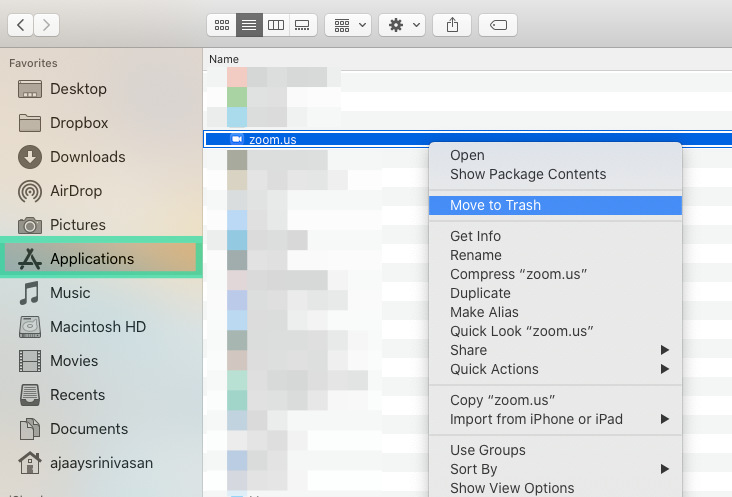
- On Mac: Open Finder > Application, locate Zoom and drag it to the Trash icon. You can then proceed to empty the trash by right-clicking the Trash icon on the dock, selecting ‘Empty Trash’, and then confirming the process.
- On Windows: Hit Windows+E shortcut, click the Uninstall or change the program option at the top, search for Zoom, click on the Uninstall button, and then confirm the action.
Step 2: Download and install a version of Zoom older than version 4.6.9.
- For Mac:
- For Windows:
Step 3: Open the newly installed Zoom app and check if selecting a virtual camera like Snap Camera opens the video output through Snap.
Method 3 – Install via Terminal on Mac
If the above method doesn’t work, you can try the following workaround. It’s important to note that this method will only work for Zoom users on Mac.
Step 1: Open the Terminal app on your Mac by pressing the ‘Command + Spacebar’ shortcut to launch Spotlight, typing Terminal, and double-clicking on the result. 
Step 2: Drag the Zoom app on your Mac from the Applications folder inside Finder to the Terminal window.
Step 3: Type the following command inside the Terminal window, and then press the Enter key
$ pkgutil --expand Zoom.pkg Zoom
$ cd Zoom/Scripts
$ ./7r x zm.7z
What else can you try – Quick Fixes
If the ‘virtual camera not working’ problem persists even after uninstalling and installing an older version of the Zoom app on Mac and Windows, you can try these quick fixes to solve them.
Make sure your virtual cam is installed and turned On
If a virtual camera isn’t working on your Zoom app, make sure your webcam is connected (if you’re using a desktop) and that it is selected as a new input source in your video calling software. You can check whether the webcam is working by opening your default webcam application or trying it out on another video calling software that’s installed on your PC like Zoom, Skype, Microsoft Teams, etc.
Close and re-open your virtual camera app
You can exit the virtual camera app manually first and then start it again to fix the problem you are facing.
Force shut Zoom and restart it
If Zoom isn’t able to detect the virtual camera as the input, you should restart it and try again. To make sure your virtual camera works, you should not only close the video call application but also exit it as many video calling software tend to stay open in the background.
Disable Hardware Acceleration on your virtual camera software
Many virtual camera apps like ManyCam make use of hardware acceleration to to render details better, switch presets, or load higher quality videos. But if you’re using a system with a basic configuration, you will have to disable hardware acceleration to make it work better on your system and also solve issues that you might be faming with the virtual camera.
Allow Zoom and virtual camera access to camera on Mac
Since a virtual camera uses your main camera as its input and modifies it as your default output, it requires access to your camera. Recent versions of macOS give users the ability to customize which app they want to give certain access to. For your virtual camera to work on Zoom, you will have to enable camera access by heading over to System Preferences (from the dock) > Security & Privacy > Privacy tab > Camera and checking the box adjacent to Zoom and your virtual camera.
Enable Camera access inside Windows Privacy Settings
Similar to macOS, Windows also lets you customize if apps on your computer can access your camera. For Zoom and your virtual cameras to work, you need to enable Camera access inside Settings > Privacy > Camera and toggle the ‘Allow apps to access your camera’ option.
Restart your computer
If shutting down the virtual camera app or Zoom doesn’t help fix the problem, you can try restarting your computer.
Is your virtual camera up to date
In case you are still unable to use a virtual camera in your Zoom app, it is likely that the virtual camera app itself is glitching out on your system. To fix this, you might want to update to its latest version or start with a fresh installation of the virtual camera software.
Reinstall webcam driver
In order for your webcam to work, your PC needs to understand how your webcam works. That’s where the webcam driver steps in, allowing communication between your webcam and PC. If the virtual camera software isn’t working on Zoom, as a last-ditch resort, you can try reinstalling your webcam driver to get it up and running again.
You can get details about your webcam driver by opening the Control Panel on your PC and heading over to Hardware > Sound > Device Manager > Imaging Devices > Webcam. Copy the name of your webcam, search the web for drivers, download and install the latest driver for your webcam.
Just accept virtual cameras are not compatible with SOME apps
Certain apps on your PC are not designed to work with third-party add-ons, including your virtual camera software. For example, you will not be able to use virtual cameras like Snap Camera, ManyCam, and Ecamm Live with Safari and FaceTime on a Mac.
Did the aforementioned guide help you fix the virtual camera not working problem on Zoom? Which one of them worked best for you? Let us know in the comments below.


The latest zoom installers for macOS have a different structure. The name is not
Zoominstaller.pkg but Zoom.pkg and if you expand that there is no /Scripts directory.
Thank you for this!
Life saver! I almost buy a webcam since iriun is not working with zoom.. Thank you so much.. Wishing you a good life and happiness surrounding you..
thanks a lot!!
CamTwist is working on Zoom 5.1.0 after applying Method 1 (Remove official signature from Zoom app on Mac using Xcode)
This worked for me using method 1, thank you
Thanks man! You’re brilliant.
It’s probably worth noting that M1 macs can’t run unsigned code, so when you hit Zoom in terminal it won’t work any longer. (Virtual cams aren’t running (again?) on my M1 mac, running Big Sur 11.4 for Zoom versions 5.6.6 and 5.6.7)