
If you had a slight idea about virtual cameras on PCs, you would have certainly heard about ManyCam. Regarded as one of the best webcam software available for free, ManyCam allows you to create video effects from your webcam with several features like the ability to change backgrounds, add face masks, and enable picture-in-picture mode while you’re sharing your screen or live-streaming.
As useful as it may be, you can be prone to a few issues on ManyCam like you would with any piece of software but rest assured, we might have some solutions for the problems you’re facing with ManyCam. The following post will help you fix issues with ManyCam now working on your system and what you can do to avoid such problems in the first place.
- Remove official signature from your video calling software on Mac
- Install an earlier version of the video conference software
- Disable Hardware Acceleration
- Change integrated webcam settings
- Disable Asynchronous frame transmission
- Adjust Video Sync Offset
- Lower the resolution and FPS
- Check if ManyCam and webcam are enabled inside Windows Device Manager
- Allow ManyCam access to camera on macOS Mojave or higher
- Enable Camera access inside Windows Privacy Settings
- ManyCam not working in your web browser
Remove official signature from your video calling software on Mac
Several users are complaining that the latest version of Zoom, Skype, and GoToMeeting aren’t working with ManyCam on macOS. While for many the ManyCam doesn’t show up as an option for setting the virtual camera, other users are experiencing problems in the video feed with ManyCam enabled.
The problem seems to be happening because of a feature called ‘Library validation’ that has been enabled across various video calling software, which restricts plugins that aren’t signed by Apple or the video software (in this case, Zoom). The only way to solve this is by unsigning the latest version of Zoom or the video calling app that you use and then enable ManyCam on it. You can do so by following the steps below:
Step 1: Update your Zoom app or the video calling app that you use to the latest version on Mac by opening the app, heading over to the Menu bar > App name > Check for updates, and then updating the app the latest version. After installing the update, force-close the zoom app. 
Step 2: Install the Xcode tool on your Mac by opening Terminal and entering the following command and hitting the Enter key:
Xcode-select --install
Wait for Xcode to install on your system and then move on to the next step.
Step 3: You can now proceed to unsign the video calling software by typing the following command and then hitting the Enter key:
sudo codesign --remove-signature /Applications/<app name>

For example,
If you're using Zoom, then you should use the command - sudo codesign --remove-signature /Applications/zoom.us.app/

OR

Enter the command "sudo codesign --remove-signature"
Then drag the video calling app from the Applications folder to the Terminal window
Step 4: You can now open the video calling app and enable ManyCam as your default camera option.
That’s it! ManyCam should now start working on your video calling app.
Install an earlier version of the video conference software
Most of the time, the reason for a feature or an app to not work any longer on your computer will be a recent update. You can uninstall the current version of the video calling app on a Mac by opening Finder > Applications, locating the video calling app, and dragging it to the Trash icon. After that, you can head over the official website of the app and search for older versions of the app to download. Once the download completes, install it and open it to enable ManyCam inside the video conference software.
Disable Hardware Acceleration
In some systems, ManyCam could use better hardware components to render details better, switch presets, or load higher quality videos. But for systems with basic configuration, disabling hardware acceleration on ManyCam can make it work better. You can disable hardware acceleration by opening the ManyCam app, heading over to ManyCam Settings > General, and toggling OFF the ‘Hardware Acceleration’ option.
Change integrated webcam settings
This option can only be tweaked when using ManyCam on a Windows PC. That’s because, for Windows, ManyCam offers a way to adjust settings of the integrated webcam. You can change the integrated webcam settings on your Windows PC from right within ManyCam by right-clicking on the Main Live Window, selecting Properties, and disabling AutoFocus, Face Tracking, and RightLight.
Disable Asynchronous frame transmission
Another Windows-only option ManyCam offers is Asynchronous frame transmission that can be enabled for PC’s with at least a quad-core CPU to improve the frame rate. However, enabling it on your PC doesn’t mean ManyCam will work for you. If you’re facing issues, then you can disable Asynchronous frame transmission by heading over to ManyCam > Settings > General.
Adjust Video Sync Offset
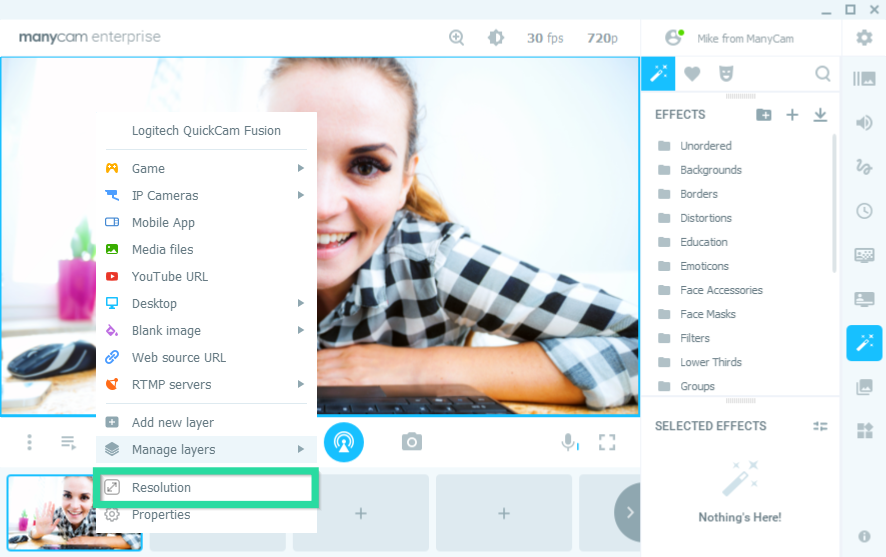

Sometimes, you might face a lag between the audio and video that’s being uploaded to your video conferencing software through ManyCam. In that case, you can adjust the Video Sync Offset inside ManyCam by right-clicking on the Main Live Window, selecting Resolution from the menu, and slide through different values under the Sync Offset section.
Lower the resolution and FPS
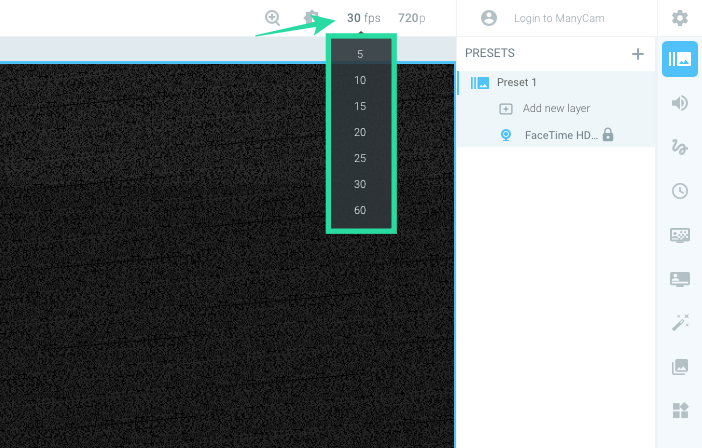

Major corporations require you to upload your video feed at the highest quality but if you’re facing problems with ManyCam or if it just doesn’t work, then you can lower the video resolution and frame rate to try making it work.
You can change the resolution of your video feed on ManyCam by clicking the resolution box at the top of your feed and selecting the required resolution (480p or 360p is more than enough for video conferences). You can adjust the video frame rate by clicking the FPS box at the top of your feed and selecting a lower FPS value (15-20 frames should be enough for a reasonable call quality).
Check if ManyCam and webcam are enabled inside Windows Device Manager
Like any virtual webcams, ManyCam creates a virtual copy of your camera so that you can use this copy as your video source inside different video calling apps. If you are not able to use ManyCam on an app, check if ManyCam is enabled on your Windows PC by opening the Windows Device Manager, selecting Imaging devices, right-clicking on ManyCam, and clicking ‘Enable device’. You can repeat the same for your integrated webcam device to see if it’s enabled on your system.
Allow ManyCam access to camera on macOS Mojave or higher
Recent versions of macOS allow users to personalize which app they want to give certain access to. Since ManyCam needs access to your camera, you might not be able to get it to work on macOS Mojave or later if you don’t enable camera access to the app. To fix this, you need to head over to System Preferences (from the dock) > Security & Privacy > Privacy tab > Camera and check the box adjacent to ManyCam.
Enable Camera access inside Windows Privacy Settings
Similar to macOS, Windows also lets you customize if apps on your computer can access your camera. For ManyCam and other virtual cameras to work, you need to enable Camera access inside Settings > Privacy > Camera and toggle the ‘Allow apps to access your camera’ option.
ManyCam not working in your web browser
If you’re using ManyCam for video conferencing through your web browser, but are facing issues regarding the same, then you should consider the following points.
- ManyCam isn’t compatible with Safari on Mac since Apple doesn’t allow third-party camera access on its web browser.
- On Google Chrome, enable camera permission on a site by heading over to More > Settings > Advanced > Privacy and security > Site settings > Camera and allowing camera access for the site. You can also enable ManyCam as your default camera on Chrome.

- For users of Firefox, recent versions of the web browser can cause some problems when using ManyCam. To make ManyCam work on Firefox, you will have to disable the Flash sandbox. You can do so by entering “about:config” on the address bar, locating and double-clicking the ‘dom.ipc.plugins.sandbox-level.flash’ option, and entering the value as ‘0’.
Are you facing problems using ManyCam on your Windows or Mac? If yes, did the solutions mentioned above help resolve your issues? Let us know in the comments below and share if there’s a problem that we haven’t covered in this post.


5 responses to “ManyCam no longer working? Try these solutions”
Maybe you all can help me. I have the software downloaded to my desktop which is where I’m controlling from but video is coming from my iPhone and iPad presets. I’m recording church services and want the audio to always be picked up from the iPad but I can’t figure out how to do this and usually end up getting a bunch of feedback, but I’m not sure why.
this is awesome thank you
My MacBook is asking for a password after using the Xcode solution … please what password will I enter
Hello . I tried with the Xcode Sudo command on my MacBook , however it’s asking for a Password. What will I enter as the password ??
I tried the method of removing the signature but it didn’t work and also now Zoom won’t share screen. It asks to allow access in Security & Privacy system setting, when it’s already allowed.
Is there a way to restore the signature?
I’ve already tried reinstalling Zoom.