If you’ve received Facetime invites from one of your friends with an iPhone then no they are not joking, you can now receive those calls directly on your PC! FaceTime has long been the go-to app for video calls for all iPhone users and Apple recently added cross-platform compatibility to FaceTime. This means you can now easily FaceTime your friends and family even if they have a Windows PC. So if you’re looking to make the most of this new feature, then here’s how to FaceTime Windows users from your iPhone. Let’s get started!
How to Facetime Windows Users from your iPhone
You can easily FaceTime Windows users by sharing an invite with them through your preferred means. You can use an email, an instant messenger, or any other app to share your invite. Follow either guide below to help you along with this process.
REQUIREMENTS
- An Android or Windows device that can support video calls.
- The latest version of Google Chrome or Microsoft Edge on Android or Windows.
- An LTE or higher mobile data connection or 5mbps or higher WiFi connection.
- H.264 video encoding support
- Subscription to necessary services to support Shareplay (Optional)
Part 1:
You first need to create and share a FaceTime link with the concerned Windows user. Here’s how to do that from your iPhone. Follow either guide below to help you along with the process.
SHORT GUIDE
- Open the FaceTime app > create a FaceTime link > tap on an app or tap ‘Copy’ > share the link.
GIF GUIDE

STEP-BY-STEP GUIDE
Here’s a step-by-step guide to help you easily FaceTime Windows PC users from your iPhone. Follow the steps below to help you along with the process.
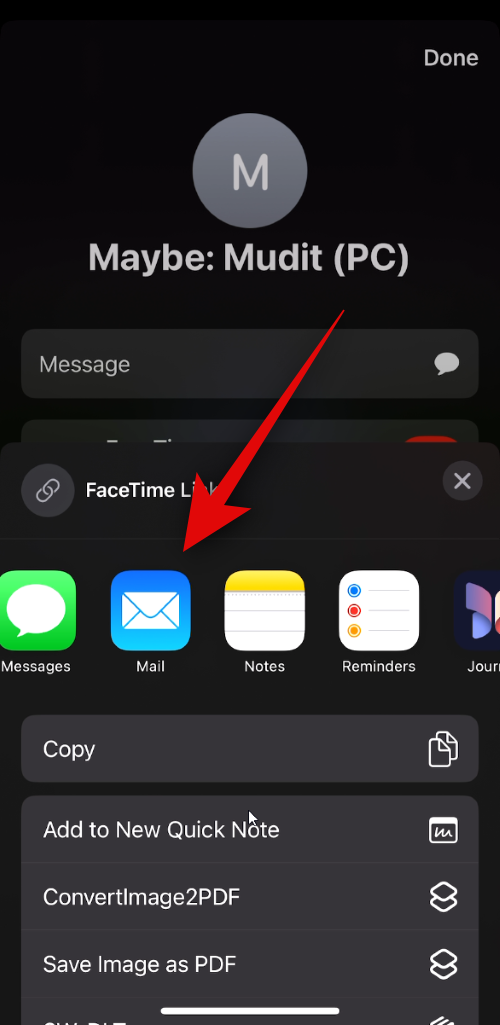
- Open the Facetime app and tap on Create Link. A share window pop-up will now appear on your screen. You can tap the desired app and share the link with one of your contacts.
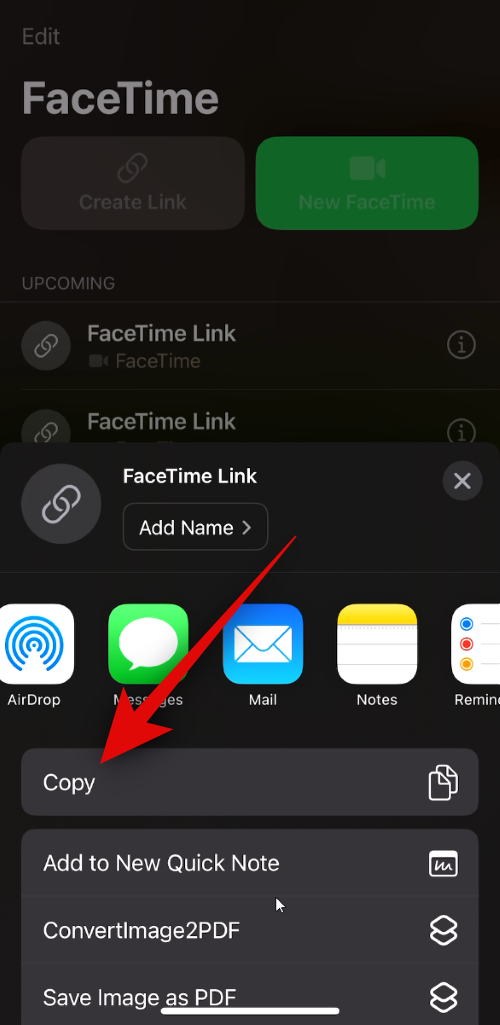
- You can also tap on Copy to copy the link to your clipboard. Once copied, you can share the link with the desired person through your preferred app.
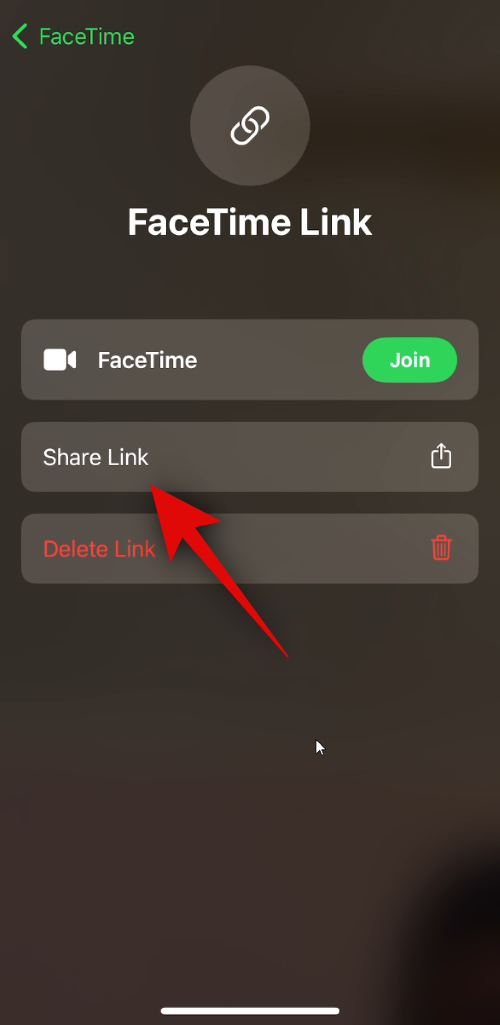
- You can now go back to the Facetime app and tap on i beside the newly created Facetime Link. Tap on Share Link and share it with more people.
And that’s it! The recipient can now use the section below to access and join the FaceTime call from their Windows PC.
Part 2: [For Windows users] Receive and join Facetime calls
Here’s how to use a FaceTime link to join a video call from your Windows PC. Follow either guide below to help you along with the process.
SHORT GUIDE
- Open the FaceTime Link > Enter your name > Continue > Join.
GIF GUIDE
STEP-BY-STEP GUIDE
The step-by-step guide below will help you easily join a FaceTime call from your Windows PC. Follow the steps below to help you along with the process.
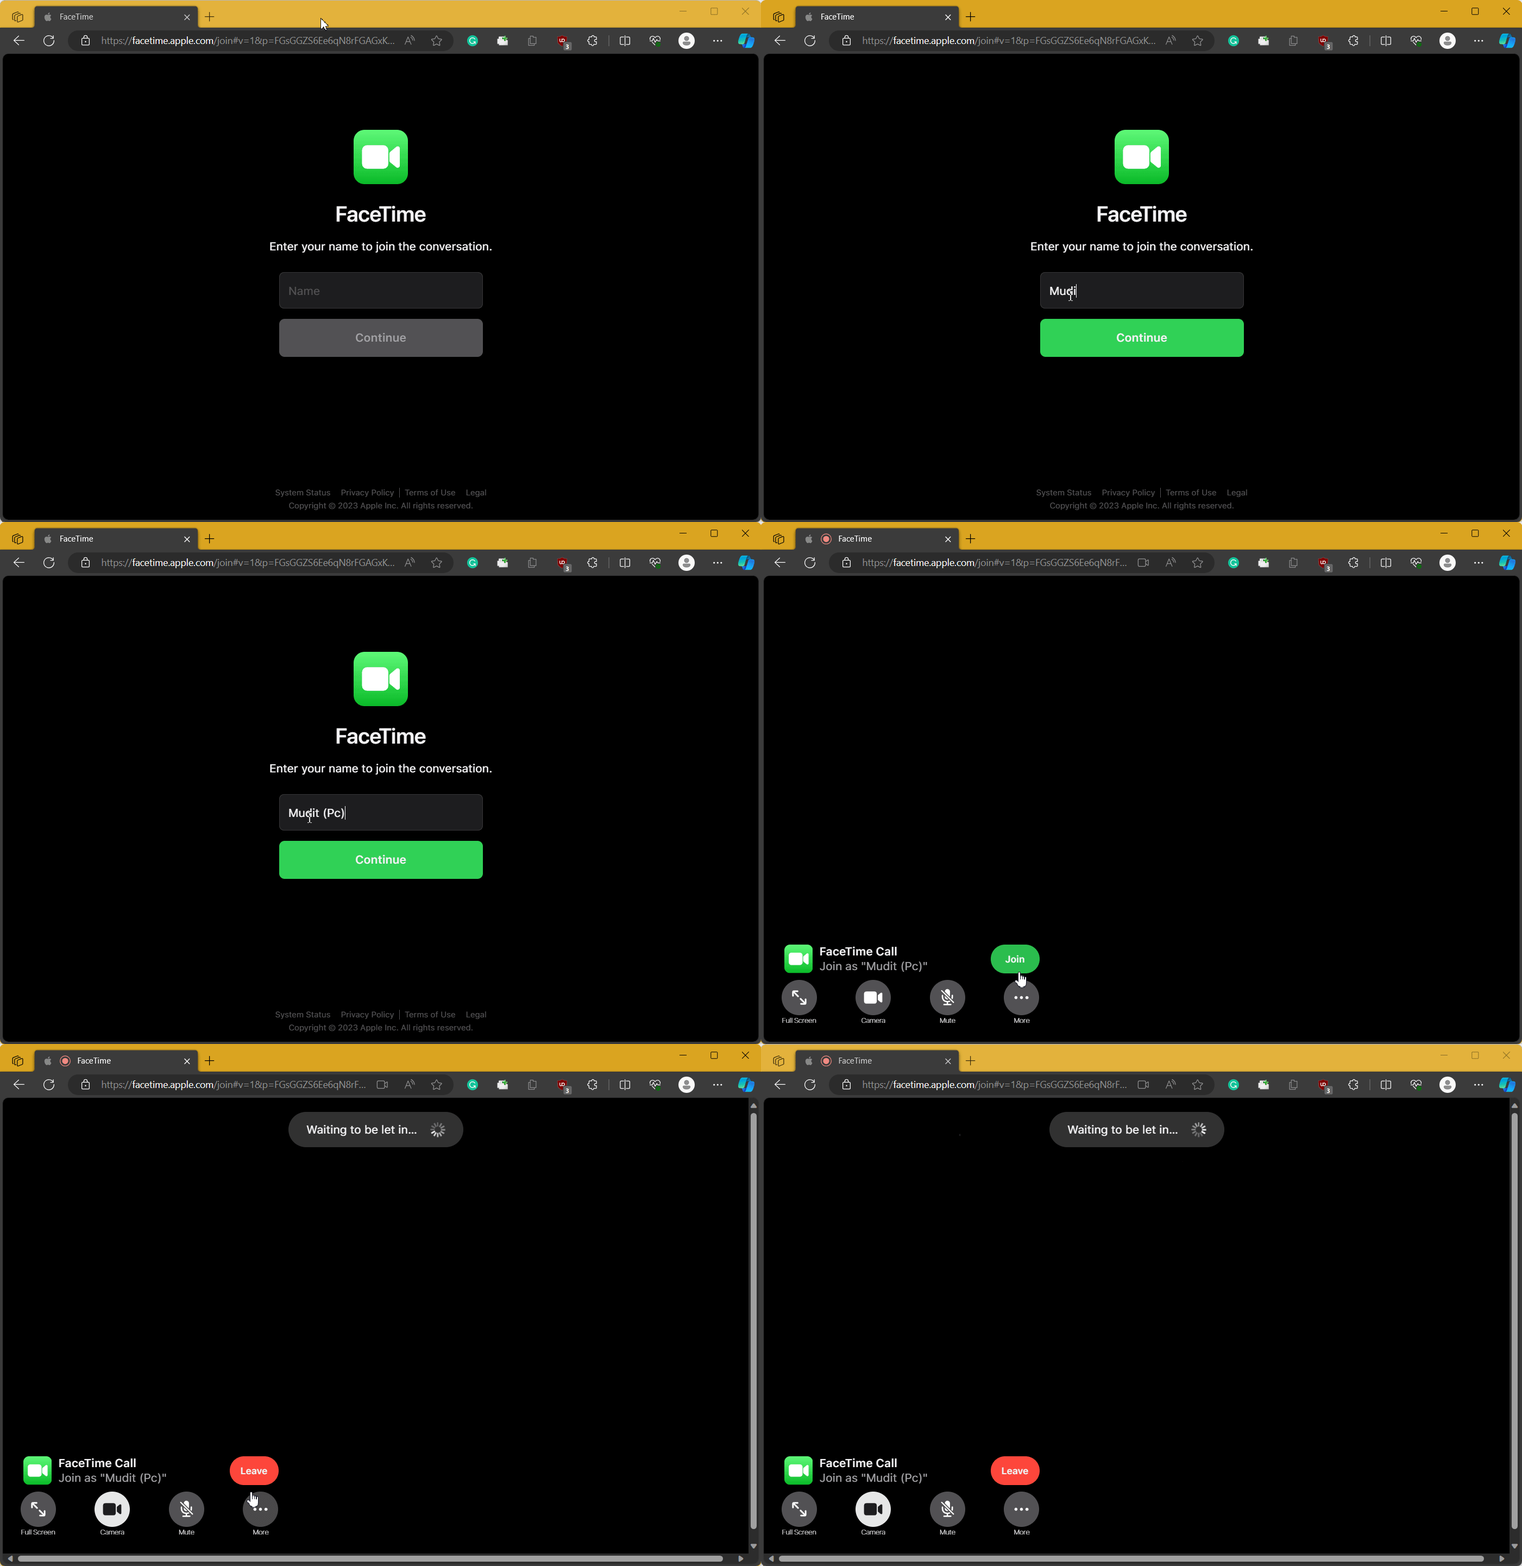
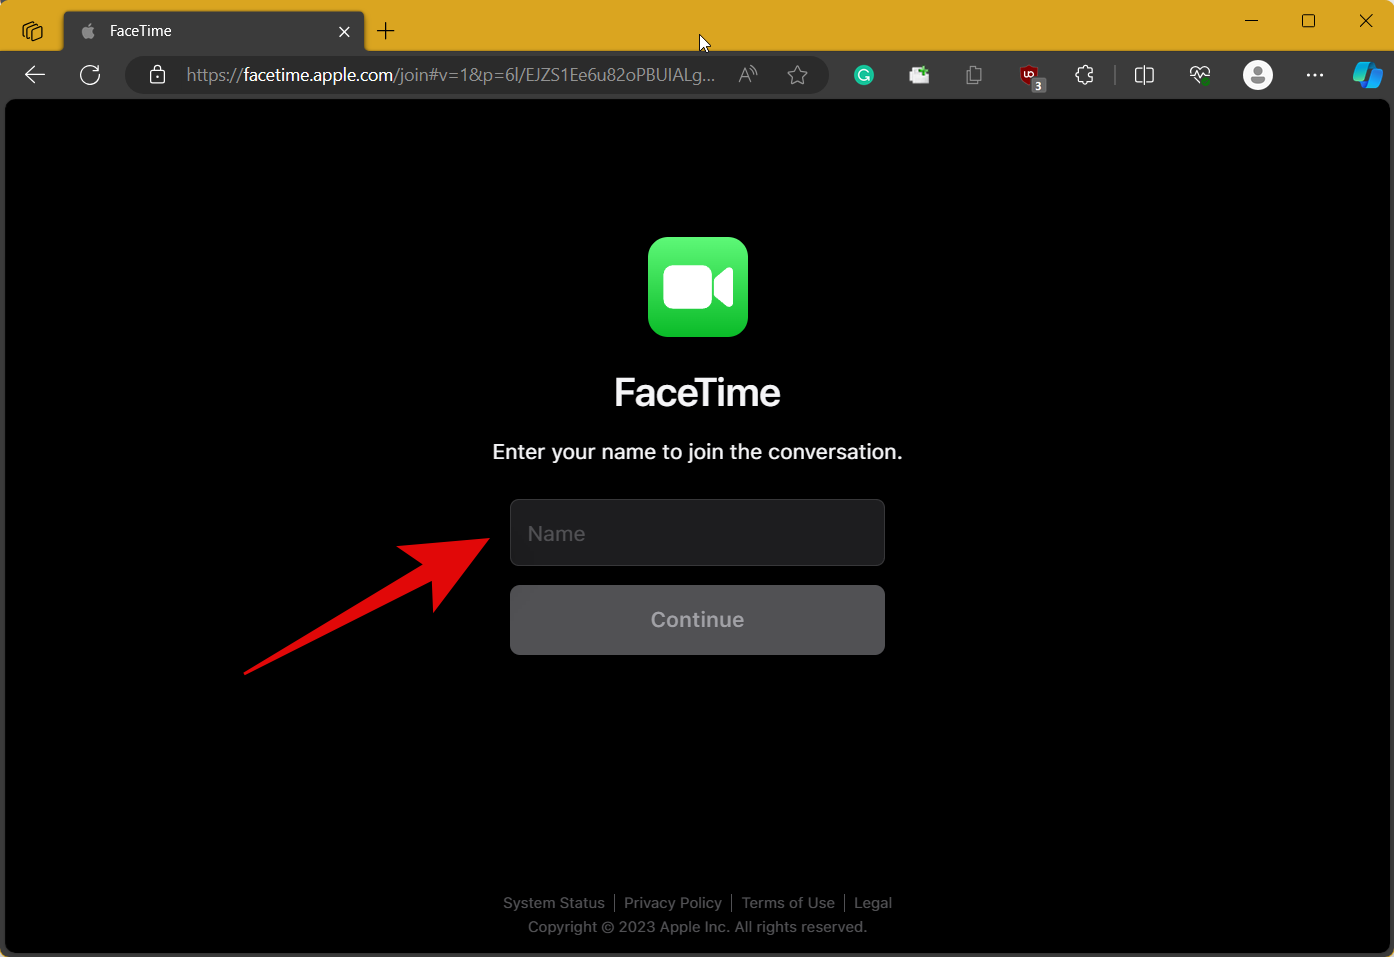
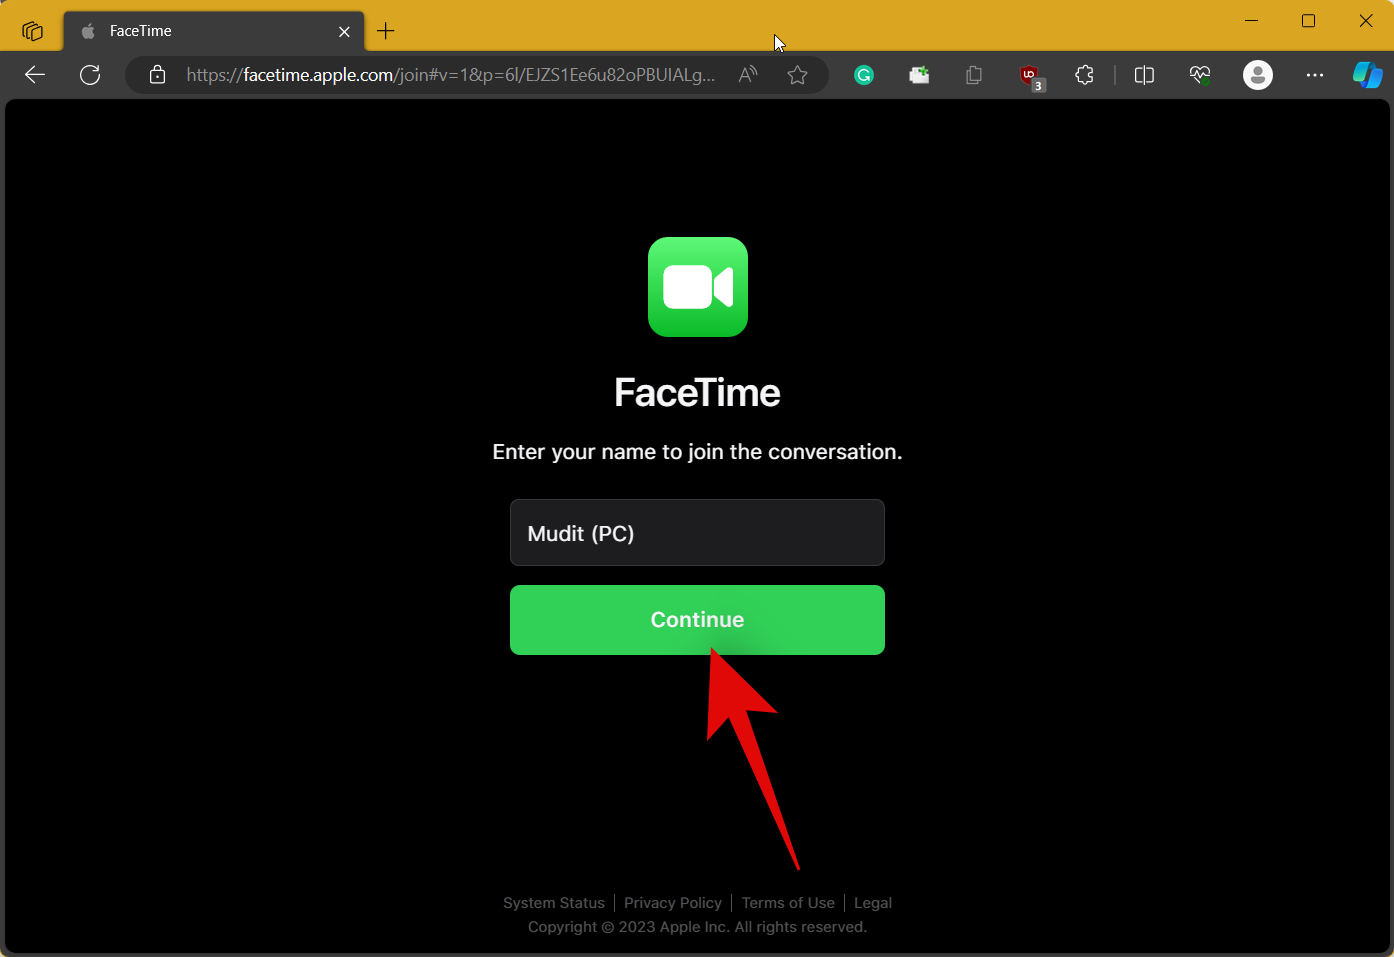
- Click on the FaceTime link you received to open it in your browser. You will now be asked to enter your name. Your display name will be used during the call and shown beside your video preview. Enter the preferred name.
- Now click on Continue.
- You will now enter the calling screen with a calling bar in the bottom left corner of your browser window. Click on Join to proceed.
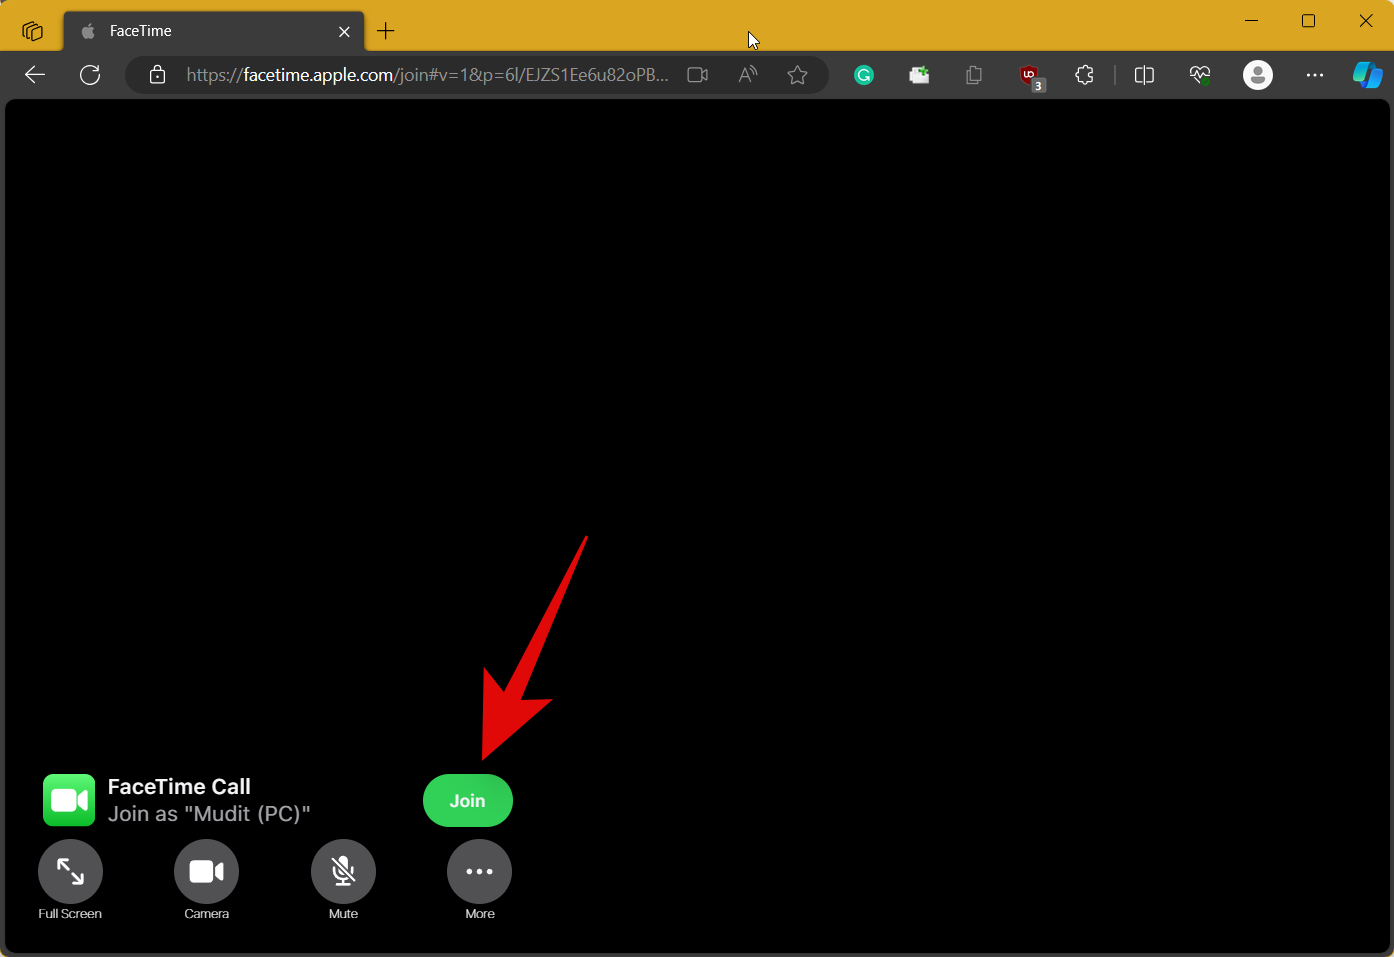
A joining request will now be sent to your host. Once approved, you will be able to join in on the Facetime call.
Part 3: [For iOS users] Approve Joining requests for Windows users
Once a Windows user joins a FaceTime call you should receive a joining request from them. You can then approve this request and join the call to chat with them. Here’s how to do that on your iPhone. Follow either guide below to help you along with the process.
SHORT GUIDE
- Open the FaceTime app > join call > wait for request > tap checkmark to accept (or tap X to deny).
GIF GUIDE

STEP-BY-STEP GUIDE
Here’s a step-by-step guide to help you easily approve FaceTime calls joining requests from your iPhone. Follow the steps below to help you along with the process.
- Open the Facetime link and make sure you have joined the call. If not, open the Facetime app and tap and join the concerned link from the list on your screen. Once the link opens, tap on Join.
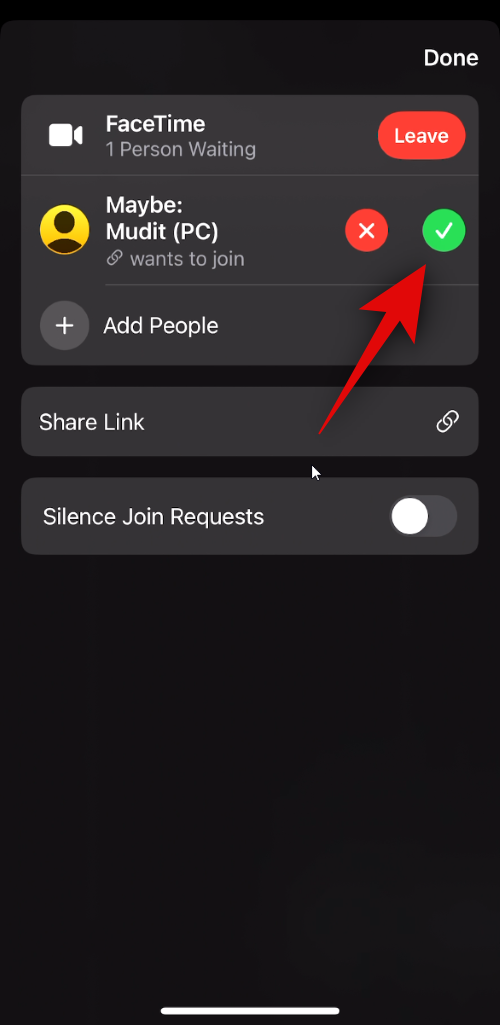
- Once you have joined in the call, wait to receive a request. Tap on the Check mark at the top to approve the request. Tap on X to deny one.
- If by chance you missed a request, tap on your screen to bring up the overlay and tap on Facetime at the top. You should also see a pending request indicator such as N Person Waiting where N is the number of people that are waiting to get the join requests approved. You will now see a list of people that have pending join requests. As usual, tap on the Check Mark to approve the request or tap on X to deny it.
And that’s how you can approve joining requests in a FaceTime call. You should now be able to chat with the recipient easily.
How to Manage Facetime Calls with Windows Users on iPhone
Here’s how you can moderate FaceTime calls when chatting with Windows users from your iPhone. Follow either guide below to help you along with the process.
GIF GUIDE

Note: iPhone doesn’t allow sharing your screen while recording the screen which is why the option is greyed out in the GIF above. If you need help sharing your screen, you can refer to the step by step guide below instead.
STEP-BY-STEP GUIDE
The step-by-step guide below should help you easily moderate FaceTime calls from your iPhone. Follow the steps below to help you along with the process.
- When you receive a joining request, you have the option to approve or deny it. Tap the Check Mark to approve the request or tap the X to deny it.
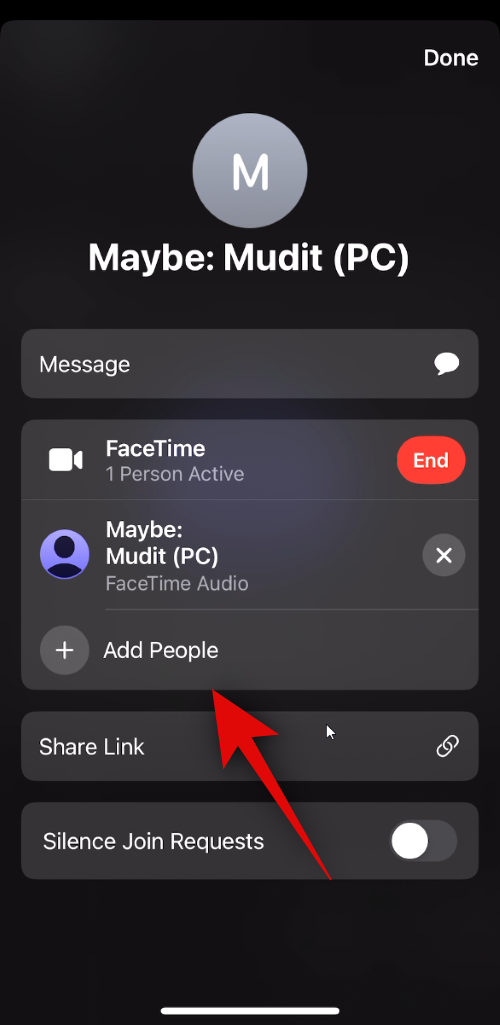
- You can also add more users to the ongoing call. To do so, tap on FaceTime or the contact’s name if someone has already joined the call at the top. Now tap on Add People.
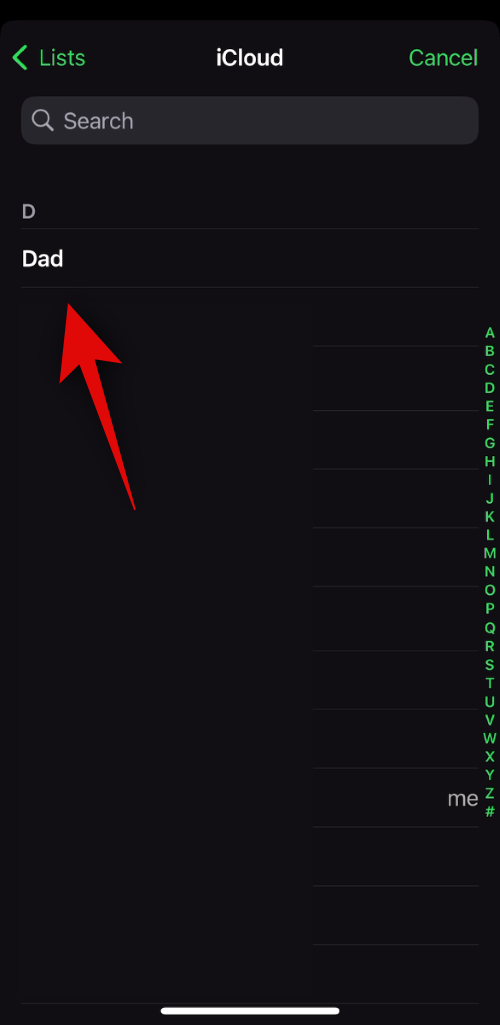
- You will now be redirected to the Messages app. Here you can share the link with your iMessage contacts, FaceTime contacts, Phonebook contacts, and more. Type the concerned contact’s name at the top and then select them from the search results.
- You can also tap on + to access your contact list. You can then scroll the list and tap on more contacts you wish to add to the call.
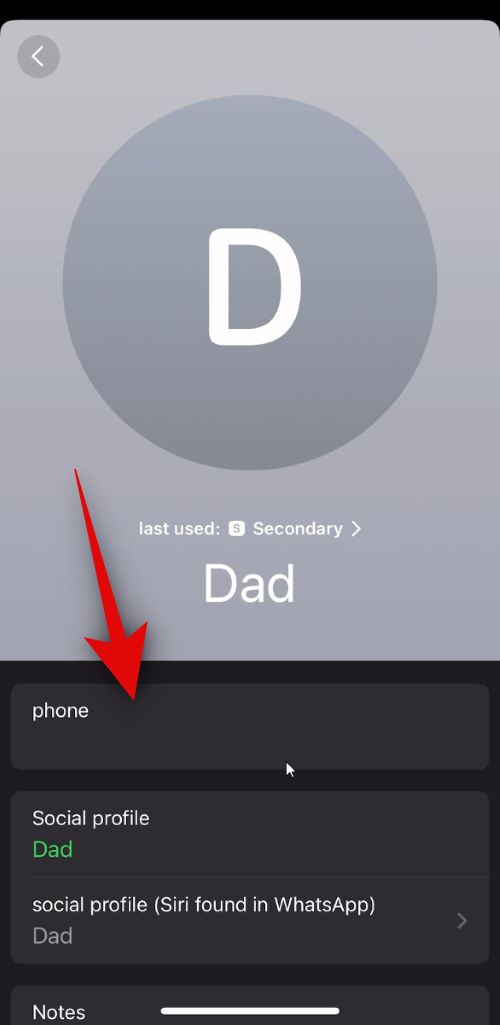
- Tap the contact’s phone number and then tap on Invite with Messages at the bottom.
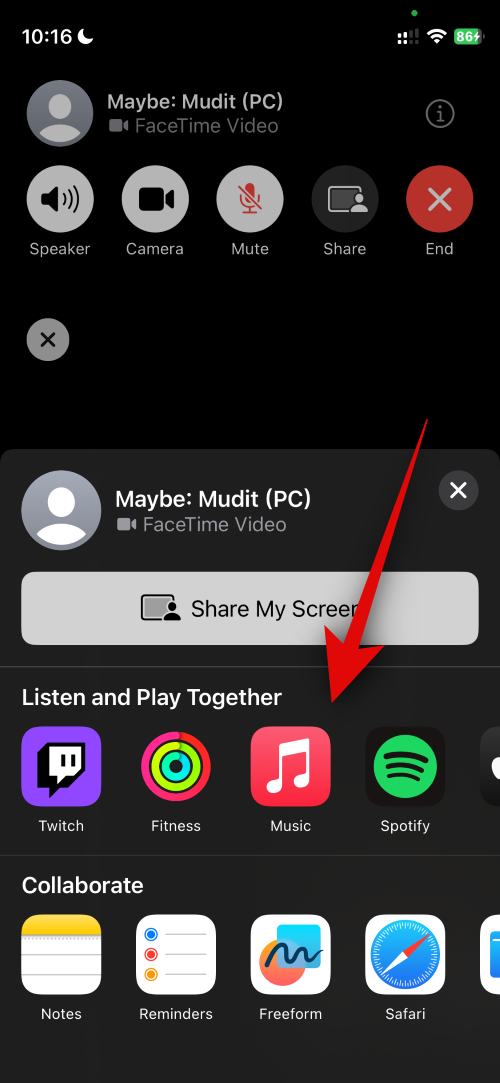
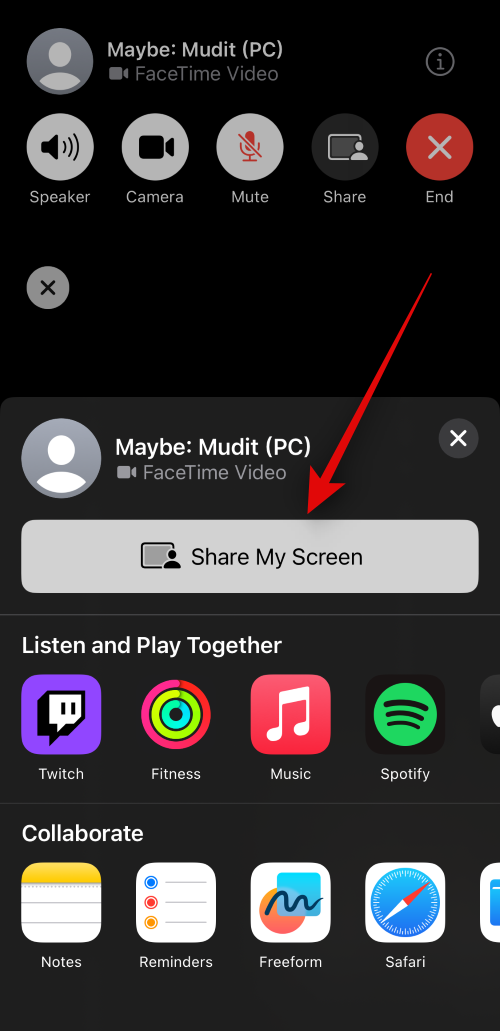
- You can also tap on Share to share your screen during a video call. You can then tap one of the compatible SharePlay apps if you prefer.
- If not, you can tap Share My Screen to share your iPhone’s screen in the call. A countdown at the top will dictate the same before your screen is shared with everyone.
- Additionally, you can apply effects during an ongoing video call. To use effects, tap on your video in the bottom left corner and then tap on the effects icon.
- Now tap and choose your preferred effect or an app from where you wish to share assets. You can also share links for the ongoing call. To do so, tap on FaceTime or the contact’s name if they have joined the call in the overlay at the top.
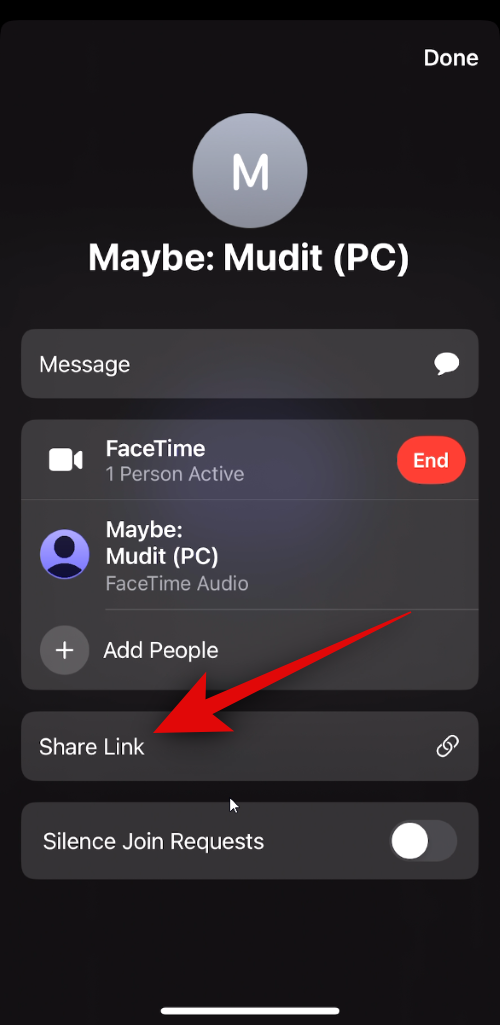
- Tap on Share Link. You can now tap the desired app or tap on Copy to copy the link to your clipboard.
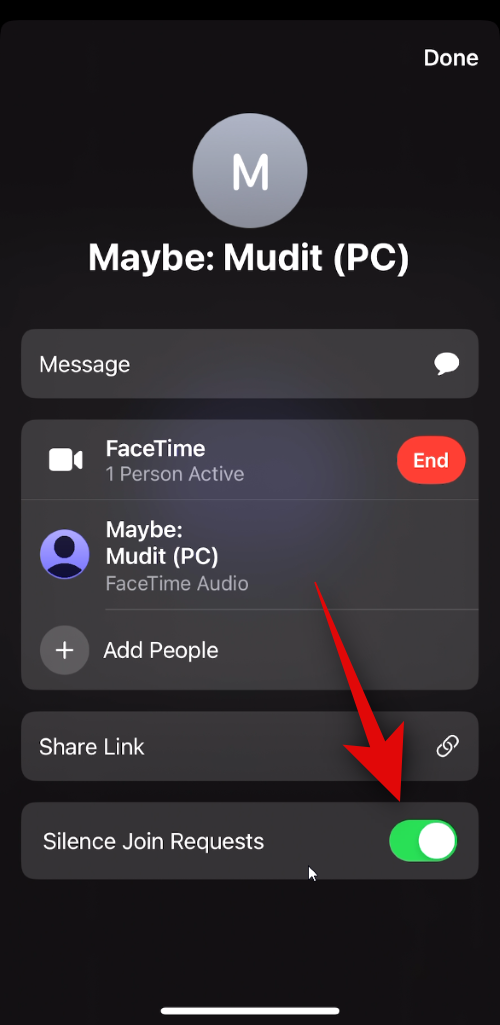
- Additionally, if your call’s link has been shared with users you don’t wish to add to the call, you can choose to silence all further requests to join the call. To do so, tap on FaceTime at the top and then tap and turn on Silence Join Requests.
- Additionally, if you have headphones connected to your iPhone, you can choose your preferred output device. To choose the same, tap the Speaker icon at the top and select your preferred output device.
And that’s how you can moderate and manage FaceTime calls with a Windows user from your iPhone.
How to Manage your Facetime calls from a Windows PC
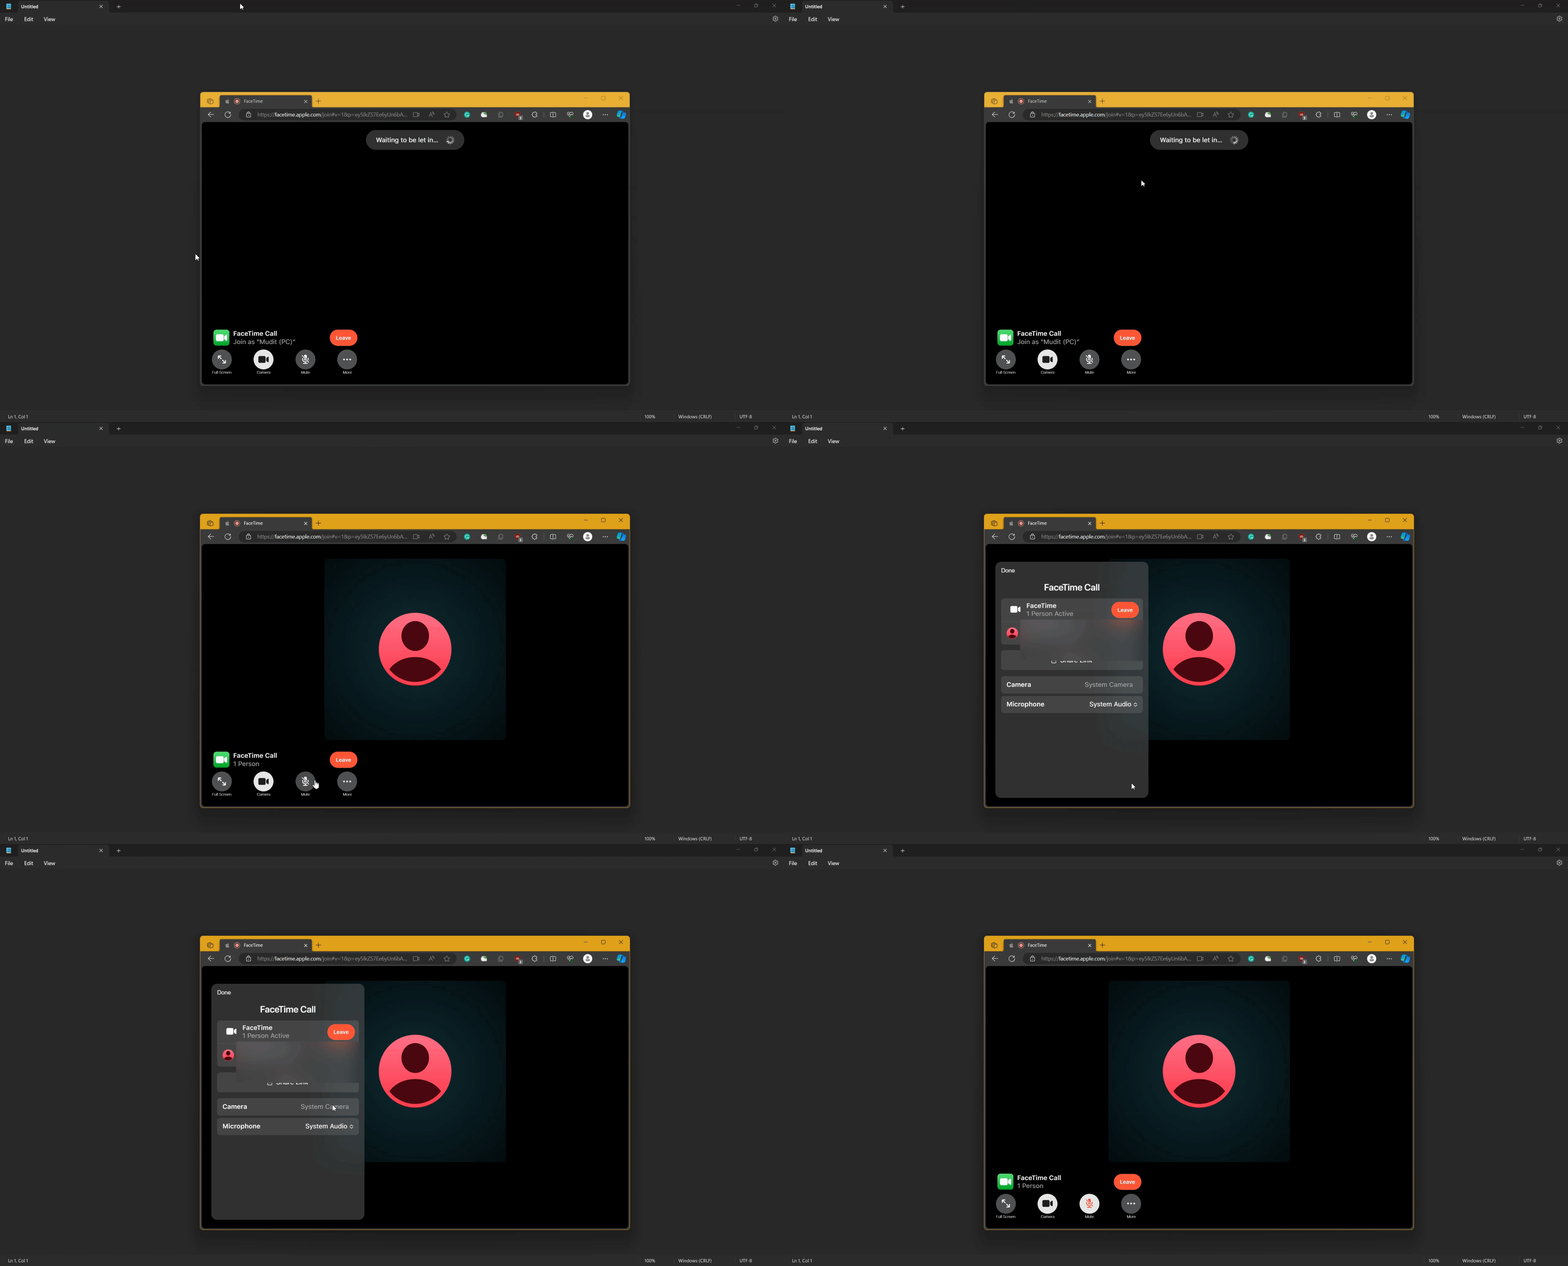
You can manage views, input devices, as well as links to the FaceTime call from your Windows PC. Follow either guide below to help you along with the process.
GIF GUIDE
STEP-BY-STEP GUIDE
Here’s a step-by-step guide to help you easily manage FaceTime calls on your Windows PC. Let’s’ get started!
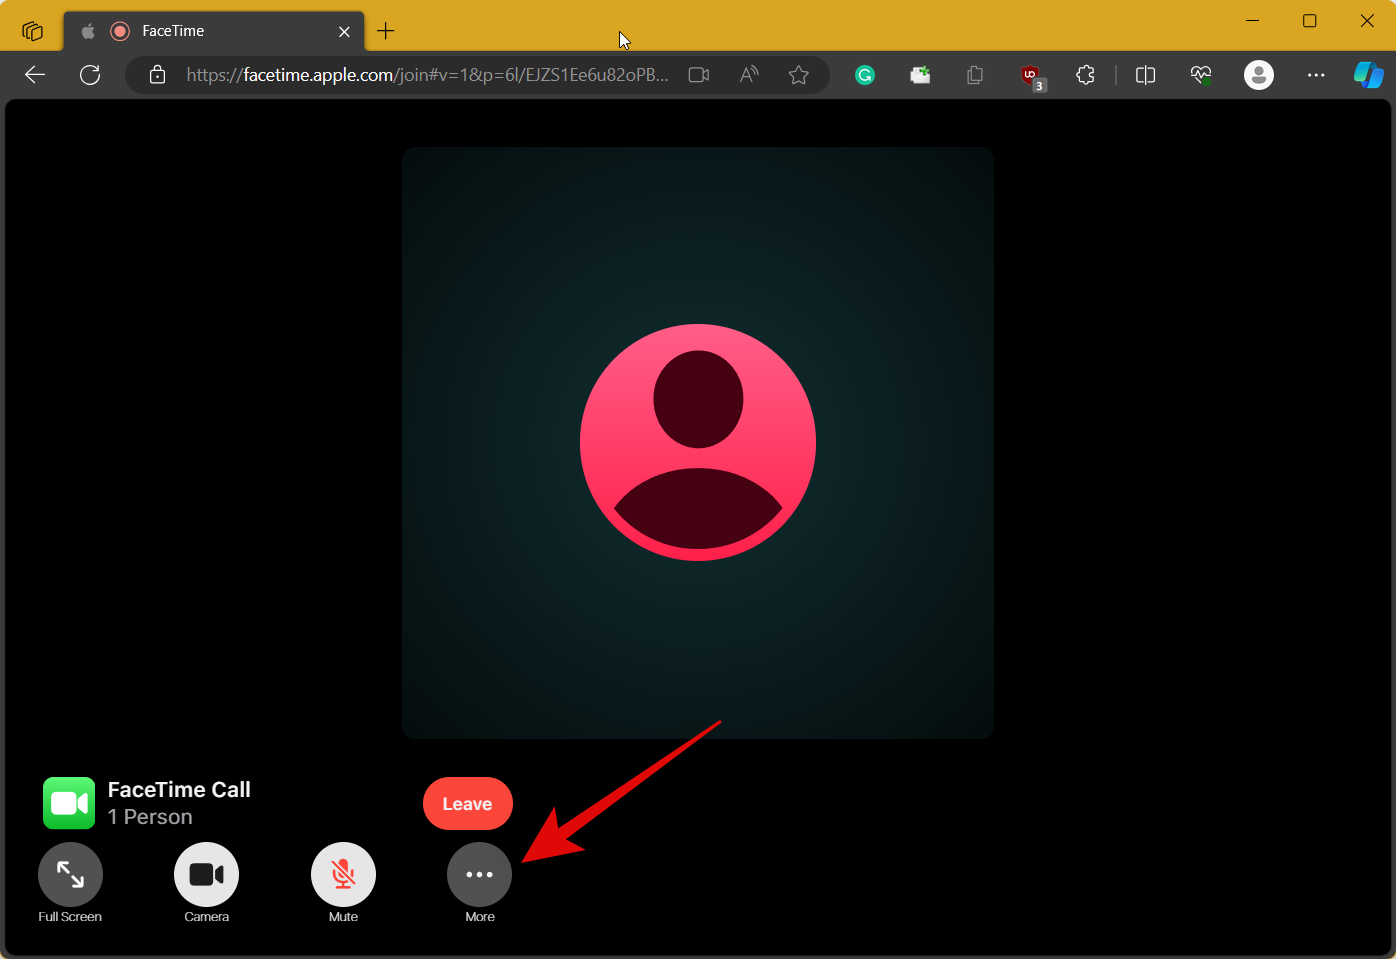
- Firstly, you can enter full-screen mode on a PC to view all users in the current FaceTime call easily. To do so, you can click on the full-screen icon in the bottom left corner of your screen.

- You can then press Esc whenever you wish to exit the full-screen mode.

- You also have the option to mute yourself and turn off your video feed. Click the Microphone icon to mute yourself. You can click on the same icon again to unmute yourself
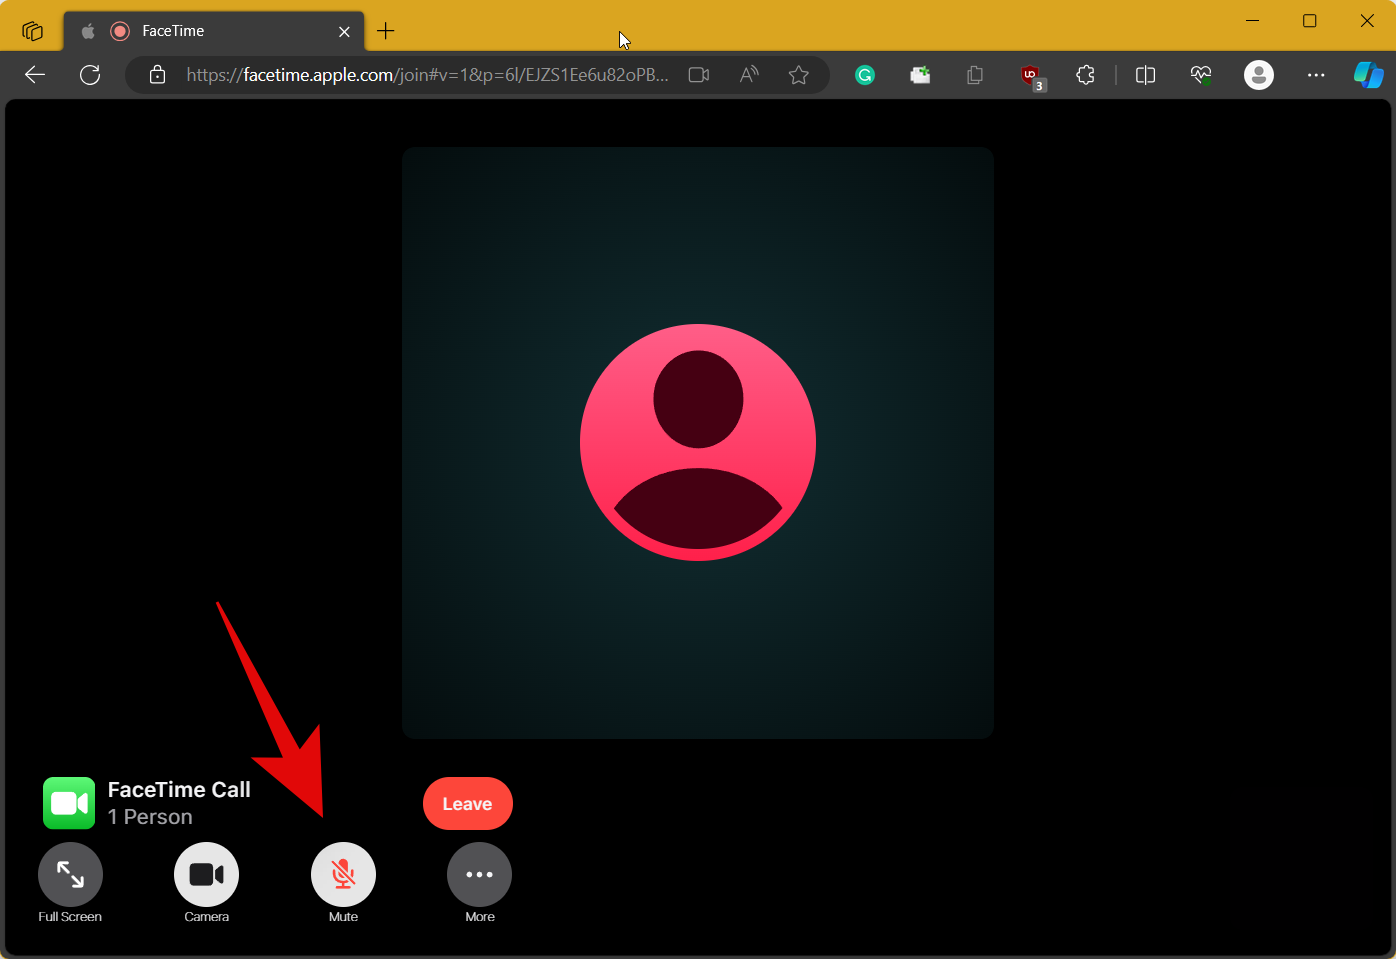
- Click on the Video icon to turn off your video feed or click it again to turn it on.

- Additionally, you can manage the input and output devices used during the FaceTime call. To do so, click on the Ellipsis icon in the bottom left corner of your screen.
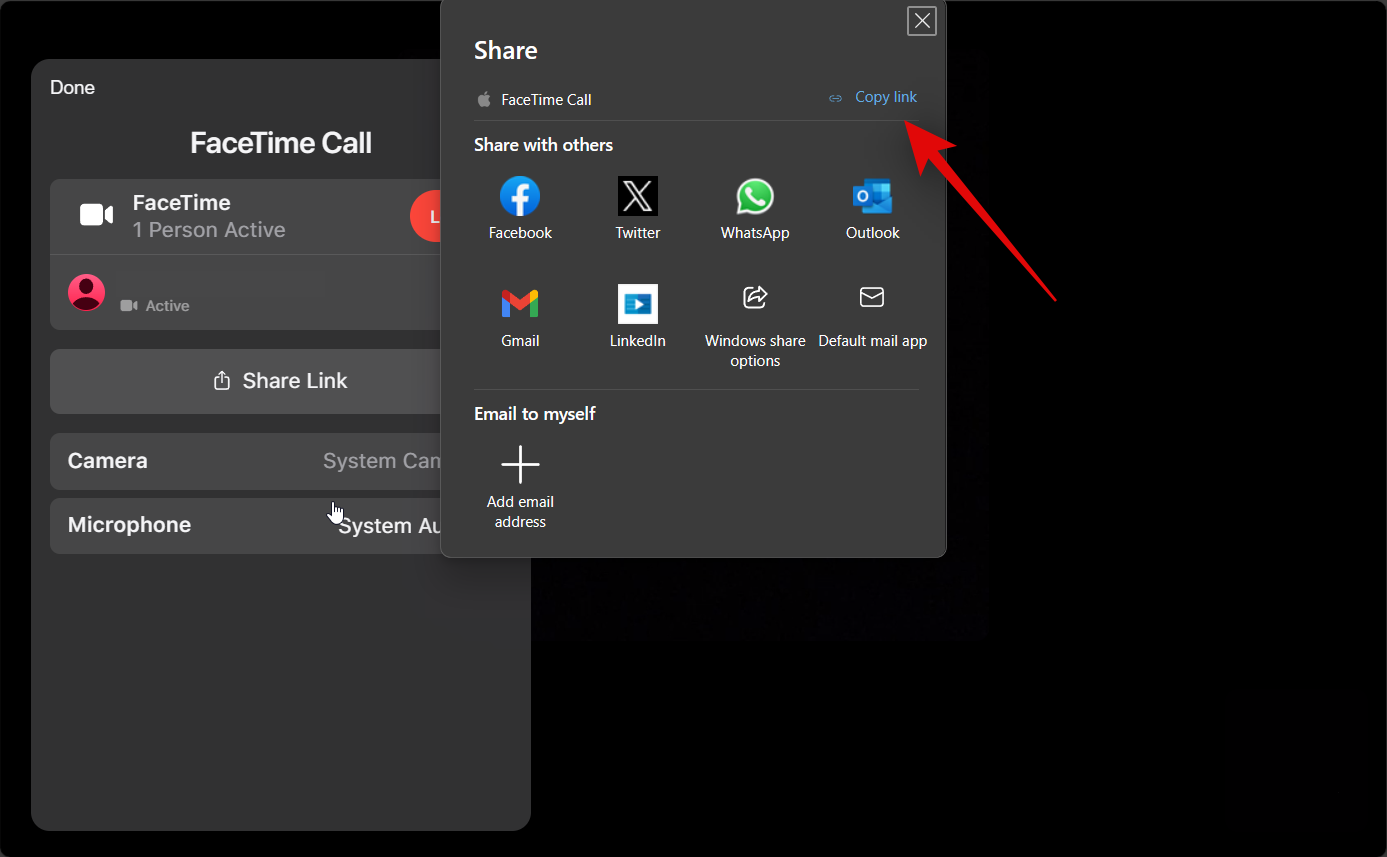
- Now click on Camera and choose your preferred camera to be used during the FaceTime calls.

- Click on Microphone to choose the microphone used during the FaceTime call.

- Additionally, you can click on Share Link to invite more users to the current FaceTime calls if you wish.

- You can then choose the preferred contact or click on Copy to copy the link to your clipboard.
And that’s how you can manage FaceTime calls on a Windows PC.
How to mark FaceTime links as inactive and delete them on your iPhone
Once created, FaceTime links are deactivated automatically once the video call is over. However, if you need to mark FaceTime links that exist as inactive and delete them, then here’s how to do that on your iPhone. Use the guides below to help you along with the process.
SHORT GUIDE
- FaceTime > Tap i beside a link > Delete Link > Tap Delete Link again to confirm your choice > Select ‘Edit’ to delete multiple links > Select > Select links you want to delete > Delete > Delete Links.
GIF GUIDE

STEP-BY-STEP GUIDE
Here’s a step-by-step guide to help you mark FaceTime links as inactive and delete them from your iPhone. Follow the steps below to help you along with the process.
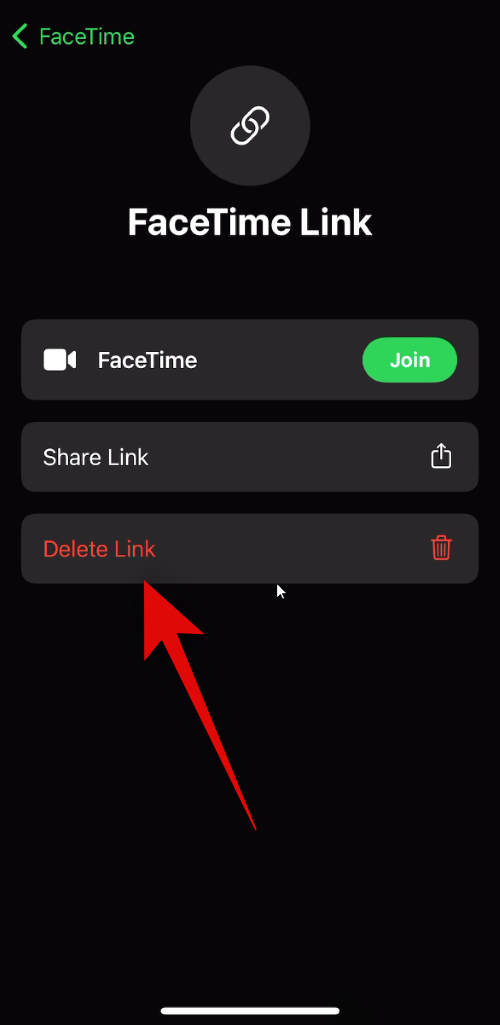
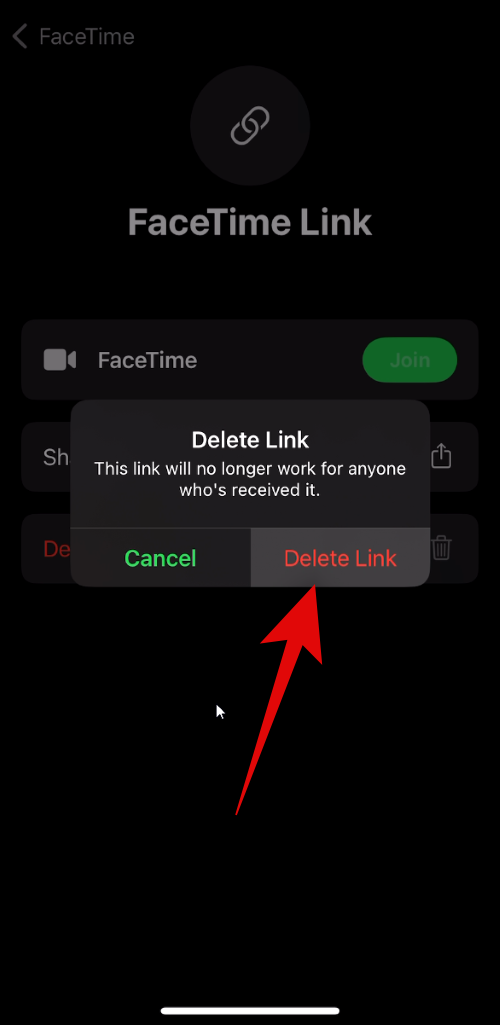
- Open Facetime and tap on i beside the concerned link that you wish to deactivate. Now tap on Delete Link.
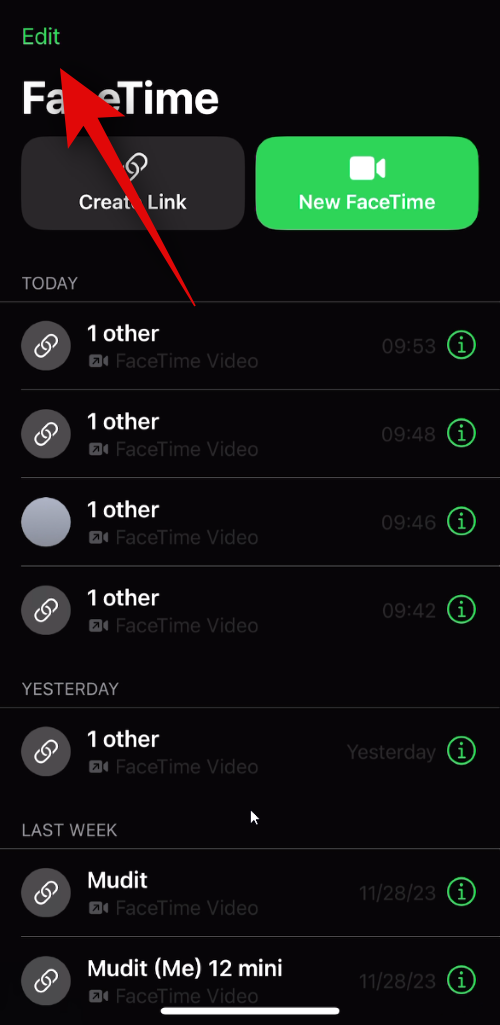
- Tap on Delete Link again to confirm your choice. You can also delete multiple links similarly. To do so, tap Edit in the top left corner.
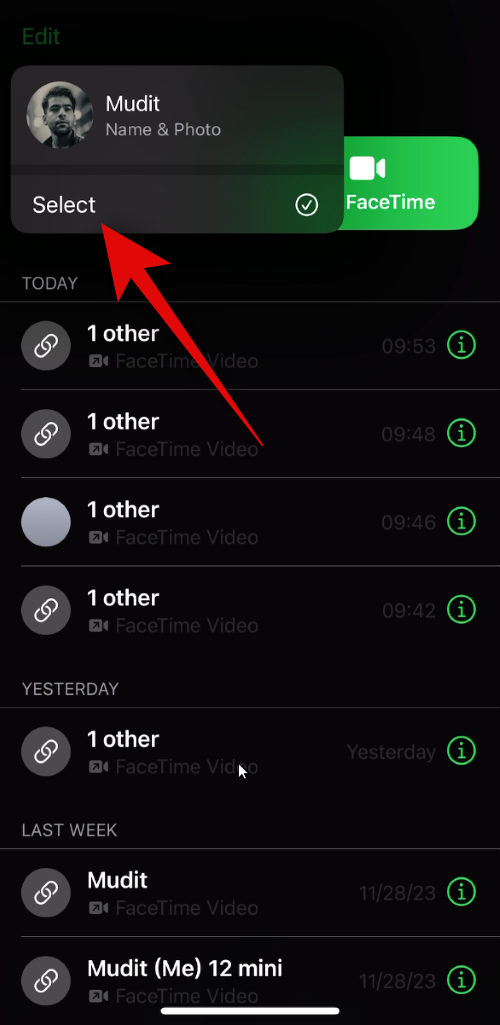
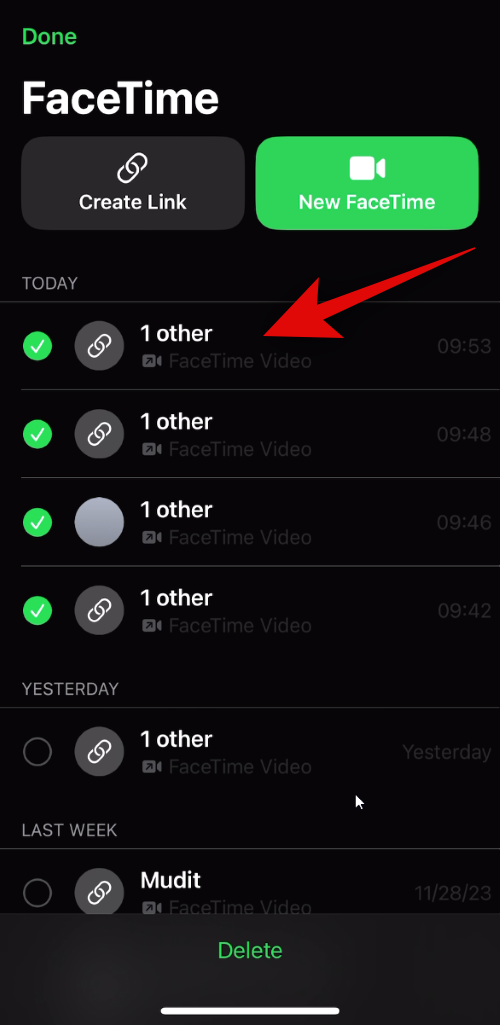
- Now tap on Select and select the links you wish to delete.
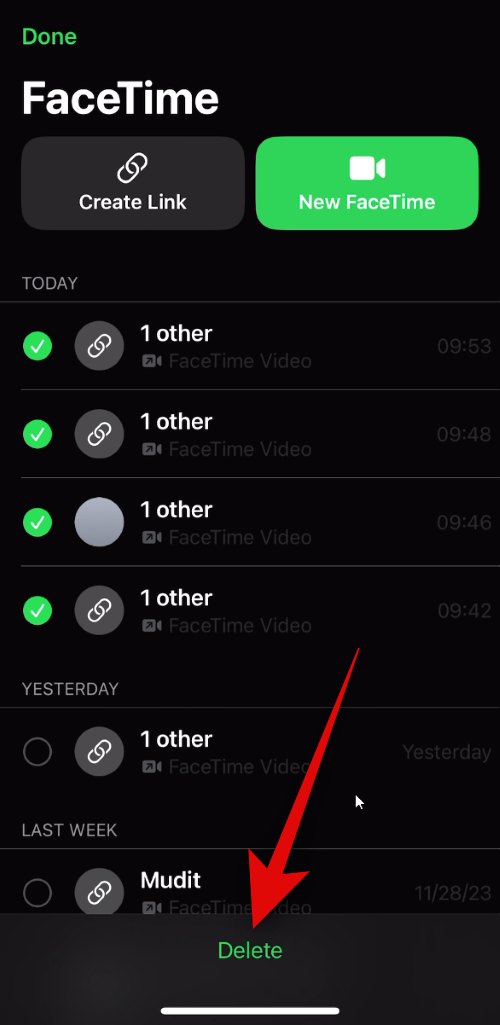
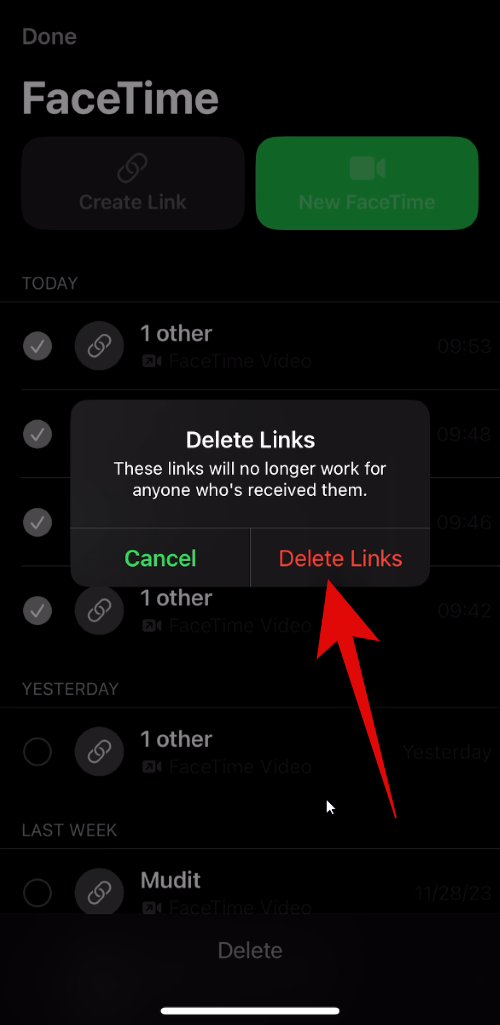
- Tap on Delete once selected, and then tap on Delete Links again to confirm your choice.
And that’s how you can delete links and mark them as inactive on your iPhone.


