What to know
- Midjourney has a Pan feature that lets you extend part of an image from a specific direction to create lengthier images.
- Panning can be used to expand an image either vertically or horizontally and you can only request panning in one direction in each operation.
- You can use the Pan tool multiple times to stretch an image’s canvas beyond its original boundaries and as you pan, the resolution of the generated images also increases.
- To generate panned images in a desired aspect ratio, you can combine it with Zoom Out and Custom Zoom tools, although this may revert the image resolution to the default maximum size.
What is Pan on Midjourney?
Pan is a new feature available on Midjourney that lets you extend your images in any direction of your choice. The feature work similarly to that of the Zoom Out tool that was released recently but unlike the latter, Pan can be used to only expand the canvas on one side, not all four.
You can pan an image to extend one side of an image you created on Midjourney once you upscale it. In addition to expanding the canvas towards your selected direction, Midjourney will also increase the resolution of the panned image.
Currently, the Pan option only allows you to extend images from one side at a time but you cannot pan both horizontally and vertically in one image. If you wish to extend your image from multiple sides, you will have to use the pan tool to extend on one side, upscale one of the generated creations, and then use the Pan option to extend the image on another side.
How to extend your images using the Midjourney Pan feature
To use the Pan feature on Midjourney, you need to first create an image on the AI tool using an initial prompt. If you want to extend one any of your existing images, you can skip the next set of steps and jump to the next part.
In case you haven’t already generated an image you want to extend from, open any one of Midjourney’s channels on Discord or access the Midjourney Bot on your Discord server or DM. Regardless of how you access Midjourney, you can start generating an image by clicking on the text box at the bottom.

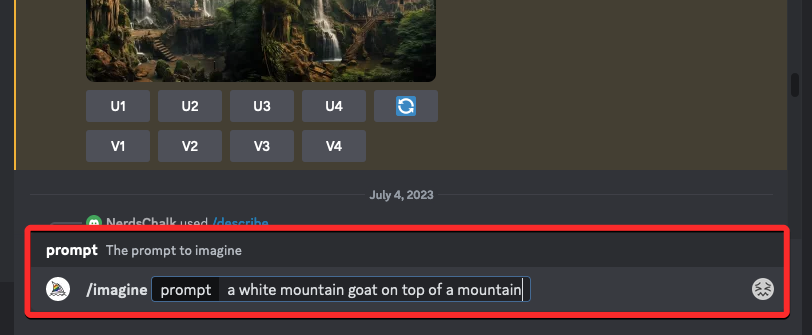
Now, type /imagine and select the /imagine option from the subsequent menu.

Inside the prompt box that shows up, type the words to describe what you want to create. Once done, press the Enter key on your keyboard.
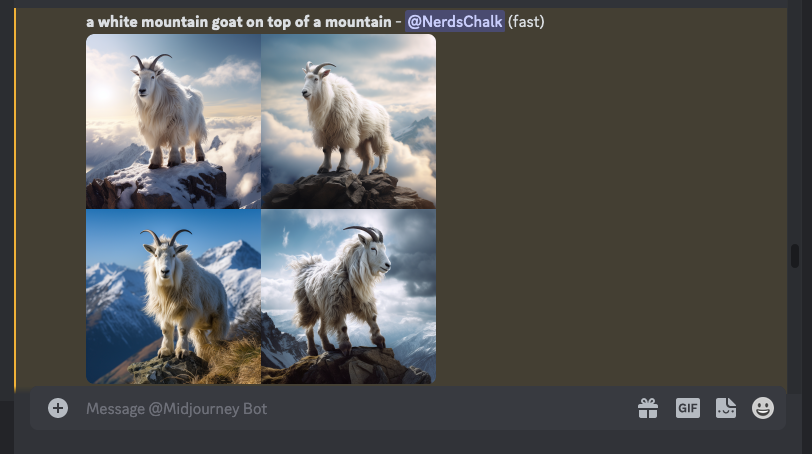
Midjourney will now create a set of 4 images based on your prompt.
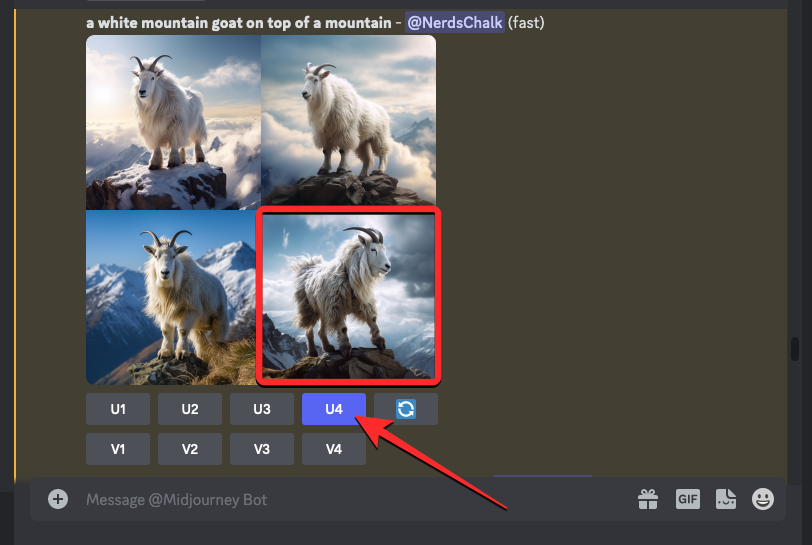
Before you can pan an image in a specific direction, you’ll need to upscale the preferred image from the generated results. To upscale an image, click on any of the options from U1 to U4 that corresponds to the image that you want to further work on.
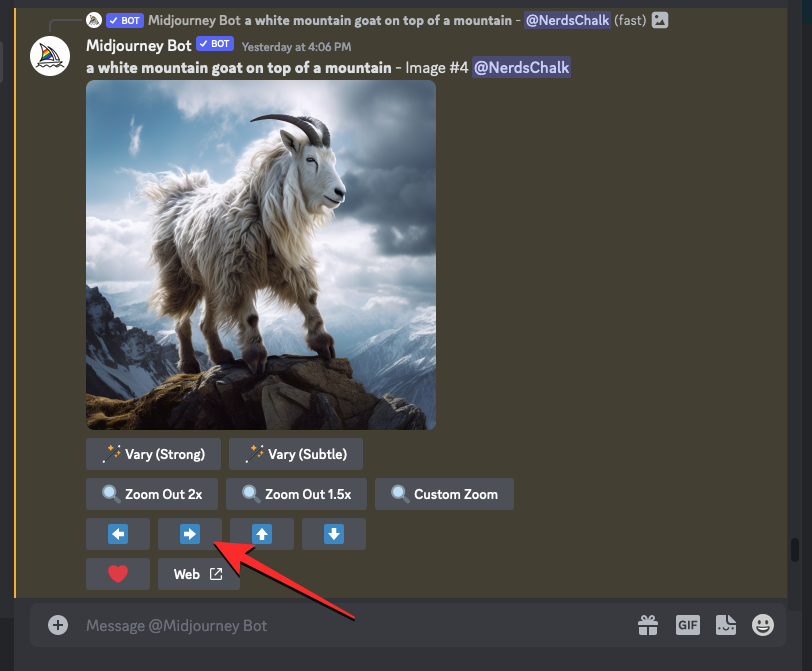
When you click on the preferred upscale option, Midjourney will now generate an upscaled version of the image you selected. You should see a preview of the upscale image at the top with additional options below.
Once you’ve upscaled the image, you’ll see a set of 4 arrow icons – left, right, up, and down. These icons are what let you pan your image in your desired direction.

If this is confusing, here’s what each of these icons does:
- Left arrow extends the image horizontally to include more elements on the left side of the current image.
- Right arrow extends the image horizontally to include more elements on the right side of the current image.
- Up arrow extends the image vertically to include more elements on the top side of the current image.
- Down arrow extends the image vertically to include more elements on the bottom side of the current image.
Depending on which side you want to extend on the original image, click on the corresponding arrow icon underneath the upscaled image on Midjourney.
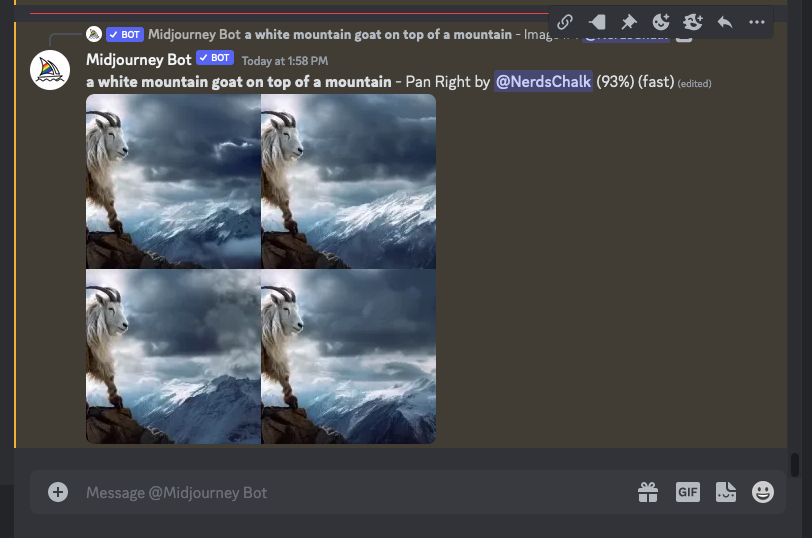
When you do that, Midjourney will now start processing your panning request and start generating extended images. Before completion, you may only see a set of images previewing the extended parts of the images but don’t worry, you’ll see the complete extended set of images upon completion.
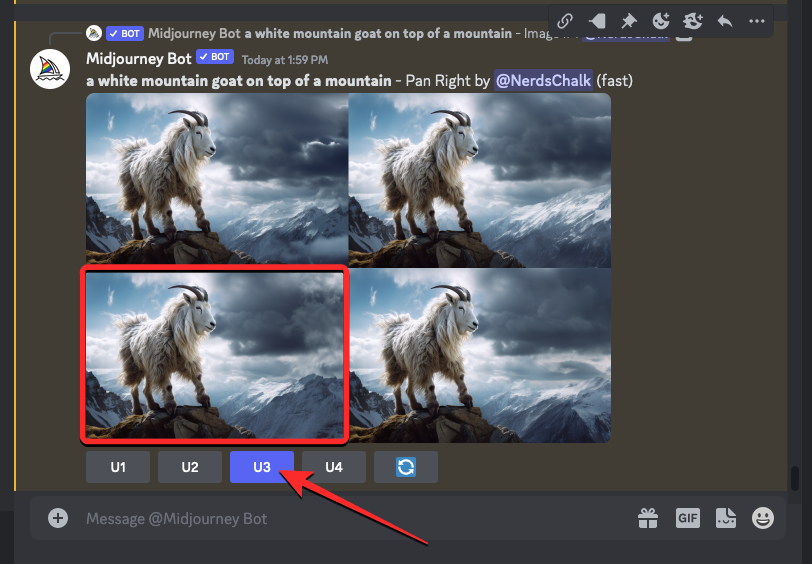
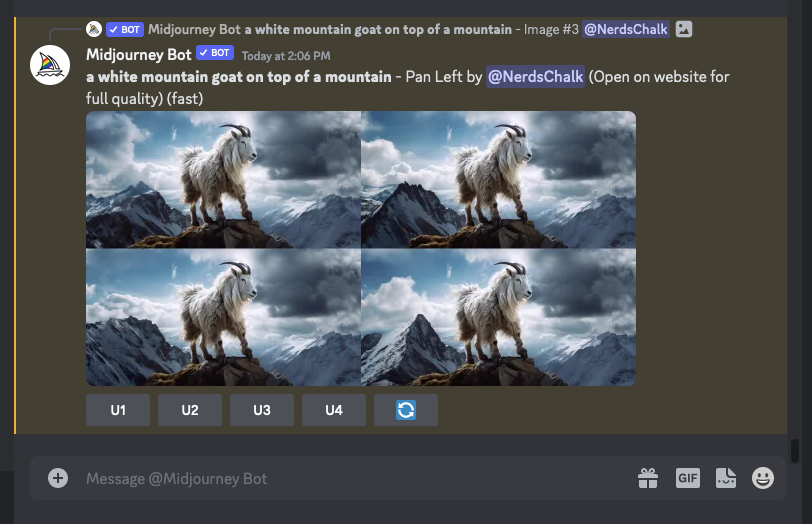
Once Midjourney completes panning the image, you’ll see a set of 4 images that have been extended toward your chosen direction. You can upscale an image you prefer by clicking on the corresponding option from U1 to U4. Unlike other image creations, you won’t find options to vary the images you pan on Midjourney. We clicked on U3 to upscale the third image from the generated results (the one at the bottom left quadrant).
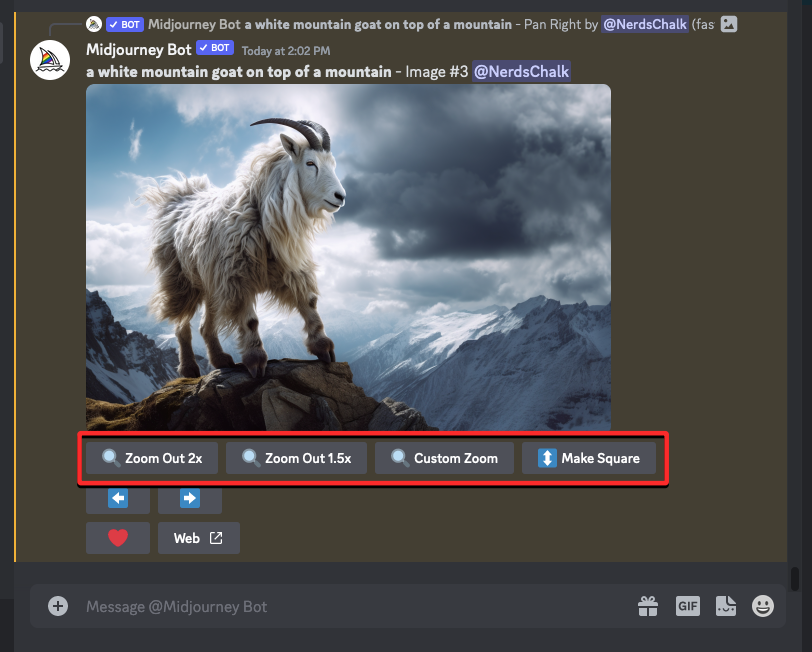
When you click on a corresponding option to upscale an image you like, the upscaled version will now appear on the screen. You can make more modifications to the panned image using the Zoom Out or Custom Zoom tool to expand the image on all four sides, Make Square to change the image’s aspect ratio to 1:1 or pan the upscaled image further.
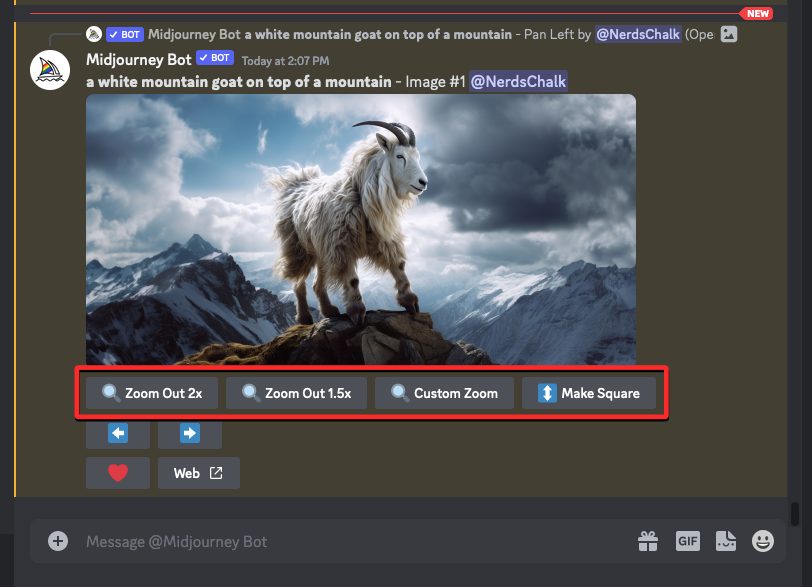
Since you can pan an image only vertically or horizontally (not both ways), the pan options that appear underneath the upscaled image will only show arrow icons based on the kind of panning you performed earlier. Since we panned the original image using the right arrow icon, the available options for the upscaled image are only the left and right arrows, as is evident from the screenshot below. In this instance, we’re trying out the second pan using the left arrow to extend the image on the left side.

Clicking on any of these available pan options will request Midjourney to create a panned image with an increased resolution and a different aspect ratio than the upscaled image you generated earlier.
From here, you can repeat the above steps to upscale a desired image from the generated results and apply more pan options to extend the image further.
To avoid seeing images in unusual aspect ratios, you can use the Zoom Out feature or Make Square option to extend the image in its original aspect ratio or at 1:1 form respectively. To expand these images in your desired aspect ratio, the Custom Zoom tool works best as it allows you to specify the aspect ratio before zooming out of an image.
How many times can you pan out of an image?
Midjourney currently doesn’t have a limit for panning on an image. You can pan an image any number of times as long as this image is created on Midjourney; you cannot pan images saved on your computer or from the web by uploading them to the AI tool.
Although multiple panning is allowed, it’s not a simple process – you are required to pan an image and upscale your preferred output before applying the pan option again. This may take a while depending on the number of times you want to pan on the image.
Multiple panning can only expand images either vertically or horizontally. For instance, if you used the right or left arrow icons on an original image, the subsequent generations can only be panner horizontally; meaning you cannot expand them upwards or downwards.
If you wish to extend the images in a direction different from what’s available after upscaling, you can use the Custom Zoom tool to expand the canvas to your preferred aspect ratio.
What kind of images can you generate using Pan on Midjourney?
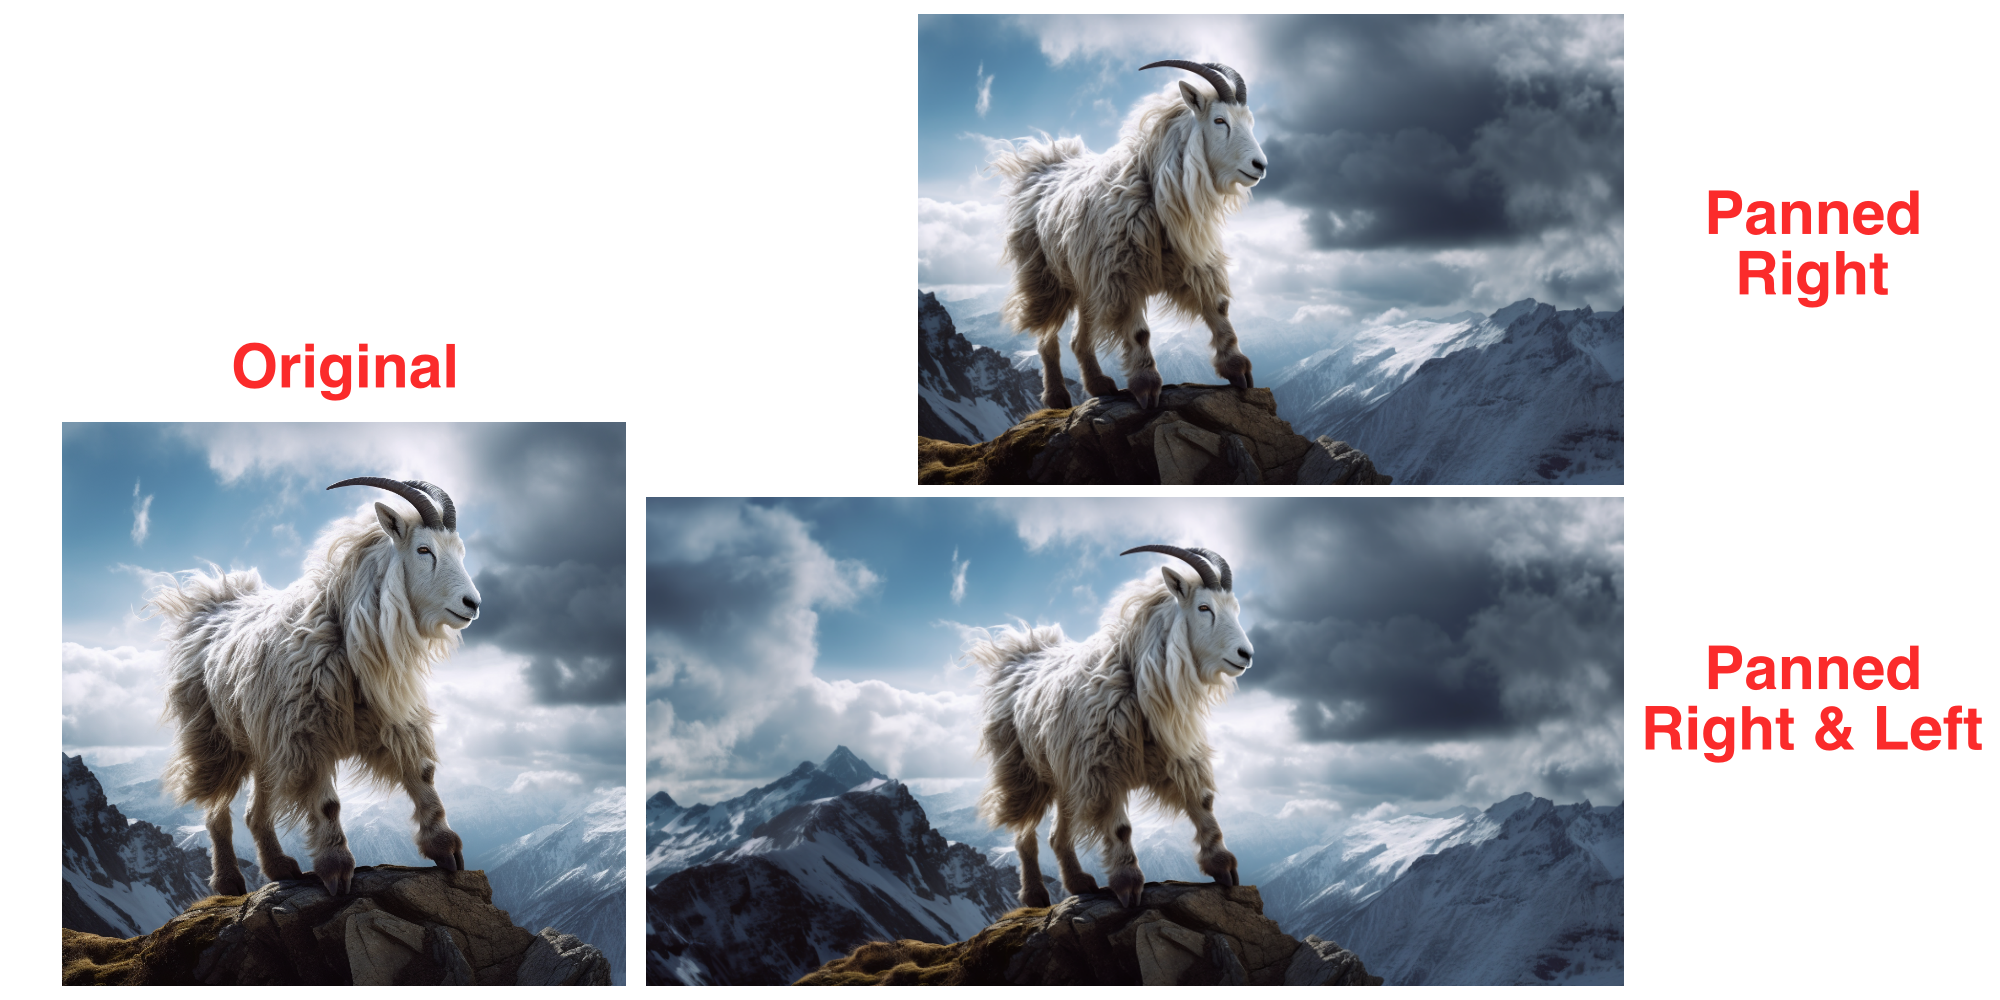
With Pan, you can extend an image you created on Midjourney either vertically or horizontally. Using this feature multiple times can help you stunning panoramic-style images in landscape or vertical view with resolutions higher than the default size of images.
Example 1: Here’s what we created using Pan on Midjourney (horizontally) with the input prompt: a white mountain goat on top of a mountain.
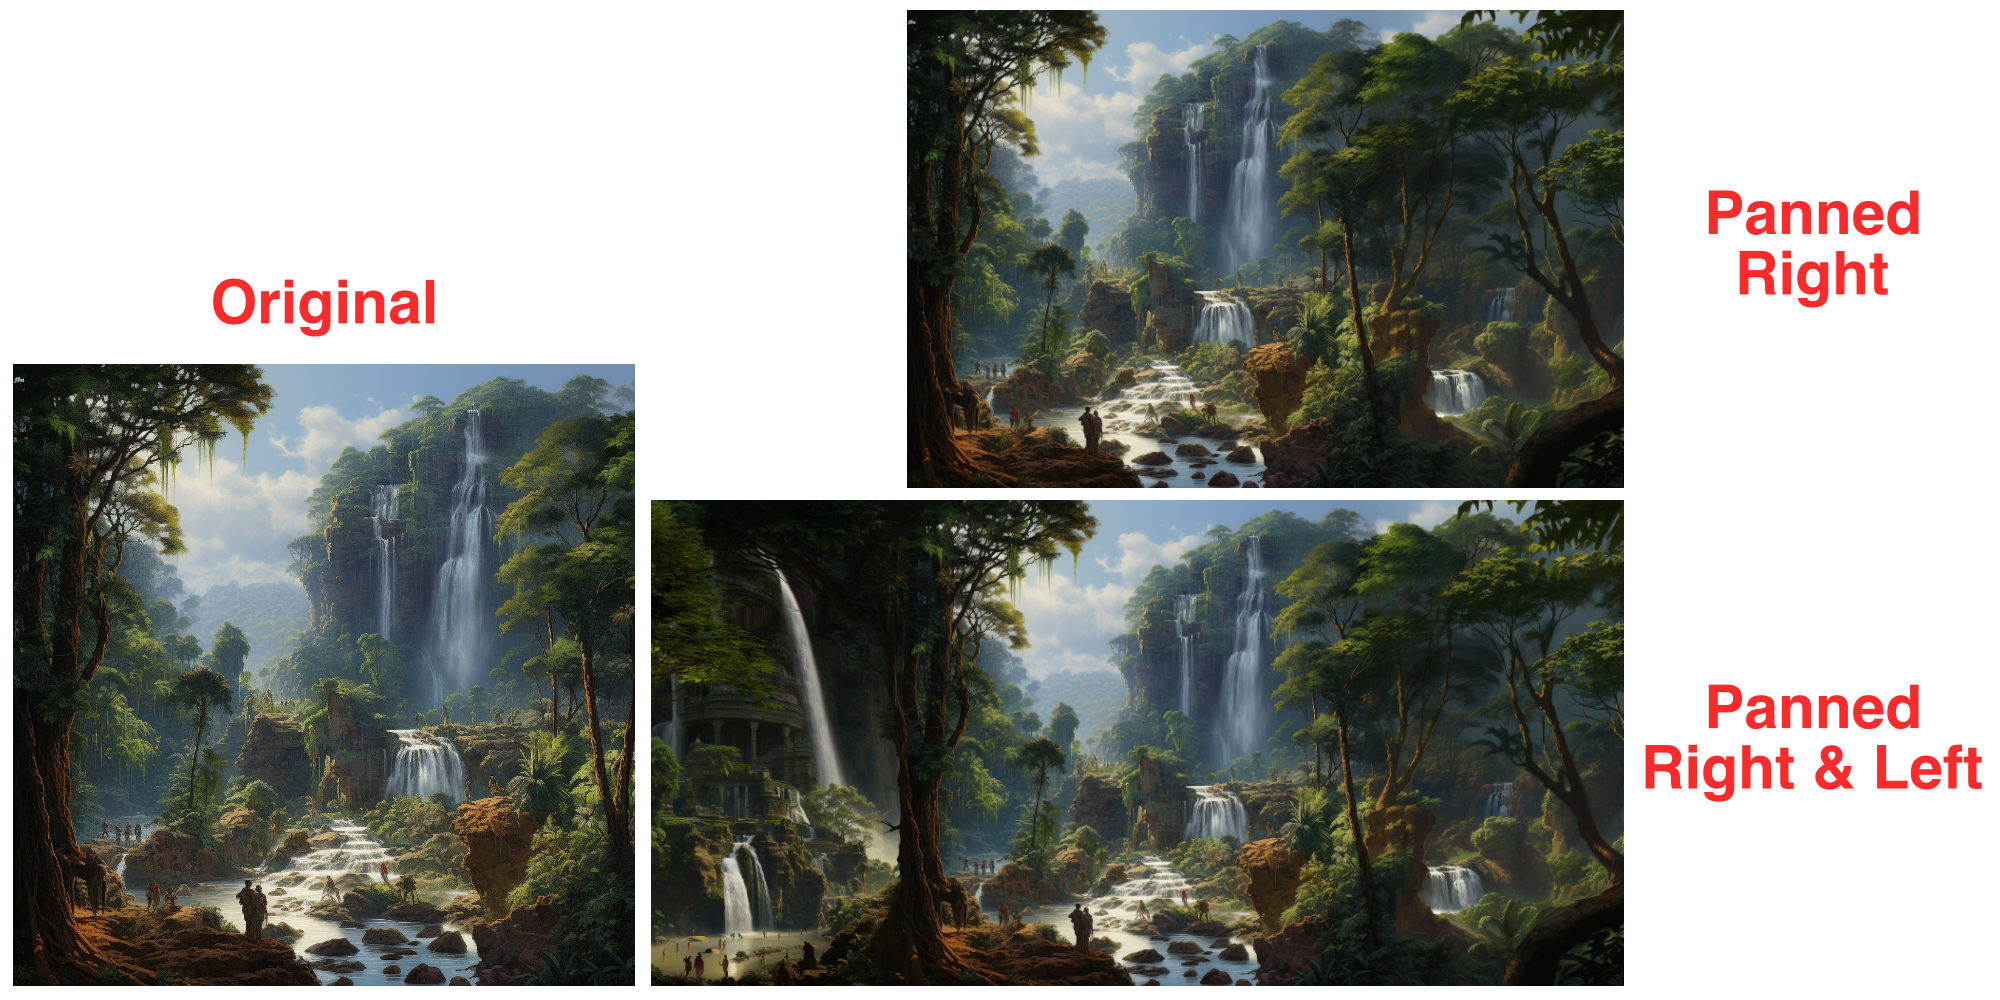
Example 2: Here’s what we created using Pan on Midjourney (horizontally) with the input prompt: tall mystical Burmese waterfall, Ramayana, Burmese river, forest.
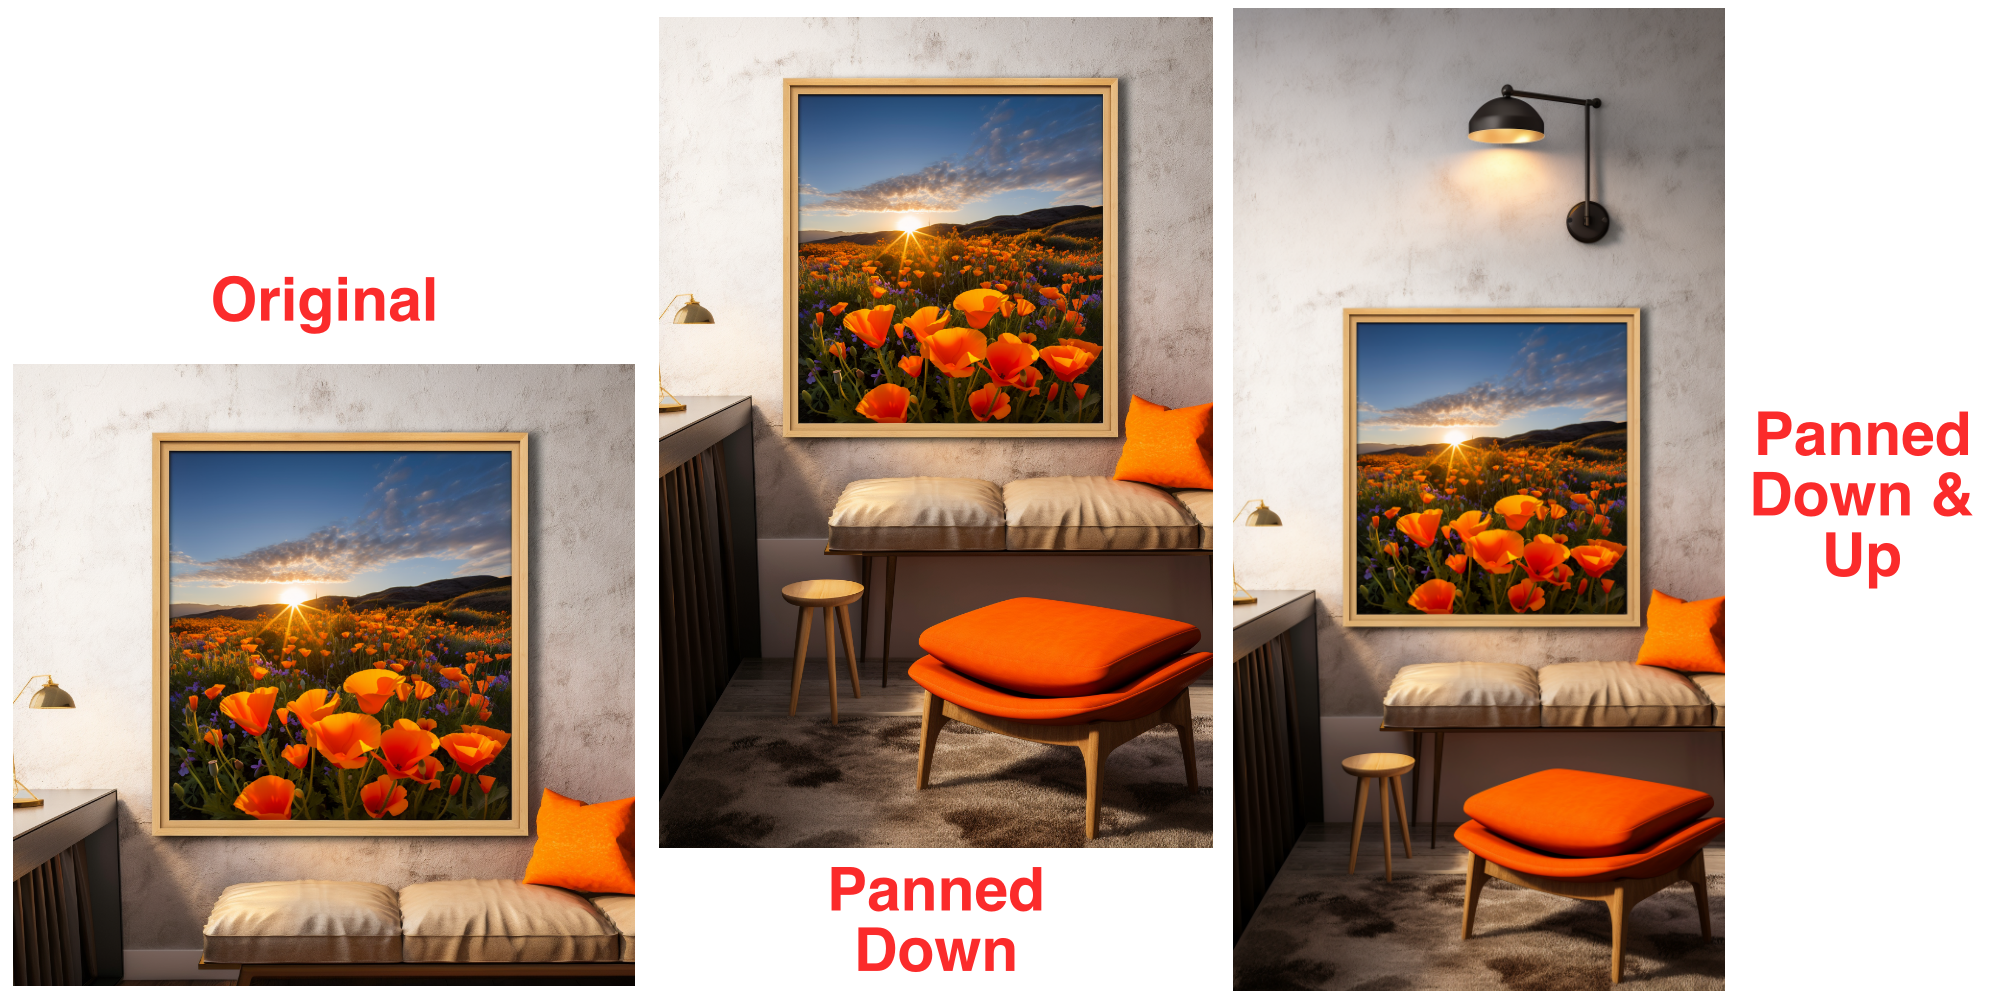
Example 3: Here’s what we created using Pan on Midjourney (vertically) with the input prompt: A framed poster on the wall.
What can you NOT do when using Pan on Midjourney?
You can create stunning panoramic art on any of your creations on Midjourney using the Pan feature but the tool does come with some limitations. Here’s a list of things you CAN NOT do when using Pan on Midjourney:
- You cannot create variations of images generated using Pan. Unlike other generations, panned images will only show upscale options underneath the results.
- You can only pan an image in one direction at once; there’s no way to extend images in multiple directions.
- Panning is only possible either vertically or horizontally for an image. So, if you pan an image using the up or down arrows, the subsequent creations can only be panned vertically and vice versa.
- Besides choosing a direction for panning, you have no control over the amount you pan with each operation.
- While multiple panning increases the resolution of the results, using Zoom Out on a panned image will revert its resolution to the default size.
- With multiple panning, there are chances of repetition of elements or environment in newer generated results. To avoid then, you can activate Remix mode to change your prompt to include new details while extending an image.
That’s all you need to know about extending your images using Pan on Midjourney.