If you have rooted your OnePlus 7 Pro, OnePlus 7 or any other older device, you know how much of a pain installing updates is.
If you don’t install an update in the proper manner, then the device may fail to boot. And even if you install the update, it may result in the removal of the TWRP recovery and root access.
But worry not!
Here’s a trick to let you install the OTA update and not run into any bootloop issue while keeping root and TWRP recovery.
How to install updates and keep TWRP and Root (Magisk)
- Download the update on your device first.
- Update download → OnePlus 7 Pro | OnePlus 6 | OnePlus 6T | OnePlus 5 | OnePlus 5T
- If you downloaded the update file on PC, then transfer it to your OnePlus 7 Pro.
- Note: Do not copy the file inside any folder or subfolder on your OnePlus 7 Pro. It needs to be on the root of the internal storage.
- Install the update file using the system update menu.

- Open the Settings app on your OnePlus 7 Pro.
- Scroll down and tap on System.
- Tap on System updates.
- Tap on the gear icon in the top right,
- Tap on local upgrade.
- Tap on the update file you transferred above. (If you saved it inside any folder, it will not show up for selection. See step 1.2 above.)
- Tap on Install Now.
- You will see the System update is installing dialogue. Let the system install the update.
- DO NOT REBOOT the device.
- Connect your OnePlus 7 Pro device to PC using the USB cable that came with it.
- Transfer these files to your OnePlus 7 Pro:
- TWRP installer ZIP file
- Magisk file
- Reboot the device to bootloader mode:
- Open Magisk app.
- Tap on Hamburger menu in the top left.
- Tap on Modules.
- Tap on 3-dot button in the top right.
- Tap on Reboot to bootloader.
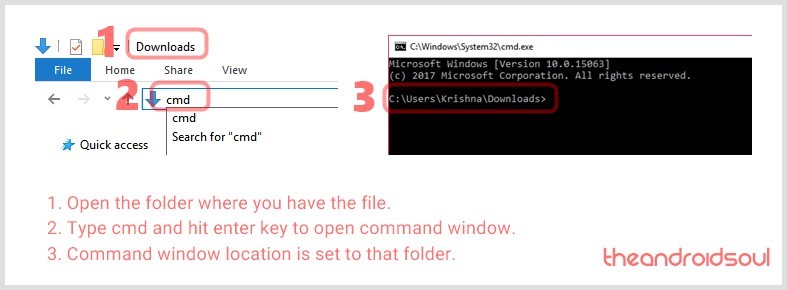
- Now open a command window inside the folder where you have the TWRP .IMG file from above. Do this:
- Boot TWRP recovery on your OnePlus 7 Pro. Once your OnePlus 7 Pro boots into bootloader mode, run the command below to install TWRP temporarily and access it right away.
fastboot boot <name of twrp file here>.img
- Install TWRP recovery on your OnePlus 7 Pro permanently. If you are sure that TWRP is working well, you can now install the TWRP recovery permanently. Here’s how:

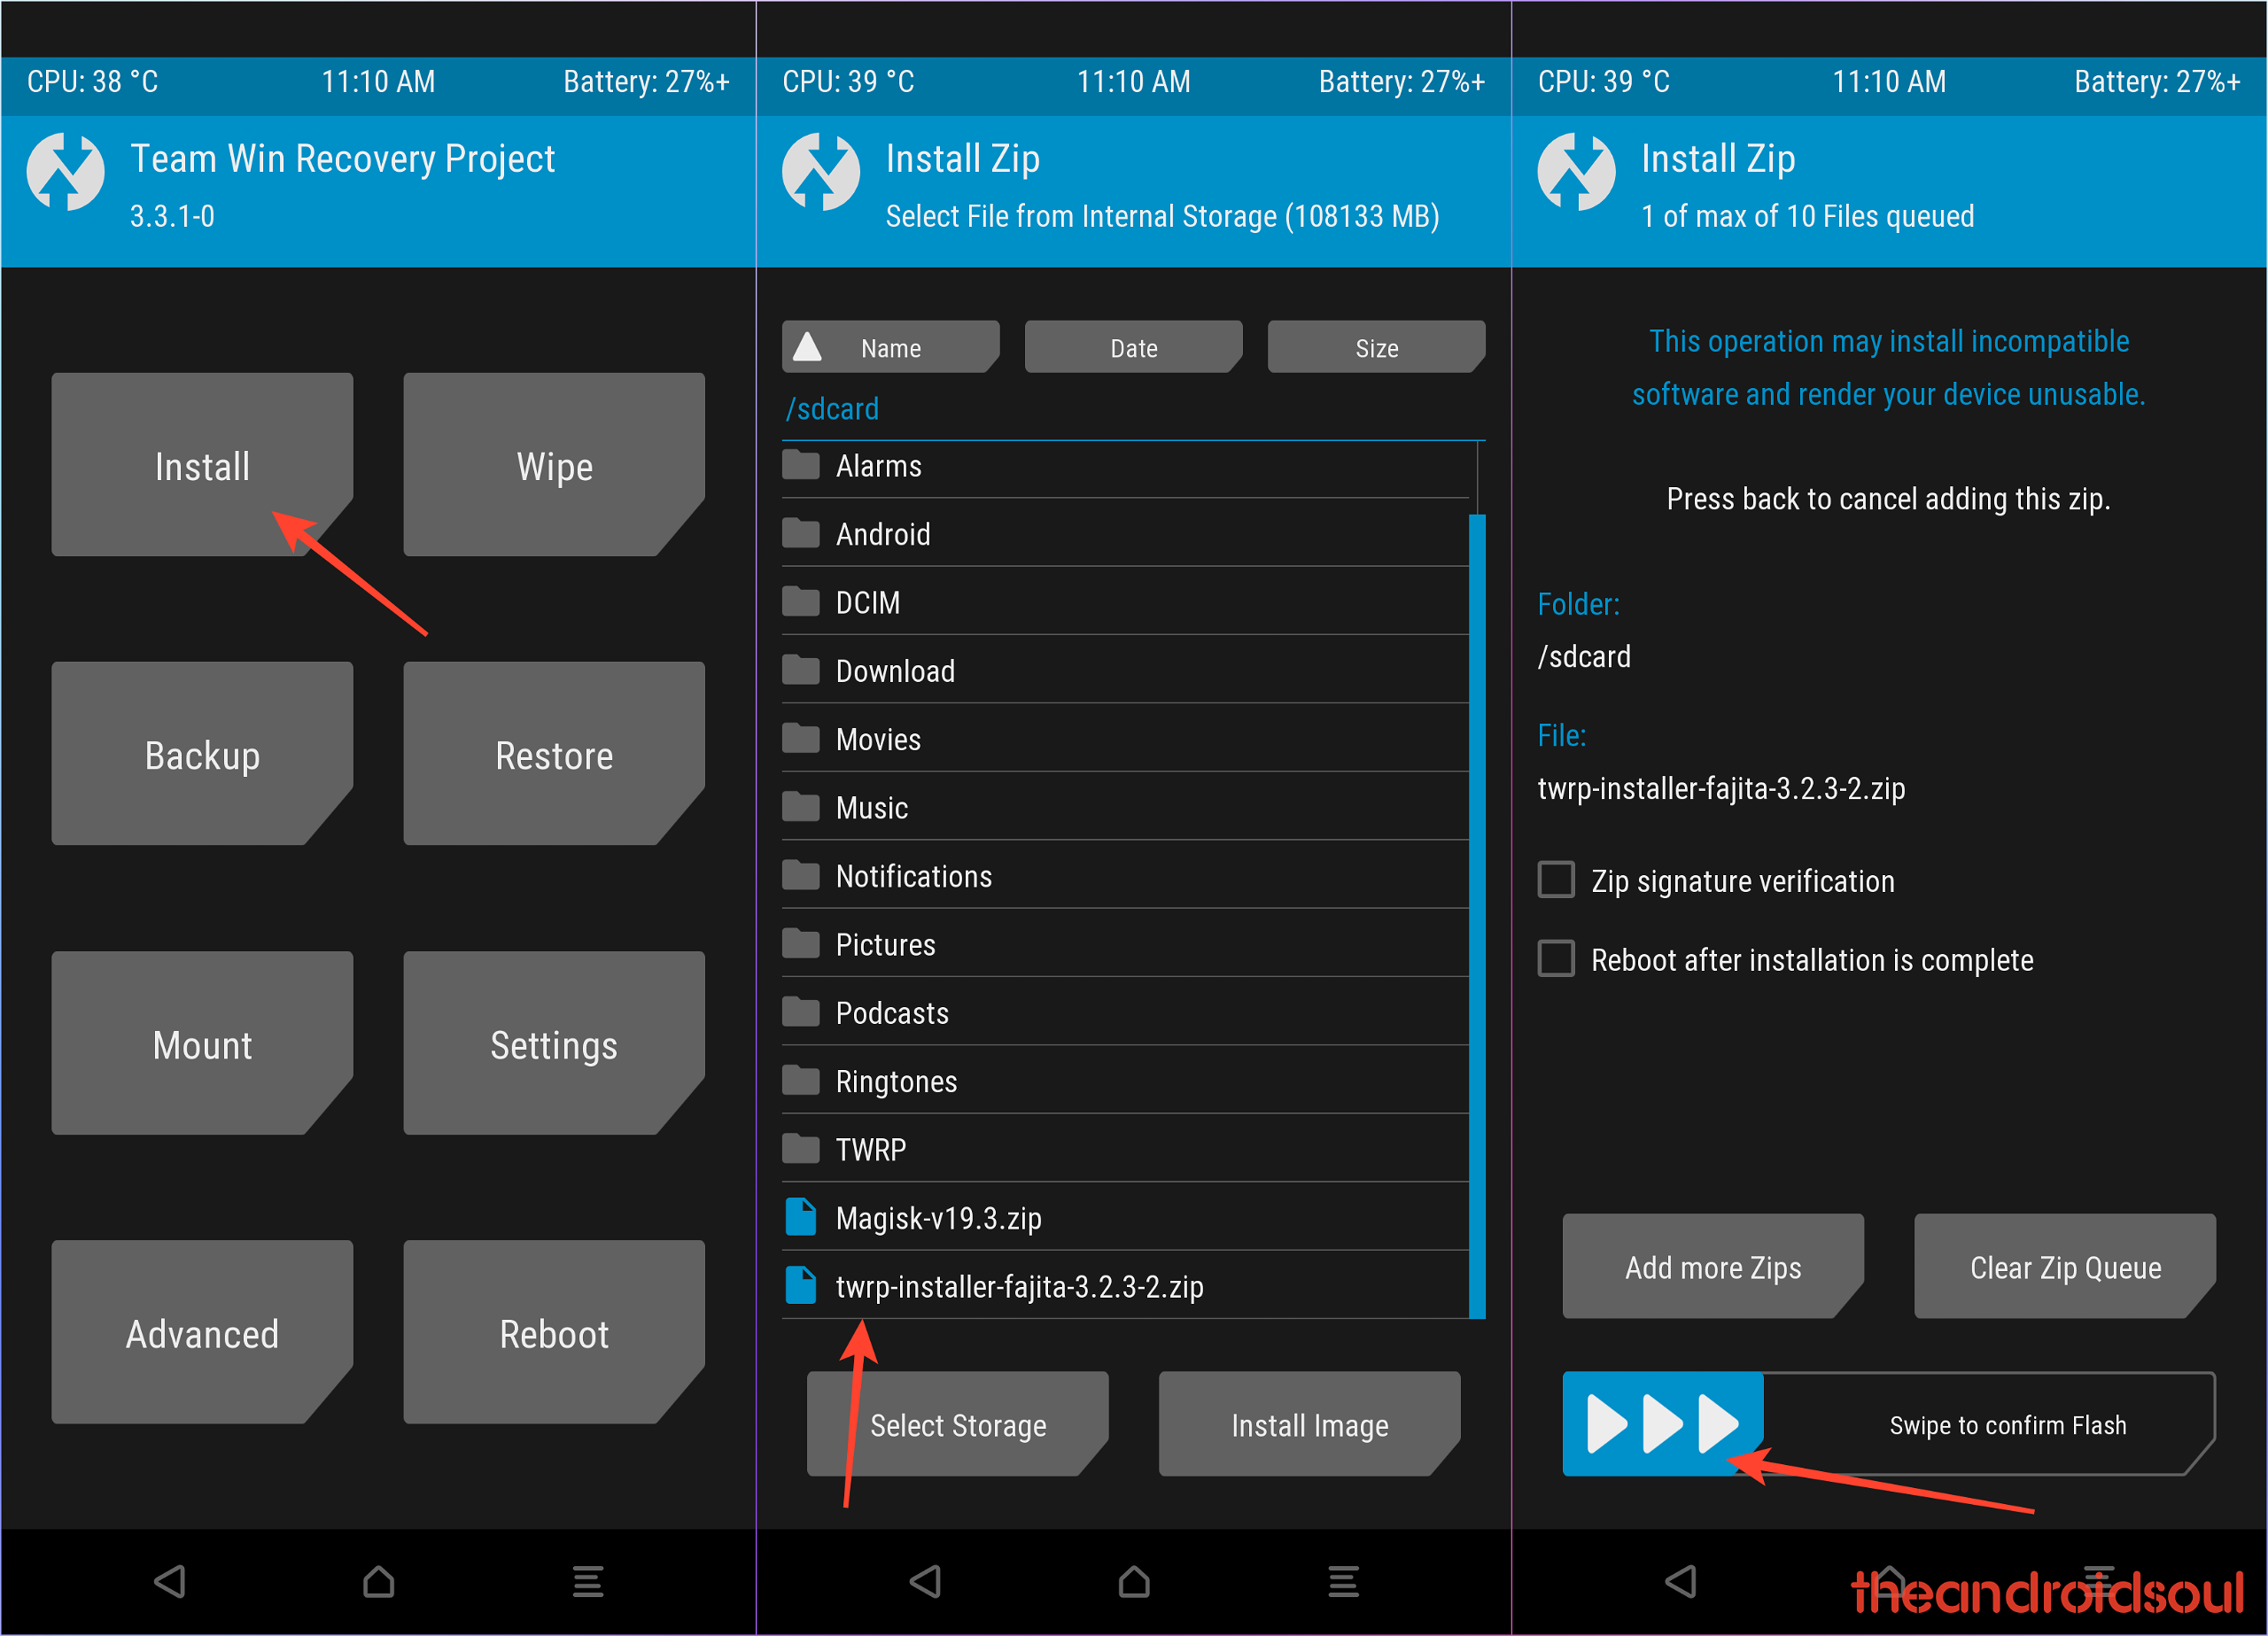
- On the device, tap on the Install button.
- Select the TWRP ZIP file you transferred right above.
- Perform the Swipe action to confirm and install the TWRP recovery permanently.
- [Careful!] Now, reboot back to TWRP again. Tap on the home button, then on the Reboot button, and then on the Recovery button to restart the device into TWRP.
- Wait, don’t reboot the device yet. You still need to root the device using Magisk, or install a DM Verity disabler file, to not let the system remove TWRP when you restart the device. Yes, to keep TWRP, you need to install either Magisk file or DM Verity disabler file. See the next step for that.
- Root your OnePlus 7 Pro. But if you don’t want to root the device, simply install DM Verity disabler file in place of Magisk root file.

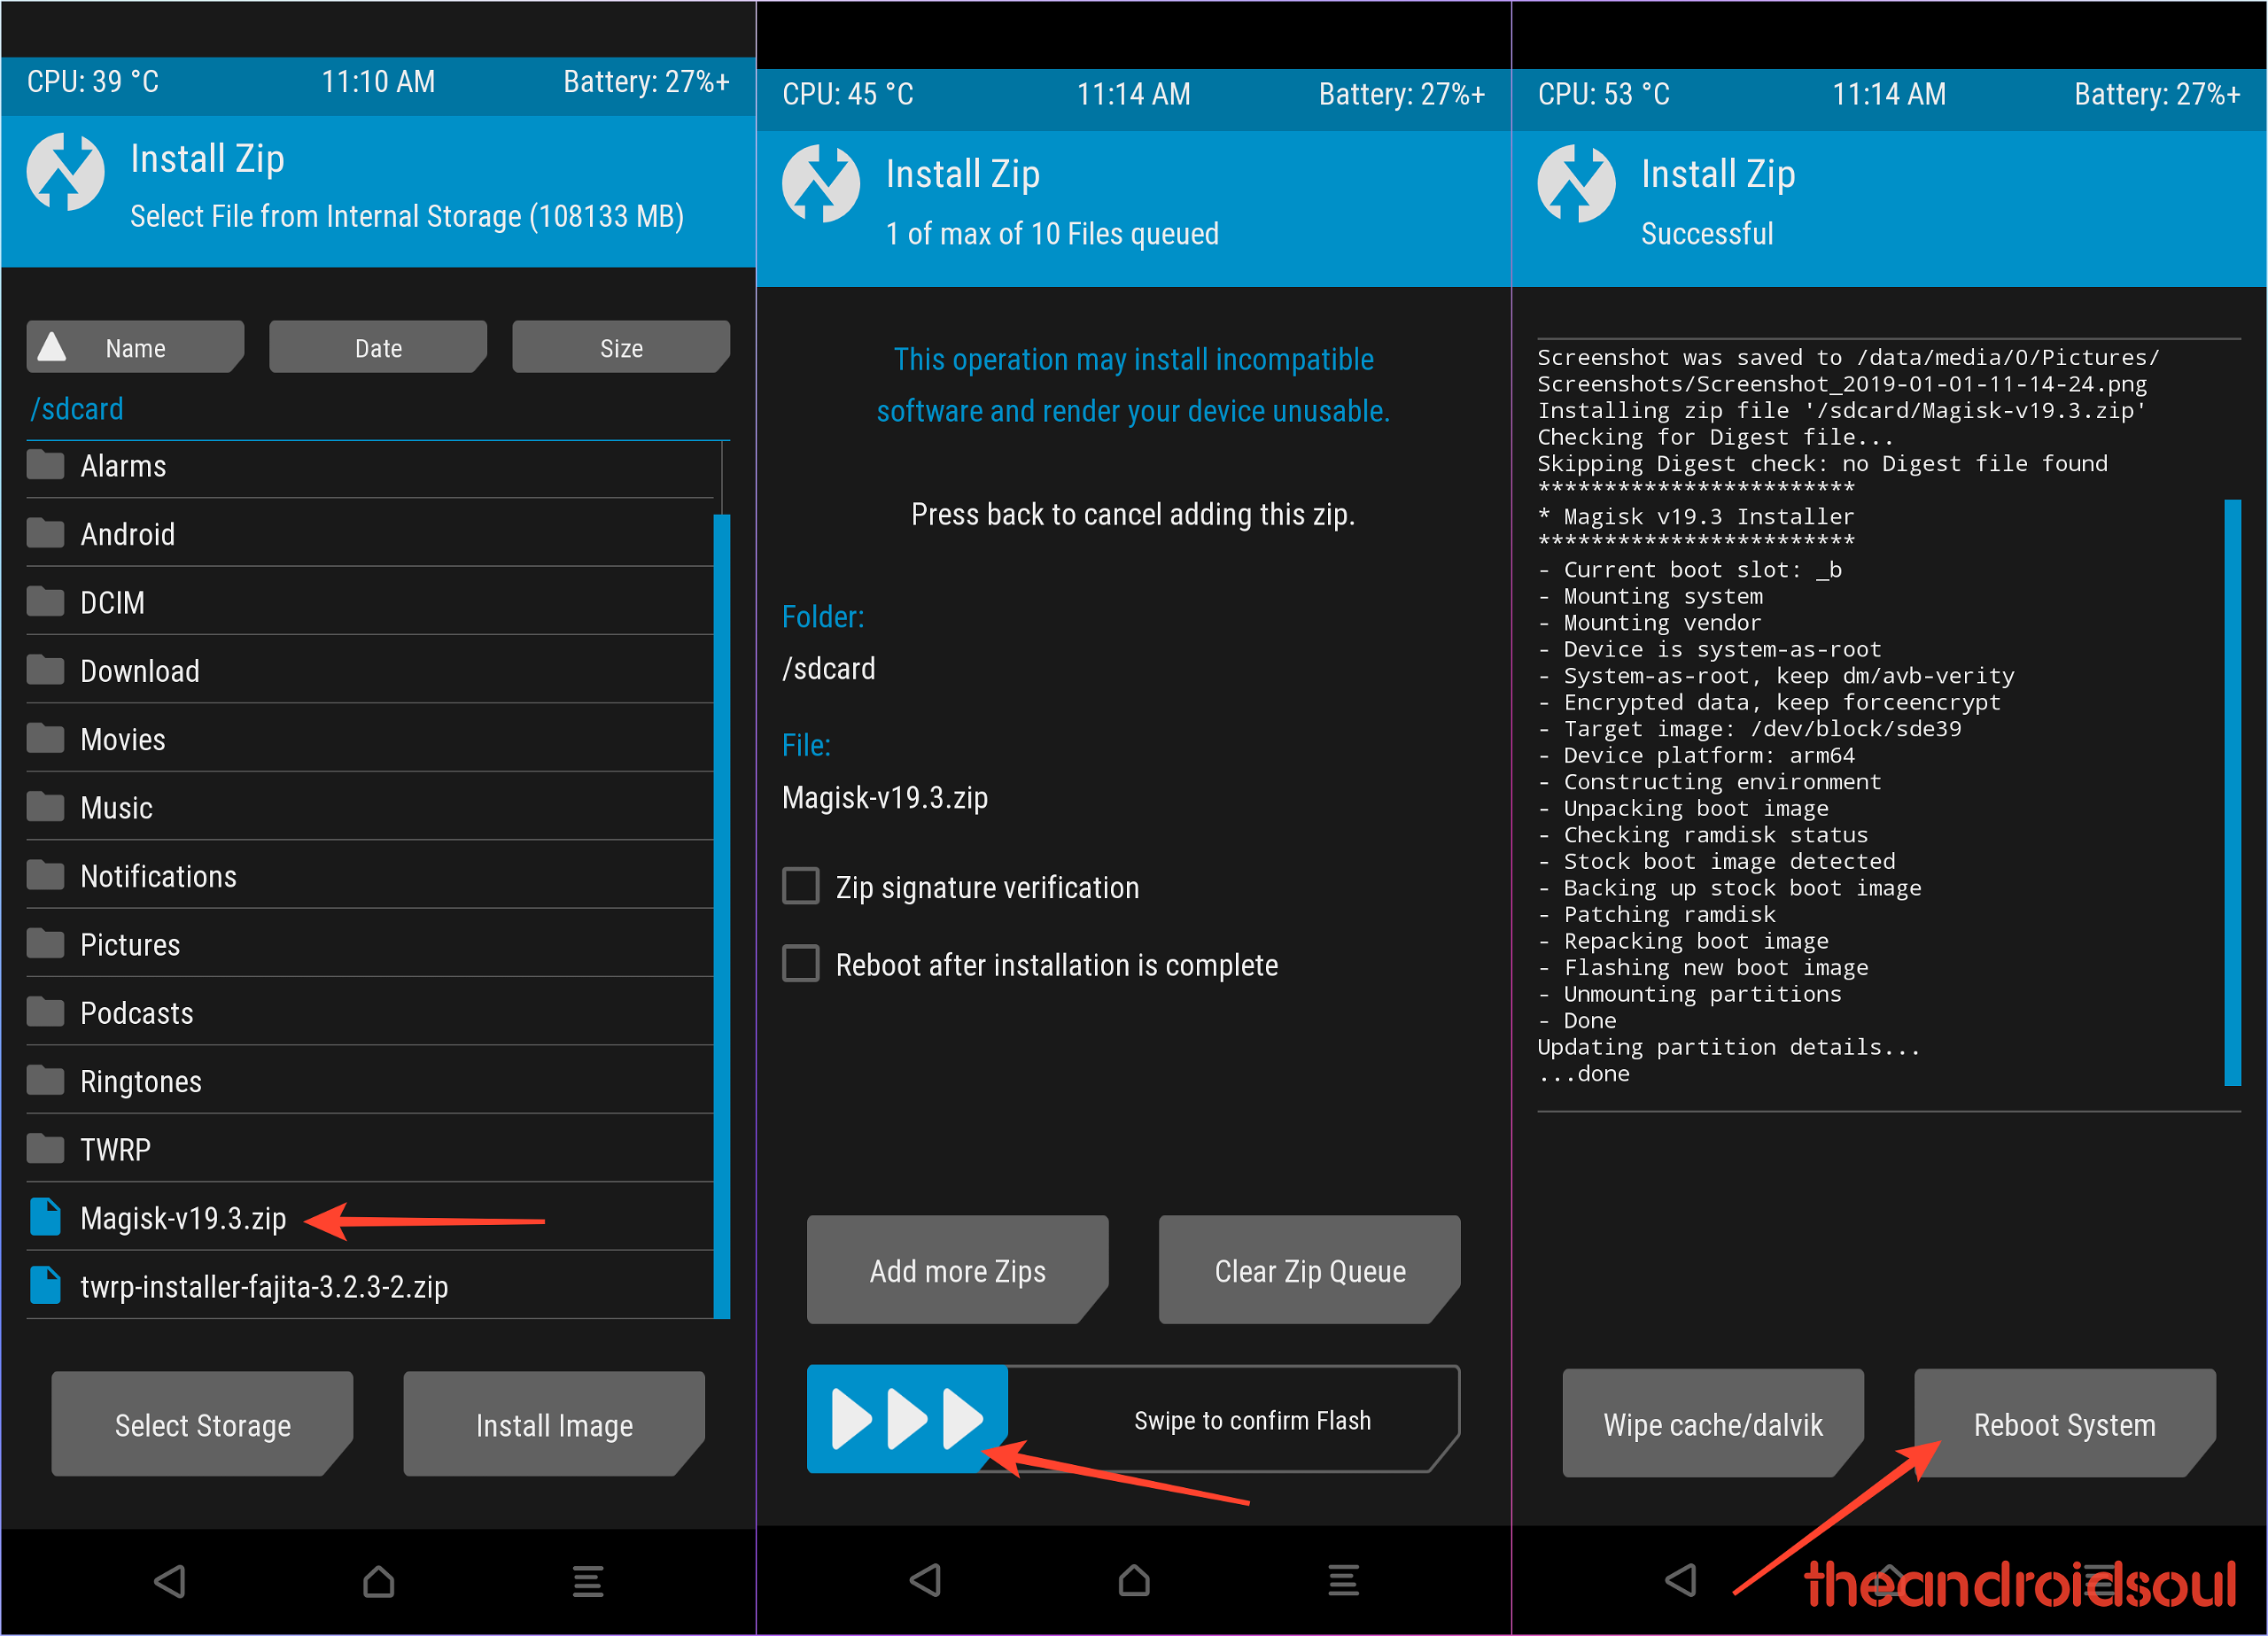
- Go back to the home screen of TWRP.
- Tap on Install.
- Browse and select the Magisk root package file (or the DM Verity disabler file).
- Perform the Swipe action to confirm the installation on the next screen.
- Tap on the Reboot system button to restart the device. You will have the latest update as well as TWRP Recovery and root access via Magisk.
That’s all.


