Google Chrome is by far the most popular web browser on the planet. It offers breakneck loading speeds, excellent extensions, and is available on almost all devices across the board. Most importantly, Google has never looked like slacking off, continuously delivering features and useful perks through routine updates.
Despite being laden with user-friendly features, Google Chrome, too, suffers from the autoplay problem. Not only does it take a toll on the browsing experience, but it also consumes your mobile data like anything — wasting it on videos you’re not even interested in watching.
Today, we’ll tackle the annoying and ever-present problem of autoplay on websites, tell you how you could silence the websites on Google Chrome in a heartbeat.
Related: How to Delete Last 15 Minutes Search History on Google
Can you turn off autoplay in Chrome?
Back in 2018, Google formally introduced a feature that allowed users to turn off annoying auto-playing music on websites. Unfortunately, it never got around to giving the same treatment to auto-playing videos. So, as of now, there’s no native way of turning off autoplay videos in Google Chrome.
Google Chrome’s compatriot, Microsoft Edge, is reportedly working on the same functionality. The feature is expected to drop in the coming weeks, which might propel Google to revive its abandoned project.
Related: How To Disable Suggestions Cards on Google Chrome New Tab Page
How to disable audio autoplay on a website
Yes, Google Chrome is yet to allow you to turn off autoplay videos, but disabling audio autoplay is not any less peaceful. When turned off, you will be completely isolated from the different audio tracks that the website might be throwing at you.
On Computer
To turn off audio autoplay on the website you are currently visiting, first, click on the little lock icon on the left-most corner of your address bar. Now, hit the drop-down menu option right next to ‘Sound.’

The option would be set to ‘Automatic (default).’ To make sure that the website doesn’t make a peep anymore, click on ‘Mute.’

As an alternative, you could change the site settings in a more detailed manner. Click on the lock icon at the left-most edge of the address bar and then go to ‘Site settings.’
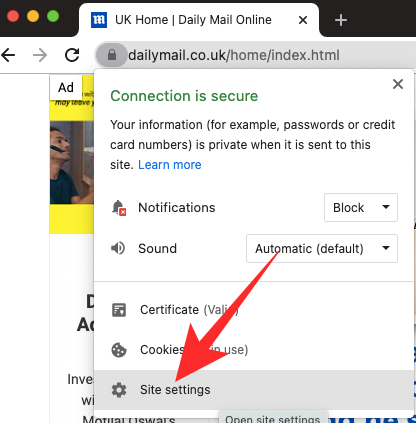
Next, scroll down until you see the ‘Sound’ option.

Click on the drop-down menu — Automatic (default) — to reveal more options. Click on ‘Mute’ to turn on website sounds.

On Mobile
You can disable sounds from a specific website through the mobile app as well. After you’ve loaded the website, you’ll find a lock button on the left-hand edge of the address bar.

Tap on it to see the site’s settings — settings that have either been allowed or blocked by you. Next, tap on ‘Permissions.’
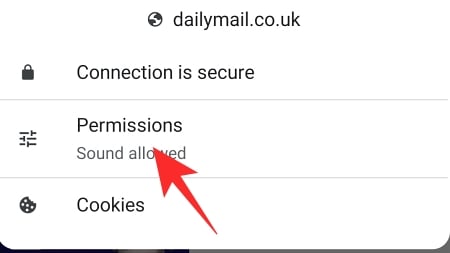
Since the website is already playing audio, permission to play sounds has already been granted. Tap on the toggle on the right of ‘Sound’ to turn it off, which would stop the website from playing audio.

How to stop audio autoplay on all sites
Want complete peace and quiet? Let’s check out how you could turn off audio by default on all websites.
On Computer
After launching Google Chrome, click on the vertical ellipsis button at the top-right corner.
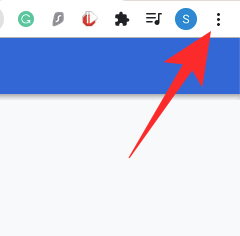
Now, go to ‘Settings.’

Then, click on the ‘Privacy and security’ tab.

Next, open the ‘Site settings’ option.

This area determines what your default preferences are for each website. So, if you choose to mute audio on all websites, all you have to do is disable sound from ‘Site settings.’
Scroll down until you find the ‘Additional content settings’ option. Click on it to expand. Now, click on ‘Sound’ to explore default options.

Finally, set the default behavior to ‘Don’t allow sites to play sound.’
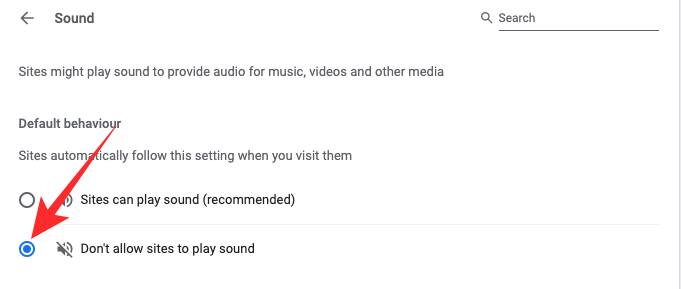
Exit the area when done.
On Mobile
You can turn off sound for all websites through the Google Chrome app as well. Tap on the vertical ellipsis button at the top-right corner and go to ‘Settings.’

Scroll down until you see the ‘Site settings’ option.

Browse the menu until you find ‘Sound.’ Tap on it to open.

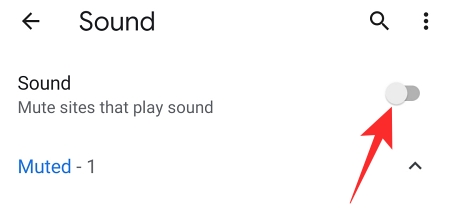
The toggle on the right of ‘Sound’ would be turned on, allowing all websites to play sound. You’ll need to turn it off and exit the area to save the changes.
How to add an audio autoplay exception
Most websites misuse the power of audio autoplay. However, there are some sites that know how to make the most of the default audio permission. If you happen to know such a site or two, it makes sense to create an exception just for them, which would allow them to keep up the good work. Here’s how to add website exceptions on Chrome.
On Computer
Launch Google Chrome and click on the vertical ellipsis button at the top-right corner of your screen.

Now, go to ‘Settings.’

Click on the ‘Privacy and security’ tab.

Next, under ‘Additional content settings,’ click on ‘Sound.’

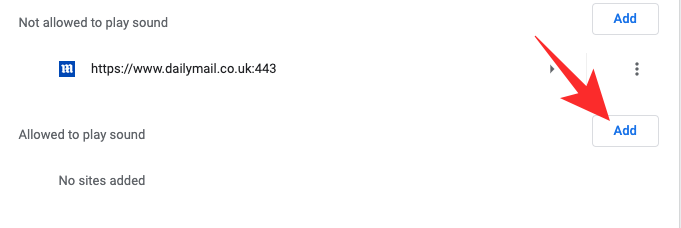
Since the default is not set to ‘Don’t allow sites to play sound,’ you’ll need to click on the ‘Add’ option next to the ‘Allowed to play sound’ banner.
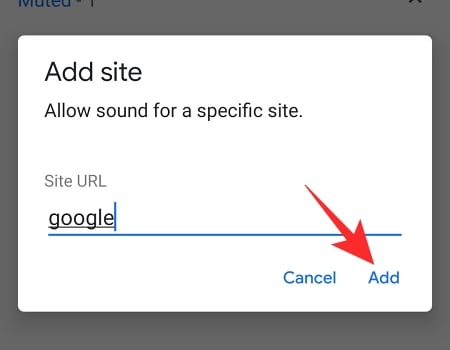
Put down the URL of the website you want to add to the list and click on ‘Add.’

The exception would be added successfully.
On Mobile
Adding an exception is pretty straightforward on the Google Chrome mobile app. After launching Chrome, tap on the vertical ellipsis at the top-right corner. Now, go to ‘Settings.’

Next, head over to ‘Site settings.’

Scroll down until you see ‘Sound.’

Upon opening, tap on the ‘Add Site Exception’ hyperlink.

Finally, add the URL of the website you wish to hear and tap on ‘Add.’
How to stop autoplay videos on Chrome on Computer
As we’ve seen, it’s not too difficult to turn off autoplay when it comes to audio alone. Unfortunately, autoplay video is still a hopeless case.
The only way — although not always reliable — out of this mess is through third-party extensions, available through the Chrome Web Store. After testing out a bunch of these extensions, we’ve picked the most reliable one, and below we’ll tell you how to use it.
Using AutoplayStopper to stop video from autoplaying
AutoplayStopper is available for free on the Chrome Web Store and is capable of stopping autoplay videos in their tracks. First, click on this link to go to the download page. Now, hit ‘Add to Chrome.’

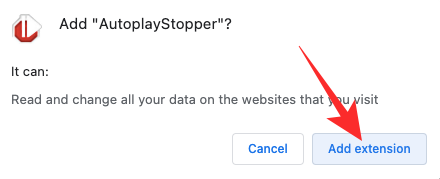
You’ll have to click on ‘Add extension’ again to add it to your browser.
The extension will stop all video pop ups right away. To keep it from killing the autoplay feature of a certain website, click on the extension icon at the top and hit ‘Allow autoplay.’

In our tests, the autoplay blocker did a respectable job. It stopped the pops on most websites, delivering a hassle-free experience.
Should you stop autoplay on all sites?
There is no denying the fact that autoplay is exceptionally annoying, especially when you’re on a strict data plan. From that perspective, it makes complete sense to stop autoplay on all sites. However, not all websites would like to play ball when you decide to kill the autoplay feature. So, if a website — especially a video conferencing site — refuses to function after you stop autoplay, you’ll have to allow autoplay and reload the website.
RELATED


