You’ve bought a new phone, loaded up your favorite apps — even some .APK files off third-party websites. You’re all set to push your favorite songs and movies, but see an alarming crunch of space. As it’s a new phone, app data can’t be the lone culprit. Maybe, it’s time to dig a little deeper, look more closely at your downloaded files.
The .APK packages you download and install off the internet are a little different than your usual Google Play Store applications. After installing, these packages don’t destroy themselves automatically but sit quietly in your Downloads folder. If you happen to download a lot of applications off the internet, chances are, they are the main reason behind your rapidly decreasing storage.
RELATED: How to sync device folders to Google drive
One-time-use, seemingly lightweight documents, such as movie tickets, flight bookings, or bill payment receipts can also take up a lot of space over some time. All of these go straight into the Downloads folder, which, more often than not, stays out of our gaze.
In this section, we’ll tackle the ‘ominous’ Downloads folder, and tell you how to get rid of the useless junk using three tried-and-tested methods. Now, without further ado, let’s get our fingers dirty.
RELATED: Why use File By Google
What is Files by Google?
Before we start our cleanup drive, it’s important to find a file manager application that gives us enough freedom to exercise our intentions. There are many file managers in the business and many of them are more than capable of getting the job done. But if we had to pick one file manager that can replace our native file managers, we’d, without a doubt, go with Google’s offering.
Files by Google has a neat interface, powerful organization tools, and a built-in file transfer mechanism, which, when combined, creates the most versatile file manager on the Google Play Store. As is the case with all Google applications, Files by Google, too, doesn’t charge you a single dime and is free of annoying ads.
Convinced and eager to get started? Head over to the Play Store and download the ‘File by Google’ app.
RELATED: How to remove duplicate files
How to easily delete files from the Downloads folder using Files by Google?
As mentioned earlier, the biggest USP of Files by Google is its simplicity. The app allows you to easily find the files residing in your Downloads folder and get rid of them for good. Follow these steps to easily access your Downloads folder and delete unnecessary files.
Step 1: Open the Files by Google app.
Step 2: Tap on the Browse tab.
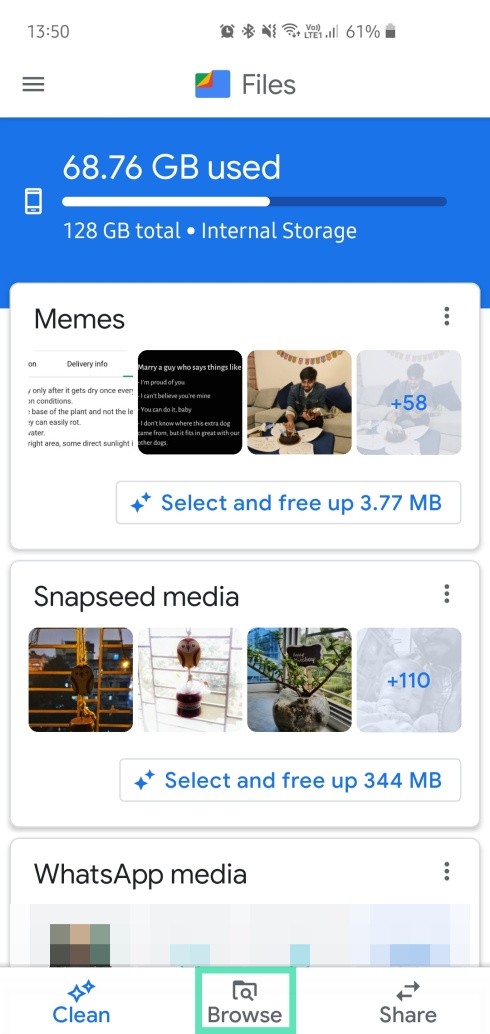
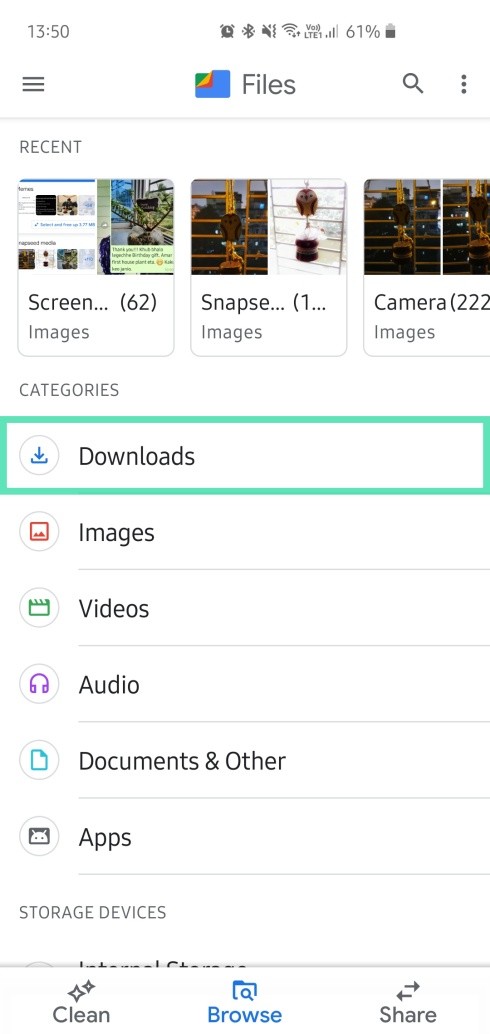
Step 3: Under Categories, tap on Downloads.
Alternatively, you could also tap on Apps and move over to App install files to check out downloaded .APK files.
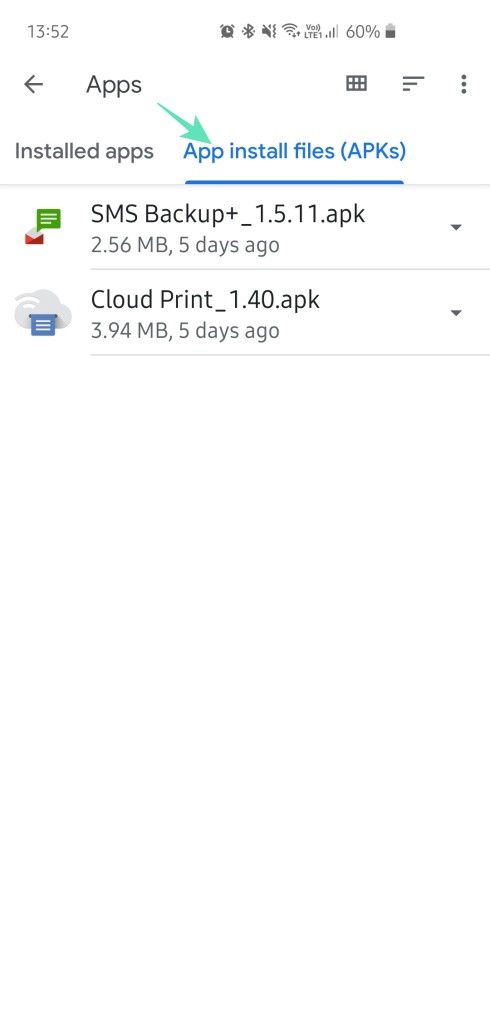
Step 4: Upon opening the Downloads folder, you can delete the files in one of three ways –
- Single: Tap on the drop-down icon at the right-hand-side of a file. Tap on Delete.

- Multiple: Tap and hold a file to access the option of selecting multiple files.

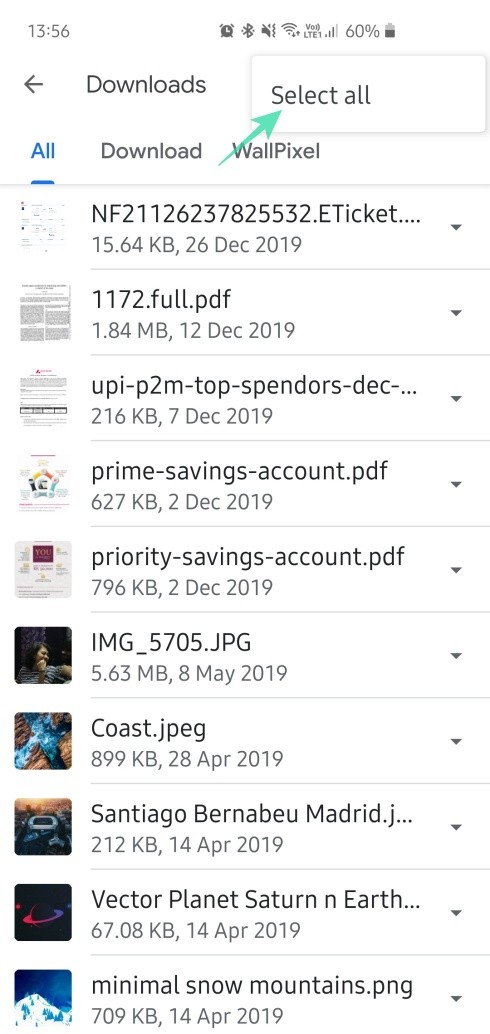
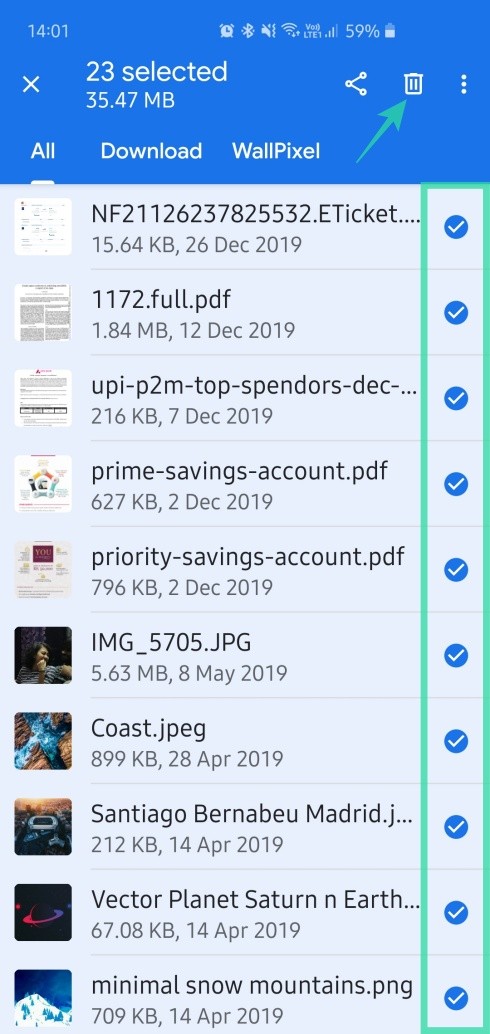
- All: Tap on More options (three-dot icon) at the top-right corner, Select All files, and tap on the little recycle bin icon.
How to perform an even deeper clean?
Accessing the Downloads folder and deleting files inside should give you plenty of peace of mind. However, if you’re still not satisfied with the amount of free space, you could benefit from digging even deeper.
Many apps store their downloaded files in their folders, which means that these files don’t show up in the Downloads folder. You may not use these files ever again, but they would continue to hog space until the end of time. Thankfully, Files by Google can help you out in this regard, as well.
Step 1: Open the Files by Google application.
Step 2: Go to Browse.

Step 3: Tap on Internal storage.
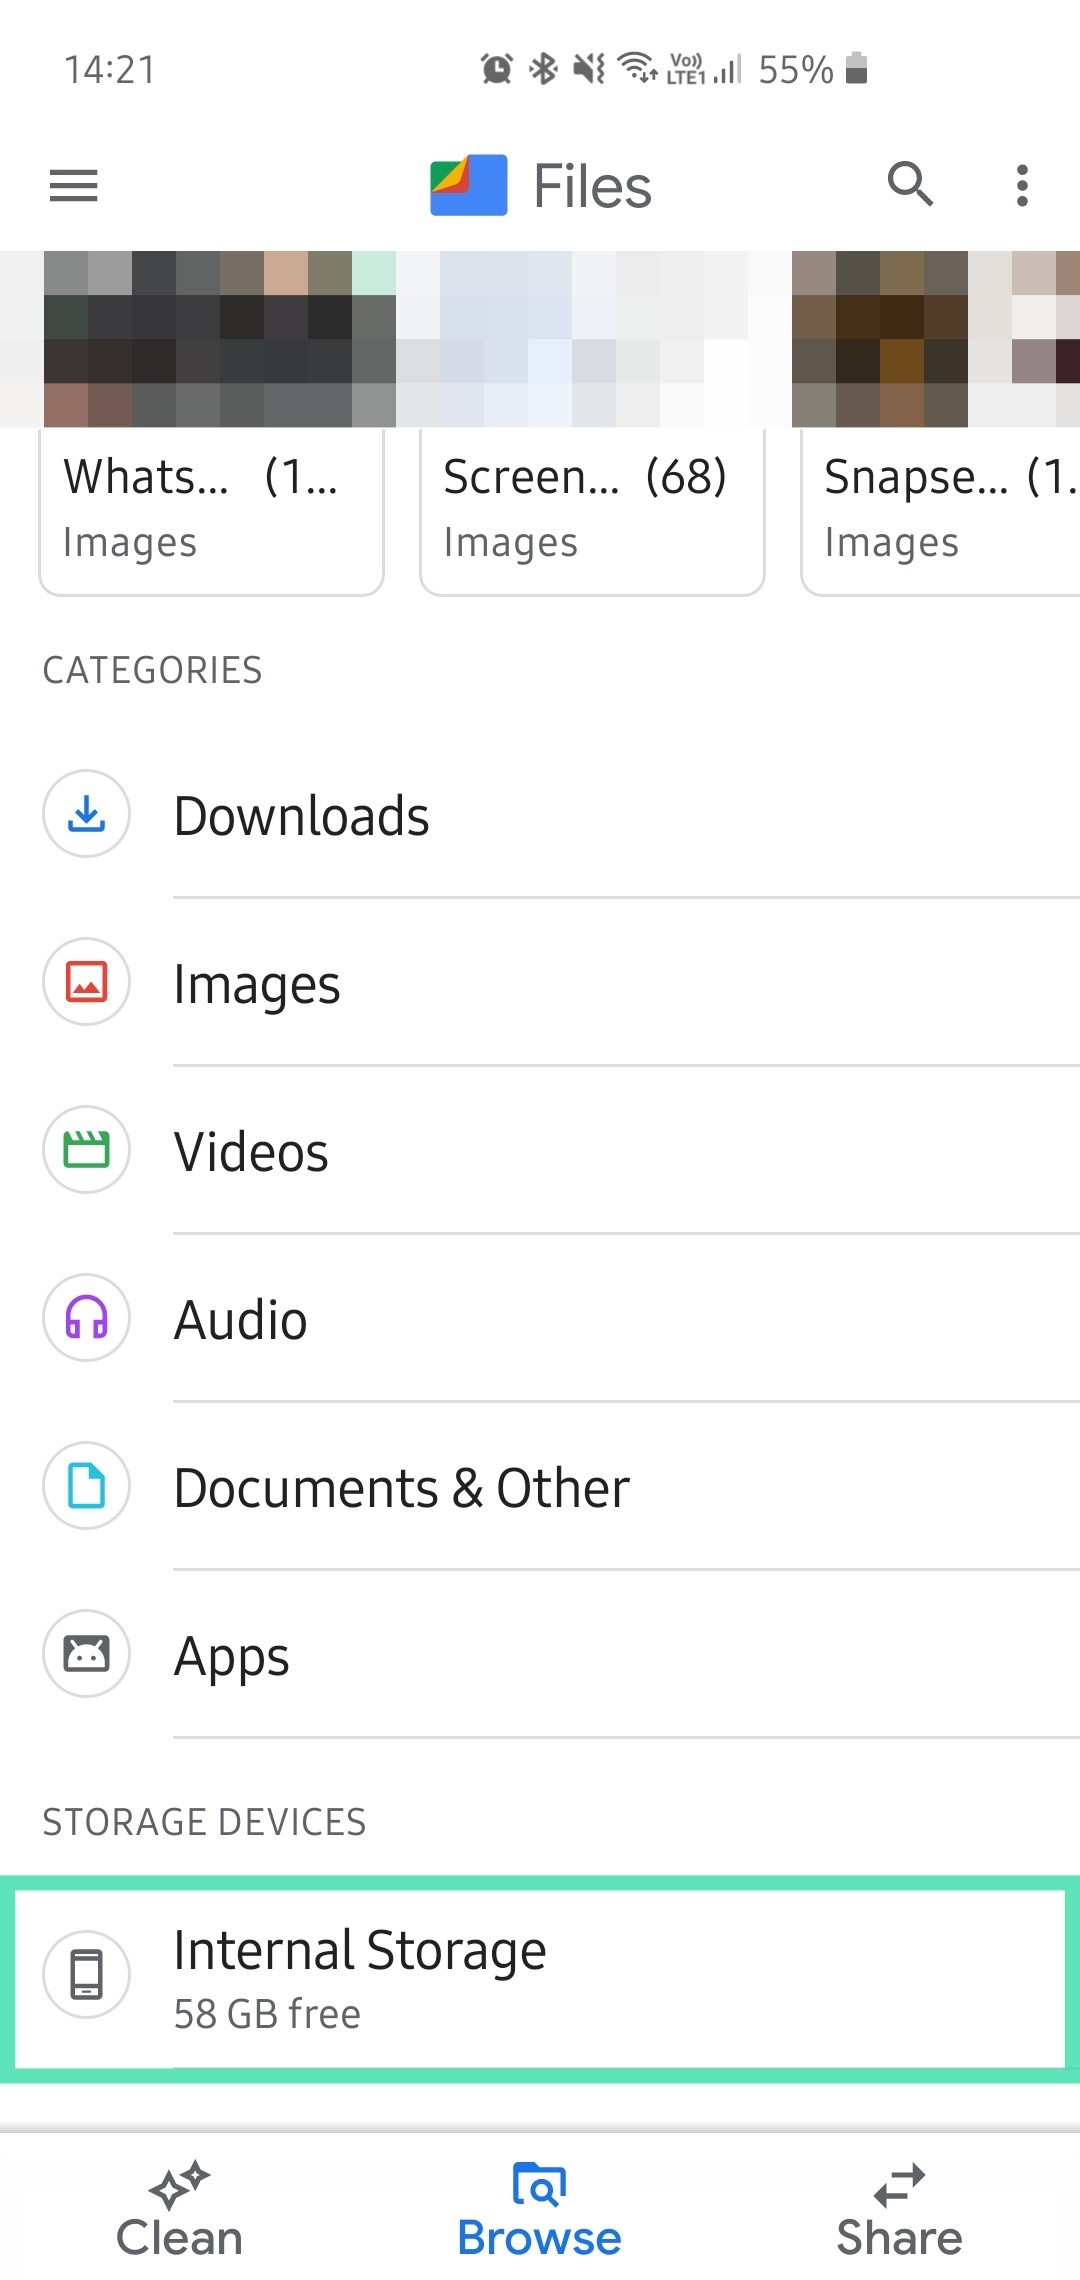
Step 4: Tap on More options at the top right corner.
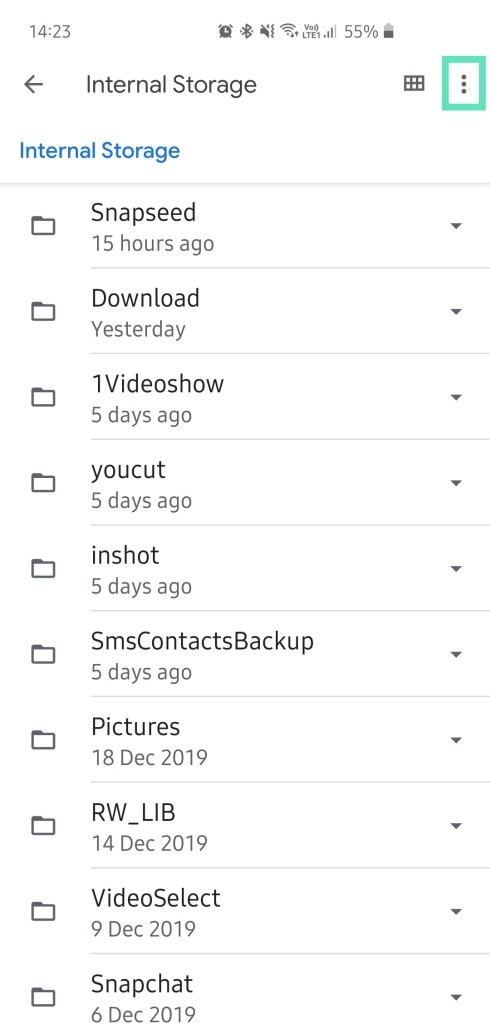
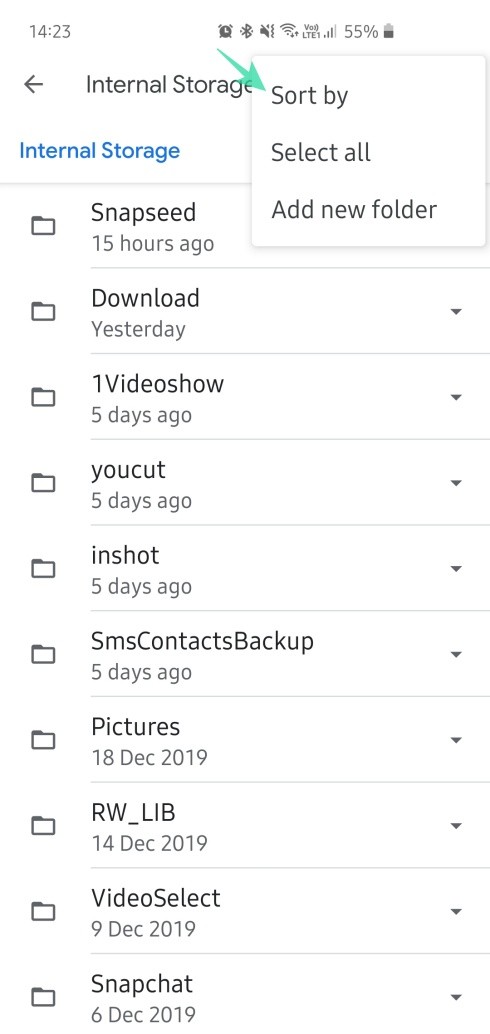
Step 5: Select Sort by.
Step 6: Select Date (newest first).
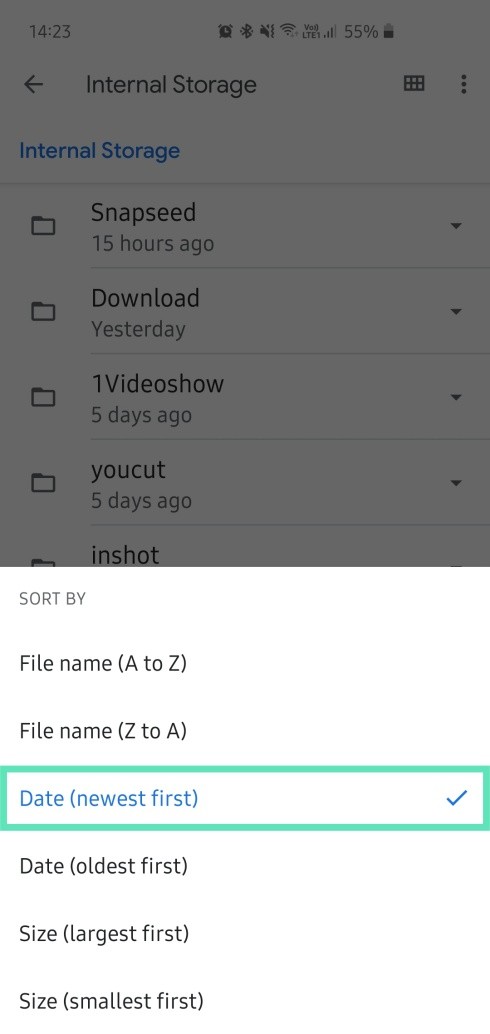
Step 7: Folders will be rearranged by the day they were last modified.
How to delete downloaded files using Samsung’s My Files app?
Samsung smartphones come with a pretty robust file manager, which, for all intents and purposes, serves as good as Google Files. Here, too, you get a dedicated ‘Downloads’ category, allowing you to remove all unnecessary files when you want it.
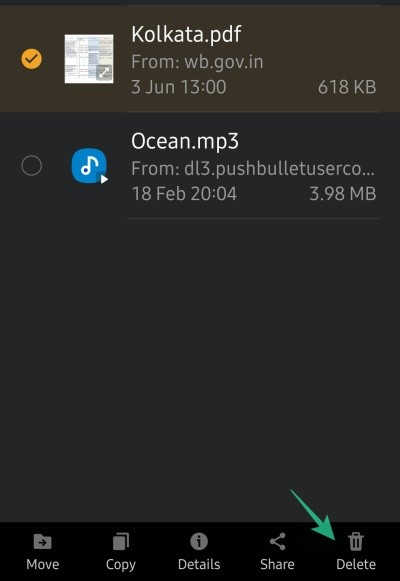
First, fire up the ‘My Files’ app on your Samsung smartphone. Now, tap on ‘Downloads.’
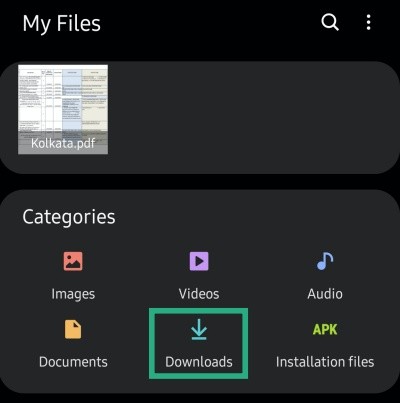
Once there, press and hold a file to select multiple files — or ‘All’. Finally, hit ‘Delete’ to confirm your action.
How to remove the files permanently?
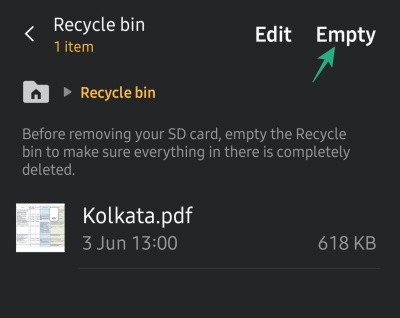
Once deleted, these files are moved to the Recycle Bin, scheduled to be automatically deleted after 30 days. You could, of course, take matters in your own hands and permanently delete the files yourself.
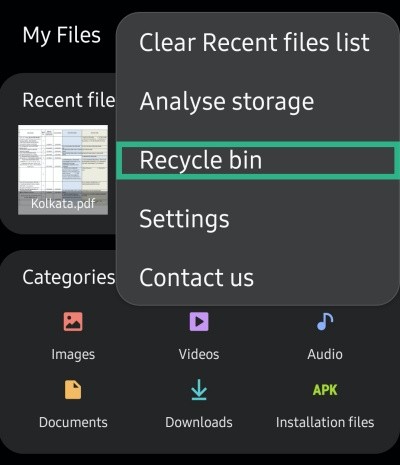
To do so, you’ll first need to open the ‘My Files’ app. Now, tap on the ‘More options (three-dot)’ button at the top-right corner and hit ‘Recycle Bin.’
Lastly, tap on ‘Empty’ to take out the trash, permanently.
How to delete downloaded files straight from Google Chrome?
Alternatively, you could go to your default browser and choose to delete the downloaded files straight from the Hornet’s Nest. To do so, first, go to Google Chrome, tap on the three-dot’ button at the top-right’ and go to ‘Downloads.’

Then, simply delete the unnecessary files.

That’s it! Follow the aforementioned steps and your device will be free from junk files in the Downloads folder.


