
Canva is one of the most creative spaces on the internet and for good reason too. The application has the most extensive set of features that amateur creators will especially find easy to use. A super-smooth design process and tons of variety in the form of fonts, shapes, templates and designs make Canva a dream to use.
A major reason why Canva takes the cake is thanks to what it offers in its free version. Even those who aren’t paying for Canva can still flesh out an excellent design thanks to the major number of features and templates that are available in the free version.
In this article, we are going to look at one such feature that is extremely useful if you want to create a logo or beautify your text. Here’s everything you need to know about how to curve text on Canva.
Can you curve text on Canva?
Absolutely, Canva offers a function that allows the user to curve text on both their website as well as Smartphone app. This function is free and you can even adjust the curve of the text according to your design needs.
The feature is not at all difficult to use so whether you’re a first-timer or a Canva pro, this tutorial will guide you perfectly. So here’s a tutorial on how to curve text on Canva.
How to Curve Text on Canva on web
Go to the Canva website and open the design you want to edit and add curved text to.
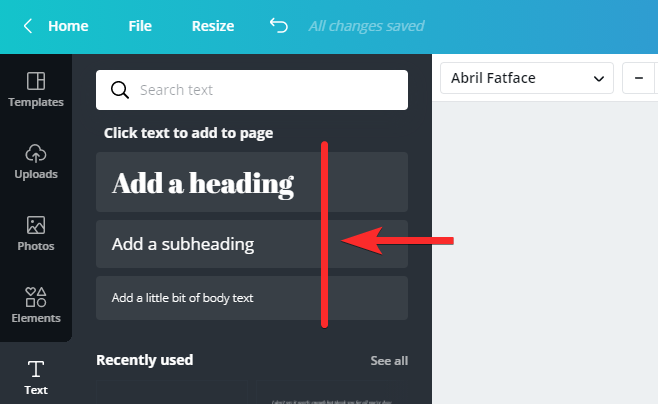
Now, add the text you want to have on your design. You can add text using a text template. From the left panel of options, click Text, and then choose either “Add a heading”, “Add a subheading”, and “Add a little bit of body text”. Once you do that, you can now type your text.
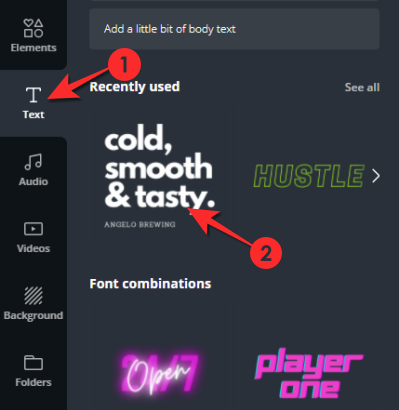
Alternatively, you can also select a Font combination to get some quick style text that you can edit to insert your own text.
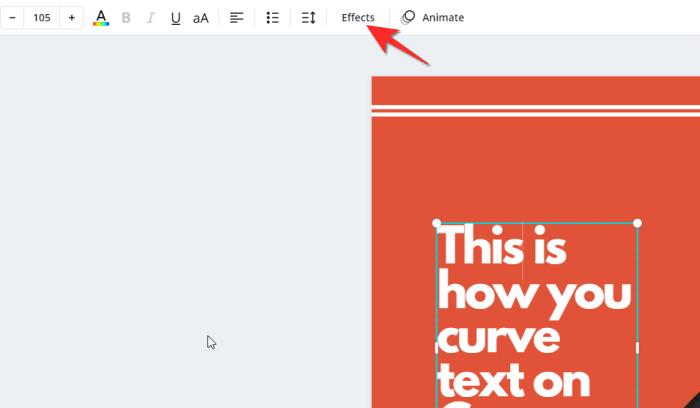
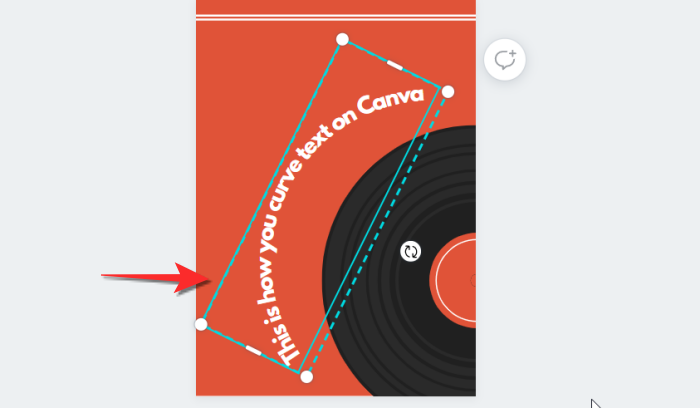
Click the text that appears on the template/design and edit it to add your text. After adding the text, select the text and then click the Effects option that is provided in the edit ribbon on top of the design.
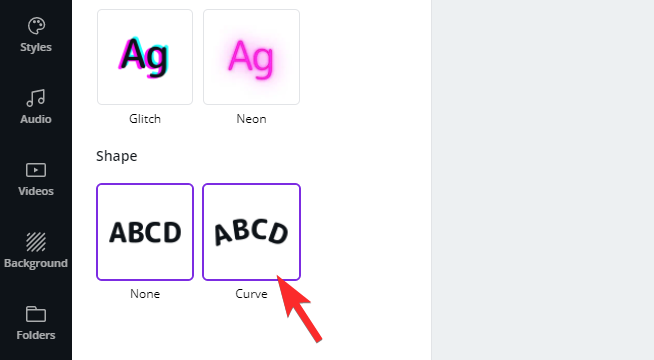
The Effects menu will open on the left, from the shape section, select the Curve option.
The text on the poster will now appear to be curved. Adjust the text using the guides provided in the aquamarine rectangle to place it on the design.
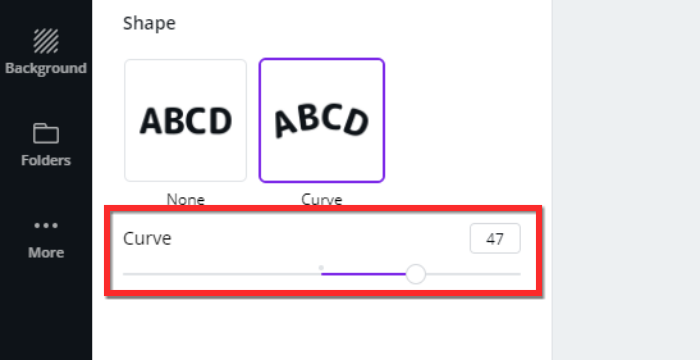
How to set up the angle of the curve on web
The curve may be too deep or steep so it will appear to fit oddly on your design. This is when you need to click on Effects and go back to the Shape menu to fix the arch of the curve.
Below the Shape menu, you will see the option of Curve along with a slider. Move the slider according to the needs of the design. If you need a tighter curve, move the slider towards the left and if you need a gentler curve, then towards the right.
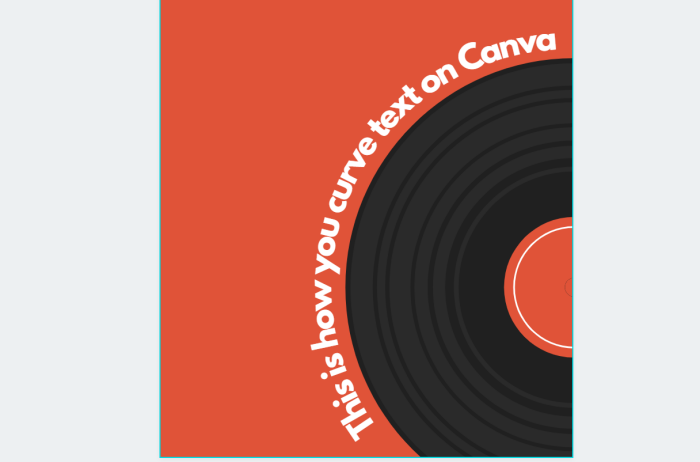
Once your curve is satisfactory, the final result will look like this.
How to Curve Text on Canva on Canva Mobile App
Open the design you want to add curved text on. To add some text to it, first, tap the purple button (+) that is present on the bottom-left portion of the screen.

A separate menu will open, from this menu, tap the “Text” option that is present on the second row.

Choose either “Add a heading”, “Add a subheading”, and “Add a little bit of body text”.

Now, tap Edit to add your text.

Once you do that, you can now type your text.
Select the text and change it to reflect the copy that you want. Adjust the size and place it appropriately on the poster.

Alternatively, you can also select any of the “Font combinations” to get some styled text format in your design. You can then select and edit it to add your text.

Once you have added the text, find the “Effects” option in the bottom menu and tap on it. You can swipe from right to left to find it.

Tap the Curve option from the set of options.

Adjust the text to fit your design.

How to set up the angle of the curve on Canva app
You may need to adjust the arch of the curve to fine-tune your image. Tap the Curve option in effects once again.
Adjust the curve using the scroller.

Ways to use the Curve text feature on Canva
There is no denying the tremendous amount of load that the Curve text feature takes off of an editing process. What would have been an arduous process that required adjusting every single letter has now become a simple and quick process. Here are a few ways that you can optimize the curve text feature for your own benefit:
- Unique text placement means that your posters and social media content will stand out. You can actually customize the curved feature to create text that appears in different patterns, designs, colors and styles. The creative scope is wide and waiting to be explored.
- Make data look good by manipulating the form of the content and placing it in strategic locations. Your data reports will become very easy to interpret, understand and explain. This one is Canva’s own suggestion and a really good one too.
- Create cool logos thanks to the Curve text feature. Small compact spaces like logos are where the curve feature really shines. So when you create a brand, definitely take advantage of what the curve feature can do.
Third-party apps that you can consider to curve text
Microsoft Word
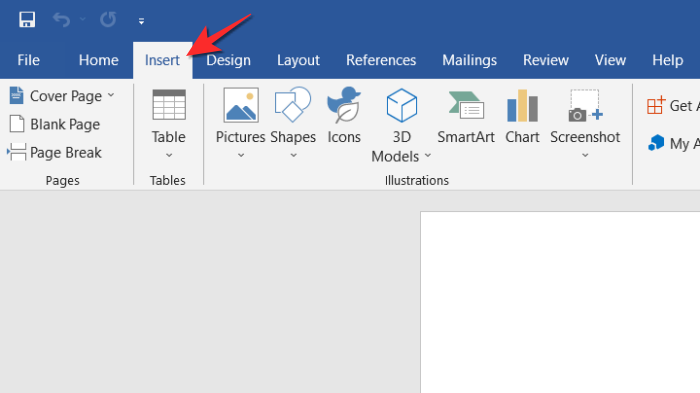
Many of us already have Microsoft Word and for any editing that requires curving the text, this application actually comes with an in-built text setting called “Word Art” under the “Insert” menu that allows the user to curve the text. Here’s how it’s done:
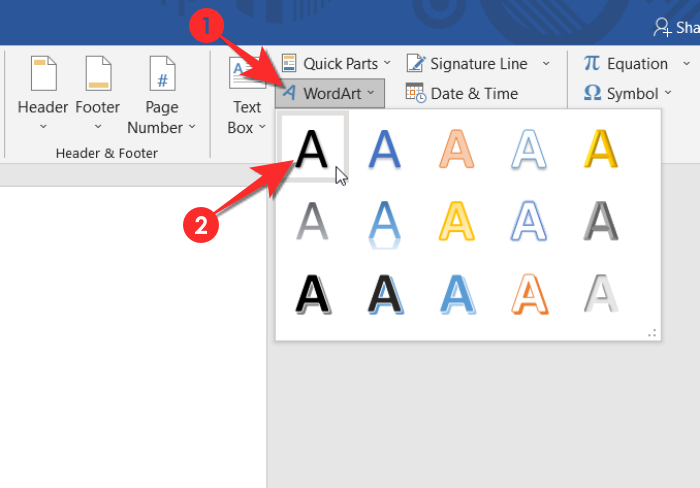
Click the Insert menu tab after launching Word.
In the Insert tab, click the Word Art option and select a font option.
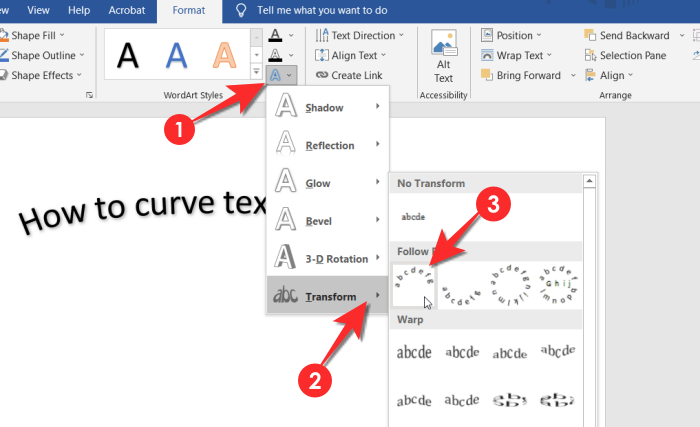
After adding a Word Art, select Text Effects > Transform. Now, choose the style of the curve you want from the “Follow Path” menu.
Do keep in mind that since designing content is not the primary function of Microsoft Word, the function is not as easy to use and locate like it is in the case of Canva. Nevertheless, as an offline solution for a text document, there is none like Microsoft Word.
Microsoft PowerPoint
A major function of Microsoft PowerPoint is beautiful text placement and in order to achieve, like in the case of Word, PowerPoint also takes advantage of the Word Art feature to deliver the curve effect. While you may not get the desired effect like you would in Canva the feature works great for minor edits or effects. Here’s how it’s done.
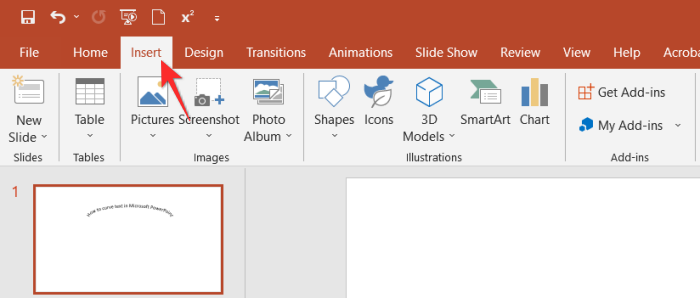
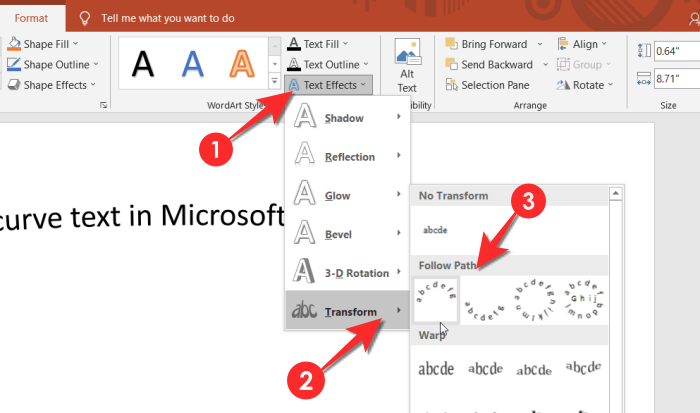
Click on the Insert tab in PowerPoint.
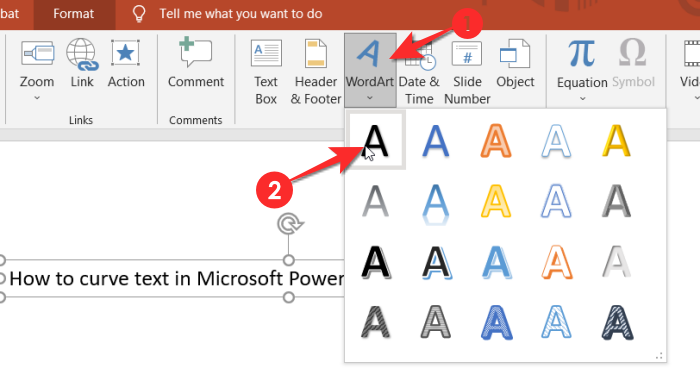
Click the Word Art option from PowerPoint’s Insert menu and select the font. Type your text in the allocated text box that appears on the slide.
Go to the Format tab, then click Text Effects > Transform. Choose the curve design from the Follow Path menu that opens.
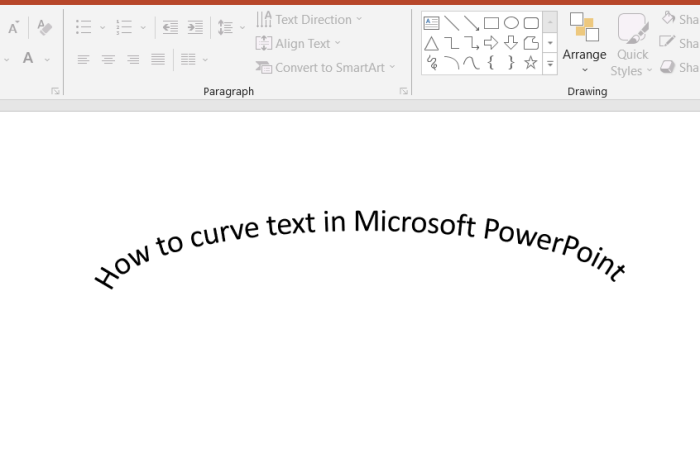
The text will now appear curved.
Can I curve text on Google Docs/Slides?
Unfortunately, there is no feature like Word Art that enables the user to directly curve text in Google Docs and Slides. If you are hoping to add curved text to your Google Docs or Slide, it is best to curve the text using a third-party app like Canva or PicMonkey and then add it to the document.
When you’re using a third-party app, do keep in mind that the text needs to be saved as an image that will then be uploaded to Google Docs/Slides. This is the simplest and least troublesome method to curve text in Google Docs/Slides. Like we mentioned for Word and PPT, text beautification is not the primary function of these applications so they haven’t prioritized features like text Curve.
That’s everything there is to know about how to curve text on Canva. Do let us know in the comments if you have any questions. Take care and stay safe!