GIFs are short animated images that first showed up in the late 1980s. They are easy to share and help communicate a lot better on social media websites and instant messengers. One of the most popular trends among the GIF sharing community has been the recent influx of reversed GIFs. Just like reversed videos, reversed GIFs are backward playing clips that make mundane things look magical. Here are some examples of reverse GIF images:
Fancy, right? Creating a reverse GIF is as simple as creating your regular GIF. All you need is the an app from the Play Store to get going. Let’s dive deep and see how you can create your own mesmerizing and magical reverse GIFs.
Creating a Reverse GIF by Recording a New Video
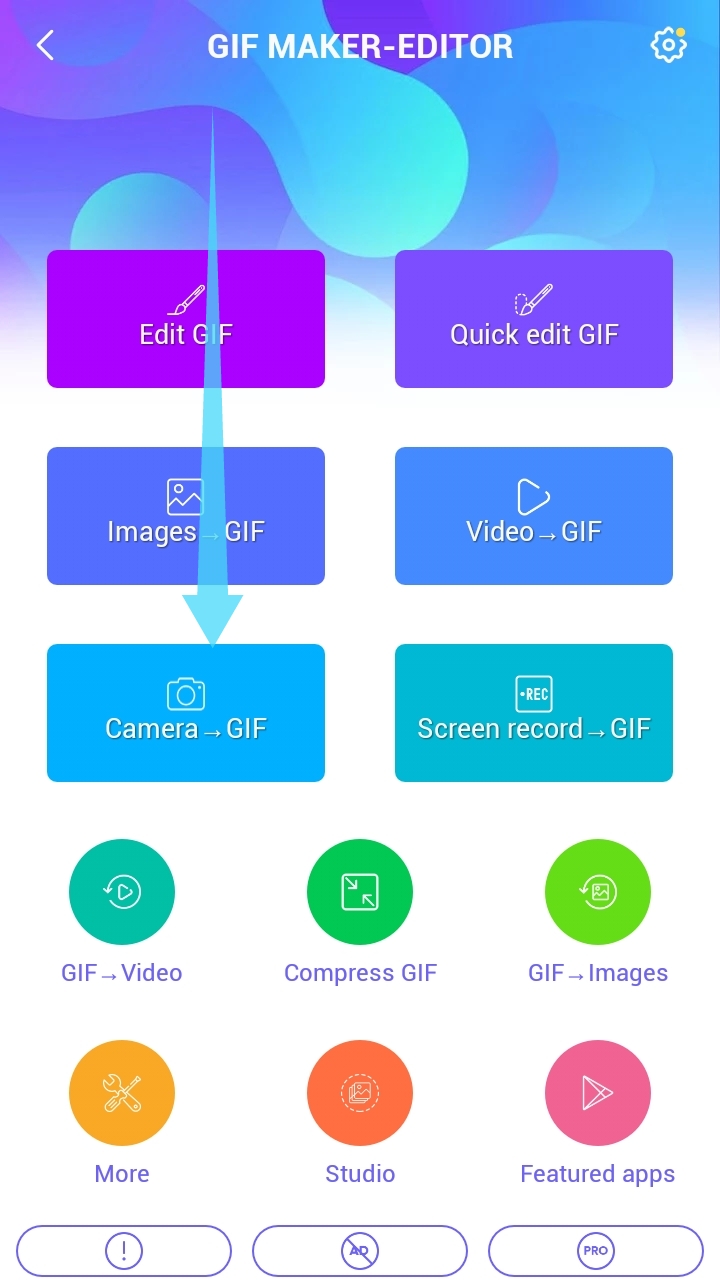
Step 1: Download the GIF Maker-Editor app from the Play Store. Then, open the app, give the required permissions. On the app’s home screen, tap ‘Camera -> GIF’.
Step 2: Record the desired video that you want to turn into a GIF and tap on ‘Done’ in the top right corner.
Note: The minimum length for the video should be at least 10s.

Step 3: Select the ‘Direction’ option and tap on ‘Reverse’.
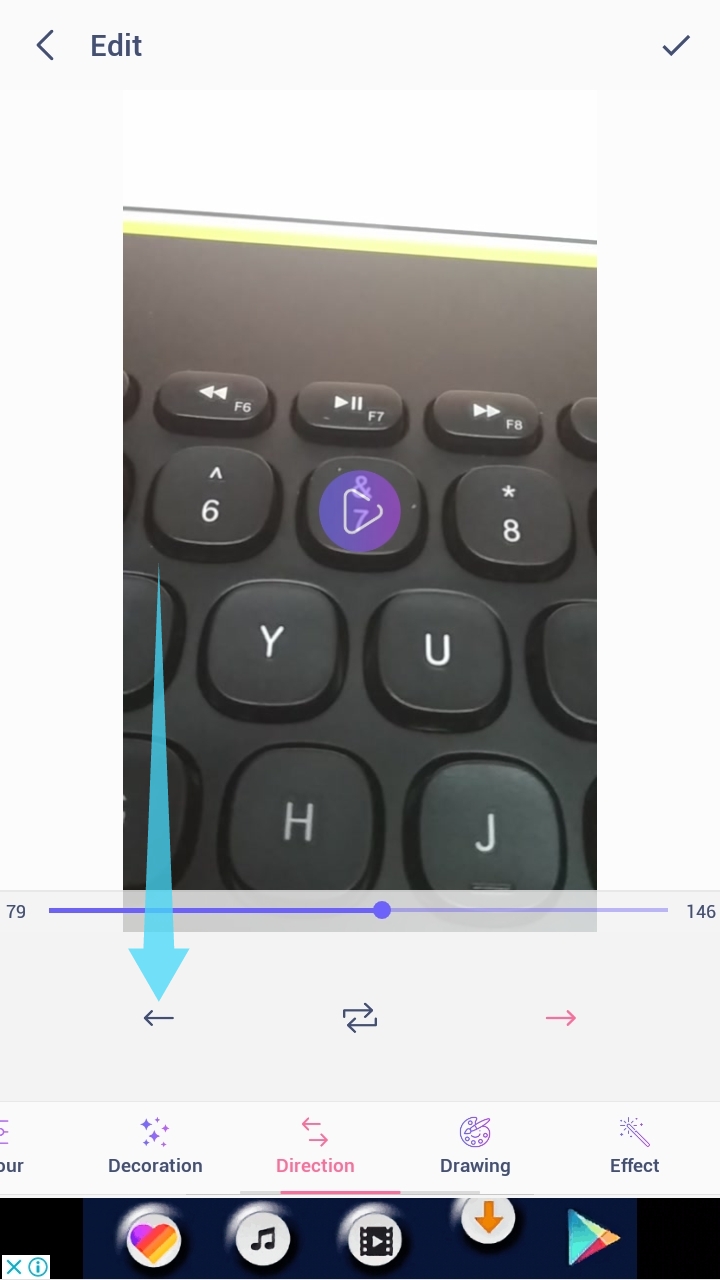
Step 4: Tap on the Tick sign in the top right corner of the screen to confirm the editing.
Step 5: Select GIF under the ‘Save Section’ and select your desired quality.
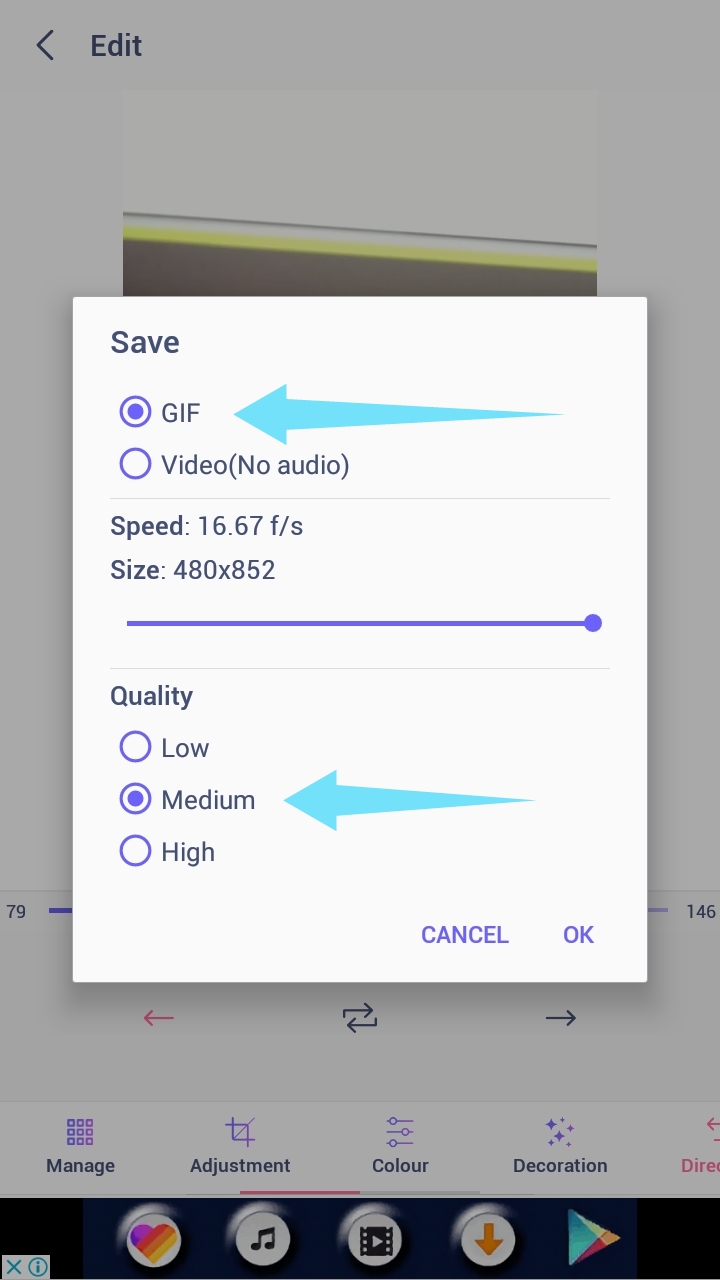
Step 6: Now tap on ‘Ok’ and your GIF will start rendering.
Note: Depending on the length of your clip, this could take anywhere between a few seconds and a couple of minutes. Make sure your phone does not turn off during this period or the App does not close.
Step 7: You will now be shown the exported clip along with options to share it, compress it or simply delete it.
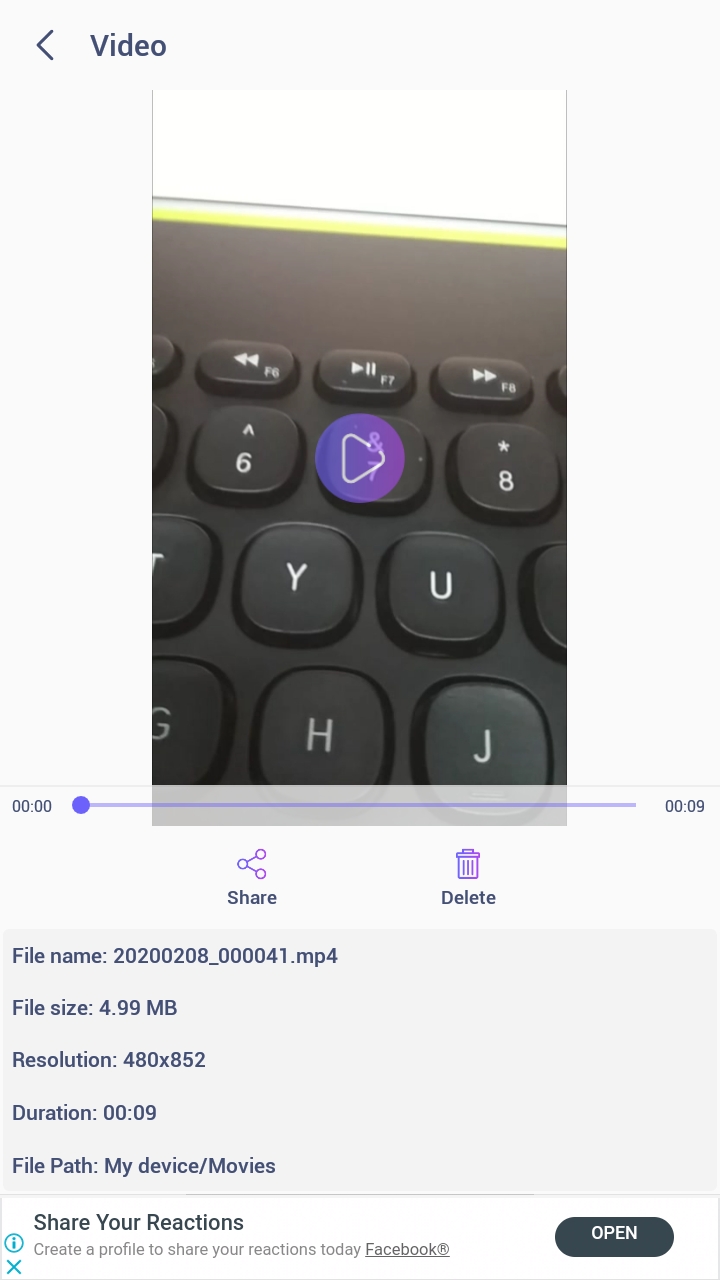
You should now have a reversed GIF of your desired Live recording.
Creating A Reverse GIF From A Downloaded Video
If you are looking to create a Reverse GIF of a video recording for your camera, or of a video you have downloaded from the web, this guide will help you out. It doesn’t differ a lot from the one above, BTW.
Step 1: Open the GIF Maker-Editor app.
Step 2: Tap ‘Video -> GIF’.

Step 3: Select the video that you want to convert into a GIF from your local storage.
Note: The maximum duration of the clip that you can use in this feature is 1 minute. So if you had planned on extracting your clip from a larger file, then you will need to trim it in the next step.
Step 4: Trim the clip using the adjustment bar at the bottom of the screen. Tap ‘Done’ in the top right corner when done.

Step 5: You will now be taken to the editing page, navigate to ‘Direction’ and then tap ‘Reverse’.

Step 6: Tap ‘GIF’ to convert your selection into a GIF. Select the desired quality according to your preferences.
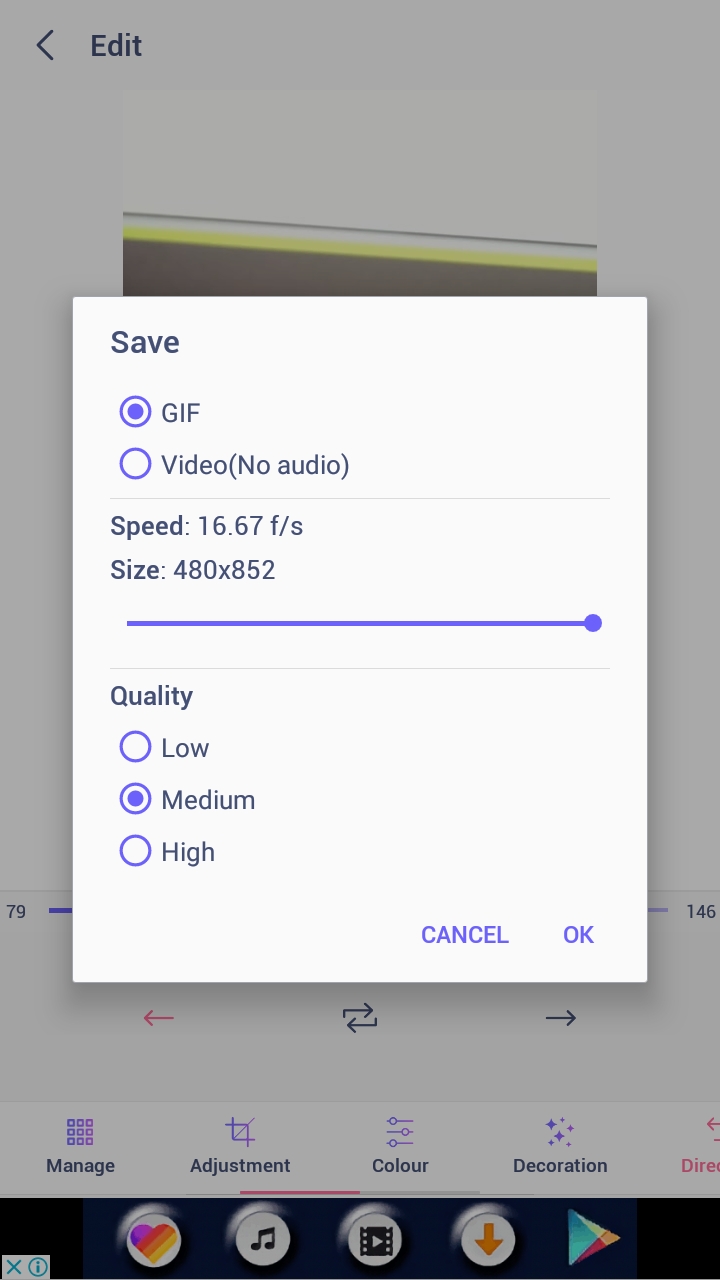
Step 7: Tap ‘OK’ and the app should start rendering your clip instantly. This process could last a few minutes depending on the length of your clip and your quality and resolution preferences.

You should now be presented with your reversed GIF along with its technical information at the bottom of your smartphone screen. You will be able to find this GIF in the local gallery of your phone or by navigating to ‘/GIFStudio’ on your local storage.
Creating a Reverse GIF From an Existing GIF
Step 1: Open the app. Tap ‘Edit GIF’.

Step 2: Select the desired GIF from your phone’s local storage. If the GIF is one the web, download it first on your device.
Step 3: Navigate to the ‘Direction’ section under tools and select ‘Reverse’ option (→). Tap the Tick sign in the top right corner of the screen when done.

Step 4: You will now be presented with render options for your GIF. Select GIF under the Save menu, and desired level of quality. Tap ‘OK’ when done.

Done. The GIF will be saved on your device’s storage. You can now share it.
This guide should help you create reverse GIFs from all possible sources that are currently available to end consumers. You can also download videos from the internet and convert them into reverse GIFs using the above-mentioned guide. Share your reverse GIF creations with us in the comments section below. If we missed out on anything, please feel free to share your feedback as well.
RELATED:


