


If you’re looking to maximize your team’s damage in Anime Expeditions, unlocking the equipment system should be one of your first major goals. Equipment provides powerful stat boosts, while rerolling allows you to optimize those stats for your strongest units. Although the system takes a bit of progression to unlock, it becomes one of the most important endgame mechanics for improving your overall performance.
| Quick Overview | Details |
|---|---|
| Unlock Requirement | Reach Level 20 |
| NPC | Fearbrand |
| Unlock Cost | 10,000 Money |
| Building Required | Armory |
| Crafting Unlock | Armory Level 2 |
| Main Materials | Equipment Scraps, Orbs |
| Best Farming Mode | Expedition Mode |
| Best Stats | Damage, SPA, Range, Follow-up Damage |
How to unlock the equipment crafting system
Equipment crafting isn’t available immediately after starting the game. You’ll first need to progress through the early levels and unlock the Expedition Hub.

The first requirement is reaching Level 20. Once you hit this milestone, the Expedition Hub becomes accessible.
Enter the Expedition Hub and locate Fearbrand. Speaking with this NPC begins the Armory unlock process.

Fearbrand offers the Armory for 10,000 in-game money. Purchase it to add the building to your Expedition Hub.

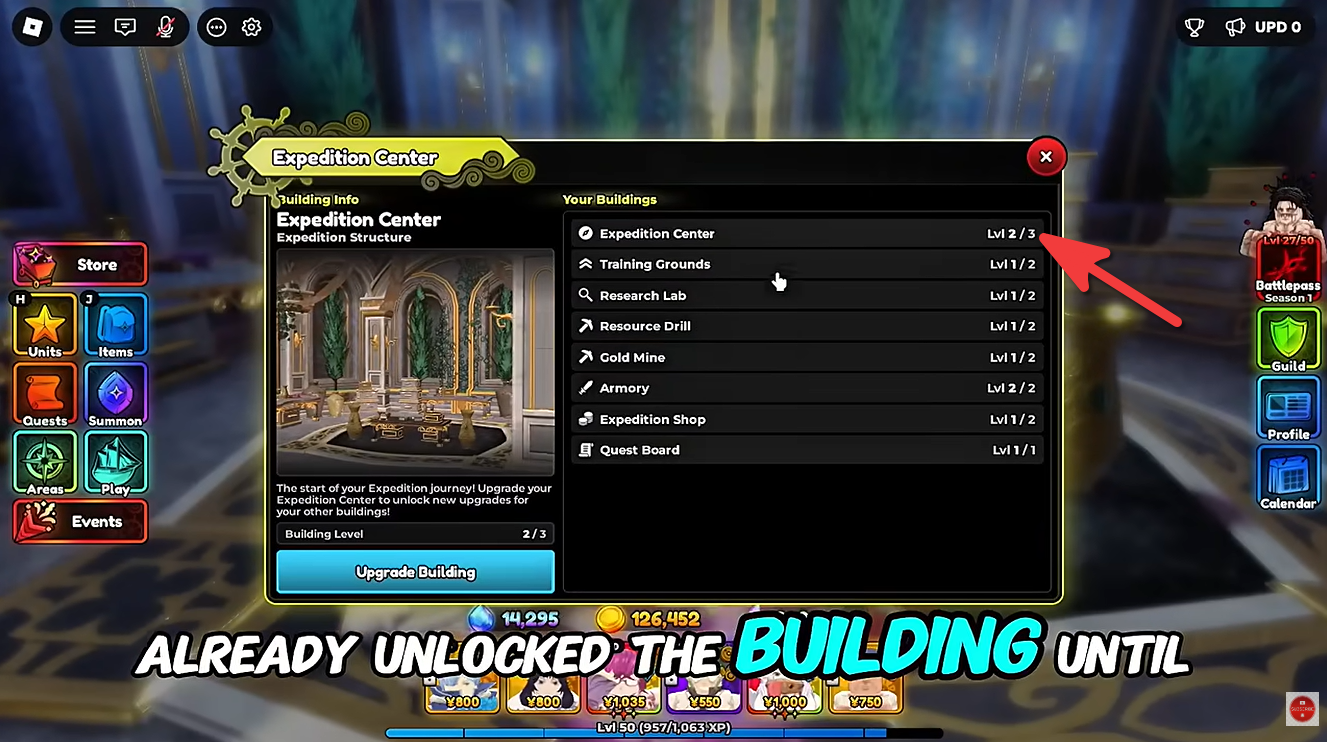
Buying the Armory isn’t enough to start crafting. You must upgrade it to Level 2 by progressing through Expedition Mode and improving your Expedition Center.
Once the upgrade finishes, the crafting menu becomes available.
Where to get crafting materials
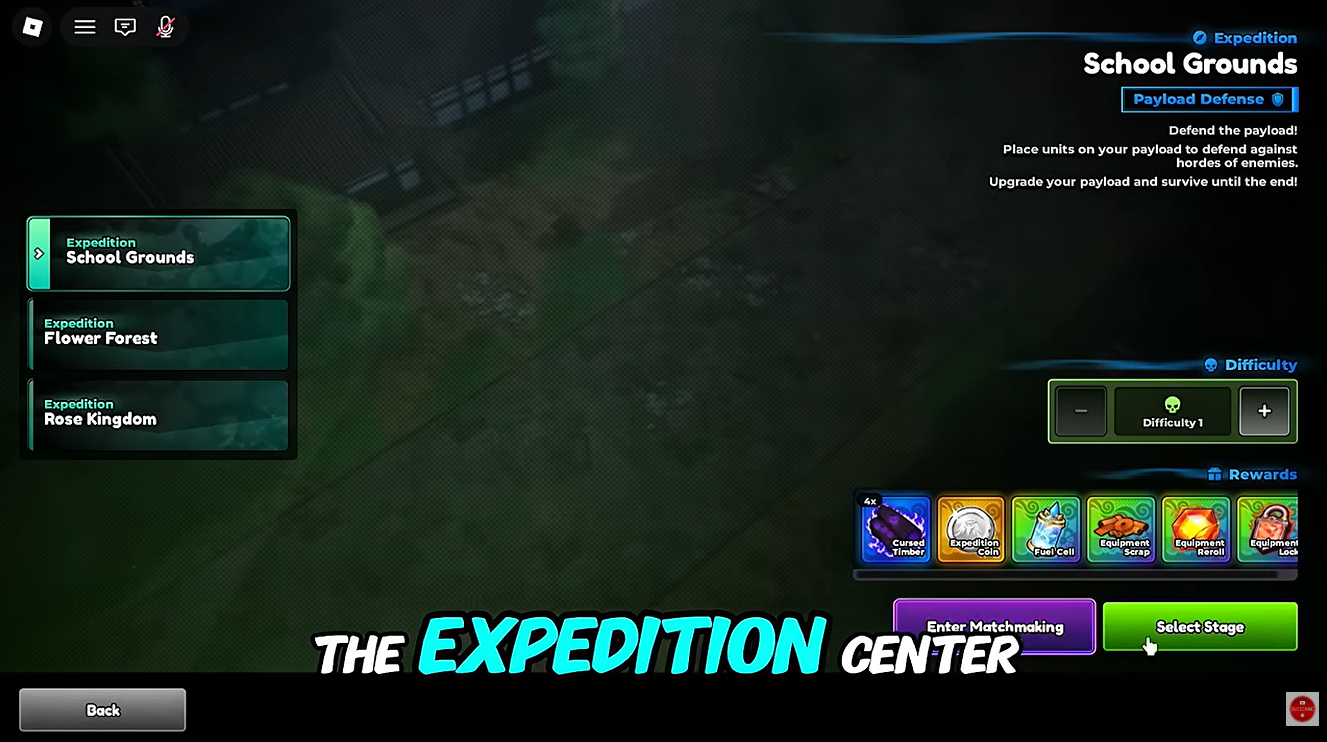
Crafting equipment requires materials that primarily come from Expedition Mode.
| Material | How to Obtain | Primary Use |
|---|---|---|
| Equipment Scraps | Expedition Mode rewards | Crafting equipment |
| Orbs | Expedition Mode farming | Equipment crafting and upgrades |
| Other Expedition Resources | Route rewards and checkpoints | Building progression |
The faster you clear Expedition Mode, the more crafting materials you’ll accumulate over time.
How to craft equipment in Anime Expeditions
Once your Armory reaches Level 2, crafting becomes straightforward. Interact with your upgraded Armory. Choose the crafting option.
Use your collected Equipment Scraps, Orbs, and any required resources. Your newly crafted equipment can immediately be equipped to compatible units.
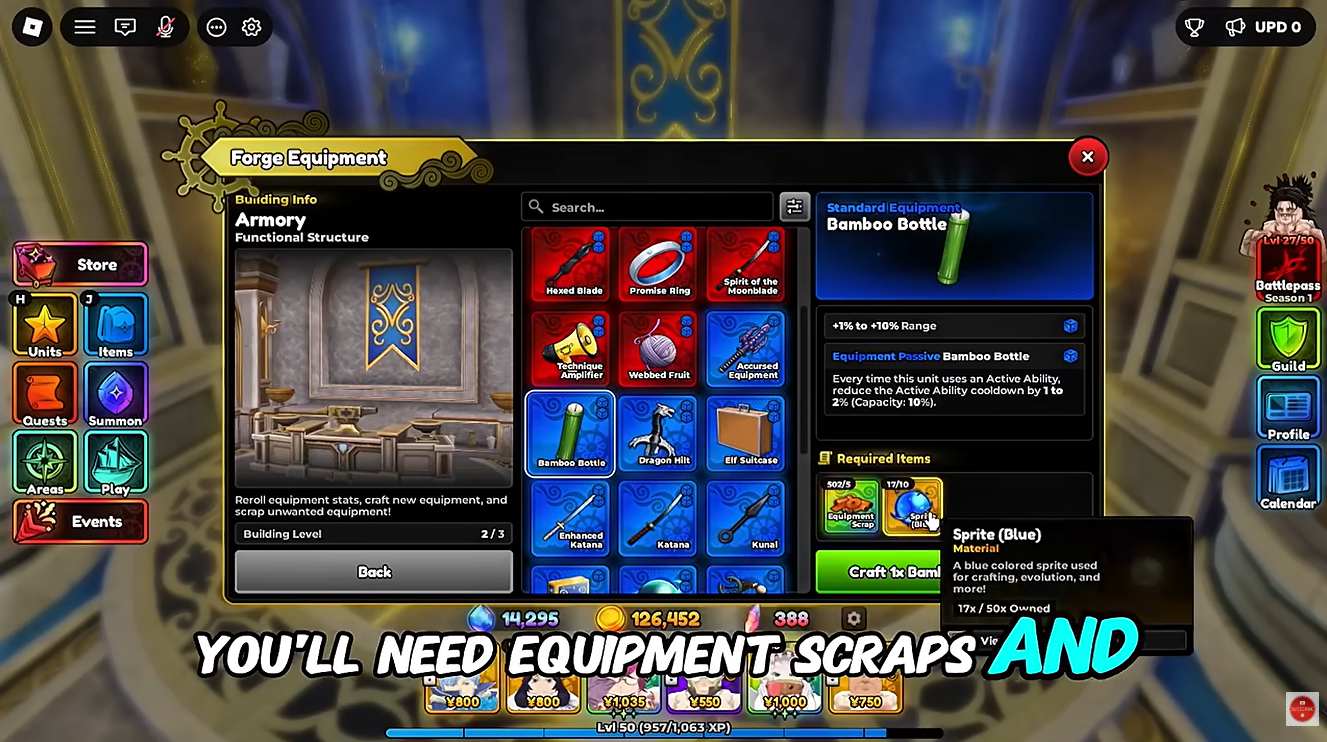
Not every crafted item will have ideal stats, which is why rerolling becomes extremely important.
How equipment rerolling works
The reroll feature allows you to replace an equipment’s stat bonuses with new random values.
Instead of crafting dozens of new items, you can keep improving a strong piece of equipment until it rolls the bonuses you’re looking for.
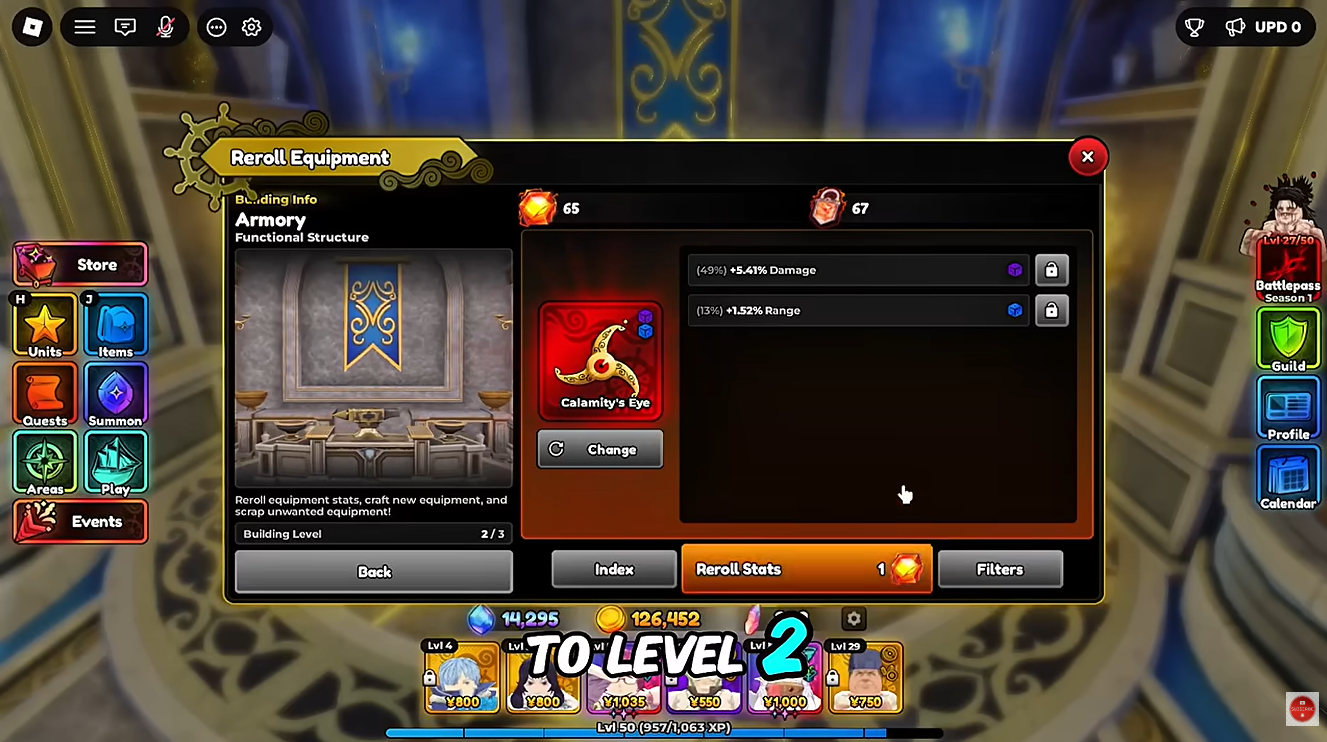
While rerolling involves some randomness, investing resources into high-quality equipment is generally much more efficient than replacing it entirely.
Best equipment stats to reroll for
According to experienced players, these stats provide the biggest increase in overall performance.
| Priority | Stat | Why It Matters |
|---|---|---|
| ★★★★★ | Damage Increase | Largest boost to overall DPS |
| ★★★★★ | SPA Decrease | Units attack more frequently |
| ★★★★☆ | Range Increase | Covers more enemies and lanes |
| ★★★★☆ | Follow-up Damage | Adds extra damage after attacks |
Damage and SPA (Seconds Per Attack) are generally considered the strongest combination for most DPS units.
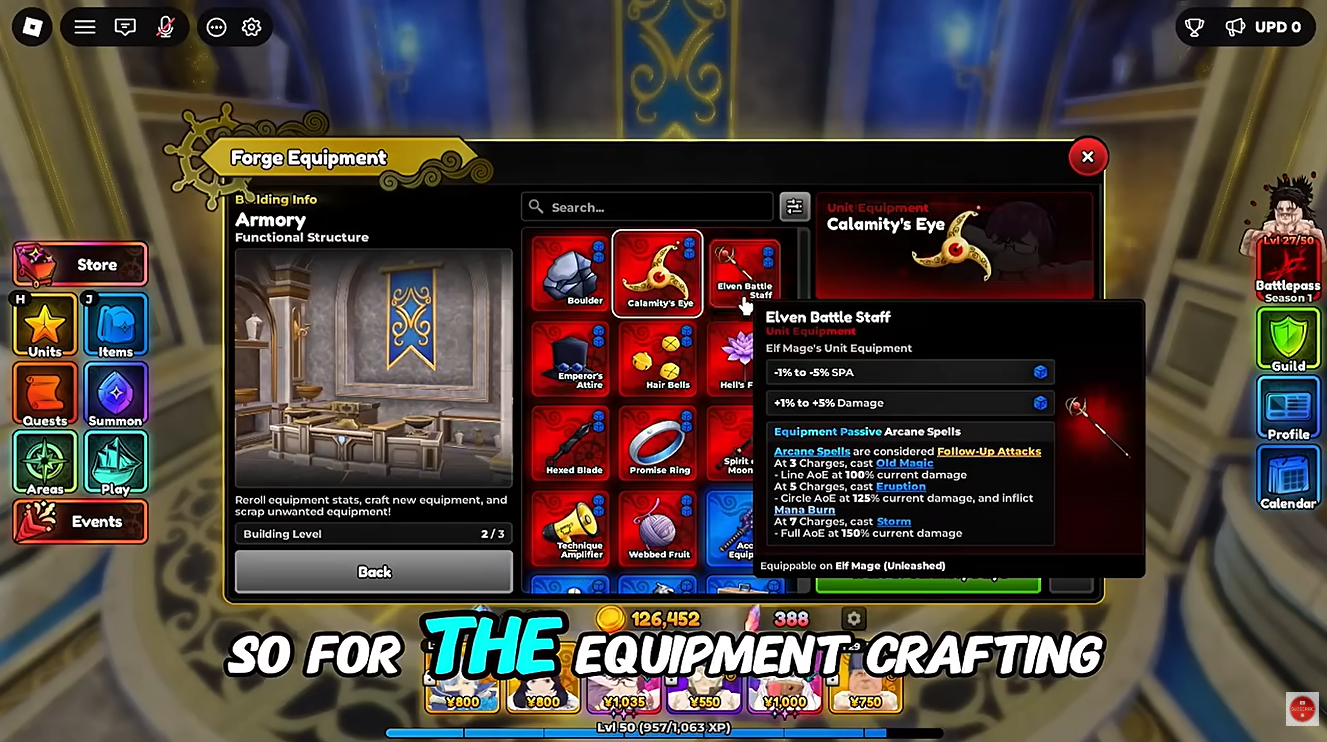
Range is especially valuable for hill units or characters with already strong area coverage, while Follow-up Damage provides additional value on sustained attackers.
Best Expedition Mode strategy for farming materials
Efficient farming greatly speeds up Armory progression and equipment crafting.
Choose routes based on needed rewards
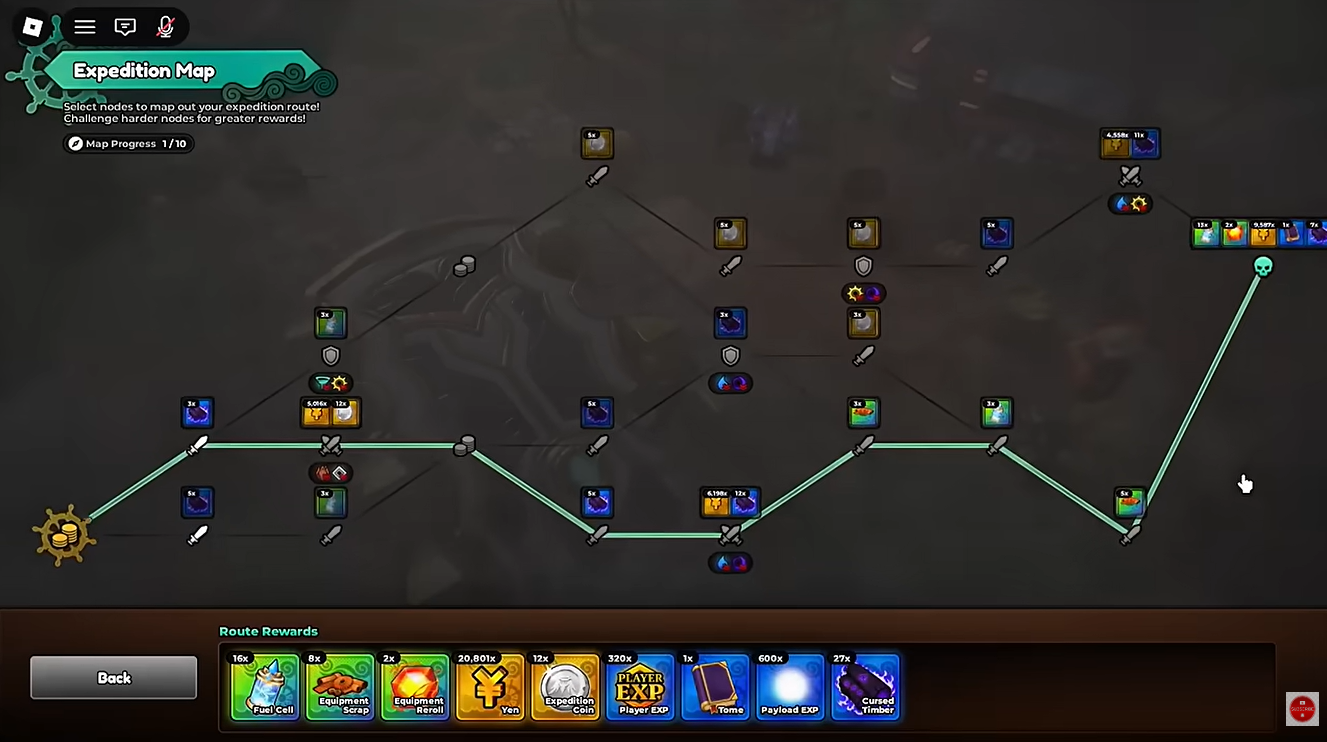
Different Expedition routes provide different resources. If you’re missing a specific material such as Cursed Timber, prioritize routes that reward it instead of simply picking the easiest path.
Position units efficiently
For smoother clears:
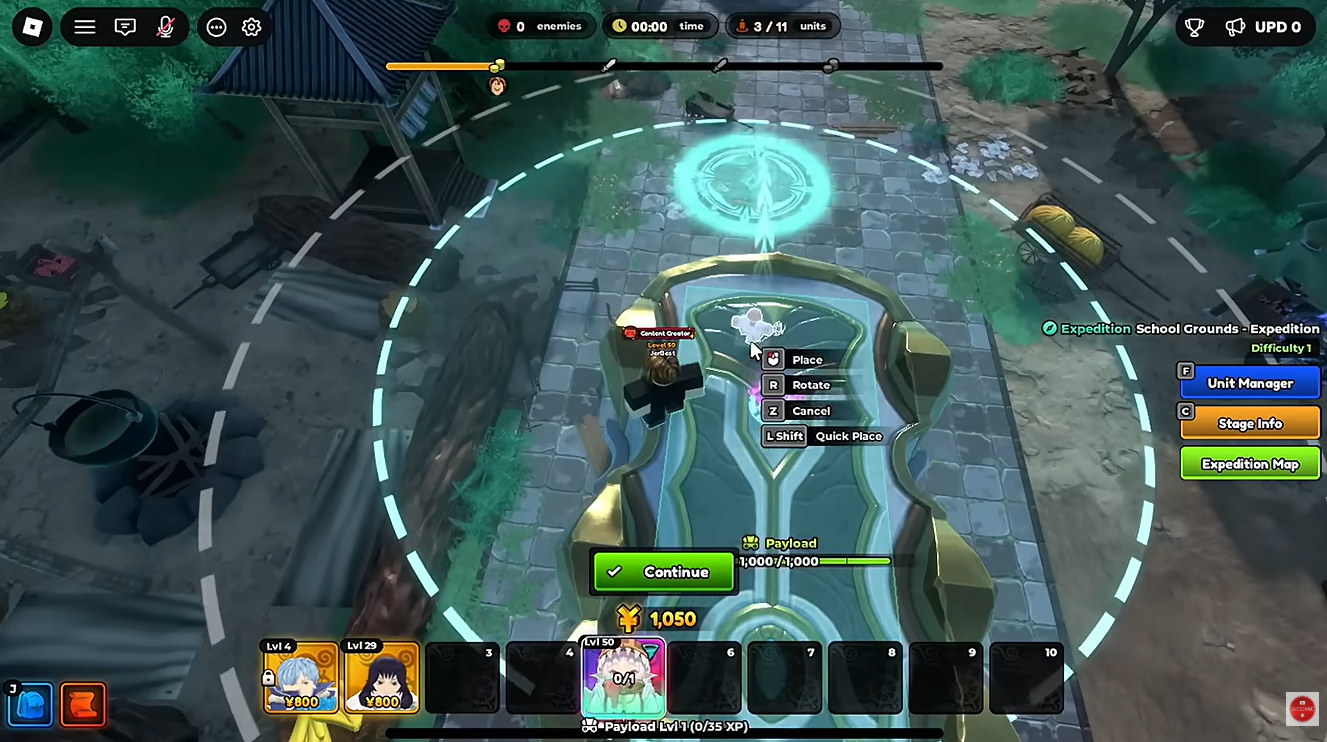
- Place farming units near the edge of the payload.
- Position your strongest DPS units near the center where they’ll attack enemies for the longest duration.
This setup improves both economy and damage output.
Prioritize auto-upgrades
Set your farm units to Auto Upgrade Priority 1 so they generate income more efficiently throughout the run.
Buy units at checkpoints
Each checkpoint is an opportunity to strengthen your team. Purchase additional units whenever possible and continue upgrading your strongest damage dealers.
Look for strong traits
Good traits can dramatically outperform average ones, making later Expedition waves much easier while increasing your overall farming efficiency.
| Stage | Goal |
|---|---|
| Early Game | Reach Level 20 |
| Mid Game | Unlock Expedition Hub |
| Next | Purchase Armory for 10,000 Money |
| After That | Upgrade Armory to Level 2 |
| Farming Phase | Collect Equipment Scraps and Orbs |
| Endgame | Craft equipment and reroll optimal stats |
Common mistakes to avoid
Many new players spend all of their resources crafting equipment immediately after unlocking the Armory. Instead, it’s usually better to first establish a reliable Expedition farming setup so you can consistently gather materials.
Another common mistake is ignoring rerolls. A well-rerolled piece of equipment often provides far greater value than several average crafted items.
Finally, don’t neglect unit positioning during Expedition Mode. Efficient placement improves clear speed, increases survival, and helps you farm resources much more consistently.
Video help:
Equipment crafting is one of the biggest power spikes available in Anime Expeditions. Once you’ve reached Level 20, unlocked the Armory, and upgraded it to Level 2, you’ll gain access to a system that can dramatically improve your team’s performance. By farming Expedition Mode efficiently, rerolling for Damage, SPA, Range, and Follow-up Damage, and continuously upgrading your best equipment, you’ll be able to clear tougher content much faster and prepare for the game’s higher-level challenges.




Leave a Reply