
Airdrop helps you transfer files and other things between iPhones, iPads, and Macs seamlessly without much effort and certainly without needing to establish a connection using cables. You can transfer almost anything that’s shareable from your macOS or iOS device and send it to your other device or your friend’s Mac or iPhone. It’s easy to use, encrypted, and is the fastest means of copying stuff from a Mac to an iPhone or vice versa.
If you’re wondering how you can use Airdrop to transfer files between a Mac and an iPhone, then the following post can help you get started with it.
Requirements
Before you start sharing files and other content using Airdrop, you have to make sure that you meet these requirements:
- You own an iPhone 5 and newer devices running iOS 8 or newer versions
- You own a Mac (iMac, iMac Pro, Mac mini, Mac Pro, Mac Studio, MacBook, MacBook Air, or MacBook Pro) from 2012 (except for mid-2012 Mac Pro) running at least OS X Yosemite (10.0)
- Both the Mac and iPhone are kept within 30 feet of each other
- WiFi and Bluetooth are turned on for both Mac and iPhone
- Personal Hotspot is disabled on the iPhone
How to enable AirDrop on a Mac
You can use Airdrop to transfer files between a Mac and an iPhone but before you start moving them, you first need to enable Airdrop on each of these devices so that a connection can be established. You can enable Airdrop on your Mac in two ways – using the Finder app and the Control Center.
Using Control Center
The easiest way to enable Airdrop on a Mac is by using the Control Center tool inside the Menu bar. The Control Center on the Mac was one of the additions to macOS Big Sur and the guide should work on newer macOS versions in the same manner.
Short guide:
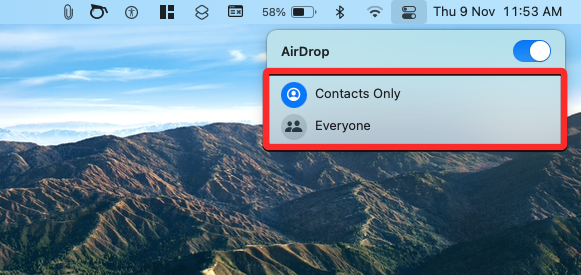
You can turn on AirDrop on your Mac by going to Menu Bar > Control Center icon > AirDrop and choosing either Contacts Only or Everyone from the overflow menu.
GIF guide:

Step-by-step guide:
- To enable Airdrop, click on the Control Center icon on the Menu bar.

- Now, click on the AirDrop icon (not the optional name) from the Control Center menu and it will be instantly enabled. Since Airdrop requires you to switch on Bluetooth, enabling Airdrop will also turn on Bluetooth.
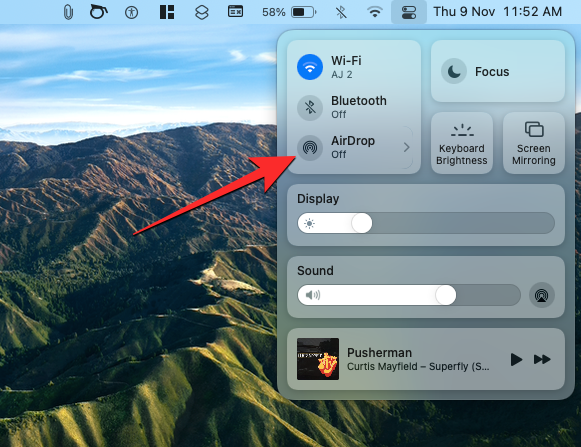
- With AirDrop enabled, click on the AirDrop tile.
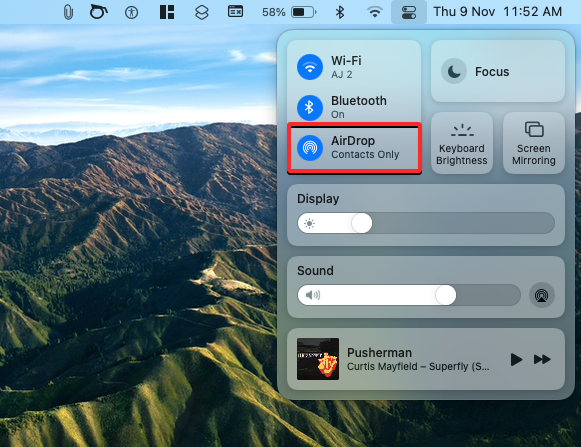
- When the AirDrop menu loads up, select any of the two options – Contacts Only or Everyone. You can choose Contacts Only to receive files from people in your contact or your own devices. If you’re about to receive files from someone who isn’t on your contacts list, you can select Everyone instead so that your iPhone is discoverable for all Apple devices around you.
Using the Finder app
Short guide:
You can also use the Finder app on your Mac to enable AirDrop. For this, go to Finder > AirDrop > Turn On Bluetooth and then click on the Allow me to be discovered by: No One dropdown menu. From the overflow menu that appears, select Contacts Only or Everyone.
GIF guide:

Step-by-step guide:
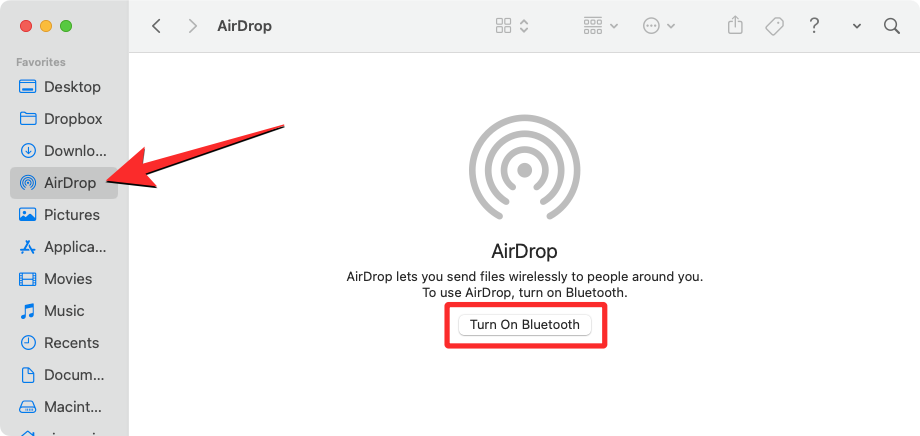
- Open the Finder app from the Launchpad or the dock.
- Inside Finder, click on the AirDrop tab from the left sidebar. Inside the AirDrop window, click on the Turn On Bluetooth button to proceed.
- When Bluetooth has been turned ON, click on the Allow me to be discovered by: No One dropdown menu.
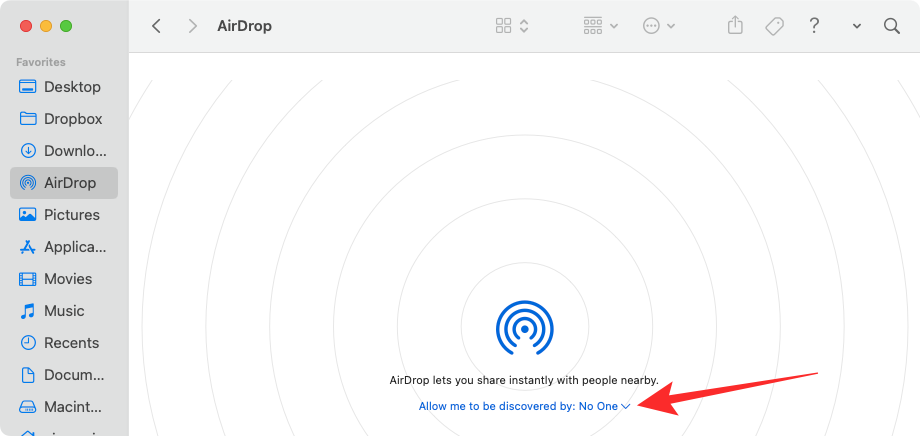
- From the menu that appears, choose Contacts Only to receive files from people in your contact or your own devices. If you’re about to receive files from someone who isn’t on your contacts list, you can select Everyone instead so that your iPhone is discoverable for all Apple devices around you.

How to enable AirDrop on an iPhone
You can enable Airdrop on your iPhone – using the Control Center or using the Settings app.
Using Control Center
Short guide:
To enable AirDrop, launch the Control Center on your iPhone and then long-press on the Wi-Fi/Bluetooth/Airplane tile to expand it. From here, tap on AirDrop and select either Contacts Only or Everyone depending on your preference.
GIF guide:
Step-by-step guide:
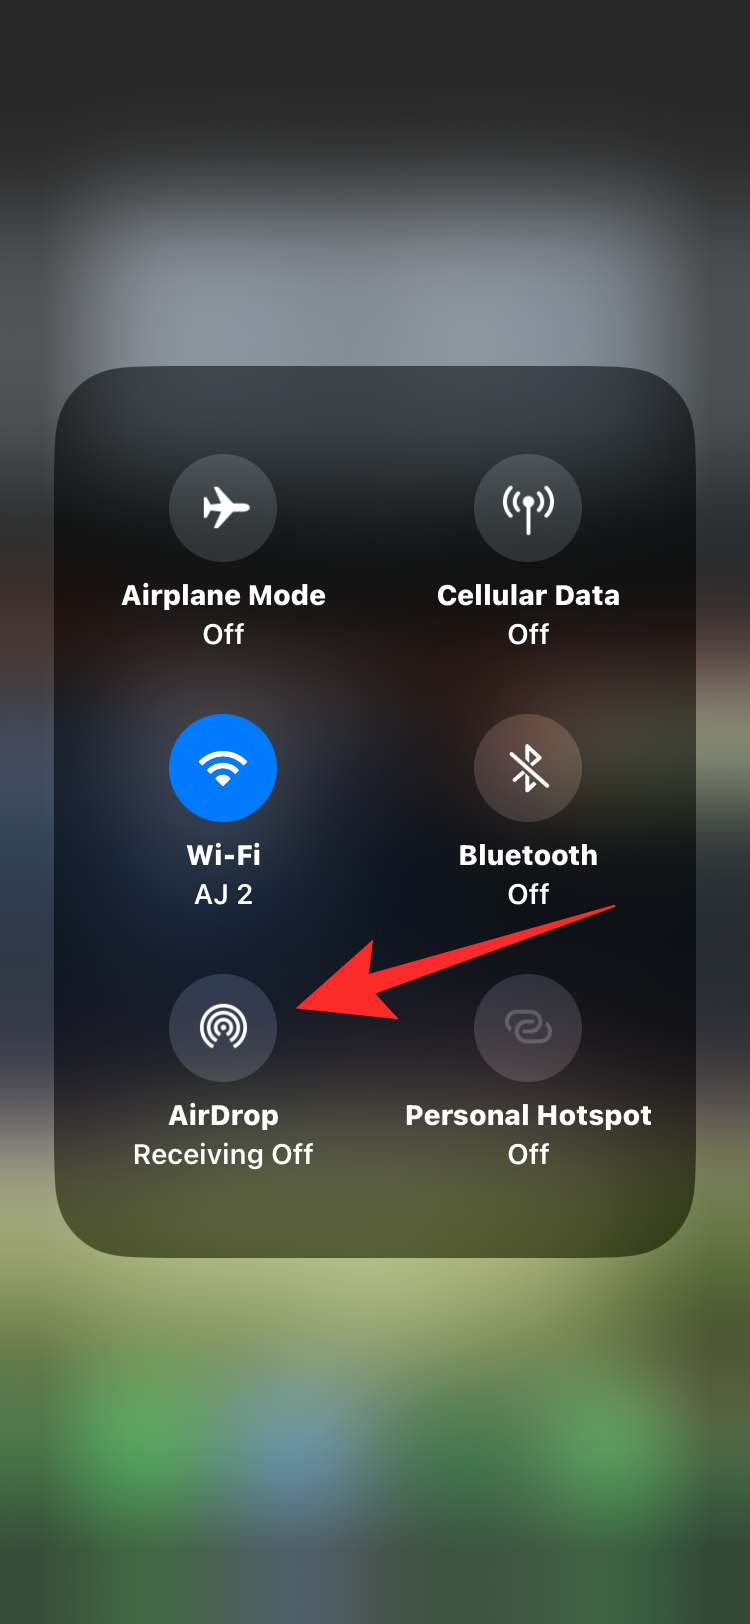
- Launch the Control Center on your iPhone by either swiping down from the top-right corner of the screen (on iPhones with Face ID) or by swiping up from the bottom of the screen (on iPhones with Touch ID). When the Control Center pops up, press and hold any of the elements or anywhere within the Wi-Fi/Bluetooth/Airplane tile (the one that includes quick access to WiFi, Bluetooth, cellular data, and other settings) to expand it.

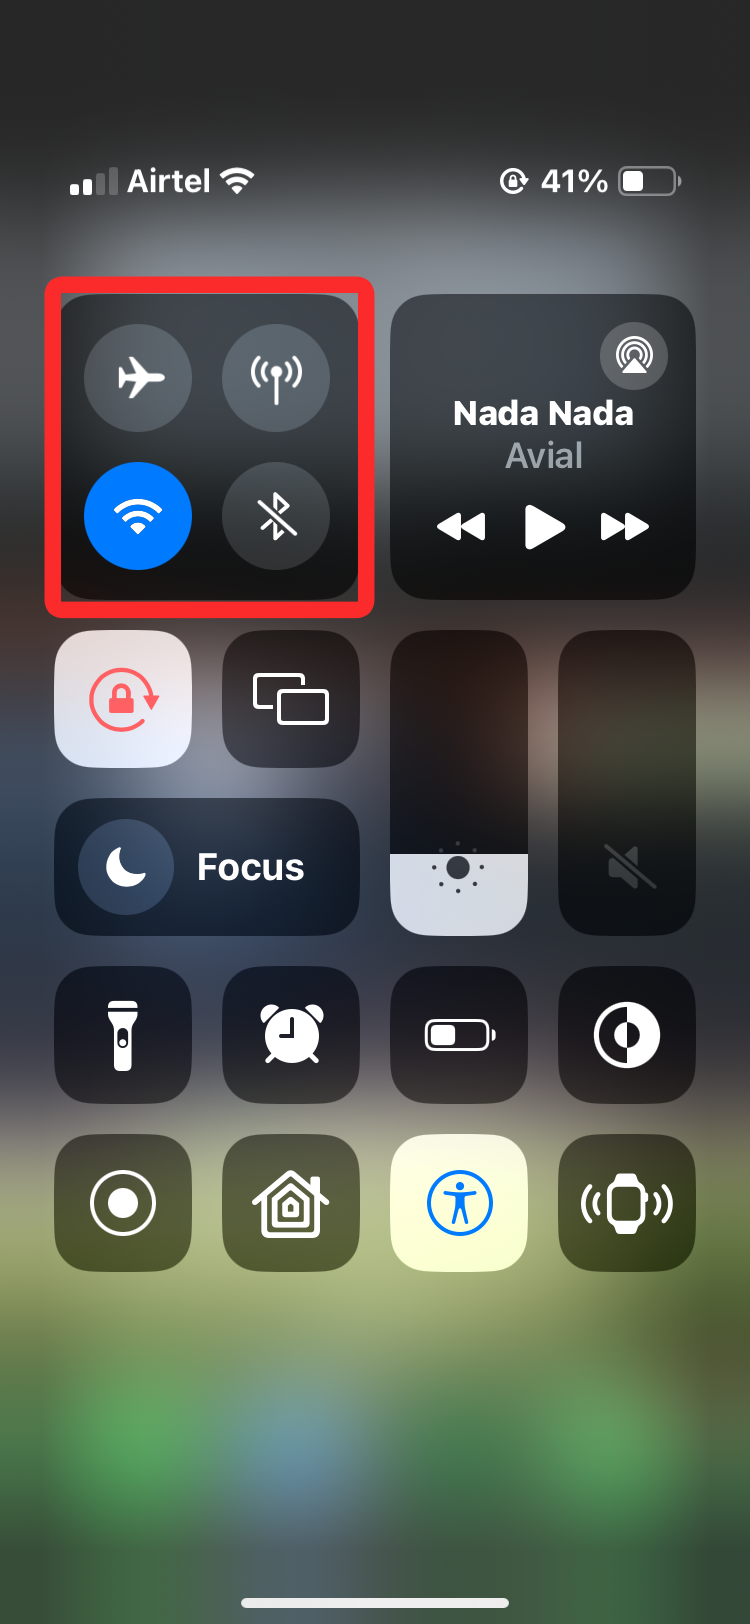
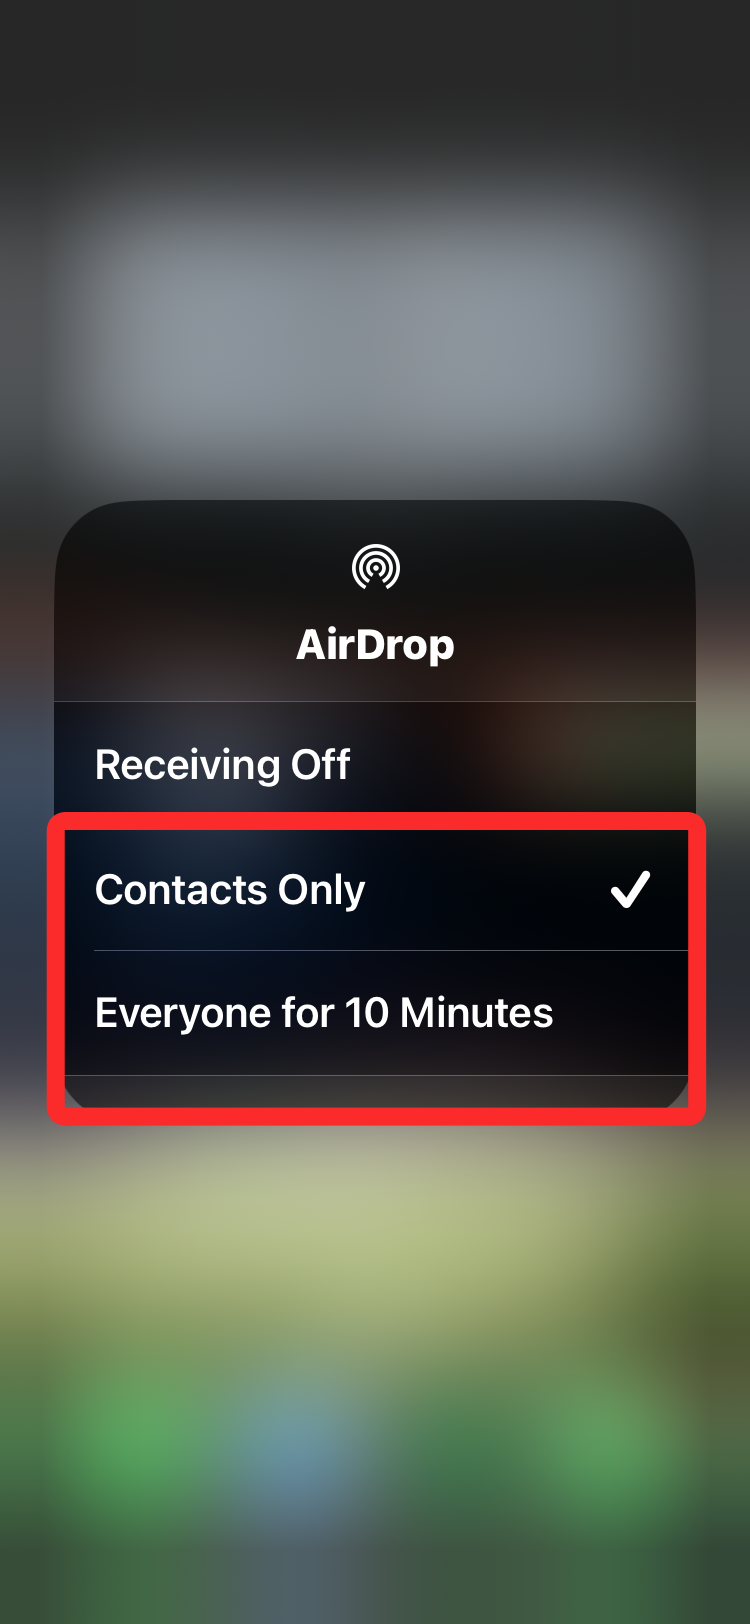
- Tap and hold the Airdrop icon to get more options. When the AirDrop menu appears, choose Contacts Only to receive files from people in your contact or your own devices. If you’re about to receive files from someone who isn’t on your contacts list, you can select Everyone for 10 Minutes instead so that your iPhone is discoverable for all Apple devices around you.
Using the Settings app
You can also turn on AirDrop from within your iPhone’s Settings app.
Short guide:
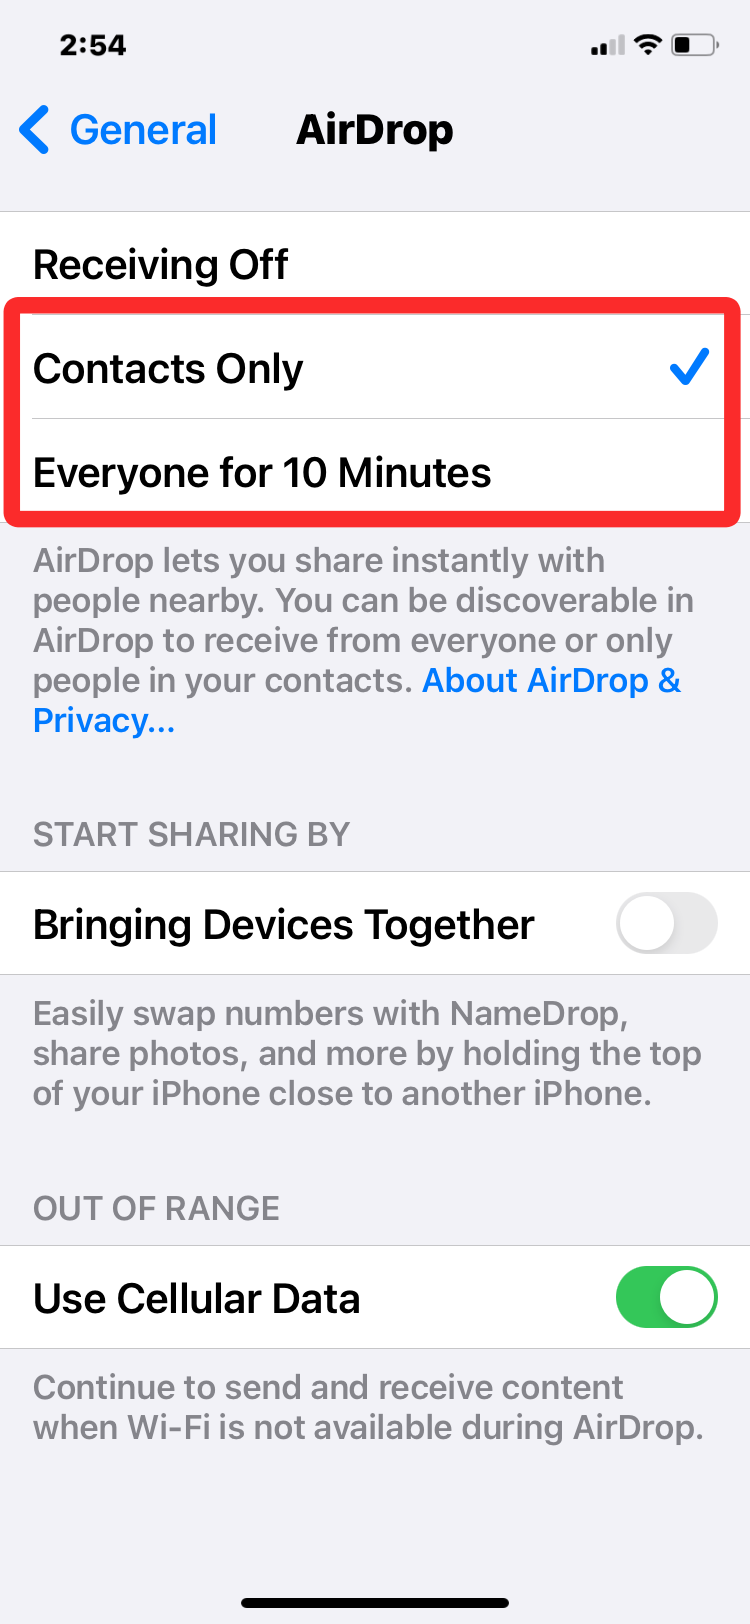
To enable AirDrop, go to Settings > General > AirDrop and choose either Contacts Only or Everyone for 10 Minutes.
GIF guide:
Step-by-step guide:
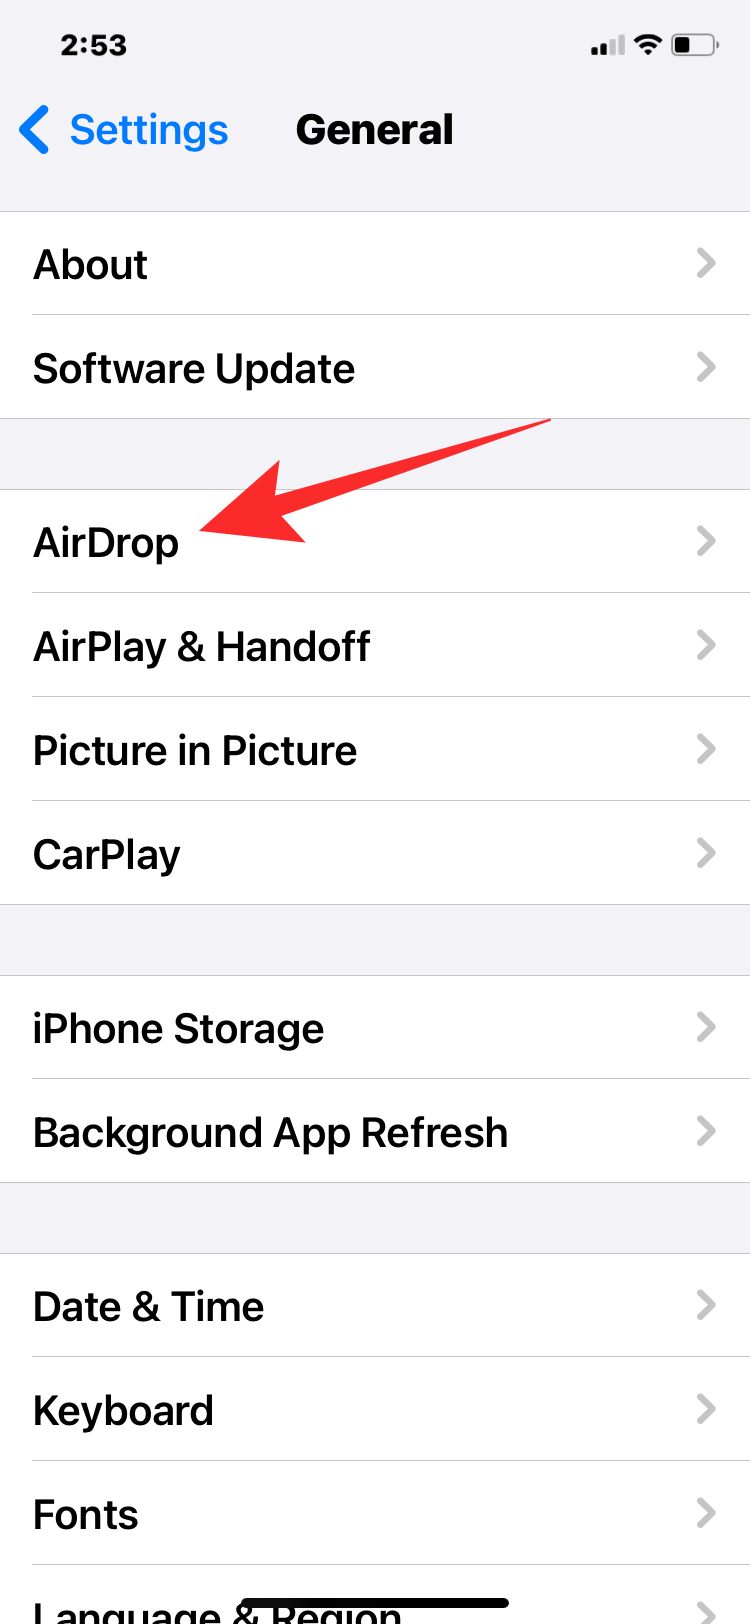
- Open the Settings app and tap on General.
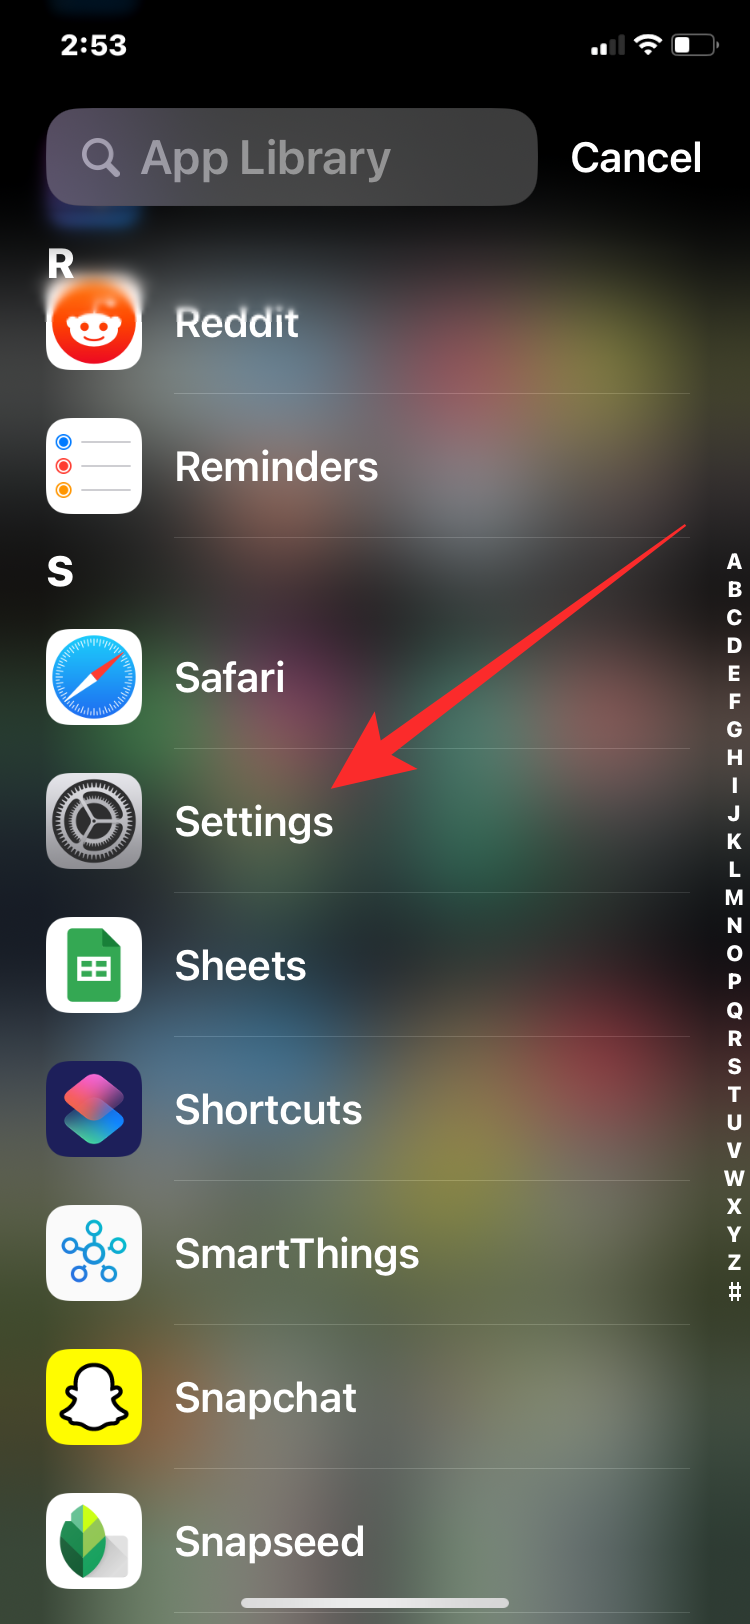
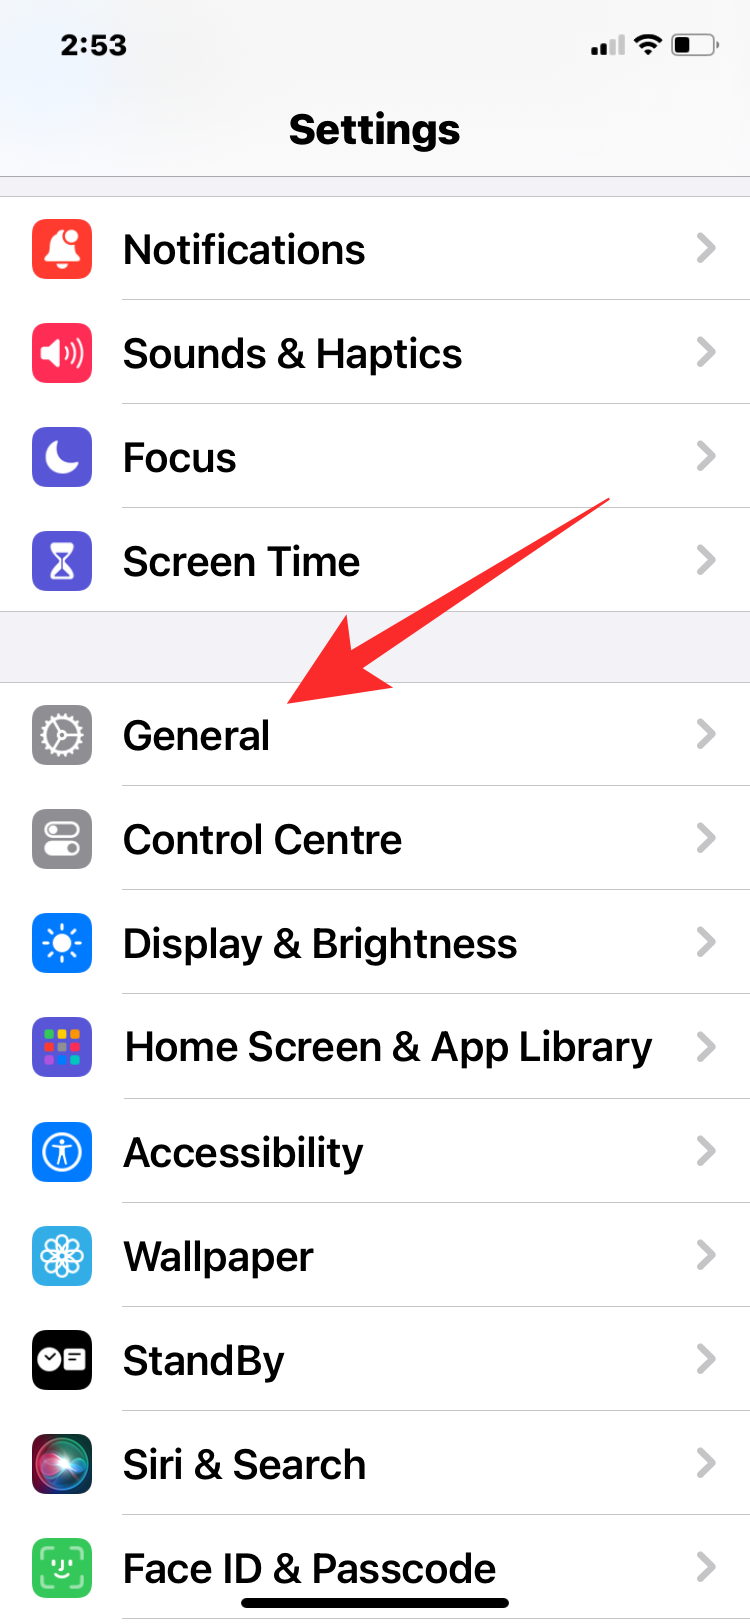
- Inside the General screen, tap on AirDrop. On the next screen, choose Contacts Only to receive files from people in your contact or your own devices. If you’re about to receive files from someone who isn’t on your contacts list, you can select Everyone for 10 Minutes instead so that your iPhone is discoverable for all Apple devices around you.
How to send files using AirDrop on a Mac
Once Airdrop has been enabled, you can start sending files from your Mac right away.
Short guide:
To start sending files via AirDrop, locate the file or item you want to send, right-click on it, and select Share > AirDrop. When the AirDrop window shows up, click on the device that you want to share with.
GIF guide:
Step-by-step guide:
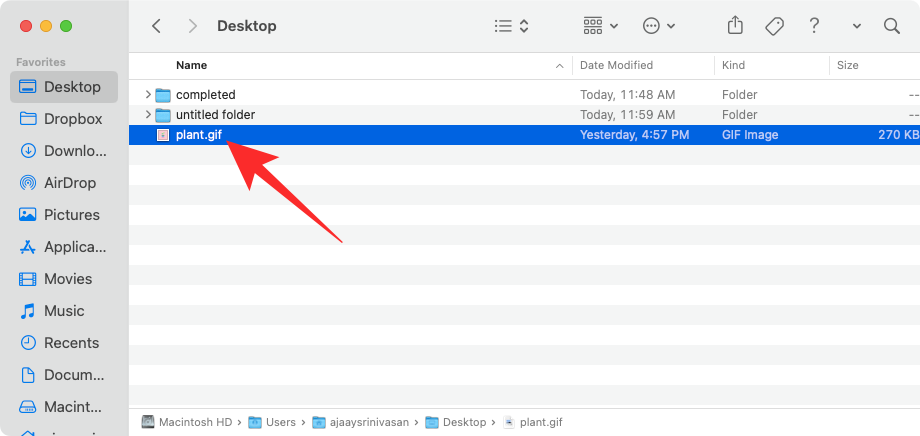
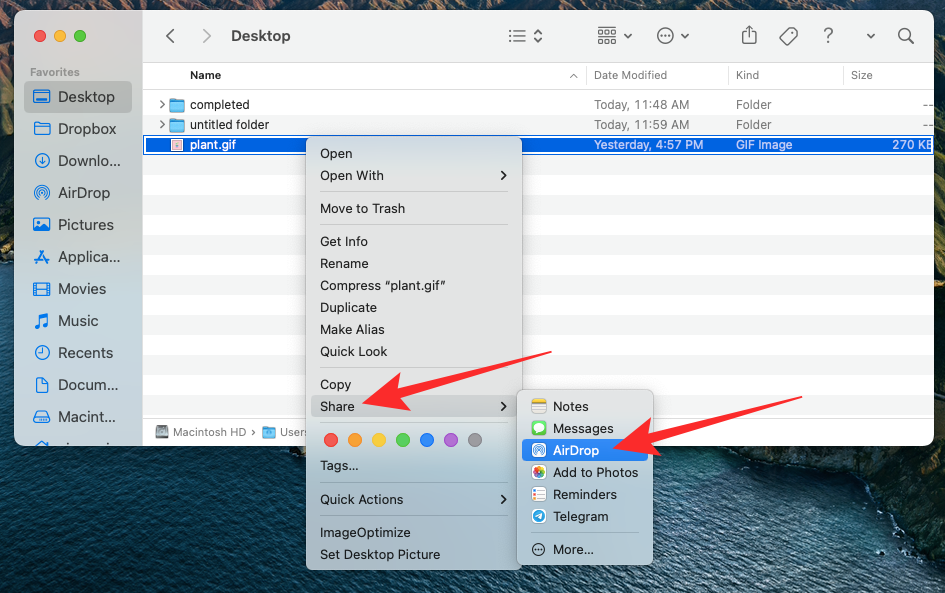
- After you have turned on Airdrop, locate a file (from Finder or Desktop) or the app whose content you want to share and right-click on it to access more options.
- Now, select Share > AirDrop from the menu that appears.
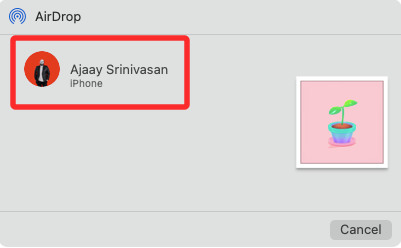
- If the recipient has enabled Airdrop on their device, you will be able to see their name or their device name in the AirDrop window that pops up on the screen. From here, click on the device you want to share the file with.
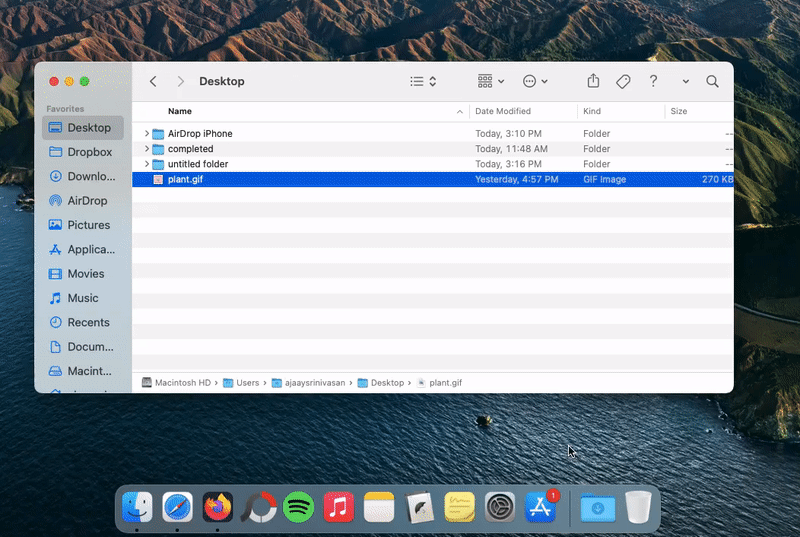
Alternatively, you can open the Finder app, go to the Airdrop tab from the left sidebar, and check whether the person you want to send to is visible inside the Airdrop window. If yes, select the files you want to share from another Finder window and drag them to the person or device’s thumbnail inside the Airdrop window.
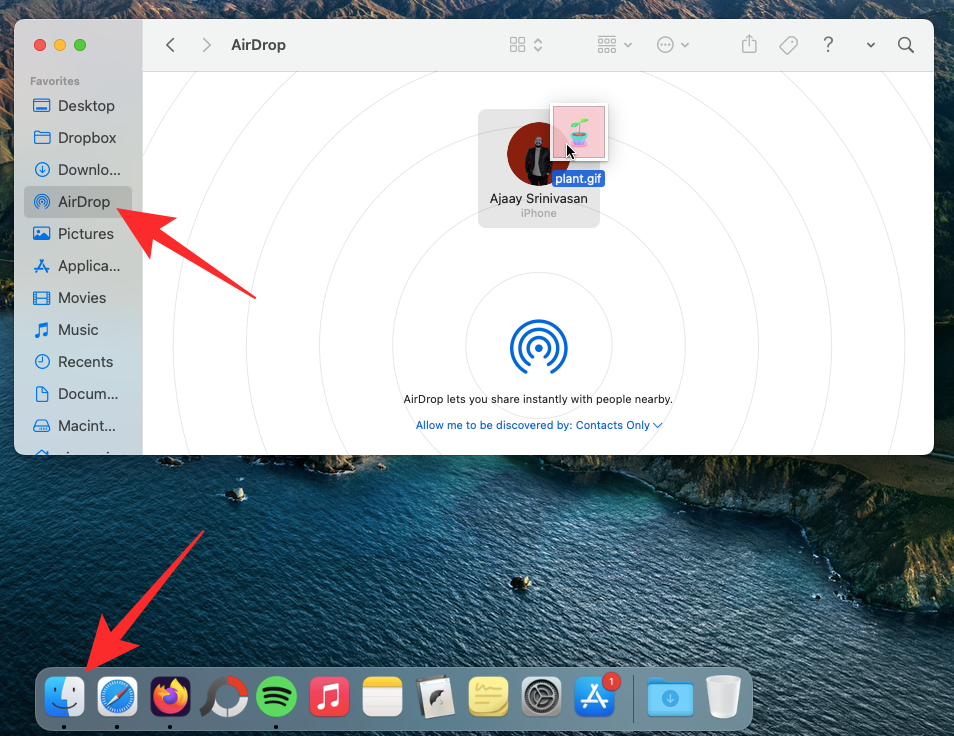
- Airdrop will now start sending the file from your Mac to the iPhone and it will take a few seconds depending on the size of the files that are being shared.
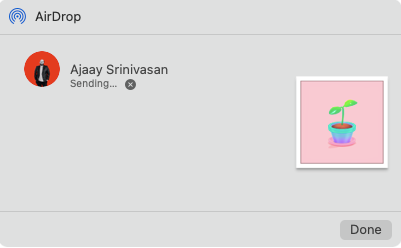
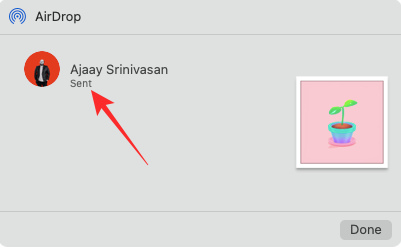
- When the shared file is successfully sent, you will see the “Sent” message appear underneath the device or person’s name inside the AirDrop window.
The above technique can also be executed when transferring files from one Mac to the other.
How to send files using AirDrop on an iPhone
Once Airdrop has been enabled, you can start sending files from your iPhone right away.
Short guide:
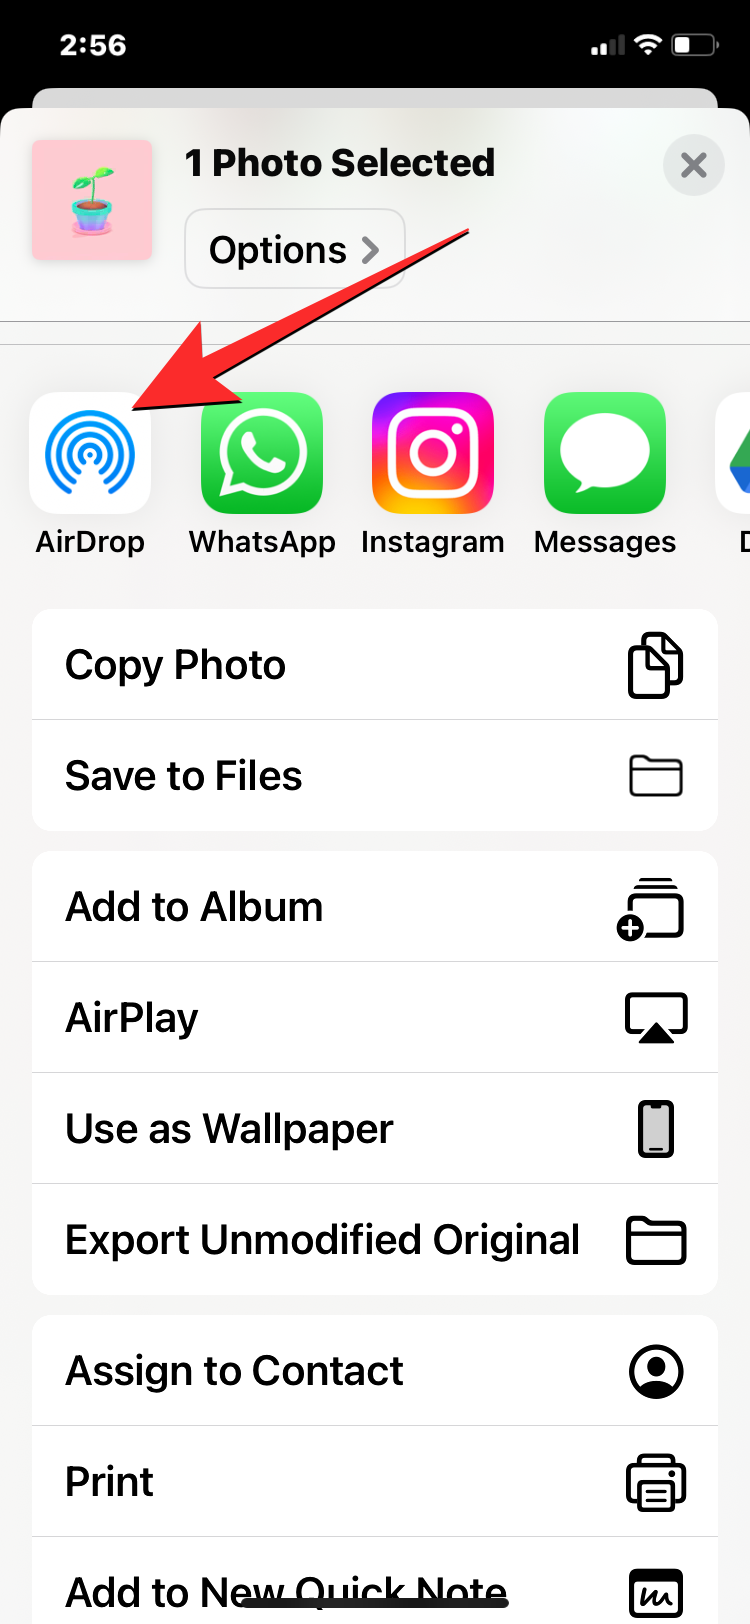
To share a file or item, locate it inside the app you want to send it from and then tap on the Share icon. When the Share Sheet opens, tap on AirDrop and then choose the device you want to send to.
GIF guide:
Step-by-step guide:
- To share a file or content from an app using Airdrop, tap on the Share icon (the one with the up arrow pointed away from the box). In apps that don’t have a Share icon, you may see a Share button instead if the selected item is shareable. From the Share Sheet that appears, tap on Airdrop.

- You will see the AirDrop screen appear showing a list of Airdrop-enabled devices in your surroundings. To transfer the file to your Mac, choose it from this list for the transfer process to begin. You will see the “Waiting” message when AirDrop waits for the recipient’s approval.


- Once the recipient accepts the AirDrop transfer, the message you will see a “Sending” message. Once the files are sent, you will see the “Sent” message inside the Airdrop screen.


How to receive files using AirDrop on a Mac
As a means to protect your device’s security and to prevent someone from sending you suspicious files, Apple provides a safety layer when using Airdrop on a Mac. You will have to give your Mac the approval to accept a file transfer to confirm that you want to receive it on your device.
Short guide:
When an iPhone or other Apple device attempts to share a file with you over AirDrop, you will see an AirDrop notification at the top right corner. You can click on Accept to start receiving this file over AirDrop. This notification only appears when you’re receiving files from someone else’s device. If you’re sharing something from your iPhone, the file will be sent directly and you will only get a notification when you receive the file.
GIF guide:

Step-by-step guide:
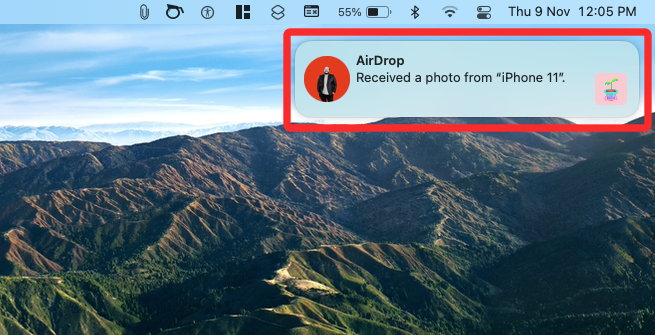
- When someone or your own iPhone is attempting to send you files using AirDrop, you will be alerted with a notification at the top right corner of your screen. The notification will read that a device is dying trying to send a particular file. If the message is from a device you know, then click on Accept. If not, click on Decline to prevent the device from sending you files.

- If the message is from your own device, then the files will be received automatically at which point you will see a notification like this.
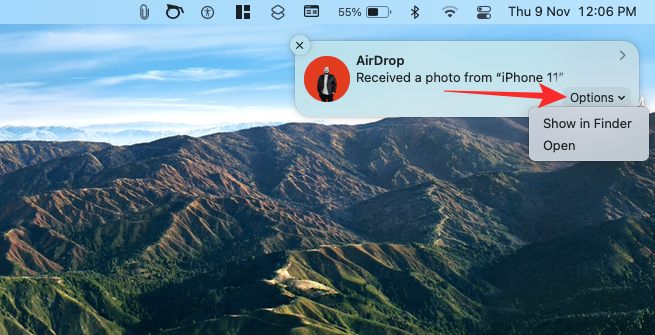
- You can hover the mouse over this notification and click on Options to either open this file or locate it on your Mac.
How to receive files using AirDrop on an iPhone
Short guide:
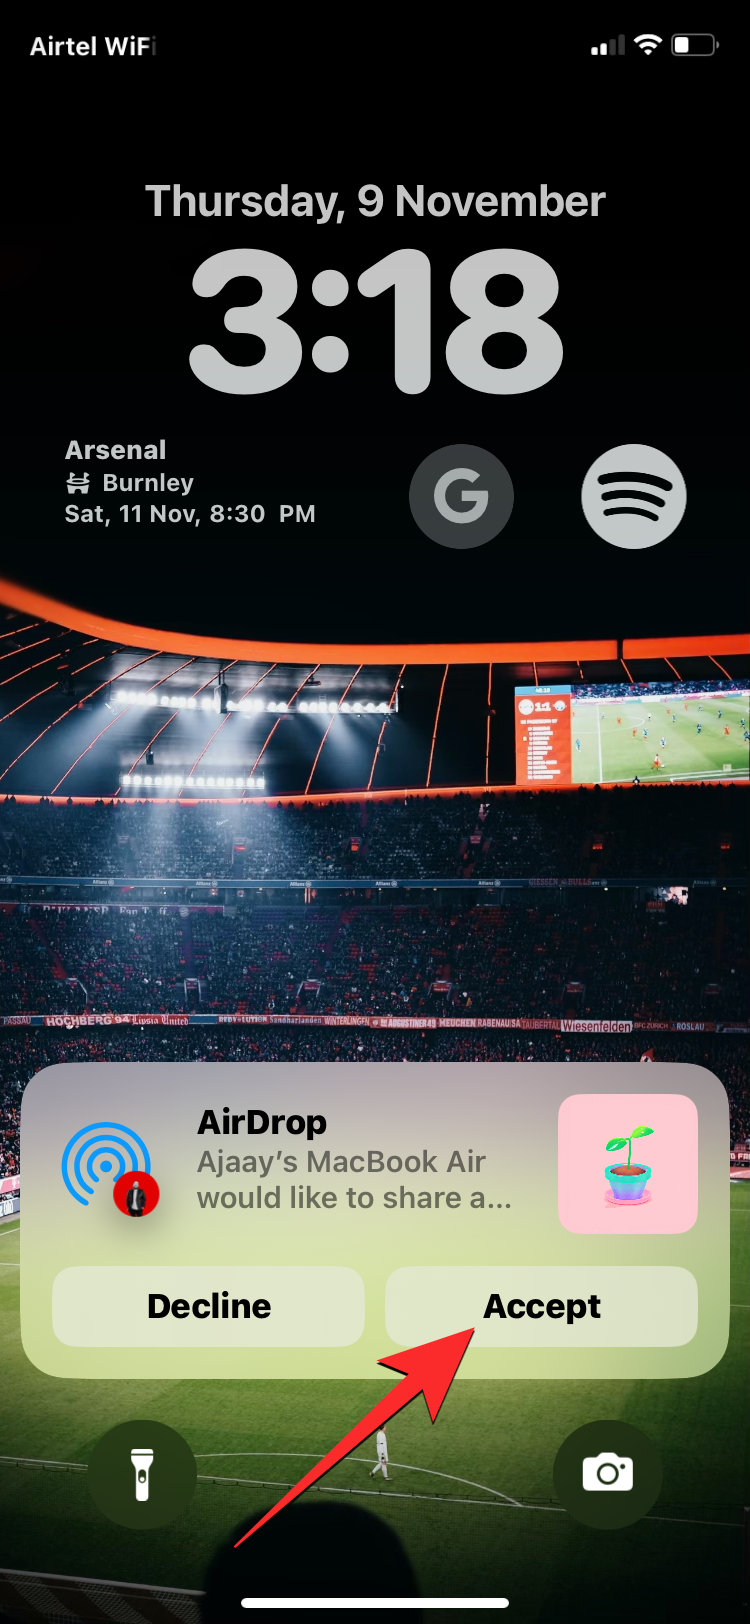
After a file is shared from a Mac, you will receive an alert on your iPhone with a preview of the file and whether you want to accept it. You can choose Accept to start receiving the file if it’s from a known person/device. If the file you’re receiving is from your own trusted devices list, you will receive the file instantly without any notifications to approve.
Step-by-step guide:
- You can start the Airdrop transfer process by tapping on Accept on the AirDrop prompt that appears.
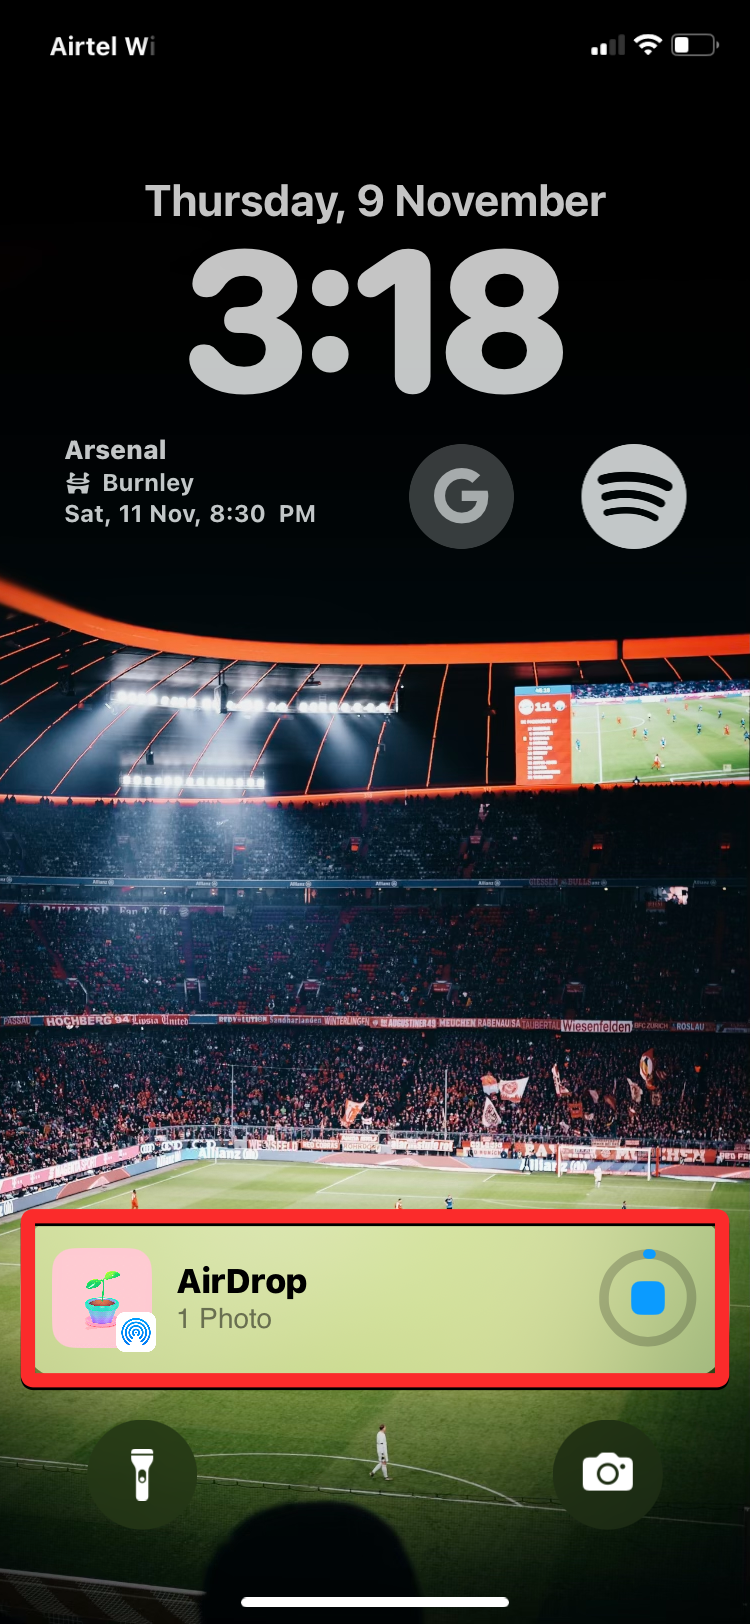
- When transferring files within your own devices, all files will be directly received on your iPhone without you needing to Accept or Decline. Links to websites will open on Safari and pictures will load up directly inside the Photos app.

AirDrop can be used to transfer files of any type and size between two Apple devices. You can share pictures, videos, notes, voice memos, documents, links, contacts, Map locations, directions, and any other file that is available on your Mac or iPhone.
Besides the files in your local library, you can also share items within apps that support AirDrop.
You will be easily able to utilize the Airdrop feature while using Safari, Notes, Photos, Contacts, Maps, Keynote, Pages, Numbers, GarageBand, Photo Booth, iMovie, iPhoto, and more. As long as the Airdrop icon appears in the Share menu inside an app, you can continue sharing things between a Mac and an iPhone using Airdrop.
That’s all you need to know to start transferring files between a Mac and an iPhone. To know more about all things Mac and iPhone, check out our dedicated macOS and iOS sections.


