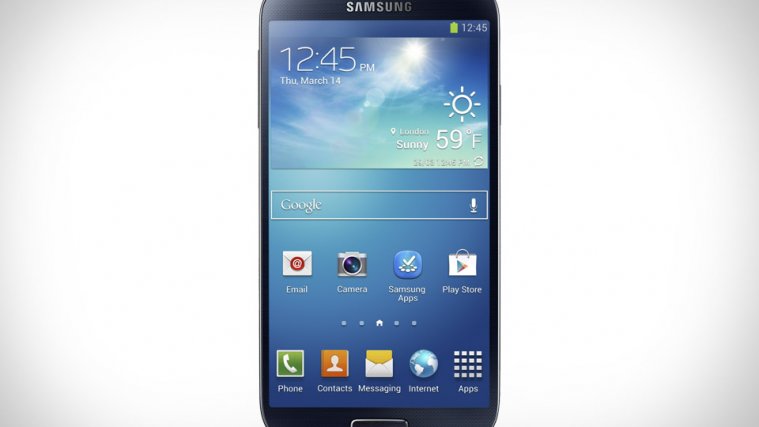
It’s been a few days since the Galaxy S4 was launched to much fanfare and adulation (admittedly with a lot of criticism as well, compared to the HTC One), and while custom ROMs are yet to begin flowing in, the development community has managed to boot up TWRP recovery on the Snapdragon LTE variant of the device.
For those unaware, TWRP is a custom recovery with a full touch interface that allows a whole lot of operations on a device – it’s needed for installing custom ROMs and also allows taking ROM backups, wiping data, flashing custom kernels, rooting, and much more. Custom recoveries are the only way one can install custom ROMs on Android devices, so you’re going to be needing one if you wish to replace that default software on your Galaxy S4 with something else.
The recovery’s interface is currently a bit finicky as it doesn’t fully support the 1080p resolution of the display, so you’ll have to be a bit careful when pressing any button in recovery, but apart from that it works without any issues. As mentioned in the title, this is only for the LTE-enabled Galaxy S4 running on the quad-core Snapdragon processor, model number GT-I9505, and the guide below will help you install TWRP recovery on your phone.
So, let’s get started.
Compatibility
The guide below is compatible only and only with Samsung Galaxy S4 Snapdragon LTE variant, model number GT-I9505. It will not work with other carrier variants or on the international Galaxy Note. Check your device’s model number in: Settings » About phone.
Warning
The methods and procedures discussed here are considered risky and you should not attempt anything if you don’t know completely what it is. If any damage occurs to your device, we won’t be held liable.
Requirements
- First and foremost, make sure you have the Snapdragon LTE variant of the Galaxy S4, which has model number GT-I9505. Confirm the model number in the Settings » About phone menu on the phone, and confirm that it’s the Snapdragon processor variant by checking the device’s box.
- Also make sure that you have an unbranded Galaxy S4 that’s not locked down to a particular carrier, as this won’t work on branded and locked devices.
- Take a backup of all the data on your phone. While flashing TWRP recovery doesn’t delete or wipe any data, it is always best to have a backup beforehand, so that you don’t lose important files and data. Use our Android Backup Guide for help on how to back up apps and other data. Skip this step if you don’t wish to take a backup.
- Make sure you have the drivers for the phone installed on your computer. You can download and install Samsung’s PC Suite software Kies, which will install the drivers automatically.
Download Kies
Install TWRP Recovery
- Download Odin. If you’re going to use either of the first two methods to root, then you will need to use Odin, which is a software for flashing firmware and images on Samsung devices.
Download Odin | Filename: Odin3_v3.07.zip - After downloading the Odin3_v3.07.zip file, extract it to obtain a folder with around 4 files inside, including a file named Odin3_v3.07.exe. Don’t delete any of these files.
- Download TWRP recovery from the source page. Be sure to download the “Odin flashable package” that we’ll use with Odin for flashing recovery on the phone.
- Turn off your phone. Now, we need to boot it up in download/Odin mode. To do that, press and hold the Volume Down + Home + Power buttons together till the screen turns on and shows a Warning! screen. Here, press the volume up key to boot the phone into download mode.
- Now, open Odin by double-clicking on the Odin3 v3.07.exe file.
- Connect your phone to the computer now. If this is the first time you’re connecting it to the computer, wait for the drivers to finish installing. Once Odin detects the phone, it will give an “Added!” message in its message box on the bottom left, and the box under the “ID:COM” text at the top will turn to blue.
- In Odin, click on the PDA button, then select the recovery file that you downloaded in step 3. Do not make any other changes in Odin. The COM number under the “ID:COM” text will vary, but that is normal.
- Now, hit the Start button in Odin to start flashing TWRP on the phone. Once the flash is complete, the phone will reboot, and you will also get a “PASS” message in Odin.
- What do if Odin gets stuck or doesn’t do anything: If ODIN gets stuck on setup connection or at any stage of this process after you’ve hit the Start button, and doesn’t seem to be doing anything, or if upon completion of the process you get a FAIL message (with red background) in ODIN, do this: disconnect the phone from the PC, close ODIN, remove battery for 4-5 seconds, re-insert it, turn phone on in Download mode again, and do the procedure again from Step 5.
- Once your phone boots up, TWRP recovery will be installed on your Galaxy S4.
Booting up into TWRP Recovery:
- To boot into TWRP recovery, turn off your phone.
- Press and hold the Volume Up + Home + Power buttons together till the screen turns on, then let them go. A few seconds later, your phone will boot up into TWRP recovery.
- In TWRP recovery, the listed options can be selecting by clicking on them. Rebooting back into Android from TWRP recovery can be done by selecting the “Reboot” option in the main menu of TWRP, then clicking on “System”.
TWRP recovery is now installed on your Galaxy S4, and you will be able to flash custom ROMs, hacks, kernels, take backups of and restore ROMs, and make other modifications such as factory resetting the device. If you run into any problems, let us know in the comments and we’ll help you out.


