Over the last few years, One Time Passwords or OTPs have managed to come out of the shadows and become mainstream, more user-friendly alternatives to complex passwords. Back in the day, OTPs primarily catered to bank transactions or something equally serious. Now, OTPs are used to login to websites and signup for different services, irrespective of their level of importance.
With so many OTPs flooding in every single day, it’s not unusual to miss a couple of important text messages from people who matter. One of the leading messaging services in the world, Google Messages, understood the problem and introduced the option to auto-delete OTPs after 24 hours.
Convenient as the option is, there could be times when you need your OTPs to stay on your phone, much longer than 24 hours. If you’re in such a pickle, let this piece be your guide to sustained information storage.
Related: How to Schedule Messages on Google Messages Android App
How to keep OTP after 24 hours on Google Messages
If you had configured Google Messages to delete your OTPs periodically, but now regretting the decision, you’d be happy to know that the process is easily reversible.
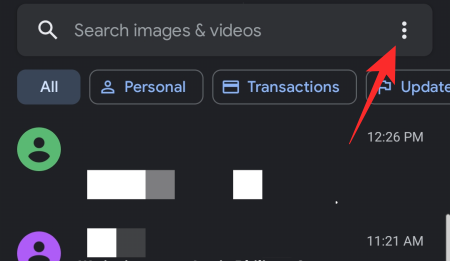
First, launch the Google Messages app, wait for your inbox to load, and tap on the vertical ellipsis button at the top-right corner of the screen.

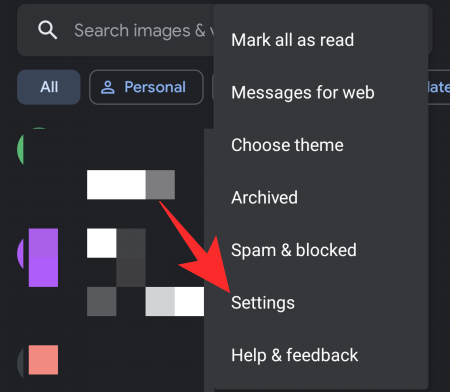
Now, tap on ‘Settings.’

Then, hit ‘General.’

Here, you’ll see a list of setting options that are available to you. Depending on the version of the app you’re running — and whether or you’re a beta tester or not — you might see some different settings. Now, go to ‘Message organization.’

Finally, disable the toggle next to ‘Auto-delete OTPs after 24 hours.’

How to find all OTPs directly
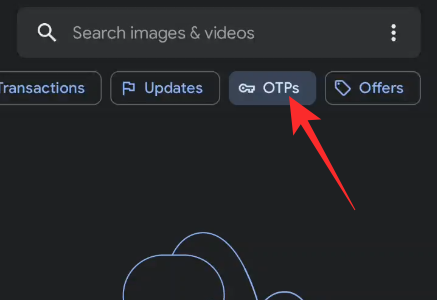
Again, if you are running a supported version of the Google Messages app, you’ll have the benefit of seeing your One Time Passwords auto-sorted for your convenience. The option is turned on by default. So, you should be able to see an ‘OTP’ tab at the top. Tapping on which should take you to all the OTPs in your Google Messages inbox.

If you don’t see the tab, make sure you haven’t disabled it accidentally.
After launching the Google Messages app, tap on the vertical ellipsis button at the top-right corner of your screen. Now, go to ‘Settings.’

Then, open the ‘General’ settings page.

Next, tap on ‘Message organization.’

Finally, make sure the toggle next to ‘Sort messages by category’ is turned on.

Why let the app auto-delete OTPs
Letting Google Message auto-delete your OTPs is a neat idea, especially if it’s your preferred mode of authentication. If you use OTPs to sign up for almost all services, you could end up getting swamped in messages that don’t mean anything after a certain period of time. With auto-deletion turned on, you save yourself from being overrun by time-sensitive text messages.
Related: Google Messages for Web –How to get it, tips, and all you need to know
Why not let the app auto-delete OTPs
Too many OTPs can take a serious toll on the well-being of your Google Messages inbox, of course, but they can come in pretty handy in certain situations. While there’s no harm in deleting OTPs that help you log into different websites, it might not be the best idea to delete OTPs that are intertwined with bank transactions. Since OTPs are virtual paper trails, keeping them in one place gives you a timeline of your spending habits. If you’re into taking control of your finances, think twice before deleting your OTPs.
What happens on Google Messages Web
Since Google Messages Web is nothing but a plug-in for PC users, it lacks the deeper customization options that you might be looking for. Message Organization isn’t exactly one of the most primary features of Google Messages, which is why you don’t get the option on the Web version. That being said, the settings you pick on your app — auto-delete OTPs, categorizing messages, and more — are reflected on the Web version just the same.
RELATED


