fooView is a multipurpose Android application which specializes in simplifying your life. Whether it is a successful attempt or not, we will discover through the course of this article, but it’s safe to say that fooView deserves a bit of your time and patience.
It bears a strong resemblance to Facebook chat heads, but be assured, its relatively smaller footprint doesn’t hinder its unmatched usefulness. If your app drawer is crawling with a host of apps, and you are exhausted jumping from one app to the other, fooView is probably your best bet to untangle your smartphone experience.
⇒ Download fooView from Play Store
Here are 13 big reasons why you should give this little Android app a shot:
Big Screen Convenience
If you are using a large device, chances are, you need both your hands to reach every corner of your screen and get the job done. fooView’s portable design allows you to go to your favorite apps in the most convenient way possible. Just position floating icon in your desired position and access from anywhere.
Here’s how to:
- After completing the initial setup, tap and hold the fooView floating icon.
- After the menu pops up, drag your finger to the Position icon.
- Readjust your fooView floater’s position.

Having a dedicated navigation bar is convenient but it eats up a good chunk of your screen real estate. fooView, however, makes use of its customizable set of gestures to mimic the actions of your navbar.
Here is the list of gestures to get you started(given you’ve placed your floating icon on the right side of your screen):
- Short swipe towards the left of your screen acts as your back button.
- A long swipe towards the left gets you to your home screen.
- A short swipe towards the bottom opens the recent apps menu.
- A long swipe towards the bottom brings down the notifications/quick settings panel.
- Swipe up to open the fooView main window.
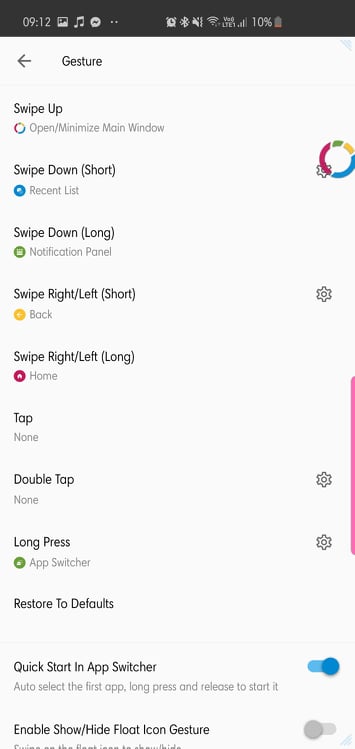
You’ll need to grant Accessibility permissions to make these gestures work.
Screenshot
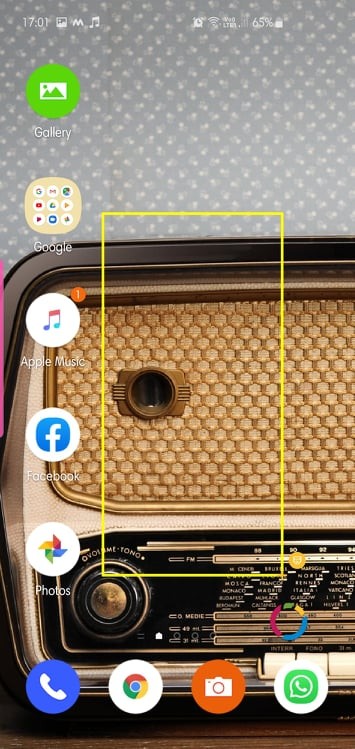
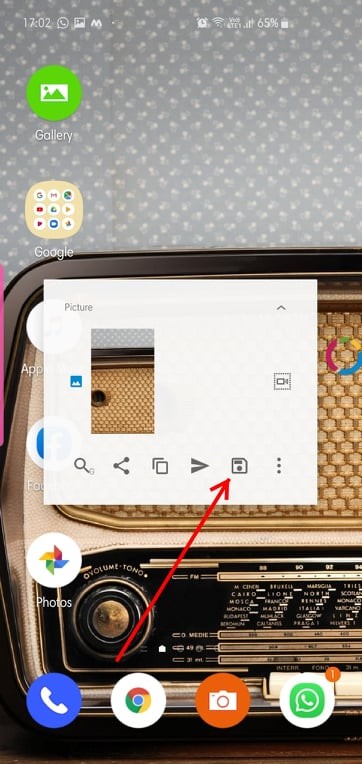
If you find yourself reaching for your screenshot combination every now and then, fooView has the perfect solution for you. Not only does it allow you to take full screenshots, but it also lets you capture a selective portion of your screen. The latter is specifically useful if you want to save images from Instagram.
Here’s how to take selective screenshots:
- Move the fooView floating icon to the desired portion of your screen.
- Pause and wait for the red cross to turn yellow.
- Drag the square and cover the area you want to save as screenshot.
- After completing, press the floppy icon to save the screenshot.
Tip: To quickly take a screenshot, you can set a gesture for it. For example, in the GIF image below, I am using the long swipe down to click a screenie easily. It’s an amazing feature, one that we love the fooView app for. Do try this.

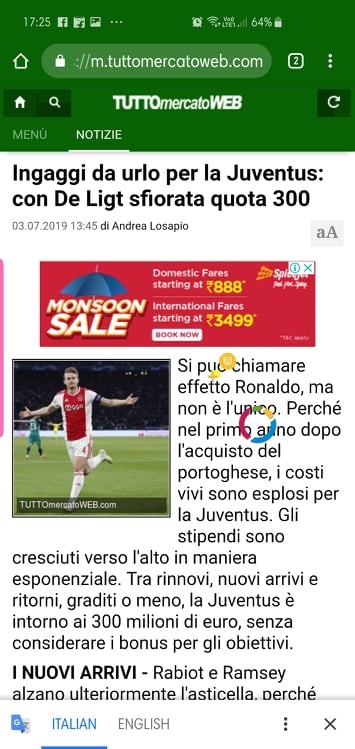
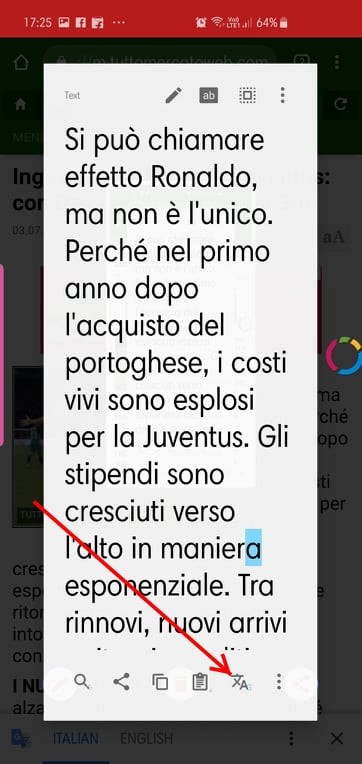
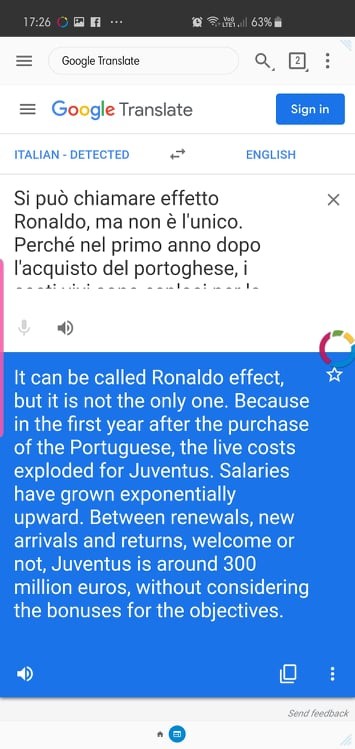
Translation on the Fly
If you’re not impressed with regional screenshots, you’re bound to be impressed with this one. This nifty feature allows you to translate any word with the help of Google Translate, and in an innovative and straightforward way.
Here’s how to translate:
- Move the fooView floating icon to the desired portion of your screen.
- Pause and wait for the red cross to turn yellow.
- Drag the square and cover the area you want to translate.
- After completion, press the Translate icon.
- You’ll translation will be shown in the next window.
Customizable Quick Access App Panel
The ability to let you go to your favorite apps in the blink of an eye – this is arguably fooView’s biggest USP. By default, fooView comes with two, fully-customizable App Switcher rings. The first one displays your recent applications, while the outer ring is reserved for your favorites. It’s pretty straightforward to populate the rings with your favorite apps/actions.
Here’s how to:
- Tap and hold to open the App Switcher.
- Move your finger to the left and select the Pin icon.
- Select any of the icons/blank spaces.
- After a dialog pops up, select the app/action/folder/shortcut you want to place there.
- The app will now be pinned to the app switcher panel.

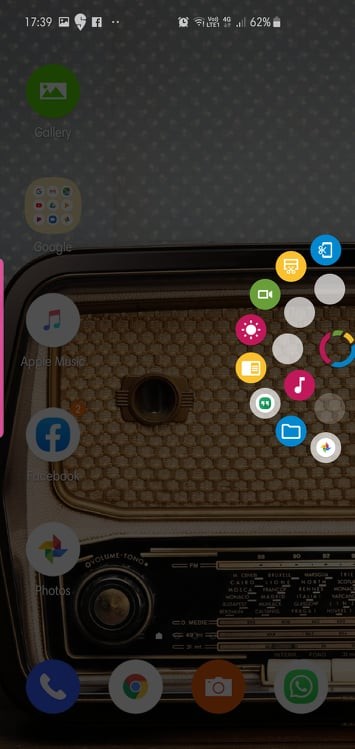

It is to be noted that you can customize only four places in the inner ring, as the fifth one will then be reserved for displaying your most recent app.
One-Tap Access
fooView is all about making life simpler for you, so, of course, it offers one-tap access to your favorite app/action.
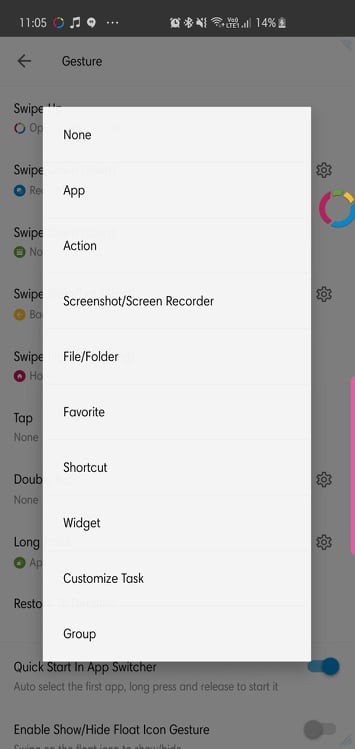
Here’s how to set it up:
- Swipe up to open the main window.
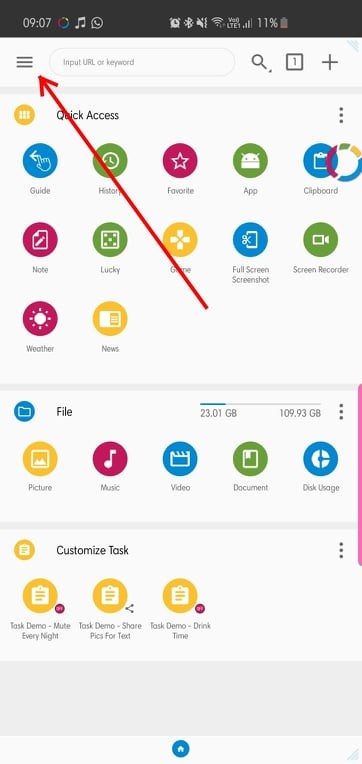
- Tap on the ‘triple bar’ icon, situated on the top-left corner of your screen.
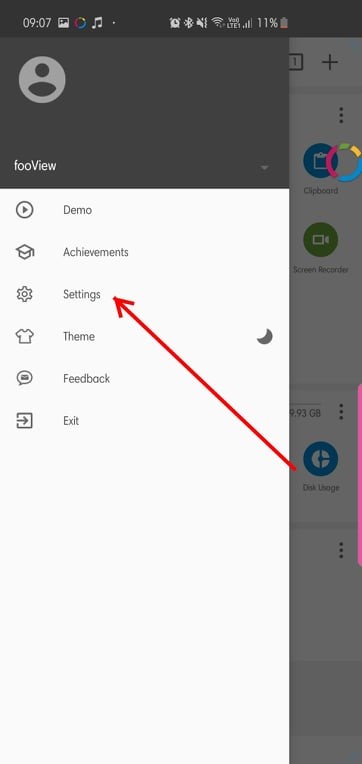
- Go to Settings.
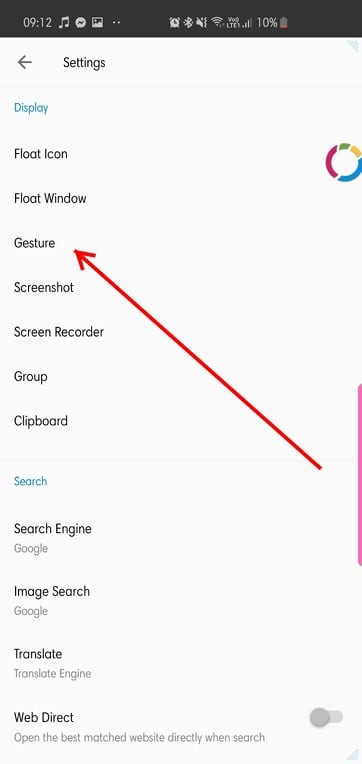
- Open Gesture.
- Select Tap.
- Pick the App/Action/Shortcut/File you want to replace it with.
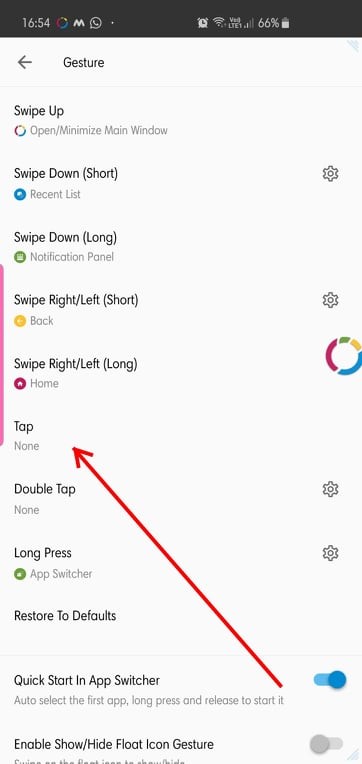
Similarly, you can customize fooView’s Double Tap functionality, as well.
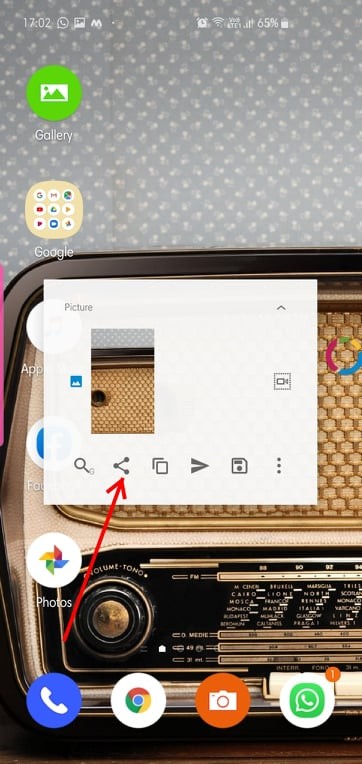
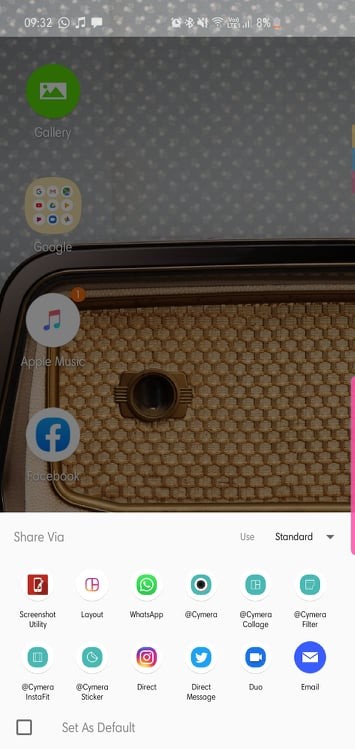
Whether you record a screenshot or save a piece of text, fooView allows you to share it with ease with just a simple tap.
Here’s how to share your recorded images/texts through fooView:
- Record a screenshot/save a piece of text.
- Tap on the Share icon.
- Choose the desired app.
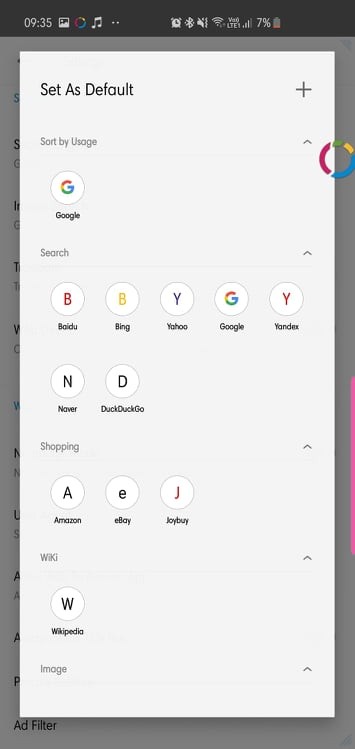
Customizable Search Options
fooView’s main window comes pre-loaded with a dedicated search bar/mini browser. If you type a keyword, it’ll make use of Google’s search engine to show you the websites relevant to your query. It offers the same option when you record a screenshot/save a piece of text.
However, if you don’t want to use Google as your default search engine, there’s an option to change that as well.
Here’s how to:
- Swipe up to open the main window.
- Tap on the ‘triple bar’ icon, situated on the top-left corner of your screen.
- Go to Settings.
- Select Search Engine.
- Take your pick.

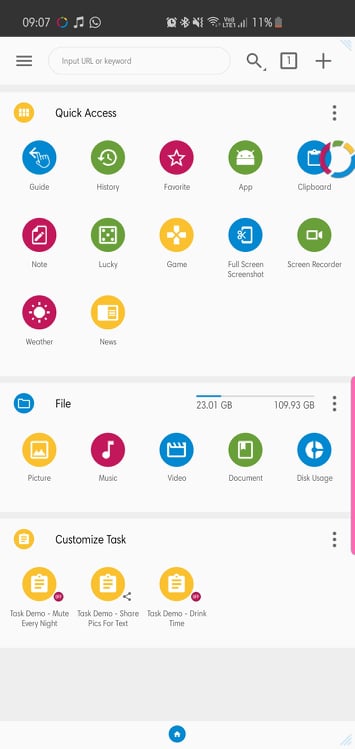
File Manager
Not only does fooView make life easier by bringing a plethora of apps and services at your fingertips, but it also has a pretty powerful file manager that’ll let you explore pretty much every corner of your smartphone. Just open the app’s main window and look under File.
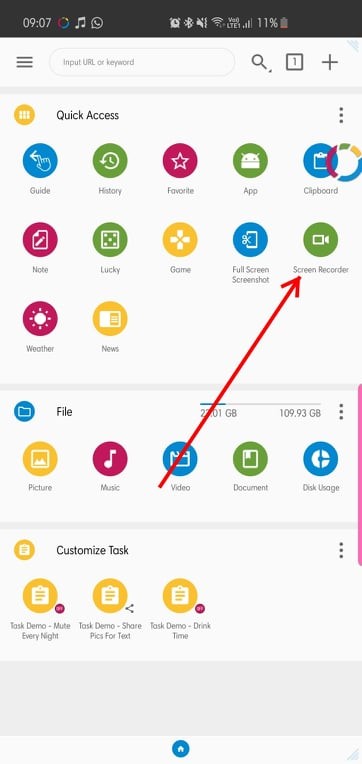
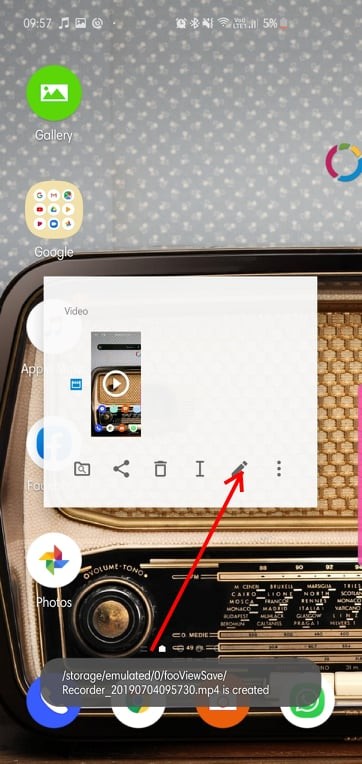
Screen Recorder on the Fly
If you’re a blogger who finds himself using a dedicated screen recorder every now and then, fooView offers a nifty solution to make your life a lot easier. The app has a dedicated screen recorder, which you can access through a single/double tap, App Switcher, and the main window.
Here’s how to access it through the main window:
- Swipe up to open the main window.
- Tap on Screen Recorder.
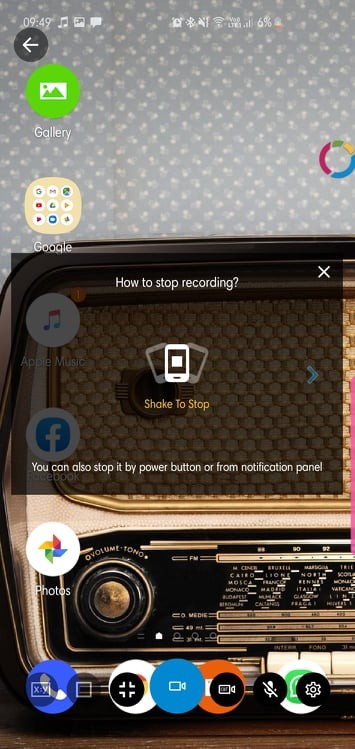
- Select how you want to stop your recording — shaking your device or through notifications panel.
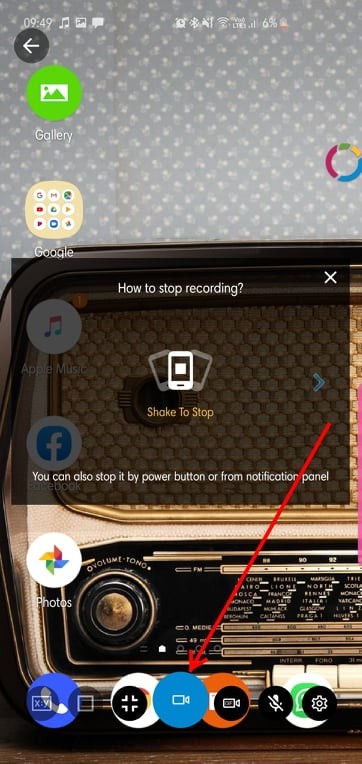
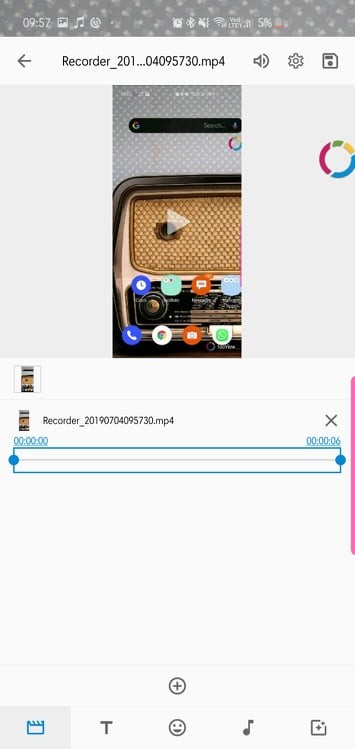
- Tap on the Blue Video Recorder to start.
- Edit your recorded video by tapping on the Pencil icon.
- Select the duration.
- Save.
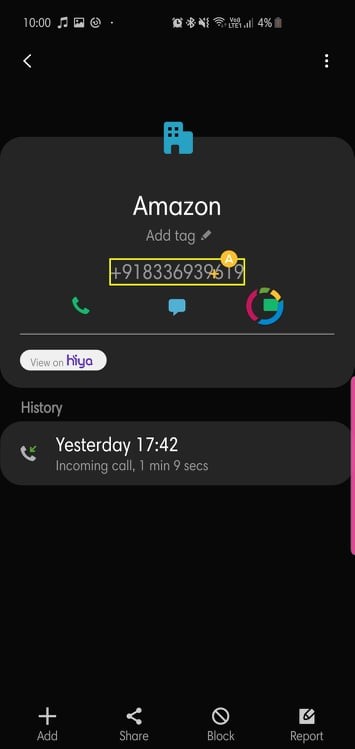
Phone Number Tracker
If you wish to detect the location of a specific caller, fooView has an in-built caller identification to help you with that.
Here’s how to look up a specific number:
- Move the fooView floating icon to the desired portion of your screen.
- Pause and wait for the red cross to turn yellow.
- When a dialog pops up displaying the number, tap on the Caller Identification icon.
- You’ll be shown the caller’s info through yellowpages.com


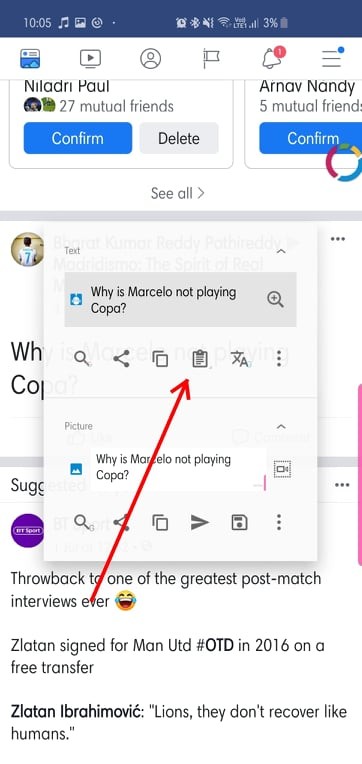
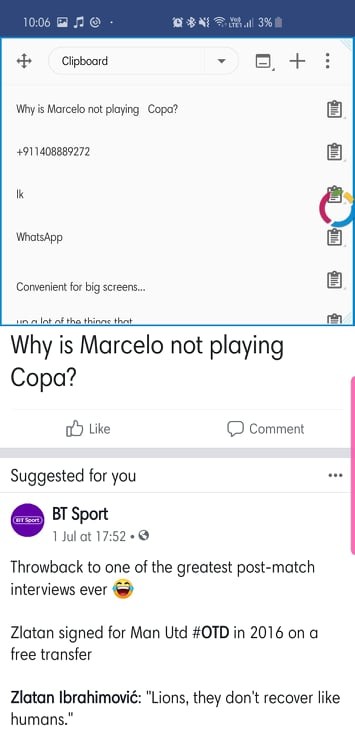
Handy Clipboard
Want to take a quick note? fooView has got you covered. The app has a handy clipboard app where you can easily store your text snippets.
Here’s how to save to clipboard:
- Move the fooView floating icon to the desired portion of your screen.
- Pause and wait for the red cross to turn yellow.
- When a dialog pops up, click on the Clipboard icon.
- Access clipboard through App Switcher/main window to see the text.
Free
If you’ve stuck around so far, chances are you are already impressed by the app’s virtually endless customizability and features. If you’re still not sure, this reason alone should sway you in the app’s favor. fooView is available for free on Google Play and it only takes less than 10 megabytes of space on your device. To top it off, it doesn’t pop up annoying ads every other minute to hamper your experience.
What are your thoughts on fooView? Is this an indispensable app for you? Or do you get a headache simply surfing around its settings?
Related: