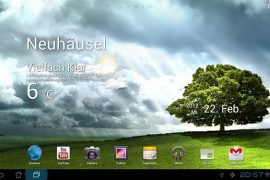
It’s been a few weeks since the Transformer Prime got the OTA bump to Android 4.0 or Ice Cream Sandwich. Despite a few hiccups during the initial OTA rollout, considering it was the first-ever device to get the update, the Prime seems to have settled down well in Ice Cream Sandwich land. So much so, that there is a brand new ICS Custom ROM out for the Transformer Prime today. It’s called Virtuous Prime, and is based on the latest Asus Stock ICS firmware release WW 9.4.2.14. Keep in mind though, that this is the first custom ROM released for the Prime, and is currently classified as a Beta, at least for now, in case there are unforeseen bugs or error. But definitely something to try out, if you have a rooted Prime.
Warning!
The methods and procedures discussed here are considered risky and you should not attempt anything if you don’t know exactly what you are doing. If any damage occurs to you or your device, including a bricked, non-functional device, we won’t be held liable. You have been forewarned!
Compatibility
This ROM and the guide below is compatible only and only with the Asus Eee Pad Transformer Prime, model number TF201. It’s not compatible with any other device and may render an incompatible device unusable. Check your device model in Settings » About Tablet.
ROM Info
Developers: Team VirtuousRom
Features
- Based on latest ASUS release (WW 9.4.2.14)
- Deodexed
- Fully zipaligned
- De-bloated
- Rooted
- Stock kernel
- Optimized for fluid performance and usability
- Included 1.6Ghz OC
Pre-Installation Requirements
- Transformer Prime with Unlocked Bootloader. You can use this Guide to Unlock the bootloader
- Root Access. You can use this guide to Root your Prime.
- Custom Recovery CWM installed on your Prime. You can follow this guide to flash CWM
How To Install Virtuous Prime ROM on the Asus Transformer Prime
- Download the Virtuous Prime ROM from the official support thread, to your PC
- Transfer the downloaded ROM file to the root of the SDcard on the Prime.
- Now power off the Prime and Reboot to Recovery (Hold both the Power-button and the Volume-down button until the splash screen appears and some white text in the left top corner is visible. Release both buttons and press the Volume-up button to enter Recovery)
- Perform a Nandroid backup of your existing ROM. To do that, Select Backup and restore from the CWM main menu, and then select Yes – Backup on the next screen.
- Perform a full data wipe. First Select Wipe Data/Factory reset, and then Yes-Wipe data on the next screen. Then select Wipe Cache Partition, and then Yes-Wipe Cache on the next screen. Finally, Select Advanced from the Main menu, and select Wipe Dalvik Cache next, and then Yes-Wipe Dalvik.
- After completing the full wipe, Go back to the Main menu & select “Install zip from sdcard”, then select “Choose zip from sdcard” on the next screen.
- Navigate to the Virtuous Prime ROM zip file you transferred in Step 2, and select it using the Power button. This will start the installation of the ROM.
- Wait for the ROM flashing to complete. Once it is done, select Go Back, and then Reboot System, and wait for your device to reboot.
- The first reboot may take a little longer than usual. So be patient. Once your device has rebooted completely, do not touch anything. The ROM needs at least 10-15 minutes to settle down. Wait for 15 minutes, and then proceed to set up your Prime.
That’s it!! You are now running the first ever Custom ROM for the Transformer Prime- Virtuous Prime. You can visit the official support page linked above, to check for updates, download add-ons, submit bugs, or to just read about how others are finding this ROM. Enjoy the goodness of rooted, and tweaked Ice Cream Sandwich, and let your friends know about this guide too. And if you run into any roadblocks while flashing this, give us a hoot in comments below, and we’ll try and help you out.