Kdenlive is an ultra-fast open-source video editing app replete with tools and features that can give even the best in the business a run for their money. If you’ve recently installed Kdenlive and have used it to create and edit a video, you might be wondering how to export your final edit.
In Kdenlive, as in many other video editing software, the option to export a video is called “Render”. This can be accessed from the main toolbar itself. But there isn’t just a single way to export or render a video. In this guide, we take a look at how you can export your Kdenlive project on Windows 11 using a variety of custom settings. Let’s get started.
1. Export the full project from Kdenlive
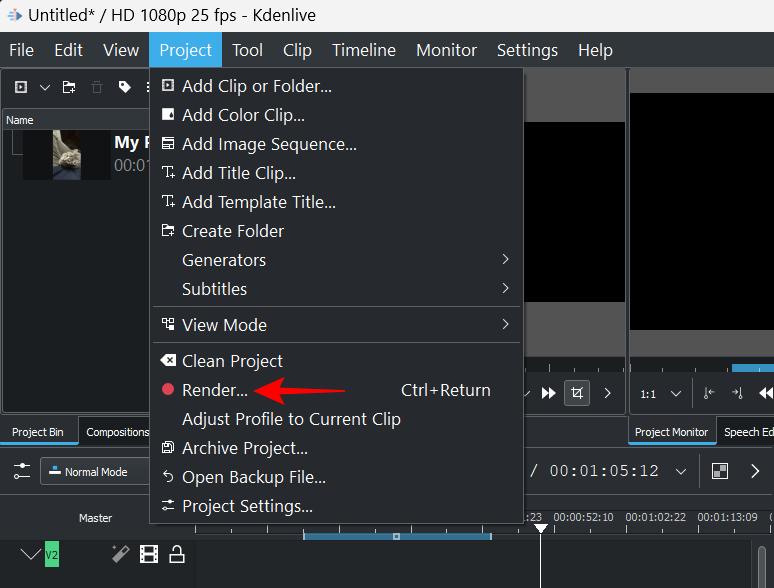
We begin at the point where you have already imported your video and made the necessary cuts and adjustments. Once you’re satisfied with the way your project looks, click on Project in the toolbar above.
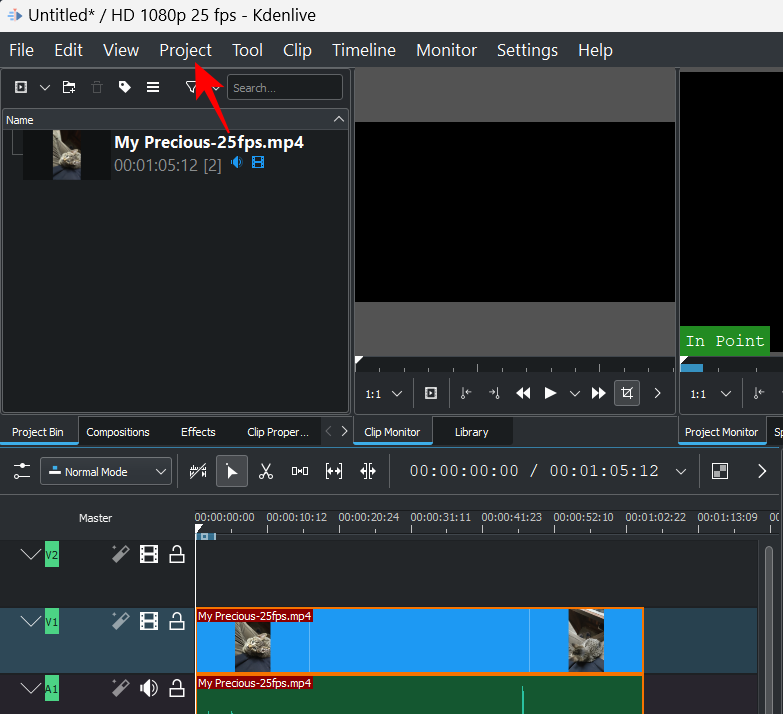
Then select Render.
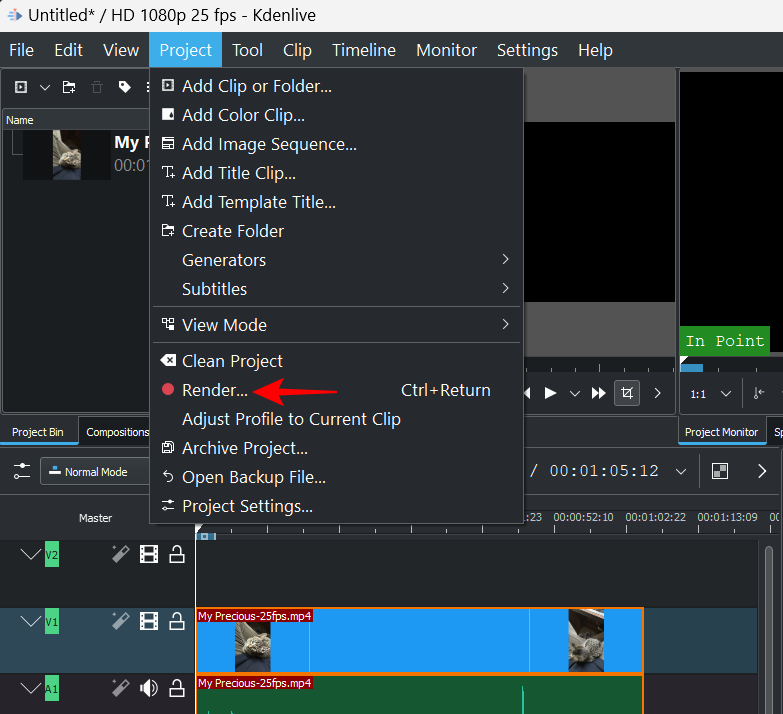
Alternatively, you can simply press Ctrl+Enter as mentioned next to the option itself.
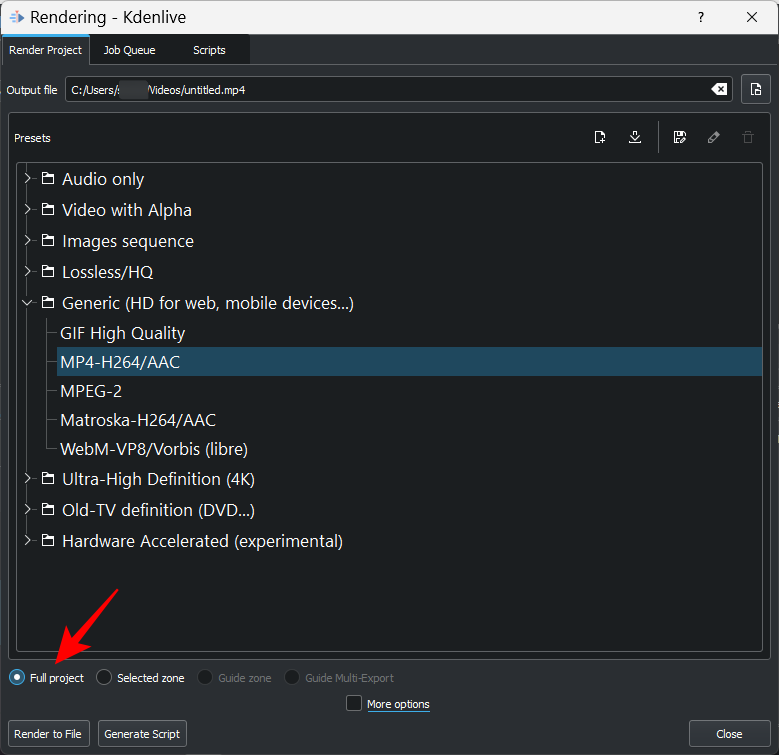
This will open the “Rendering” window. Here, under the “Render Project” tab, you can choose from the available format presets.
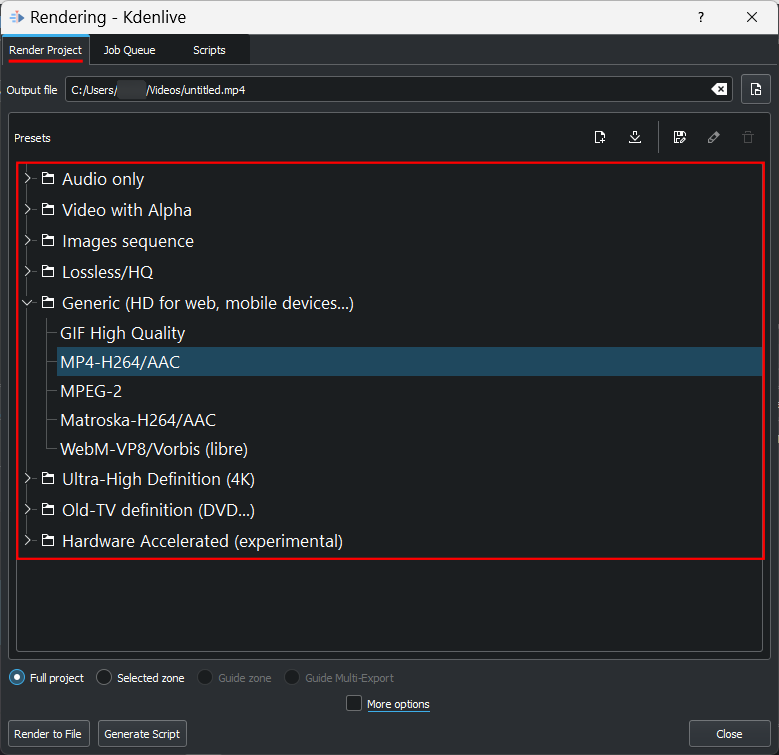
You can simply use the default MP4 preset. Then make sure that Full project is selected.
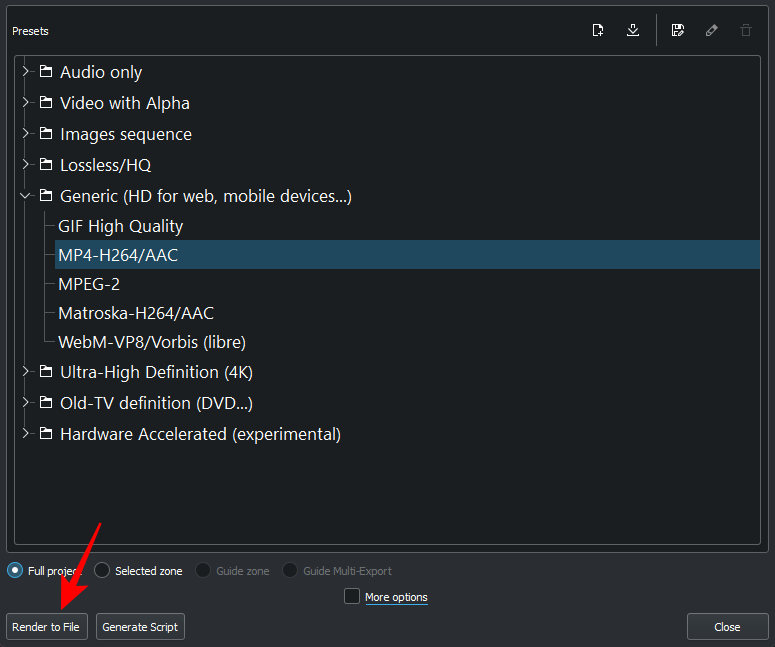
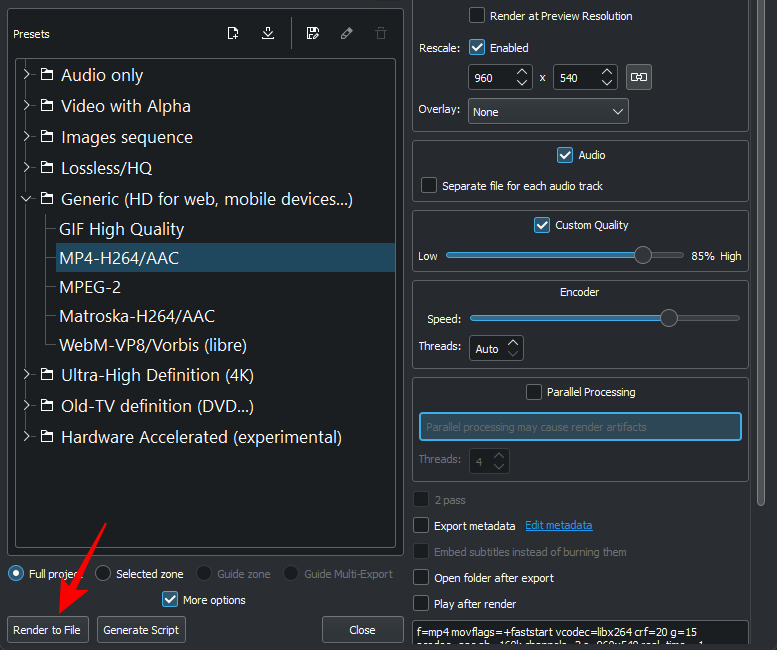
Finally, click on Render to File to export your video.
Wait for the export to finish.
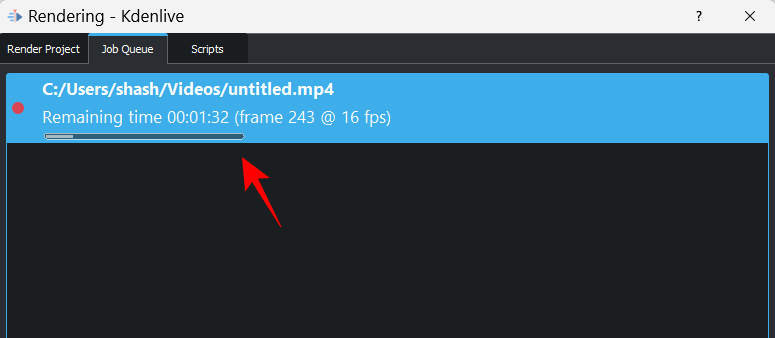
Once done, it will be available at the default save location.
2. Export selected zone from Kdenlive
Sometimes, rather than exporting the whole project, you may want to export only a part of it. To do this, you’ll first have to mark the video in and out points.
Bring the timeline marker to where you want to start the video, and then press i.
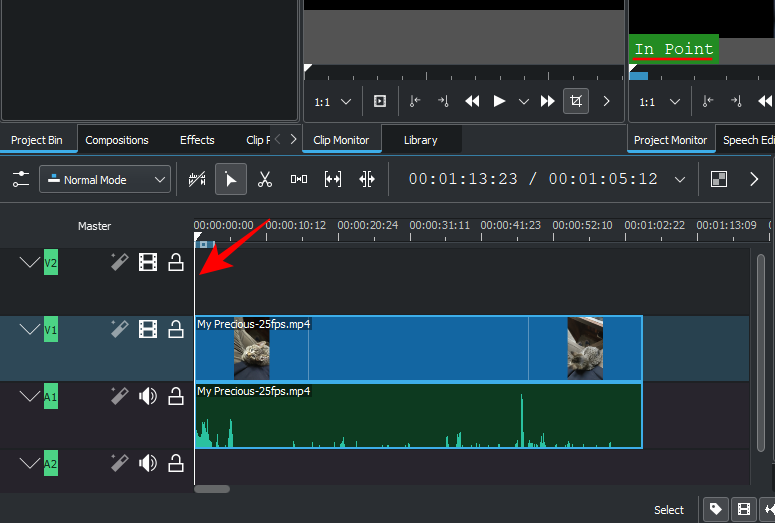
This will mark the video in point. Then bring it to where you want to end the video, and the press o.
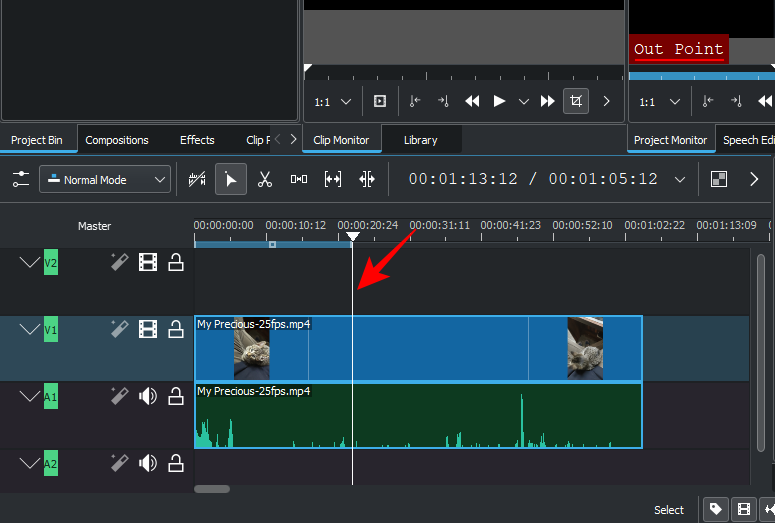
This will mark the video out point. You will see the selected zone appear in blue in the timestamp area.
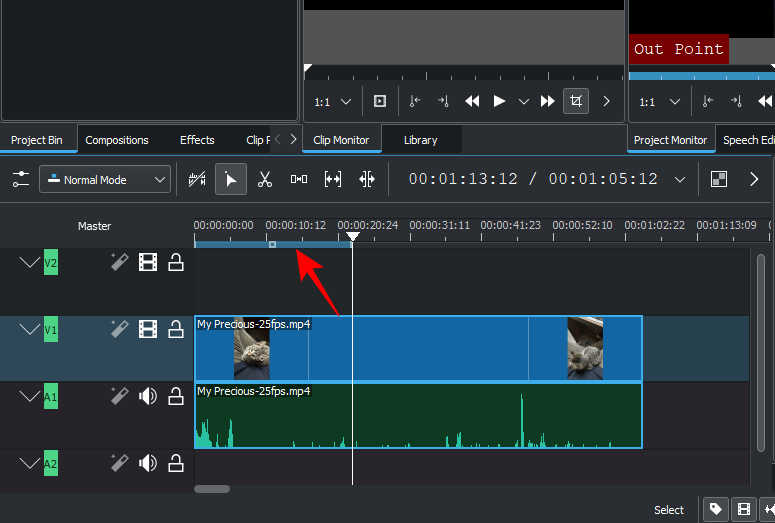
The selected zone can be moved around by dragging the center…
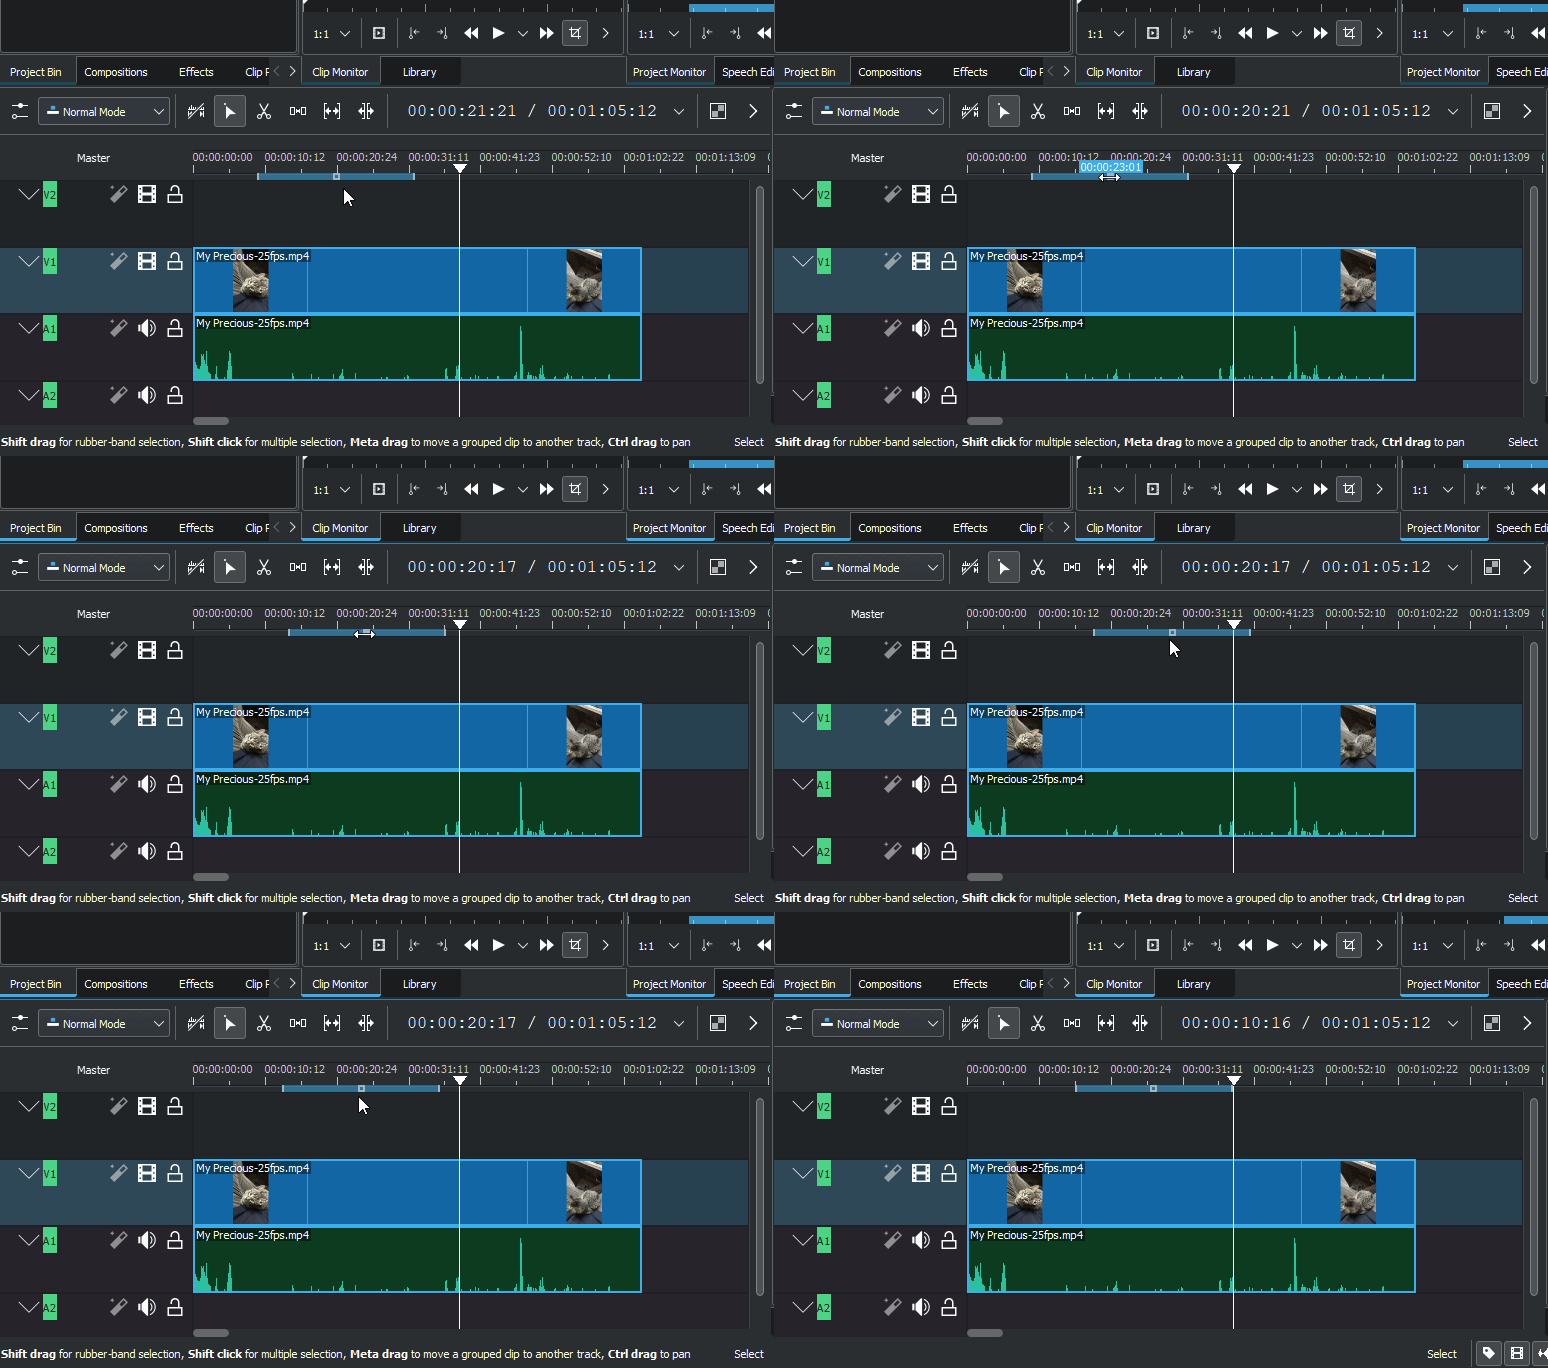
…or adjusted for length by dragging the edges.
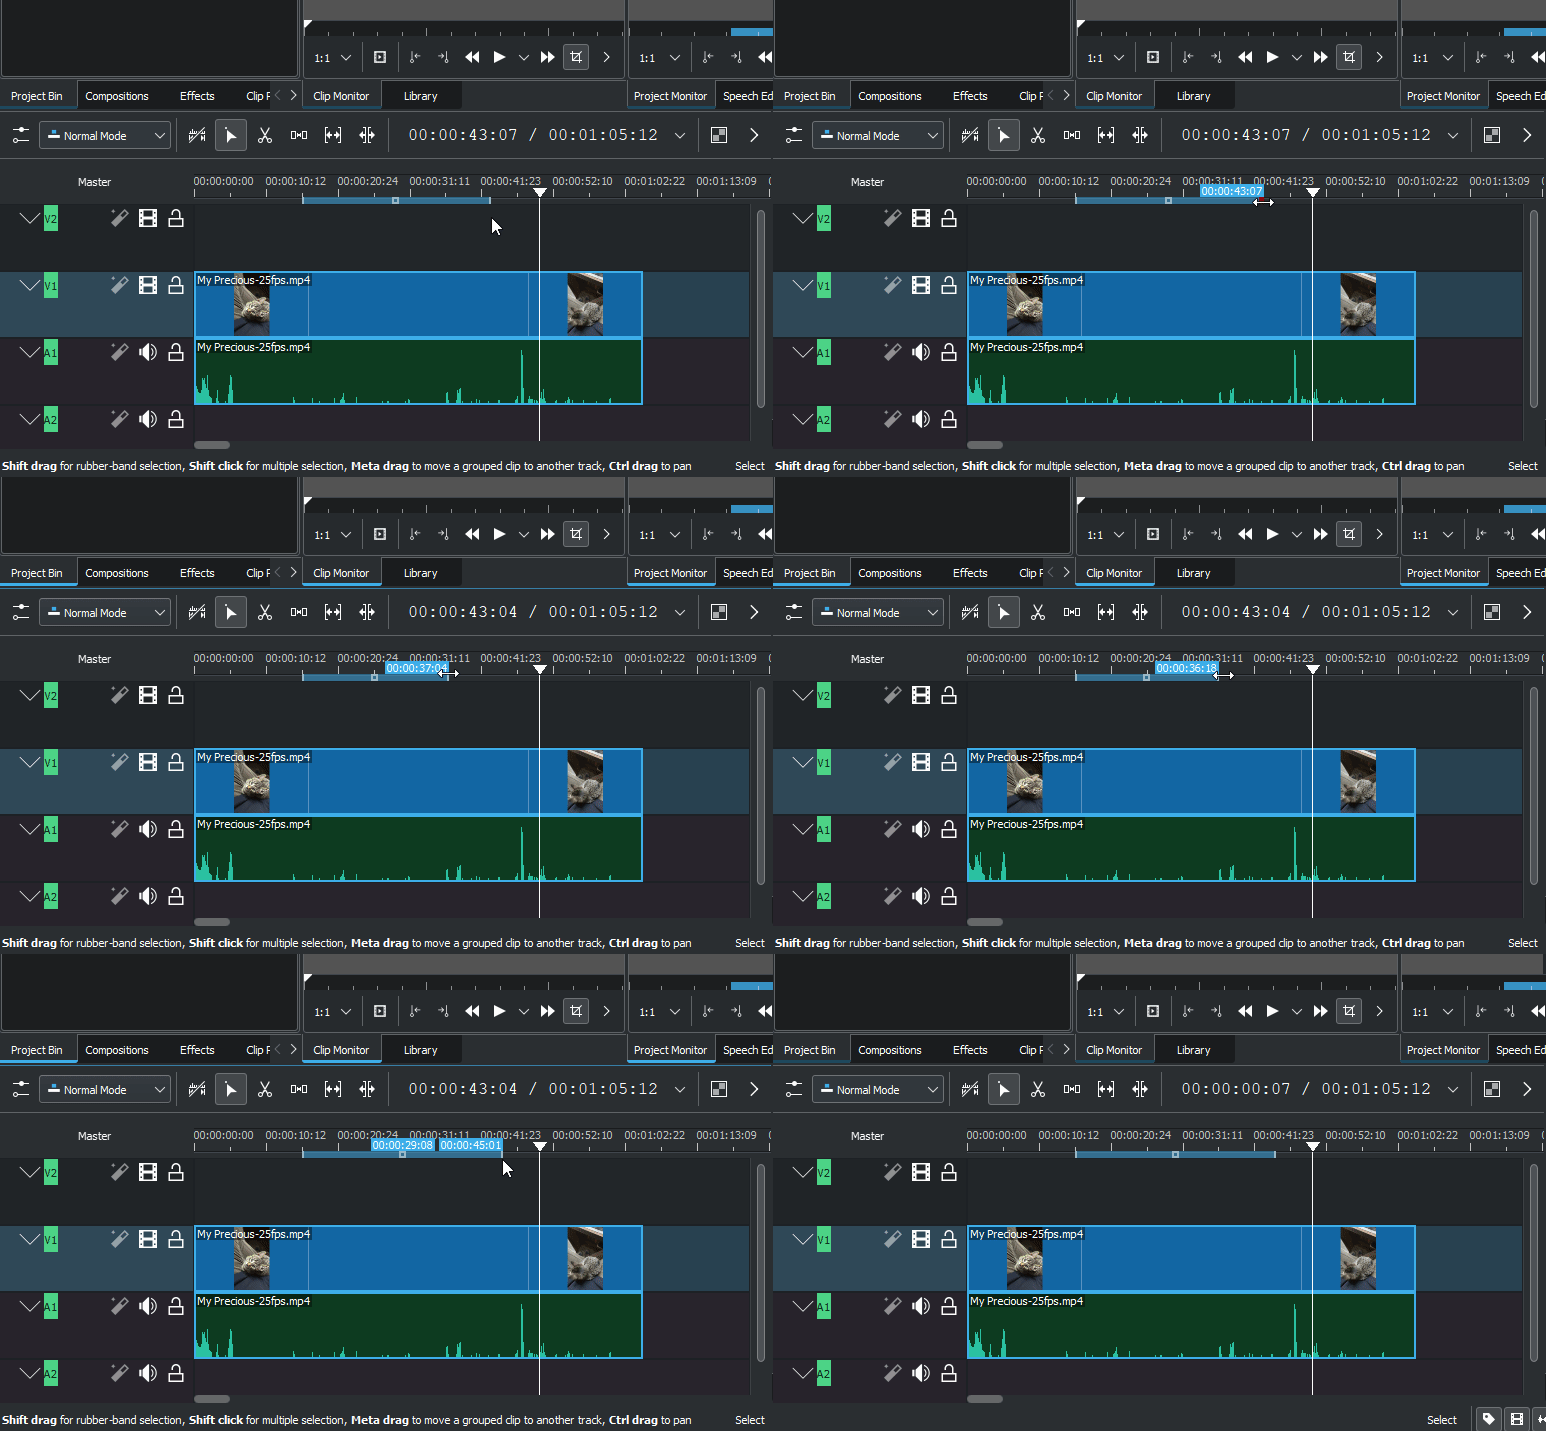
Once you’re satisfied with the selected zone, click on “Project” and then “Render”.
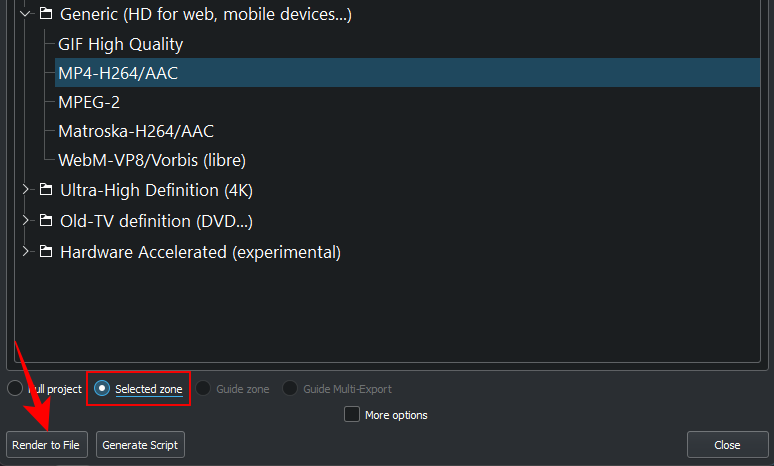
Then make sure Selected zone is selected at the bottom. And click on Render to File.
Change Render/Export options
There are a number of options available in the “Rendering” window that let you specify how exactly you want to export your video. Let’s take a look at a few important options that you should know about:
Change export location and filename
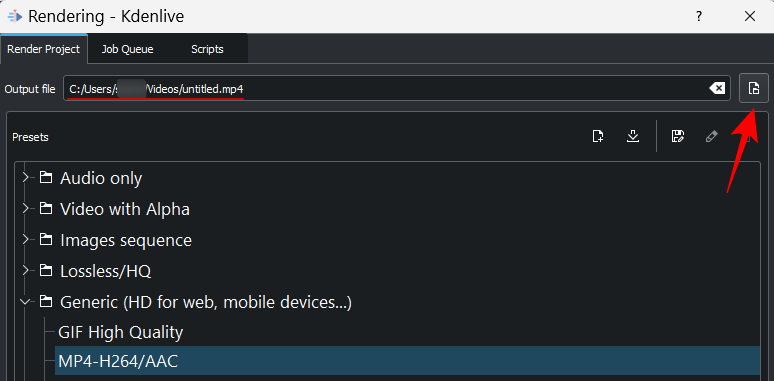
The first field in the “Render Project” tab is where the file will be exported to. The default location is as follows:
C:/Users/(username)/Videos
To change the location and the file name, simply click on the button next to the field.
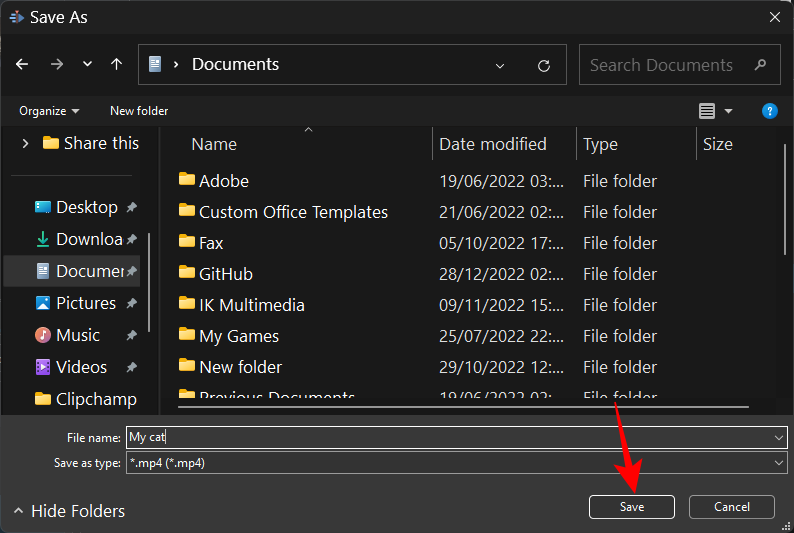
Navigate to where you want to save the video. Enter the “File name”, and click on Save.
Change format preset
Kdenlive provides a few essential format presets for you to choose from. MP4-H264/AAC in the “Generic” category is the default and the most utilized format.
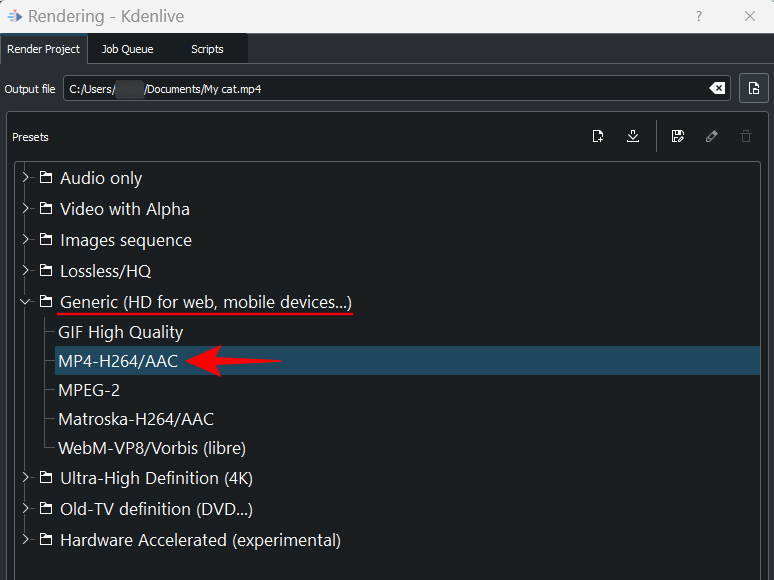
But if you have a specific format in mind, simply click on it to choose it.
Export audio only
If you want to export just the audio, select the Audio only format category.
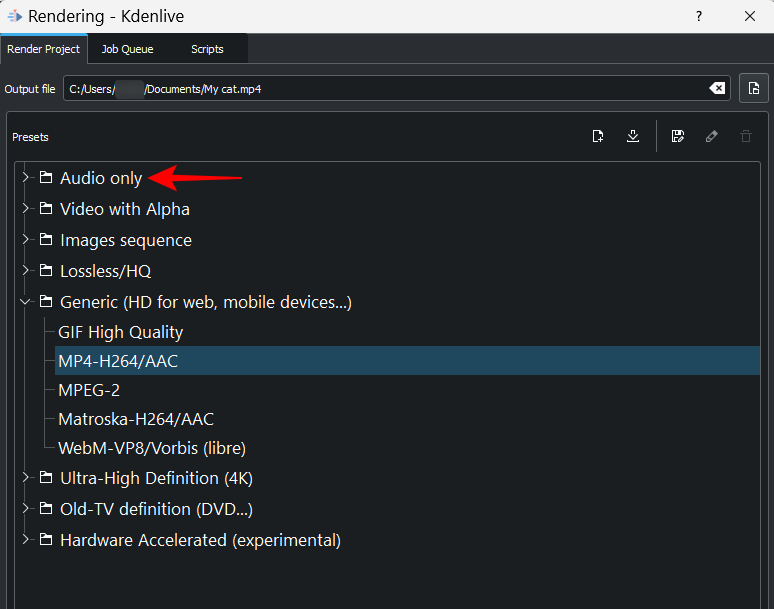
And then choose from the available audio formats – AC3, ALAC, FLAC, MP3, OGG, and WAV.
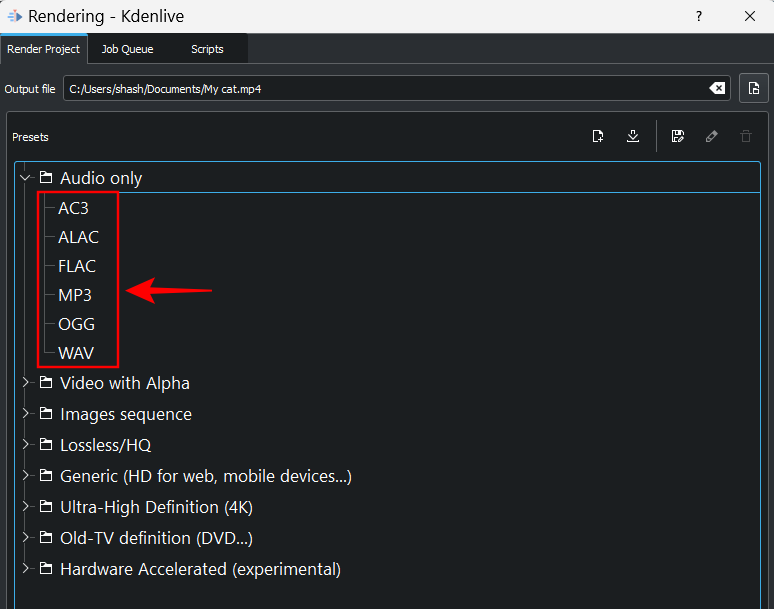
Finally, click on Render to file.
Export video as images sequence
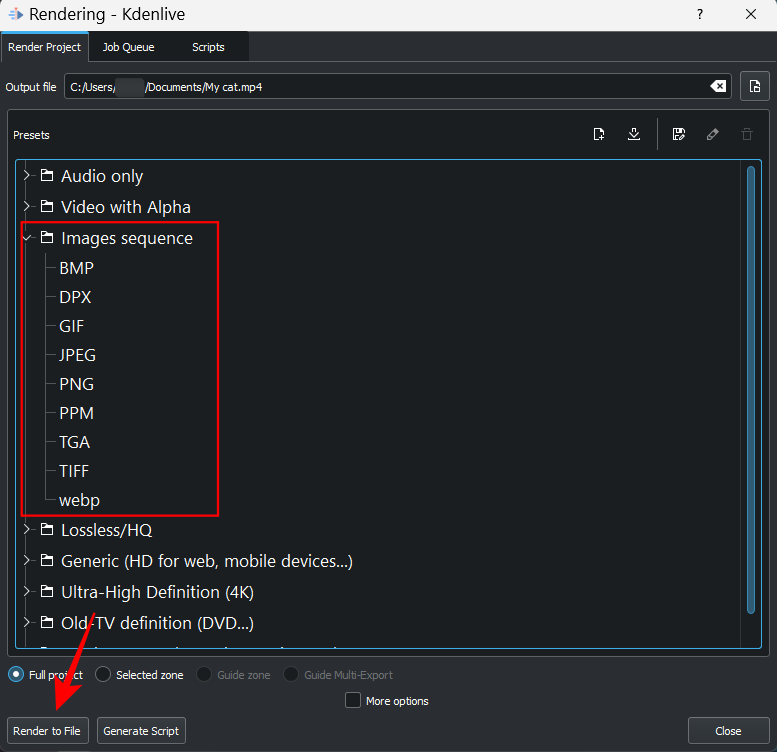
If you want your video frames to be exported as images, you’ll benefit from the “Images sequence” category. Click on it to expand it.
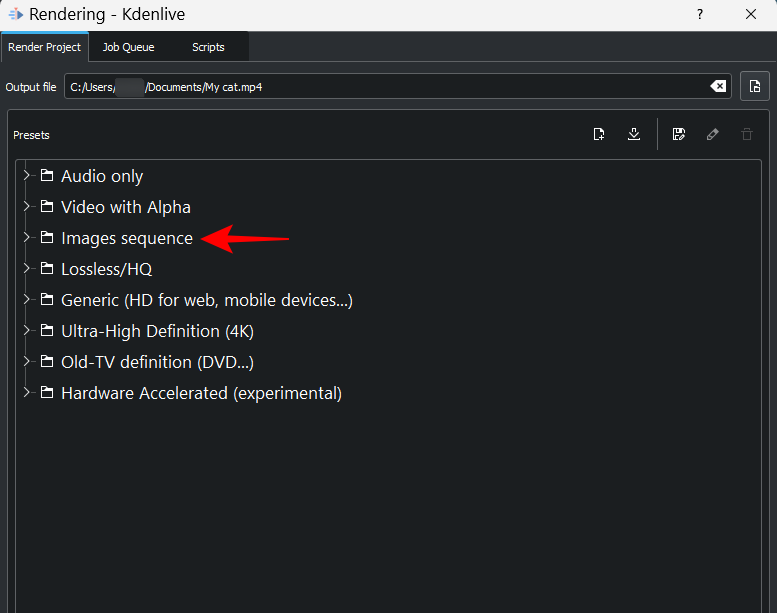
Then select the format of the images. Finally, click on Render to file.
Change quality
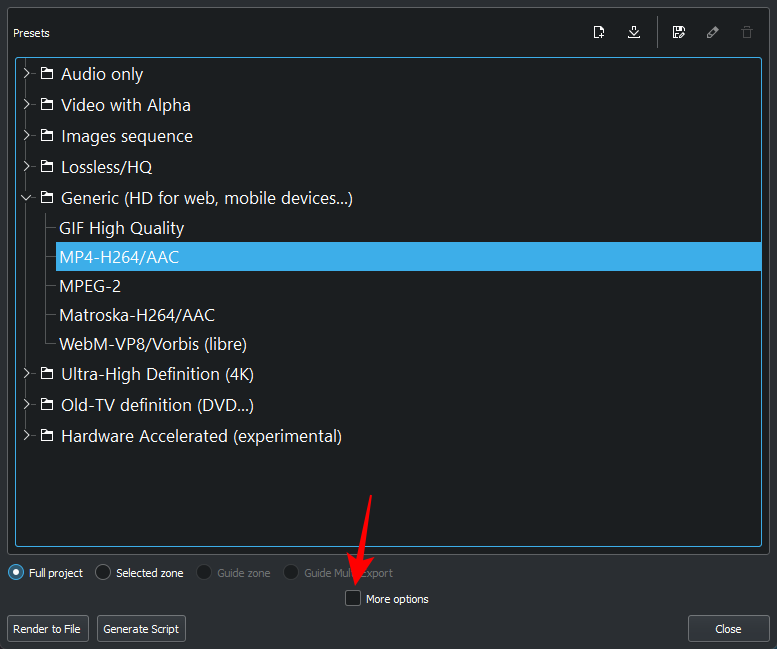
There are additional export or render options available for you to customize your output file. To view them, click on More options.
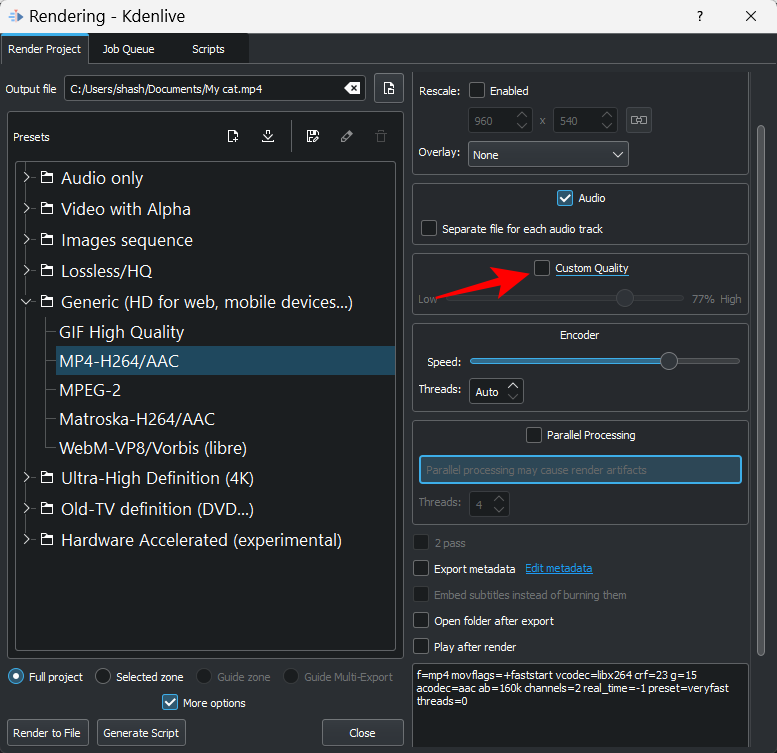
On the right, you’ll see a bunch of options for you to select from. For starters, let’s see how you can change the quality of your output file. To do so, firstly, click on Custom quality.
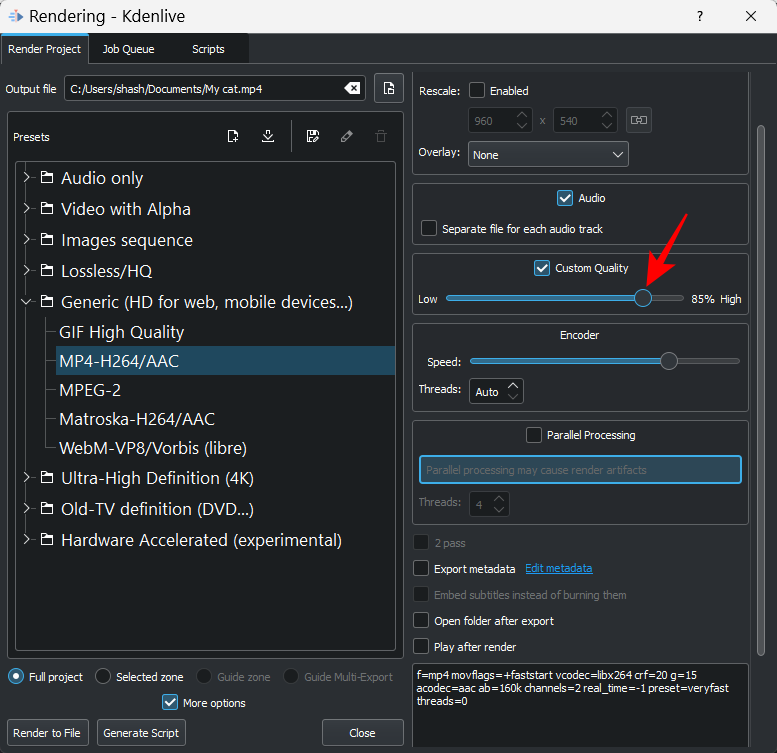
Then use the slider to adjust the quality.
Export audio files separately
Kdenlive also lets you render all the audio tracks in your project separately, along with the video. This can come in handy when you have a number of audio files in your video and you want to have these files exported separately.
To do so, make sure you check the box before the Separate file for each audio track option.

Render video at a different resolution
You don’t only have to render your video with the project settings. Kdenlive allows you to rescale the video at a custom resolution. To do so, select Enabled next to “Rescale”.
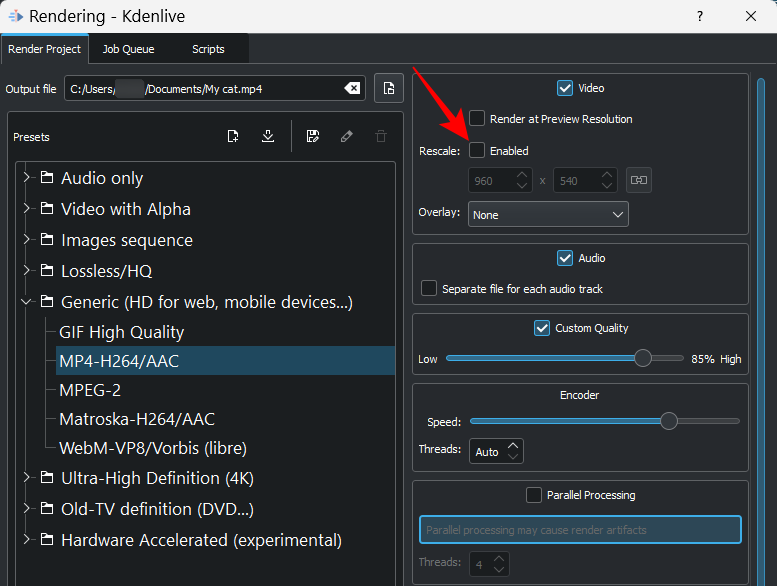
Then enter your custom resolution.
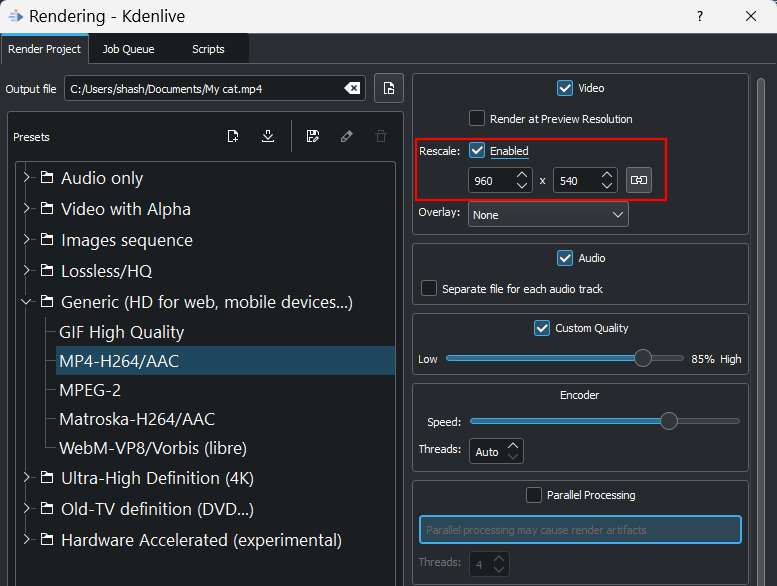
Now when you click on “Render to File”, the video will be saved with the custom resolution.
Use Hardware Acceleration for faster rendering
Rendering videos can take up quite a chunk of memory and processing time. However, with hardware acceleration, you can cut down the render time by a good margin.
To use hardware acceleration, click on the Hardware Accelerated category.
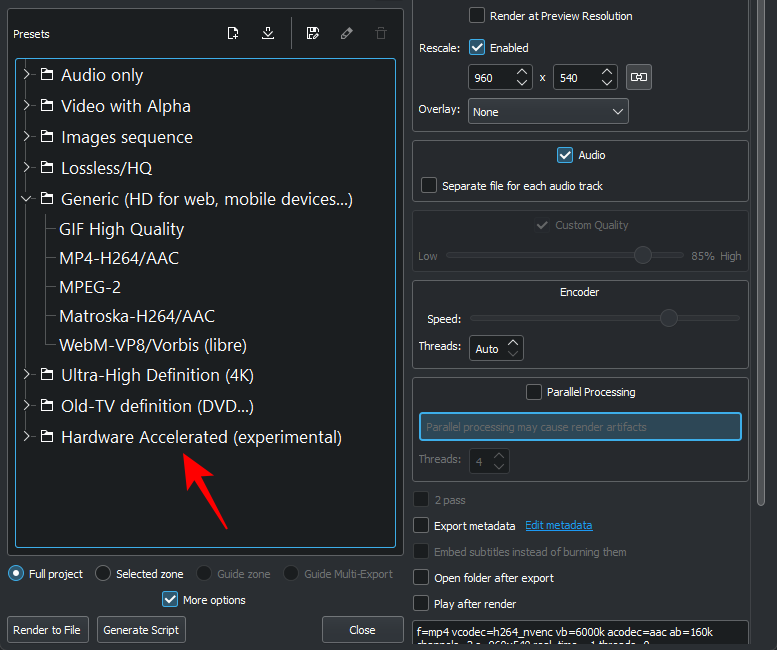
Then select your format preset.
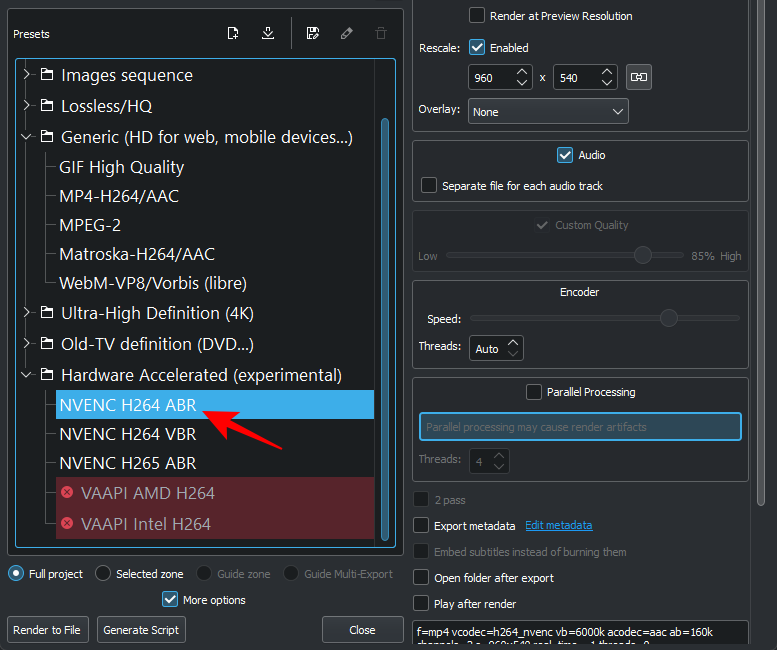
Do note that hardware acceleration works for systems that have dedicated graphics cards. If you have an AMD or Intel graphics processor, the options for the same will be open to you. Once you have selected your export settings, simply click on Render to File to finish the job.
FAQs
In this section, we take a look at a few commonly asked queries about exporting Kdenlive projects.
How do I export a Kdenlive project?
Exporting a Kdenlive project is quite an easy task. All you have to do is press Ctrl+Enter to get to the “Rendering” window. Then select your export settings (or use default) and click on Render to File.
How do I render 1080p in Kdenlive?
To render a Kdenlive project at 1080p, use the “Rescale” option and customize your resolution in the “Rendering” window.
How do I save my progress on Kdenlive?
To save your project, simply press Ctrl+S. To save it at a new location with a new name, press Ctrl+Shift+S. Then select your folder, give your project a name and click on “Save”.
Kdenlive provides a variety of ways for you to customize your project export. We hope you were able to export your Kdenlive project with your chosen render settings.


